This project shows how to wire a light switch after the switch box wiring rough-in in this phase of How To Build a Basement Closet. The closet ceiling light was wired in the prior installment.
How to Wire a Light Switch
The new basement closet wiring has been roughed-in for the wall outlet power extension to the closet ceiling light. I’m now making the wiring connections working my way from top to bottom:
- wire the ceiling light fixture
- wire the wall light switch
- connect the Wiremold surface mount junction box
- lastly, connect the light circuit to the wall outlet for power
Because the NM-B 14/2 line-side (bottom cable) is not yet connected to the wall outlet, the wires are dead (no electricity) and are safe to work on.
If you happen to be replacing an existing light switch, shutoff the electricity at the circuit breaker panel and verify the power is Off with a voltage detector before working with the wiring. Hire a licensed electrician if you have any doubts.
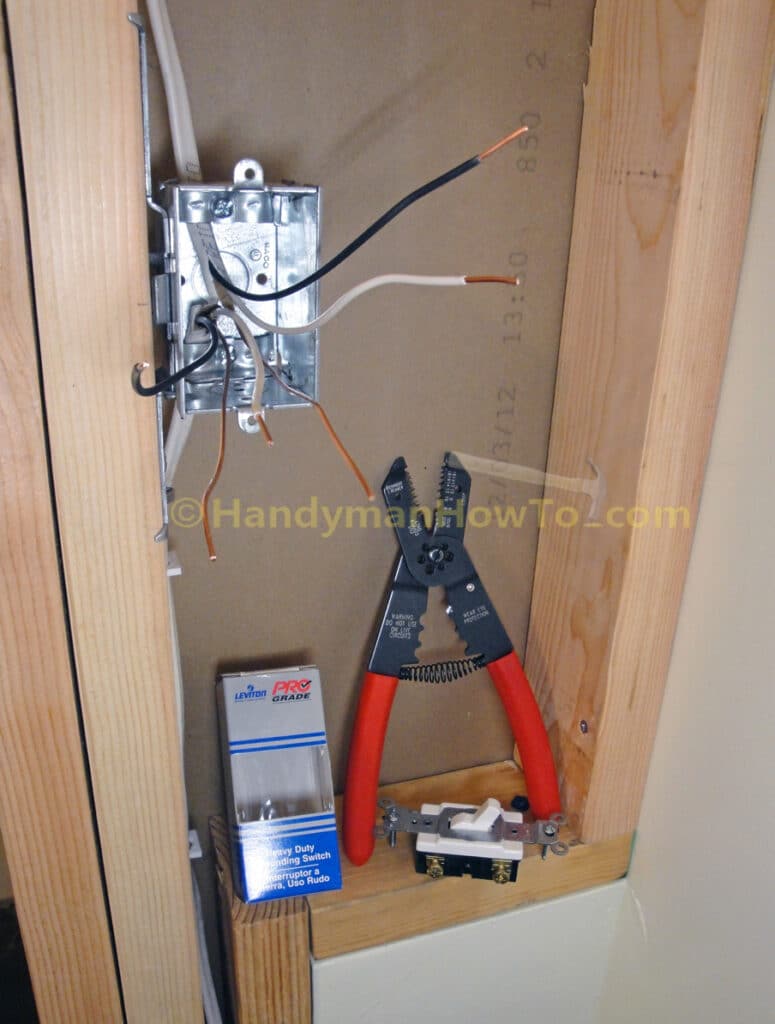
Rough-in Wiring Preparation
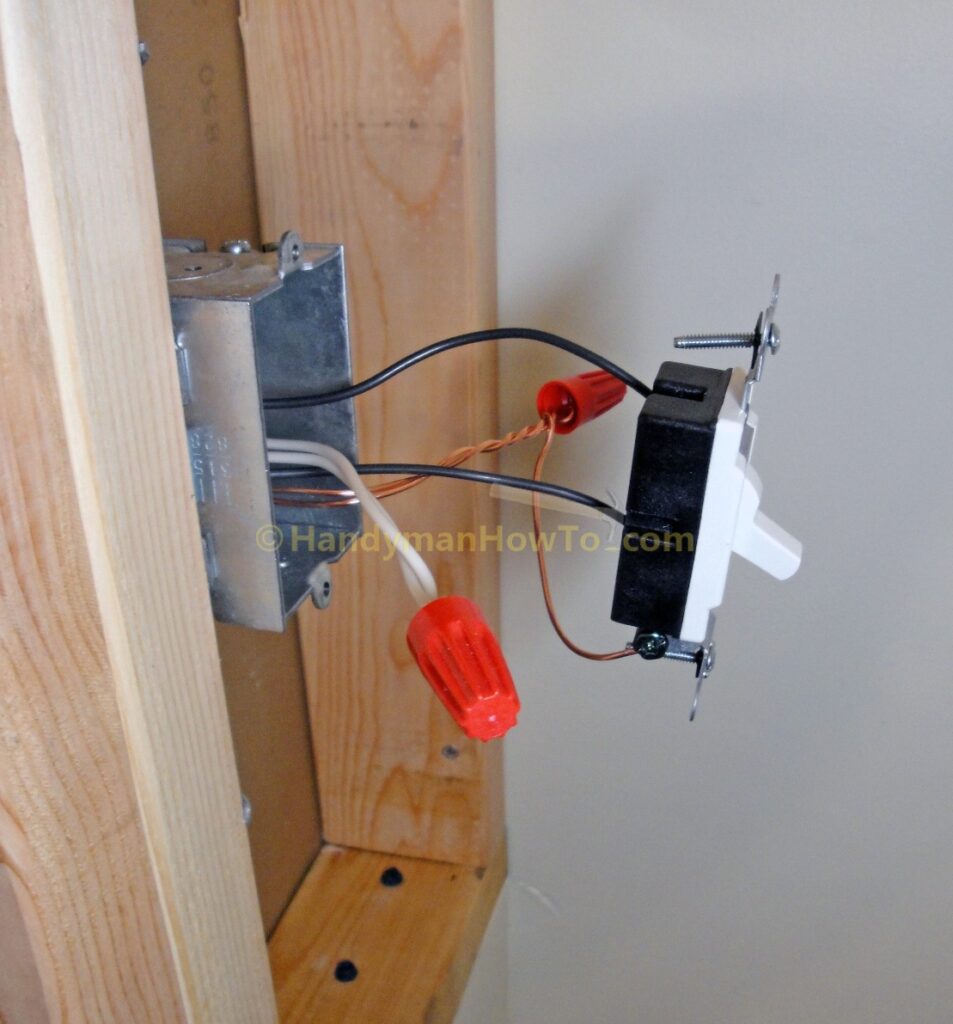
In the next photo, the NM-B 14/2 cable entering the bottom of steel switch box is the “line-side” that will carry power from the wall outlet. The NM-B 14/2 cable leaving the top of the switch box is the “load side” that goes to the ceiling light.
The Leviton 5501-LHI heavy duty grounding illuminated-off toggle switch will operate the closet ceiling light. I like illuminated light switches in certain locations because it saves hunting around in the dark. The proper name for this common style of light switch is a “toggle switch”. One minor issue with the Leviton commercial grade 5501-LHI switch is it clicks a bit loudly when flipping the switch, whereas most residential light switches operate quietly.
Prepare the roughed-in NM-B 14/2 cables by doing the following:
- The outer jacket of the NM-B 14/2 cables are carefully removed so as not to damage the insulation on the individual wires.
Make a short, shallow lengthwise cut in the outer jacket at the end of the cable, then peel the outer jacket back like a banana. - Leave 1 inch of of the outer insulation jacket poking inside switch box as shown.
- Tighten the cable clamp screws in the switch box to secure the NM-B 14/2 cables.
- Trim the wires if needed to have at least 6 inches of wire extending beyond the switch box.
- Strip approx. 5/8 inch of insulation from the ends of the black (hot) and white (neutral) wires with wire strippers.
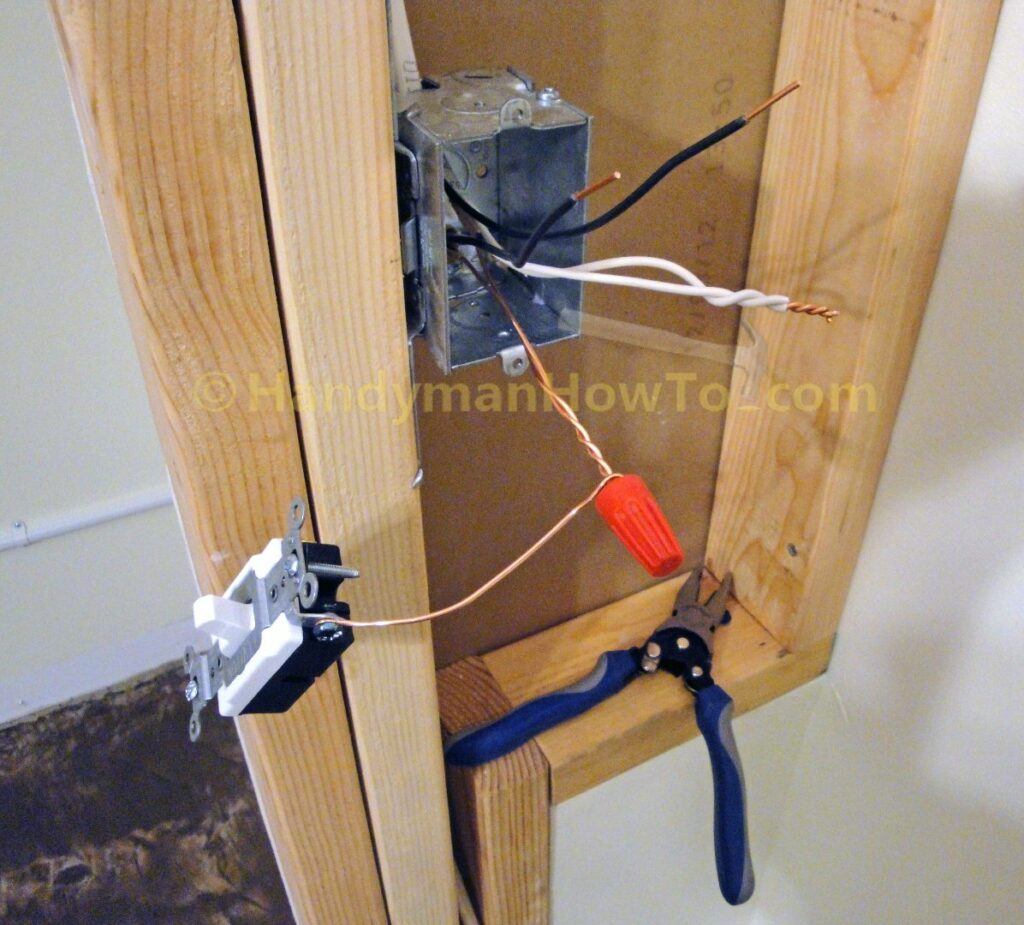
Light Switch Ground & Neutral Wiring Connections
Ground wire (bare copper) connections:
- Cut a 6 inch length of 14 gauge copper wire to make a pigtail connection to the light switch.
- Make a small loop in the end of the pigtail ground wire and place the loop around the green ground screw on the light switch.
- Pinch the loop closed with needle nose pliers.
- Tighten the ground screw.
- Right-twist (clockwise) the ends of the three ground wires together with the linesman pliers and secure with a wire nut.
White (neutral) wiring connections:
- Strip about 5/8 inch of insulation from the white neutral wires.
- Twist the white wires together and secure with a wire nut.
Light Switch Hot (Black) Wiring
The Leviton toggle switch is side wired. Take care to orient the light switch correctly… the toggle lever will display the word “On” when the switch is upright and in the On position. The line-side (from the circuit breaker) black wire from the bottom of the switch box is connected to the bottom side screw as shown in the next photo.
- Make a small loop in both black (hot) wires.
- Connect the line-side black wire to the lower switch side screw.
- Pinch the loop closed around the correct side screw on the switch.
- Firmly tighten the screw.
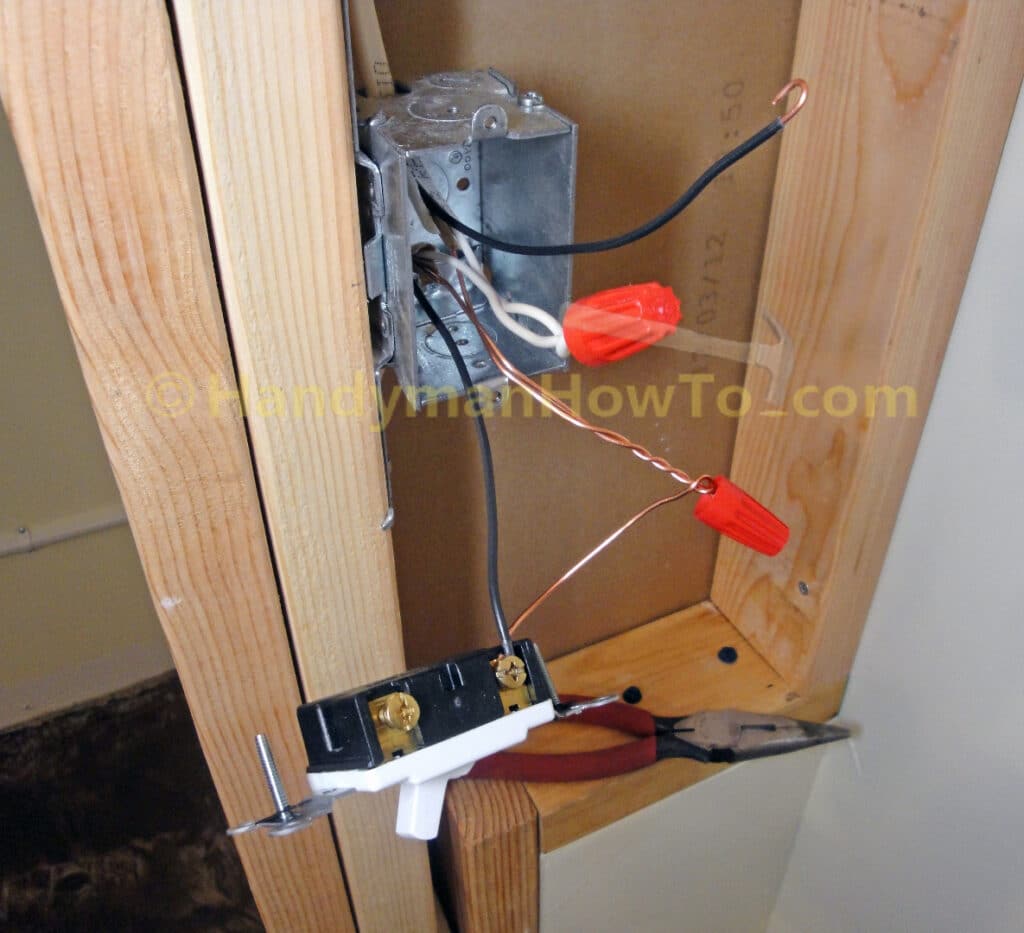
- Loop the load-side (to the closet light) black wire around the upper side screw, pinch the loop closed with needle nose pliers, then tighten the screw. (I’ve yet to tighten the upper side screw in the next photo to illustrate the wire loop.)
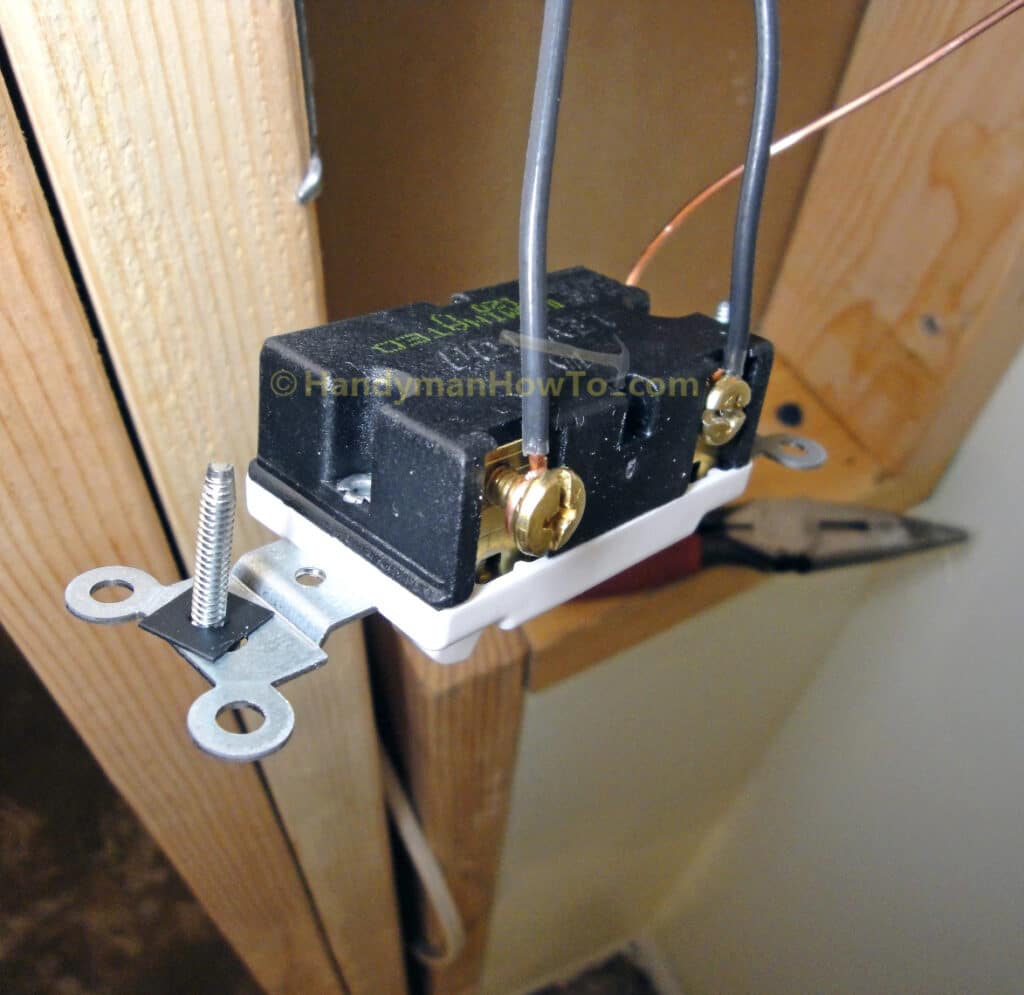
The finished light switch wiring connections:
Drywall Installation
If you’re wondering why I installed the light switch before the drywall, the reasons are:
- I’m leaving this part of the wall and electrical wiring open while waiting for the building inspector to arrive and sign-off on my work.
- The light switch will be slipped through the drywall cutout for the switch box when I hang the drywall, so this is not a concern.
- I want to complete the wiring connections so the closet light is operational to better see when finishing the drywall inside the closet.
But what about the exposed side screws on the light switch? Wouldn’t that be a shock/electrocution hazard if the electricity is turned on before mounting the light switch in the steel switch box? It sure would be! To avoid being accidentally shocked, I temporarily wrapped the toggle switch with several layers of 3M vinyl electrical tape rated for 600 volts.
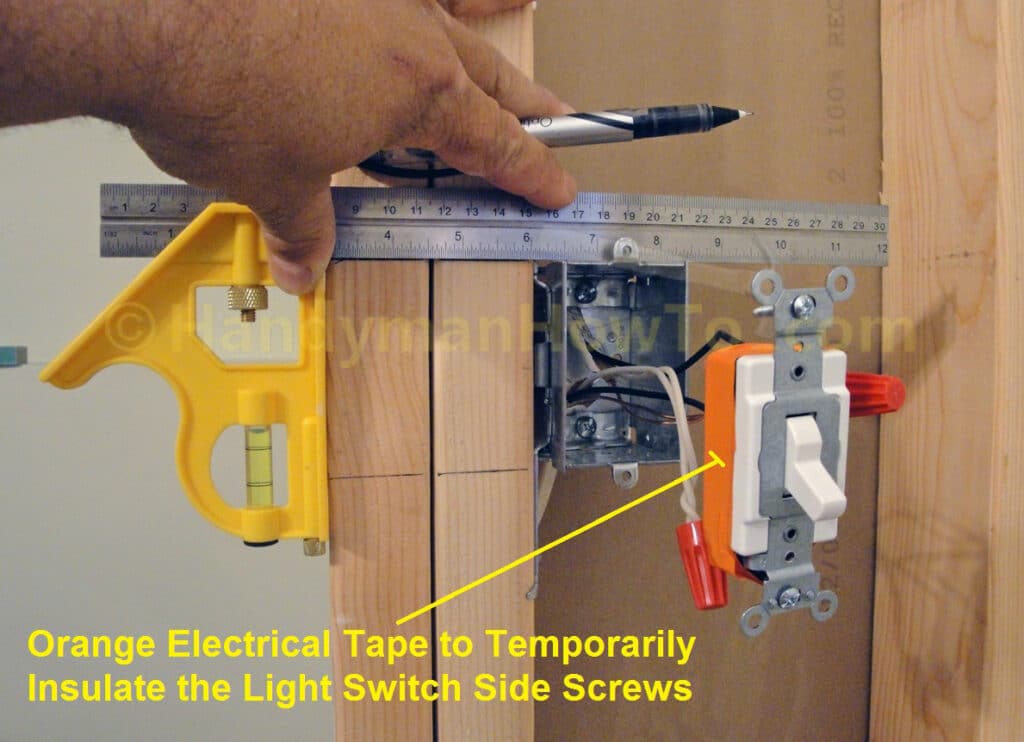
Since I don’t have young children or other susceptible persons in the house, doing so isn’t a major concern. I informed the family of the hazard with orders to stay out of the construction site and to keep the basement bedroom door closed.
I’m not recommending that you do this; instead you should fold the wires into the switch box and mount the toggle switch to the box. The switch plate can be temporarily installed if you’re worried about children sticking their fingers in the switch box.
The Wiremold® junction box and outlet box wiring connections are completed to power up the closet light in the next part of this series.
Take care,
Bob Jackson