How to Wire an Attic Electrical Outlet and Light: A new junction box is wired for the switch controlled electrical outlet for the attic light after removing the old light switch and wiring. This project is continued from the Exposed Work Cover junction box project. Also see Part 1 for the project introduction.
Remove the Old Electrical Wiring
Because the electrician cut the electrical box ground wires off inside the light and outlet boxes in violation of NEC 300.15, both electrical boxes will be removed and a new junction box installed.
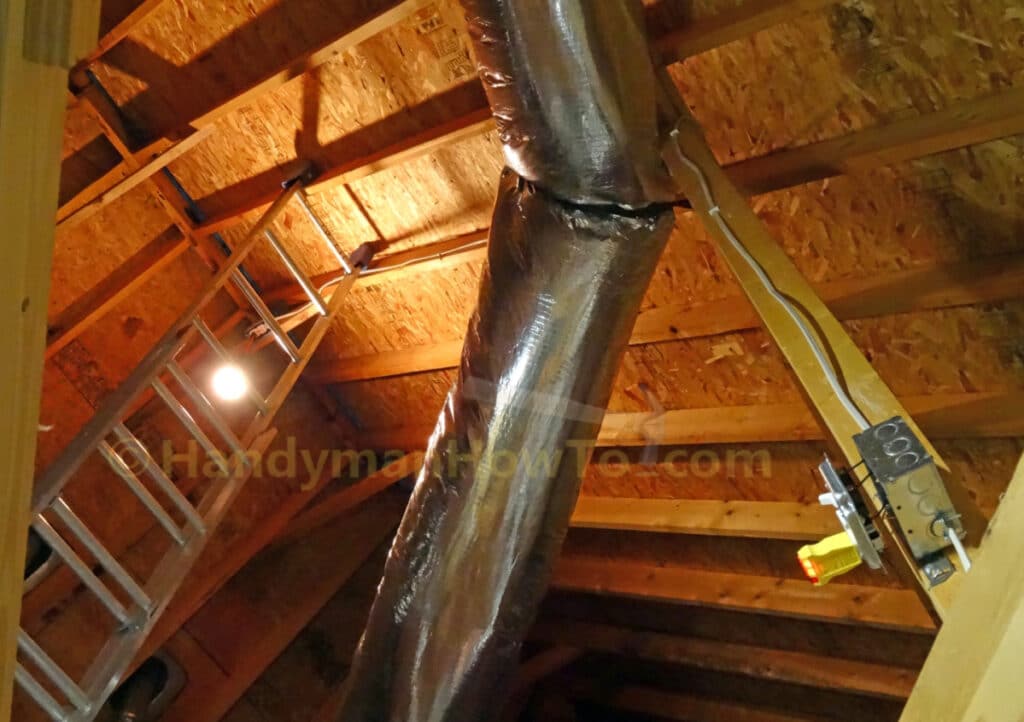
In Part 1 of the project, the new duplex receptacle was wired at the rafter collar tie located high in the attic. The new NM-B 14/2 cable drop is seen hanging in the next photo.
Electrical Safety
Before working on the wiring, shutoff the electricity at the circuit breaker and verify the electricity is Off with a voltage detector:
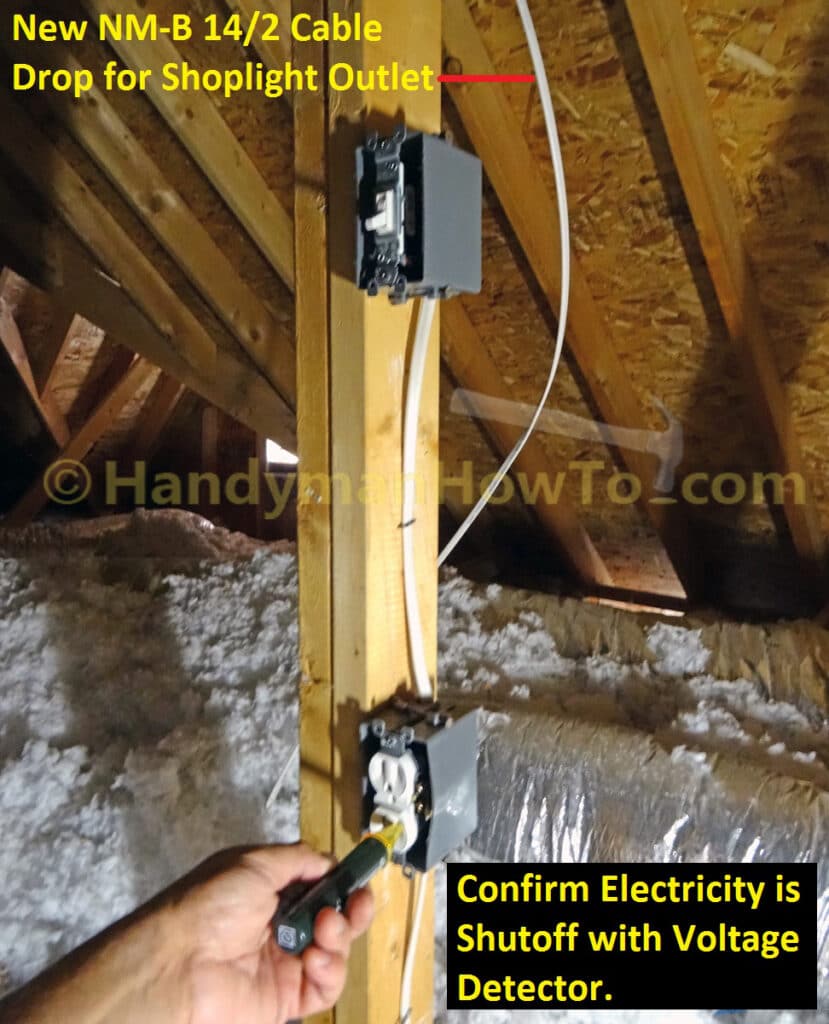
The plastic light switch electrical box is removed by inserting a large screw driver under the box to pry it off the 2×4 framing. The box is held by two nails and was easy to remove.
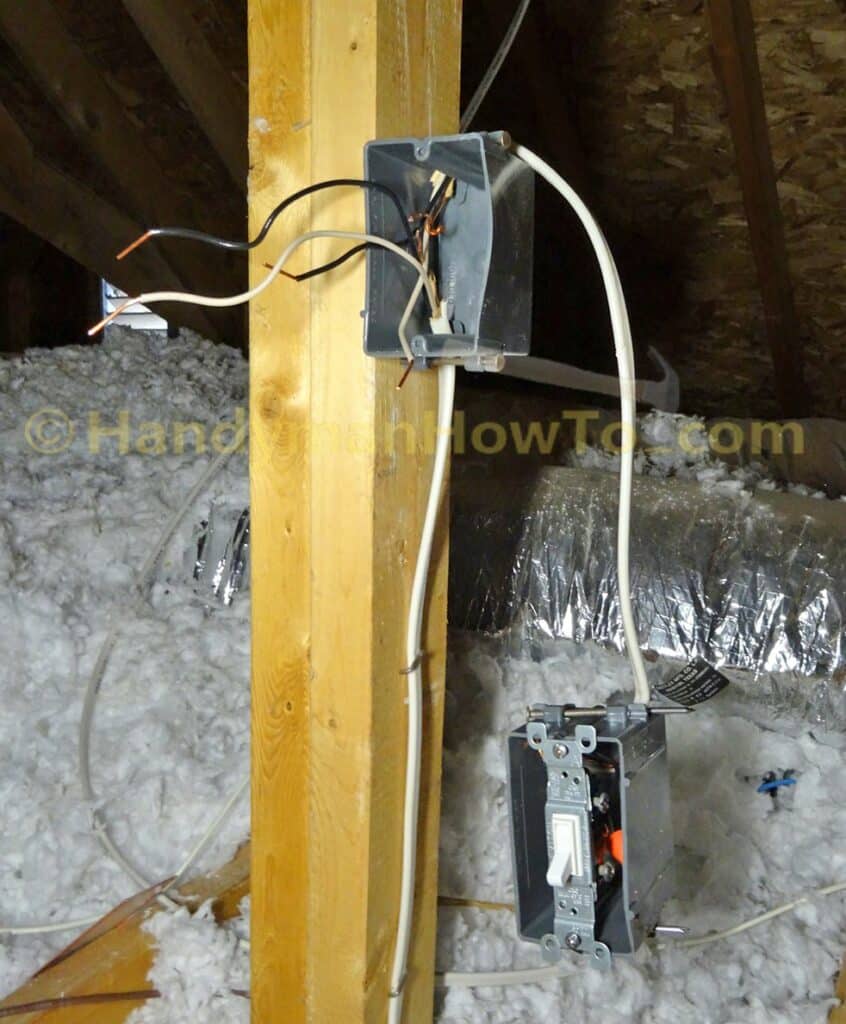
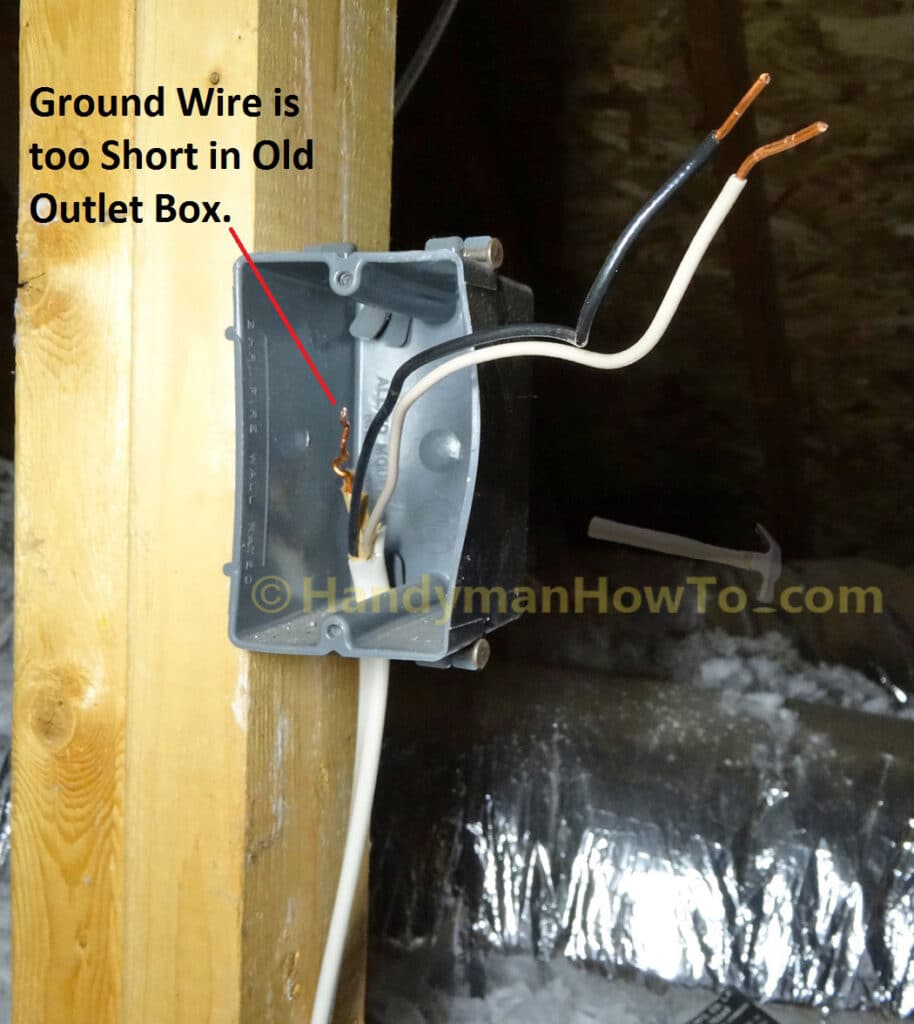
I have to remove it the old electrical box because the ground wire is too short to make a proper pigtail connection. The electrician twisted and crimped the line- and load side ground wires together, cut off ground wires inside the box, then used a metal crimp sleeve to connect the receptacle ground wire, which is a violation of NEC 300.14. Per NEC 300.14, all conductors must extend at least 6 inches in the box and at least 3 inches beyond the box. Otherwise, the Building Inspector will flag it and won’t sign-off on the electrical permit.
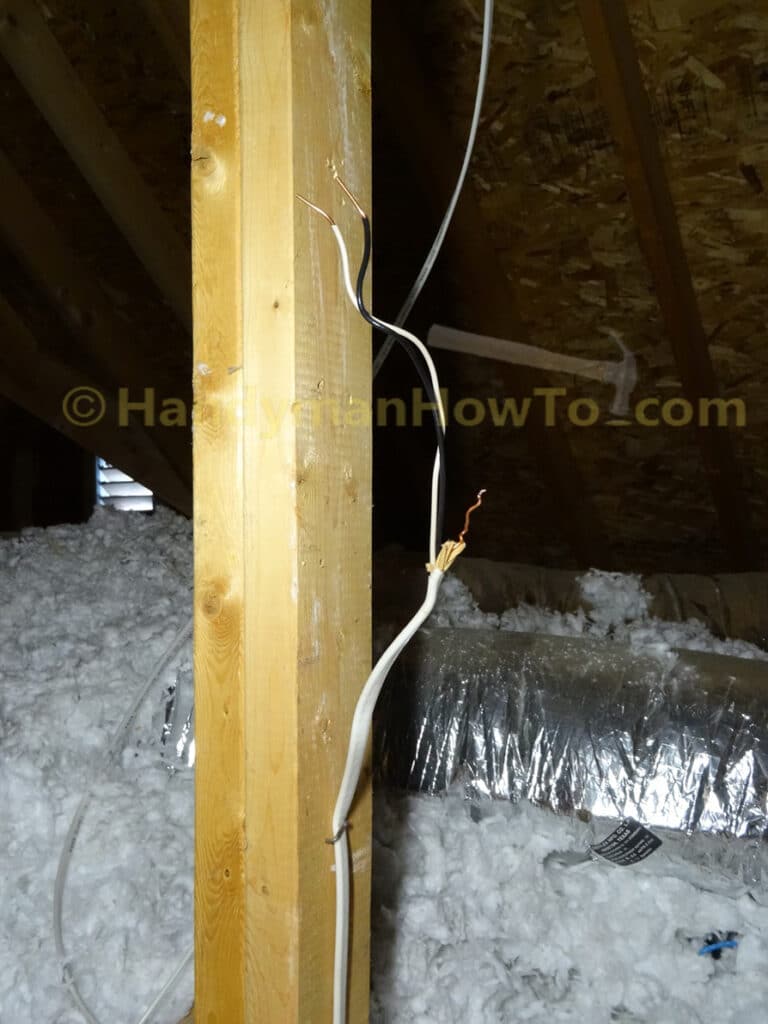
Here’s the NM-B 14/2 line-side cable (i.e. power from the circuit breaker) cable after removing the outlet box. I now have sufficiently long cable to properly wire the new junction box:
Attic Light Junction Box Wiring Instructions
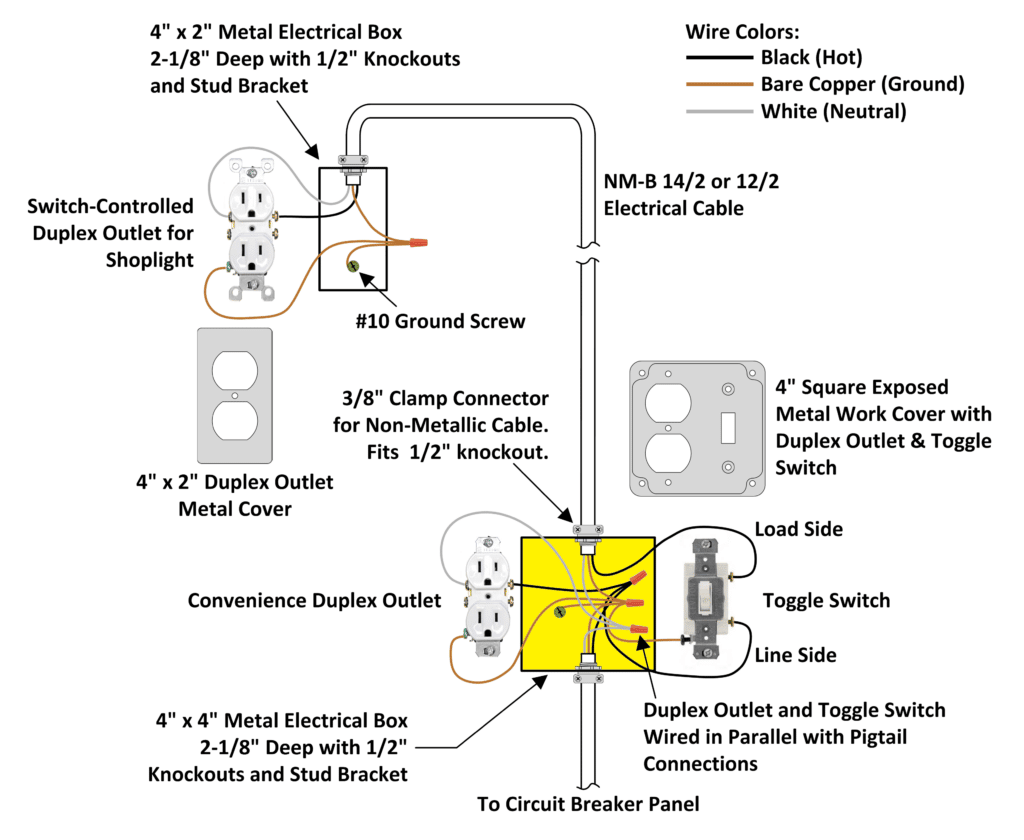
The following wiring steps show how to wire the attic light switch junction box per the yellow box in the wiring diagram:
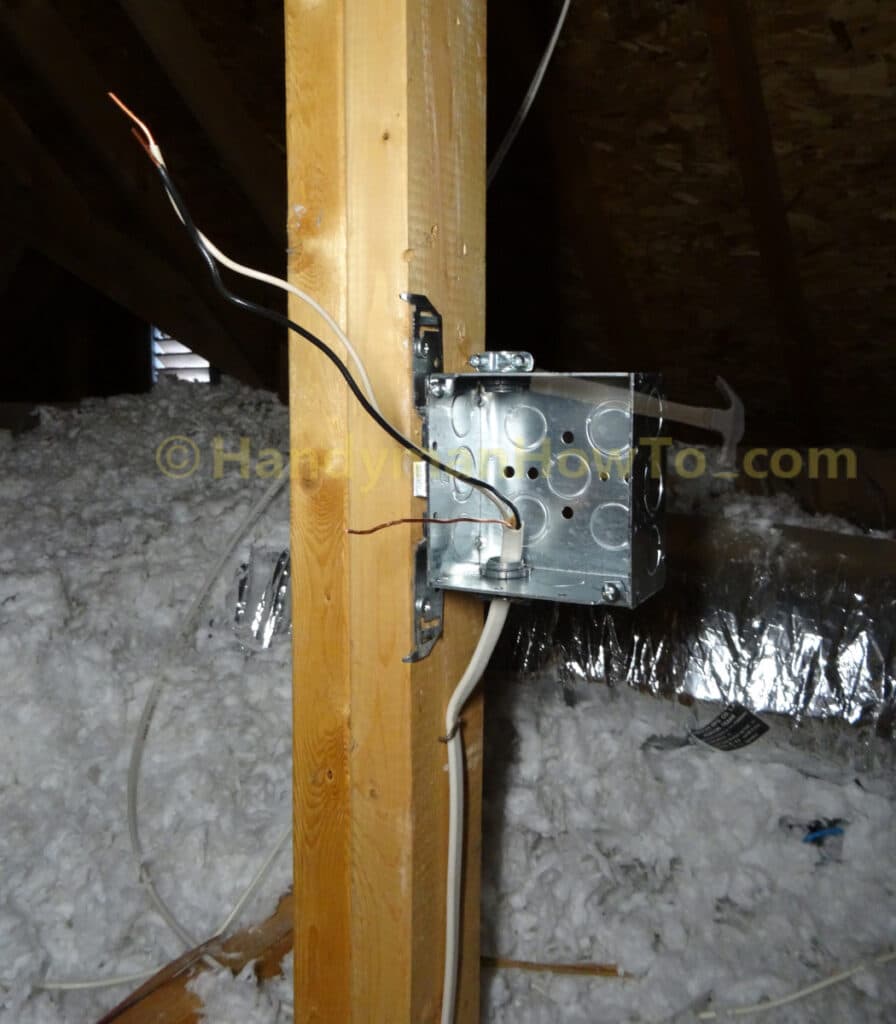
The line-side NM-B 14/2 wires are fed through the 3/8″ NM cable clamp into the junction box, the box is positioned several inches lower on the 2×4 framing by attic stairway to provide at least 6 inches of wires in the box, which is determined by the length of the “short” ground wire. The junction box bracket is fastened to the 2×4 framing with two pan-head wood screws.
Recall the outer insulation jacket requirements:
NEC 314.17: The outer jacket of type NM cable shall be secured to the box and extend into the box at least ¼ inch.
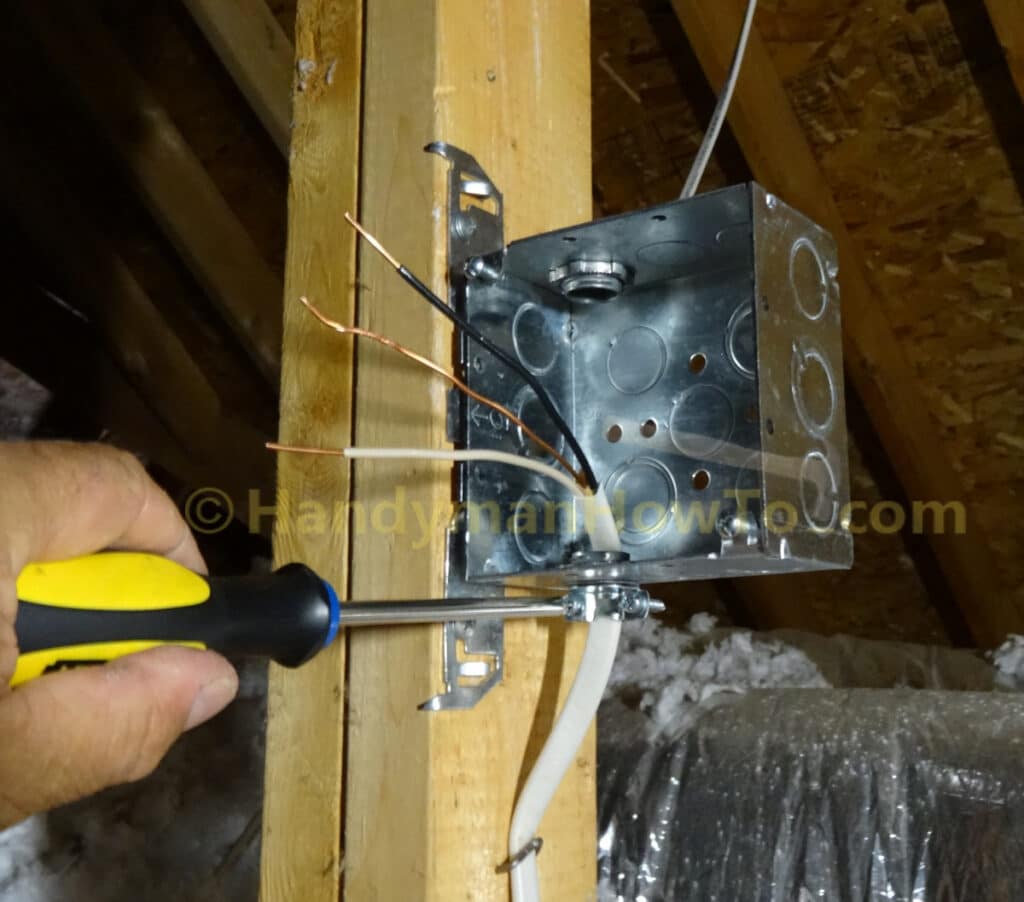
I trimmed the hot (black) and white (neutral) wires to an equal length with the bare copper ground wire, stripped about 3/4 inch of insulation from the ends, then tightened the two screws on the NM cable clamp to secure the cable to the junction box. The NM cable clamp also protects the NM-B 14/2 cable from nicks by the sharp metals edges of the junction box knockouts.
See the following photos for the next steps:
- the load-side NM-B 14/2 cable from the new switch controlled outlet at the rafter collar tie is cut to length
- about 3/4 inch of insulation is stripped from the black and white wires
- the cable is inserted into the top portion of the junction box, then secured with the NM cable clamp.
Recall that the duplex outlet and light switch pigtail leads were prewired on the workbench in the previous project. Refer to this wiring diagram closeup for the outlet and light switch wiring connections:
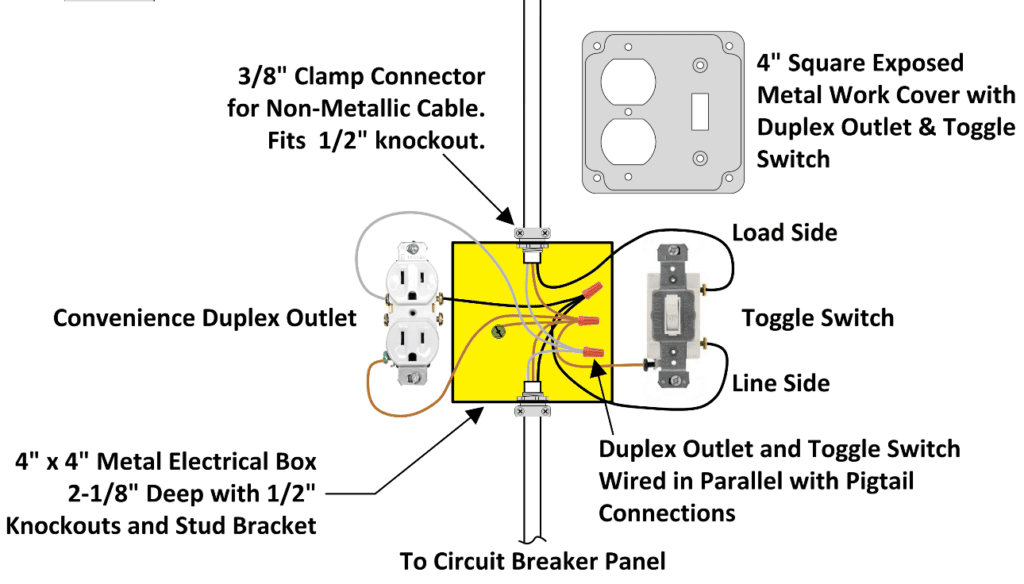
The duplex electrical outlet and light switch (aka “toggle switch”) are wired with pigtail connections as follows:
Ground Wiring:
- Install a #10 green ground screw and in the junction box and ~8 inch long ground wire lead.
I got distracted and almost forgot this important step when while focused on wiring the outlet and light switch. See this photo a couple of steps later for the junction box ground wire connection. - Right-twist (clockwise) the five (5) ground wires together with linesman pliers.
The five ground wires are:- Line side cable ground wire
- Load side cable ground wire
- Duplex outlet ground wire
- Toggle switch ground wire
- Junction box ground screw wire
- Right-twist on a wire nut to secure the ground wires.
I’m using Ideal 76B wire nuts suitable for a minimum of two 14 gauge and maximum of four 12 gauge solid wires.
White (Neutral) Wiring:
- Right-twist the three white wires together with linesman pliers.
The three white wires are:- Line-side (from the circuit breaker) white wire.
- Load-side (to the attic light) white wire.
- Duplex outlet white wire.
- Twist on a wire nut.
Black (Hot) Line-Side Wiring:
- Identify and twist together the black wires for the:
- Line side circuit wire (power supply from the circuit breaker).
The line side wire enters from the bottom of the junction box. - Duplex outlet black wire.
- Light switch line-side black wire.
Be careful to orient the light switch correctly such that On/Off words are not upside down.
Also check the wiring instructions for your light switch. The line-side should be
the lower side-screw terminal.
- Line side circuit wire (power supply from the circuit breaker).
- Twist on a wire nut.
The black (hot) line-side wiring is shown in the following photo:
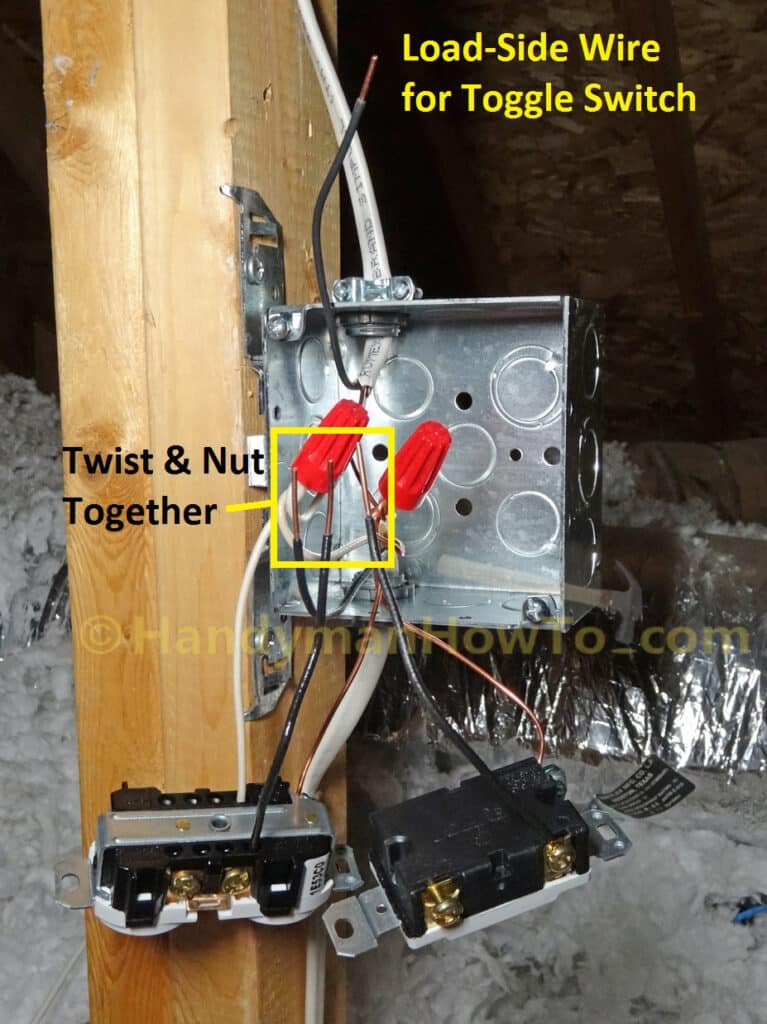
Note: The load-side black wire (see above photo) is not connected at this point.
The electrical outlet and light switch wiring connections thus far:
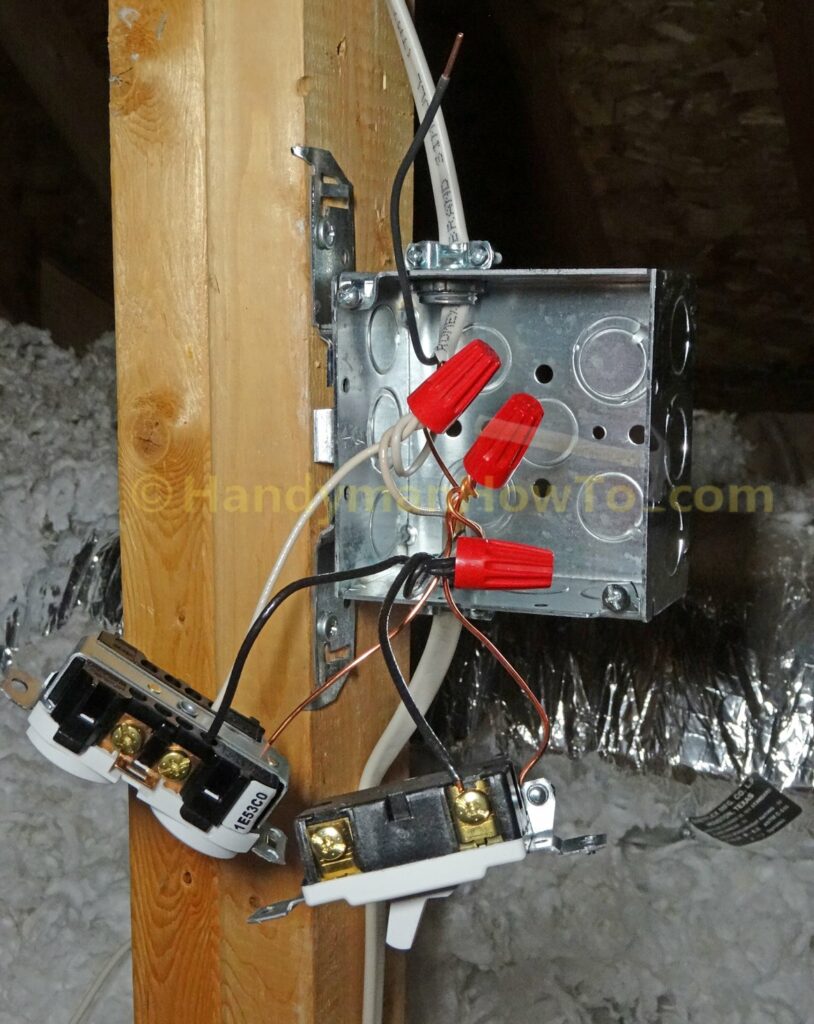
Light Switch Black (Hot) Load-Side Wiring:
- Connect the load-side black wire to the load-side terminal on the light switch (a.k.a. toggle switch).
Recall the load-side black wire goes to the switch controlled outlet installed at the rafter collar tie.
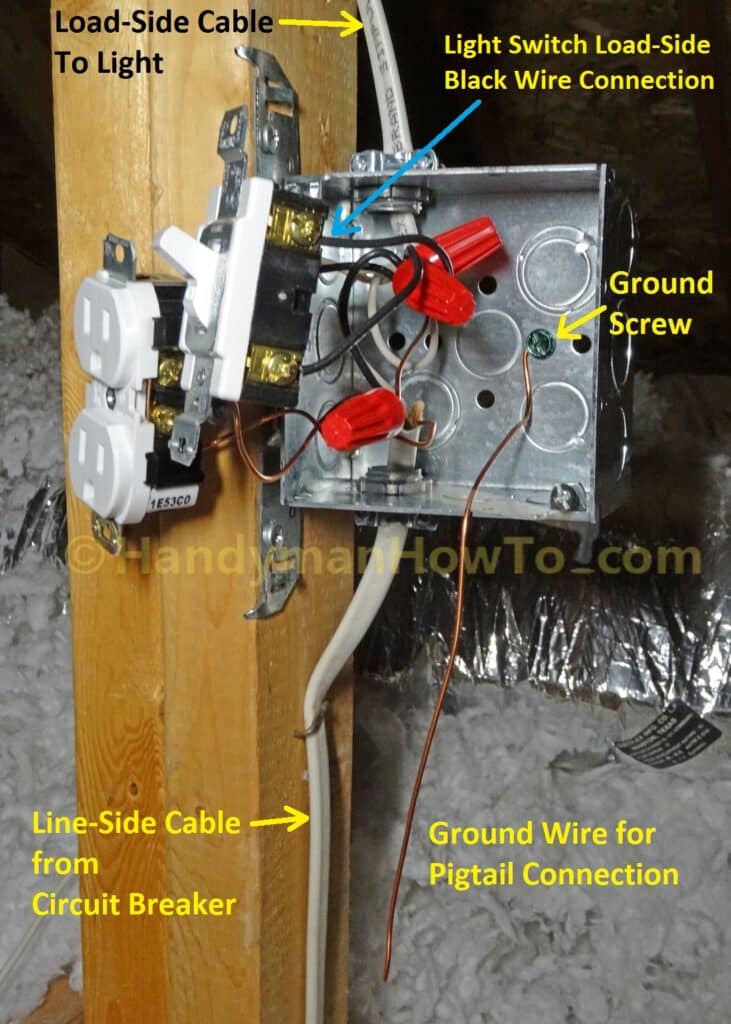
Steel Junction Box Ground Wiring:
Steel junction boxes and outlet boxes must be grounded. (Note: Plastic electrical boxes do not require grounding.) I should have installed the #10 green ground screw and 14 gauge ground wire when making the ground wire pigtail connections earlier, but I was focused on wiring the outlet & switch and inadvertently missed this important step. The correction is simple with wire nut pigtail connections:
- Install a #10 green ground screw in the junction box threaded hole.
- Cut a generous length (at least 6 inches) of 14 gauge ground wire.
- Loop the ground wire around the ground screw.
- Tighten the ground screw.
- If needed, trim the ground wire a bit longer than the other ground wires.
- Remove the ground wire nut, twist the junction box ground wire together with the other ground wires.
- Twist on a wire nut.
The purpose of the steel junction box ground connection is to provide a safe path to ground if a hot or neutral wire were to come loose and contact the steel box, energizing the steel box with electricity and a shock hazard. Otherwise the junction box would be “hot” (or electrified) and your person would be the ground path if touched. The junction box ground ensures there’s a lower resistance path to ground than your body!
Exposed Work Cover: Outlet and Light Switch
After completing the junction box wiring connections, mount the electrical outlet and light switch to the exposed work cover as shown in the previous project. Then gently fold the wires into the junction box so as not to kink or pinch the wires. The exposed work cover can be mounted to the junction box now, but I left it open until I verify the receptacle wiring, light switch and switch controlled outlet installed at the rafter collar tie… just in case I made mistake and needed to correct the wiring.
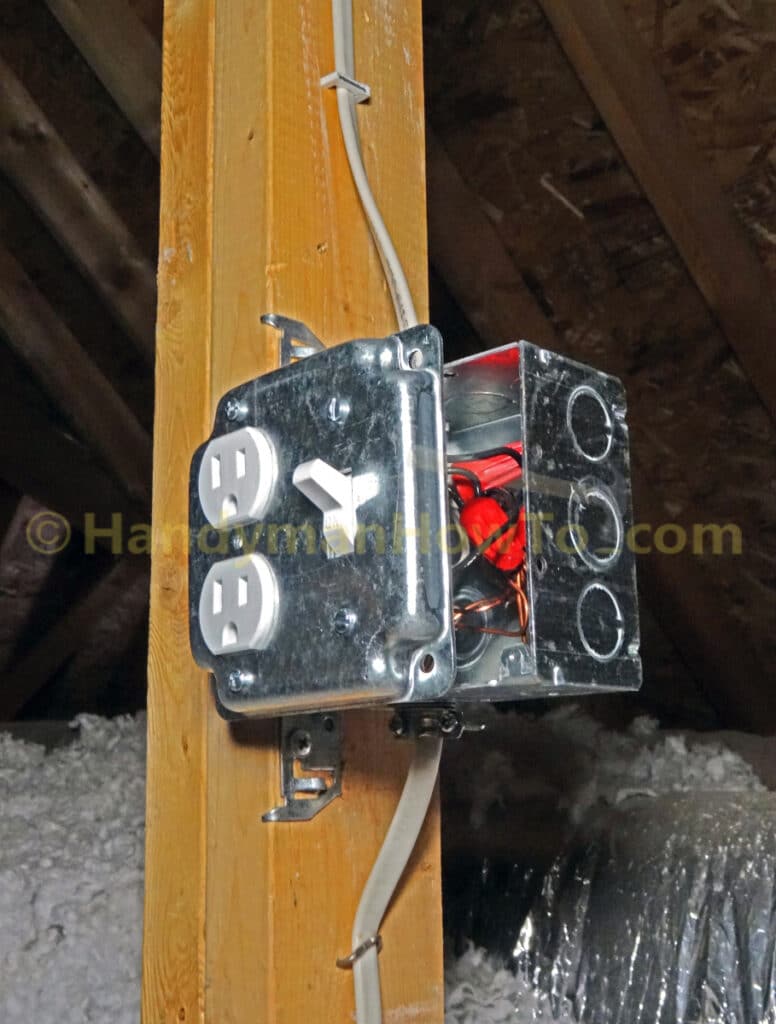
Verify the Light Switch and Outlet Wiring
To verify the attic light wiring:
- I climbed the ladder and plugged the trouble light into the switch controlled outlet installed at the rafter collar tie.
- Inserted a receptacle tester in the convenience outlet at the exposed work cover by the attic stairs.
- Turned on the electricity at the circuit breaker.
- The trouble light turned On & Off when the light switch was operated by the stairs.
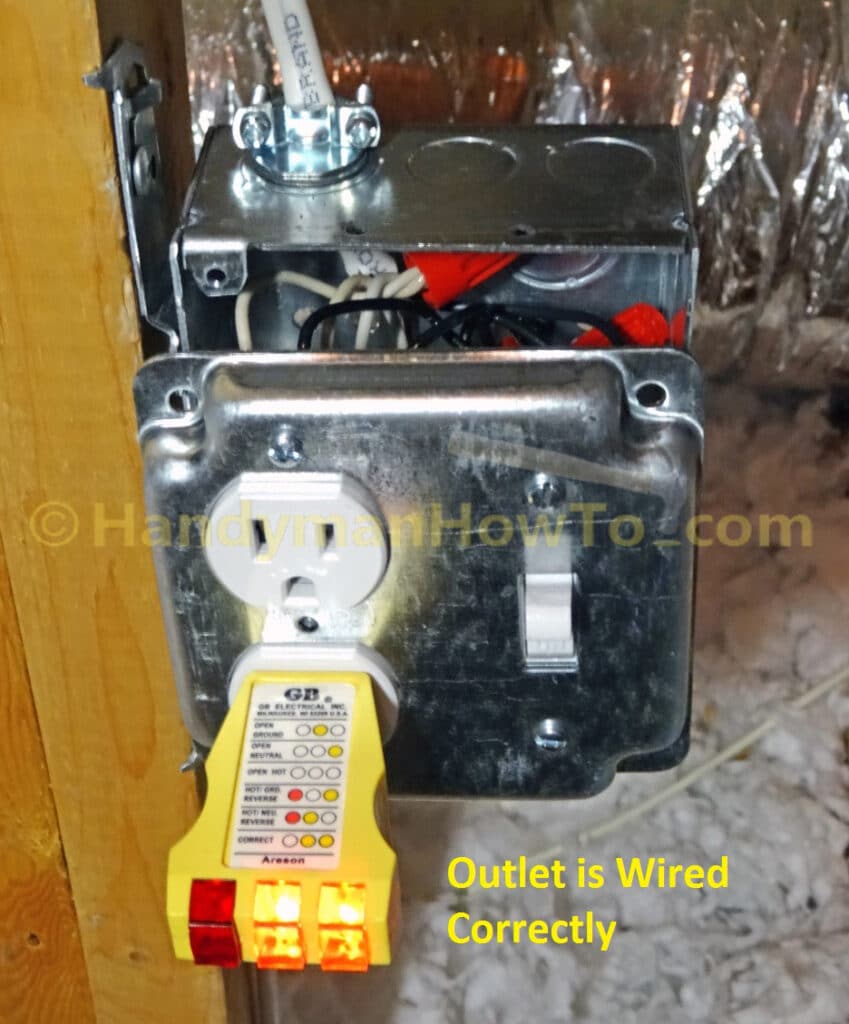
The two yellow lights on the receptacle tester indicates the convenience electrical outlet is wired correctly:
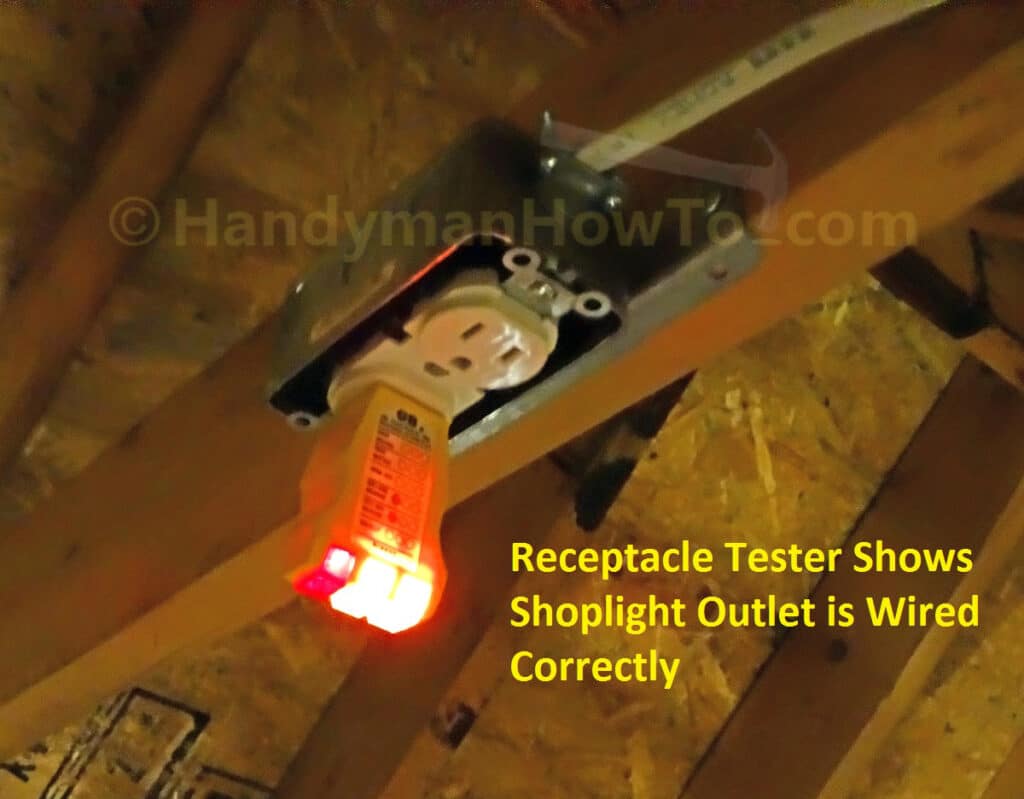
The switch controlled outlet is also verified with the receptacle tester; the outlet is correctly wired:
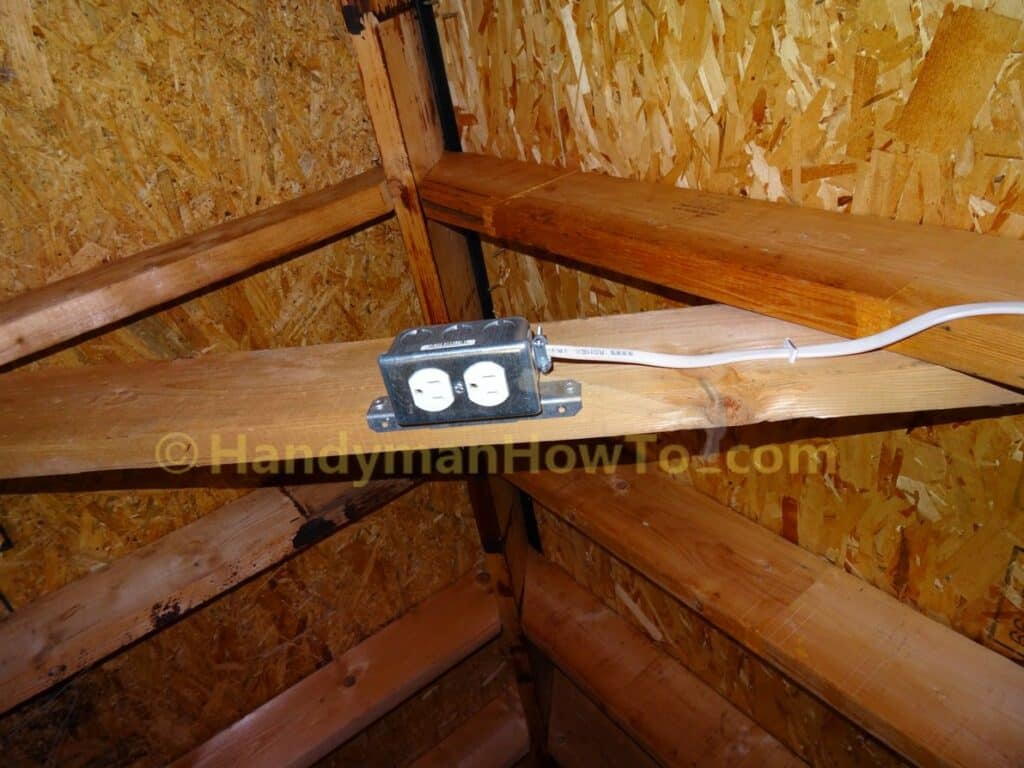
The steel face plate is installed on the switch controlled outlet. I prefer to install face plates last in case I made an error and need to pull the outlet to fix the wiring.
Having verified the wiring and light switch operation is correct, I shutoff the circuit breaker, then mounted the exposed work cover to the steel junction box. The extension cord for the air handler UV treatment light is plugged into the outlet here:
The fluorescent light is mounted to the rafters in the How to Install an Attic Shop Light.
Take care,
Bob Jackson