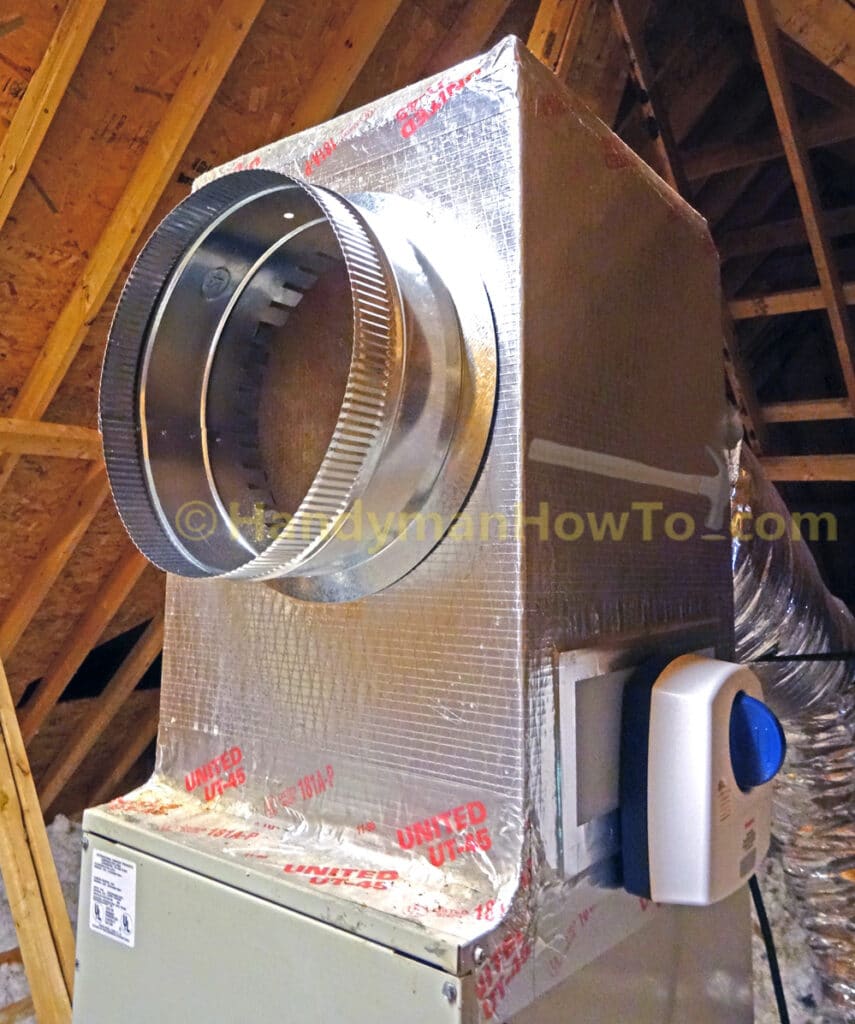
The sheet metal start collar is installed in the supply air plenum and adjustable elbow attached. This project is continued from How to Install Round Sheet Metal Duct – Part 1.
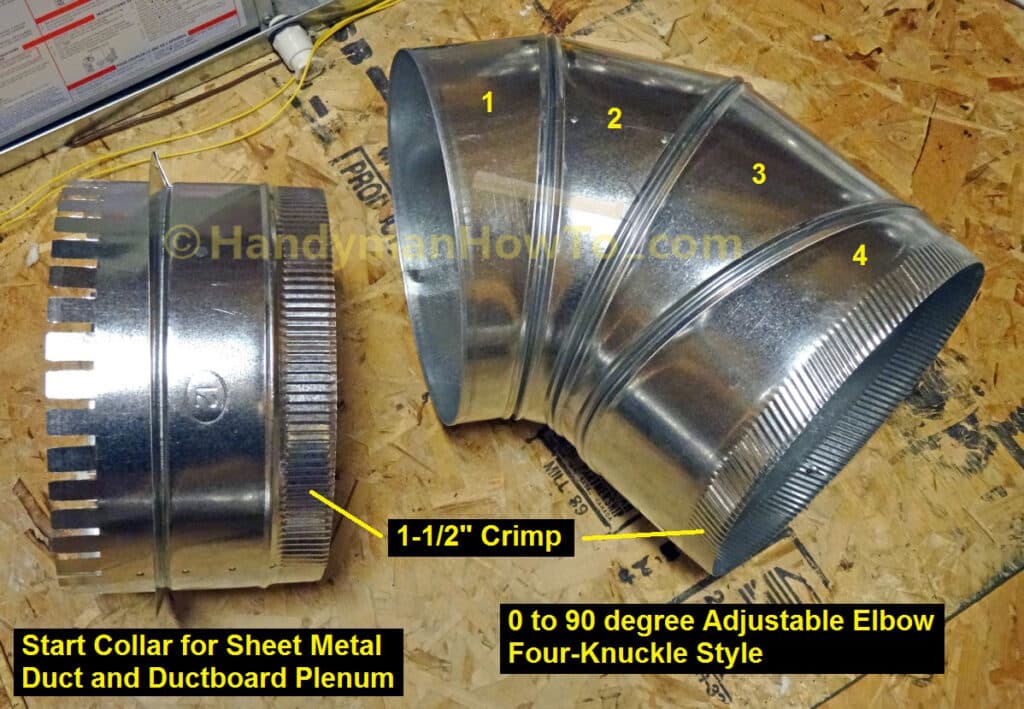
Sheet Metal Duct Installation: Start Collar and Adjustable Elbow
The 12 inch diameter sheet metal start collar and 0 to 90 degree adjustable elbow will be installed on the rigid duct board supply plenum. The pieces both have 1-1/2 inch wide crimps to connect the male (crimped end) to a smooth female fitting. The adjustable elbow is a four-knuckle or four-segment style where each section can rotate independently (with some fussing) to make any angle between 0 (straight) and a 90 degree turn. I really like the 4-knuckle elbow which made aligning sections of duct easy.
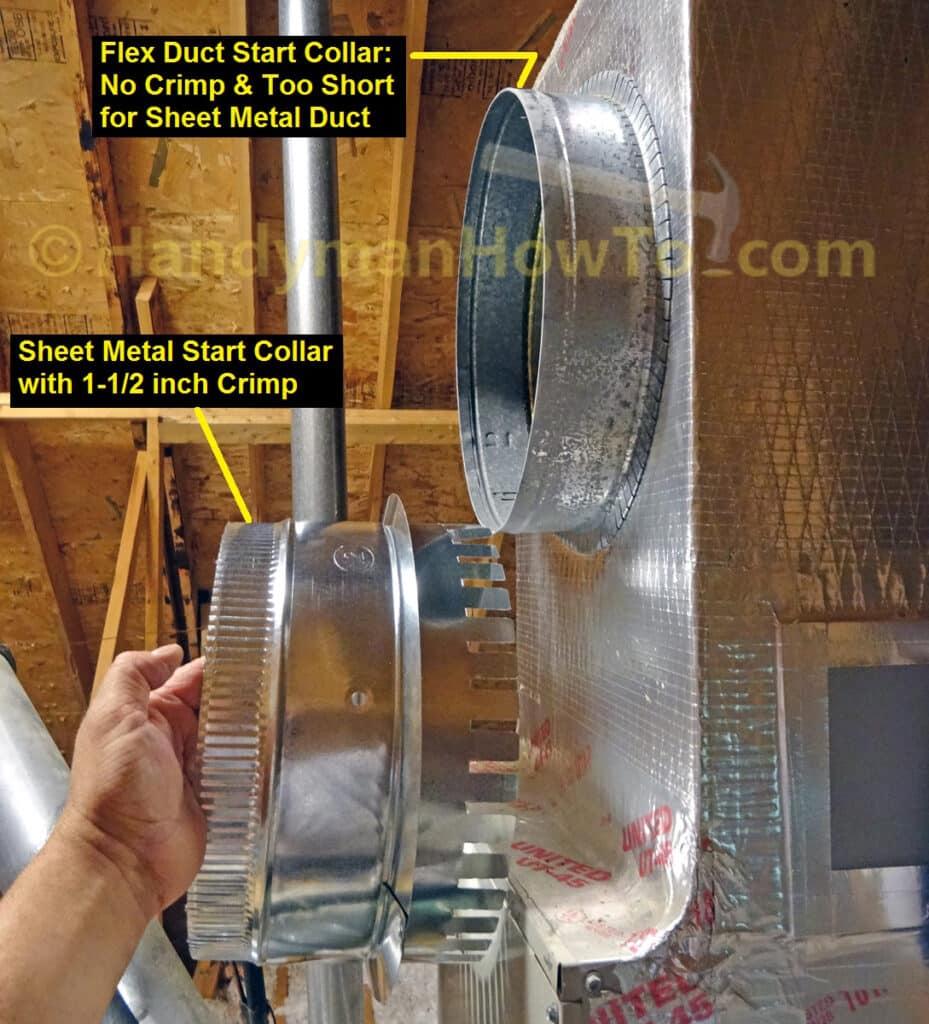
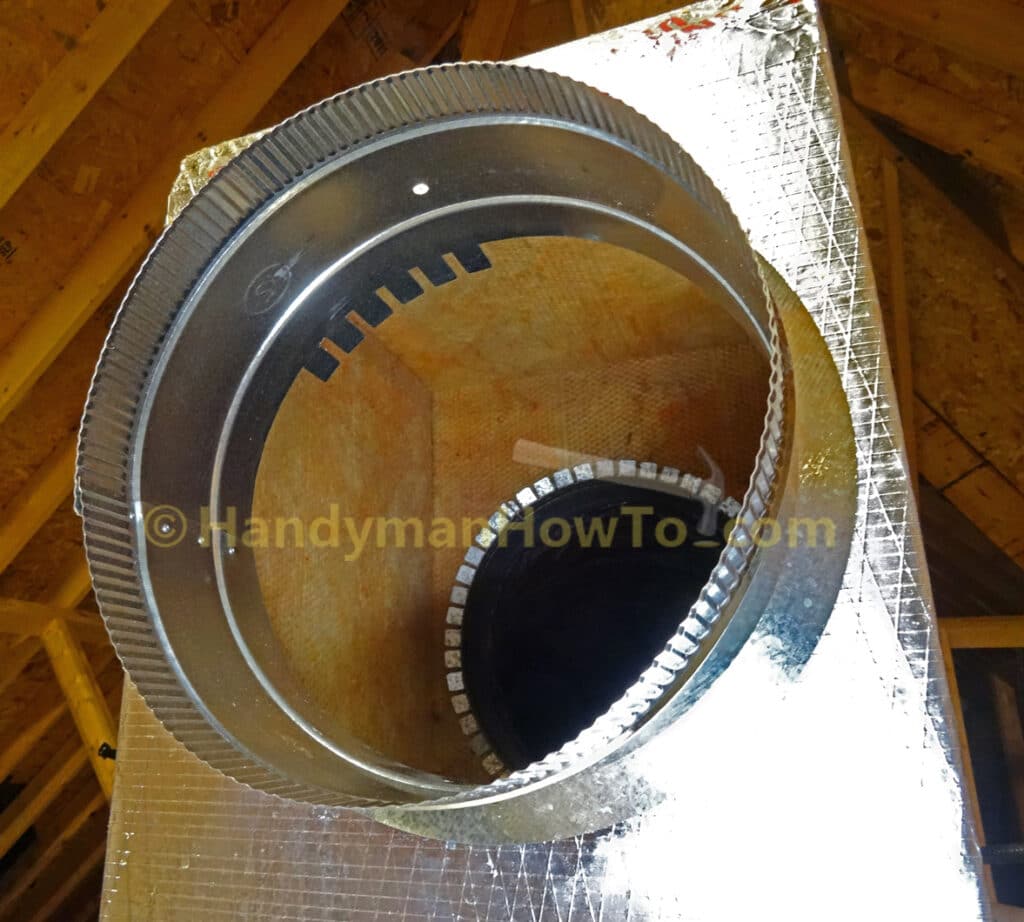
A flexible duct start collar cannot be used with sheet metal duct because it lacks the required 1-1/2 inch wide crimp band. The differences between the two start collar styles is shown here:
Remove the Flexible Duct Start Collar
The old flex duct start collar is removed by reaching inside the duct board plenum and bending up the metal mounting tabs:
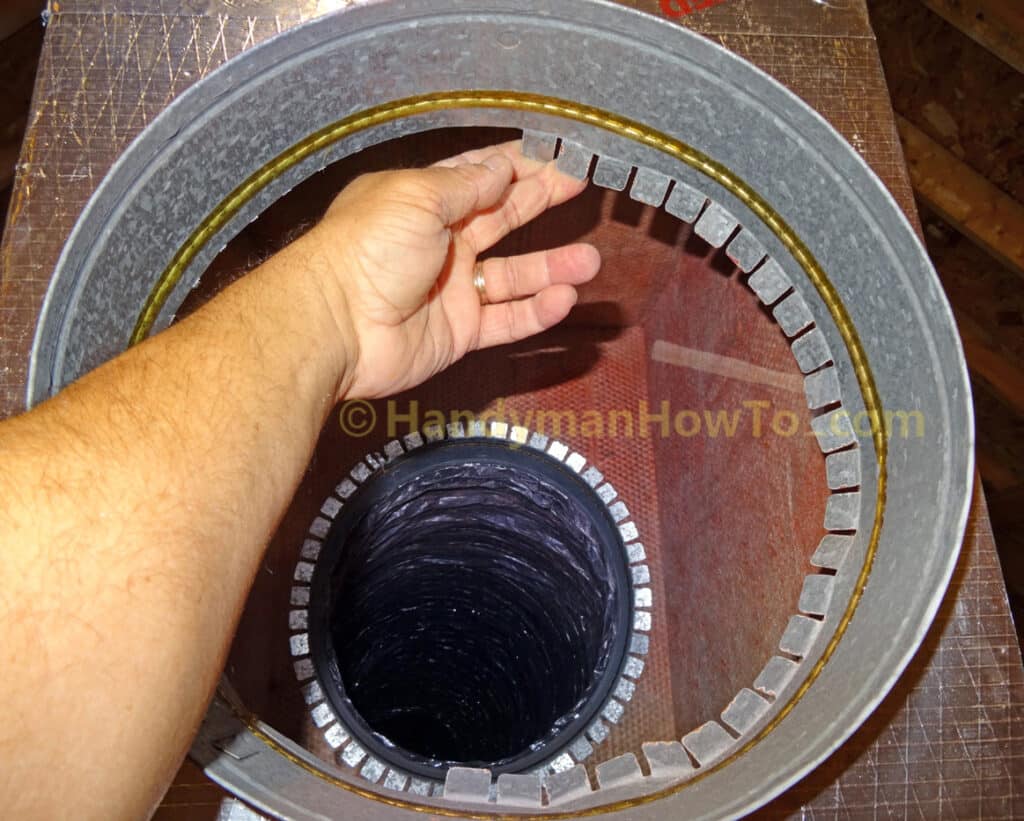
After bending back the metal mounting tabs, pull the start collar out of the duct board plenum:
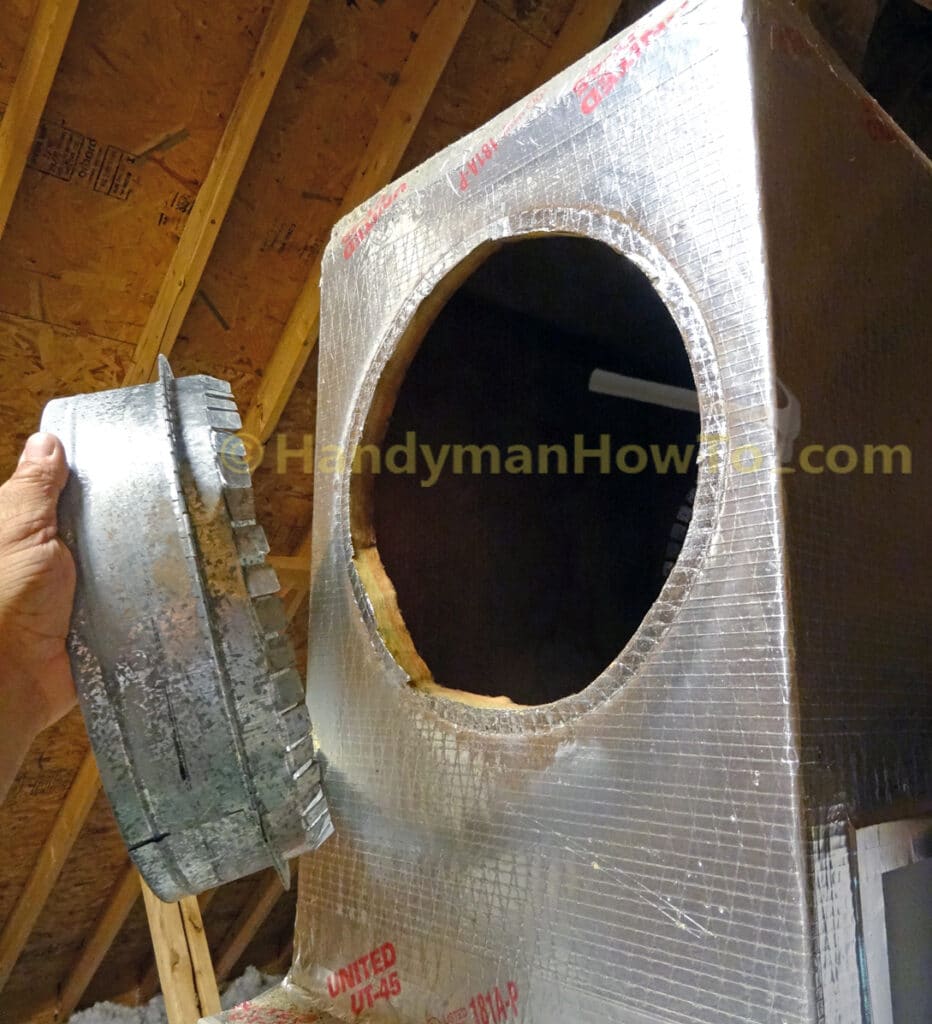
Install the Sheet Metal Duct Start Collar
The goober who originally installed the flex duct couldn’t be bothered to cut a symmetric round hole in the duct board plenum, which prevented the new start collar from fitting; the old start collar was squished out-of-round to make it fit. I center the new start collar mounting tabs over the plenum opening and traced an circle with a permanent marker pen, then evened up the hole with a serrated knife. The duct board generates a fair amount of fine fiberglass dust when cutting, so I cut on the pull stroke so dust fell outside the plenum.
The new sheet metal duct start collar is then slipped into the plenum opening:
Press the start collar against the duct board and bend the mounting tabs outward and against the duct board. I’ve bent back all but the last few tabs here:
Install the Sheet Metal Duct Adjustable Elbow
The round sections of sheet metal duct must be fastened with at least three screws per TABLE M1601.4 DUCT SYSTEM CONSTRUCTION AND SEALING (link is for State of Florida) of the residential building code:
“Round metal ducts shall be mechanically fastened by means of at least three sheet-metal screws or rivets equally spaced around the joint. Where a duct connection is made that is partially inaccessible, three screws or rivets shall be equally spaced on the exposed portion of the joint so as to prevent a hinge effect.”
I’m using Malco Zip-in Self Piercing hex head 1 inch screws with a 1/4 inch magnetic bit:

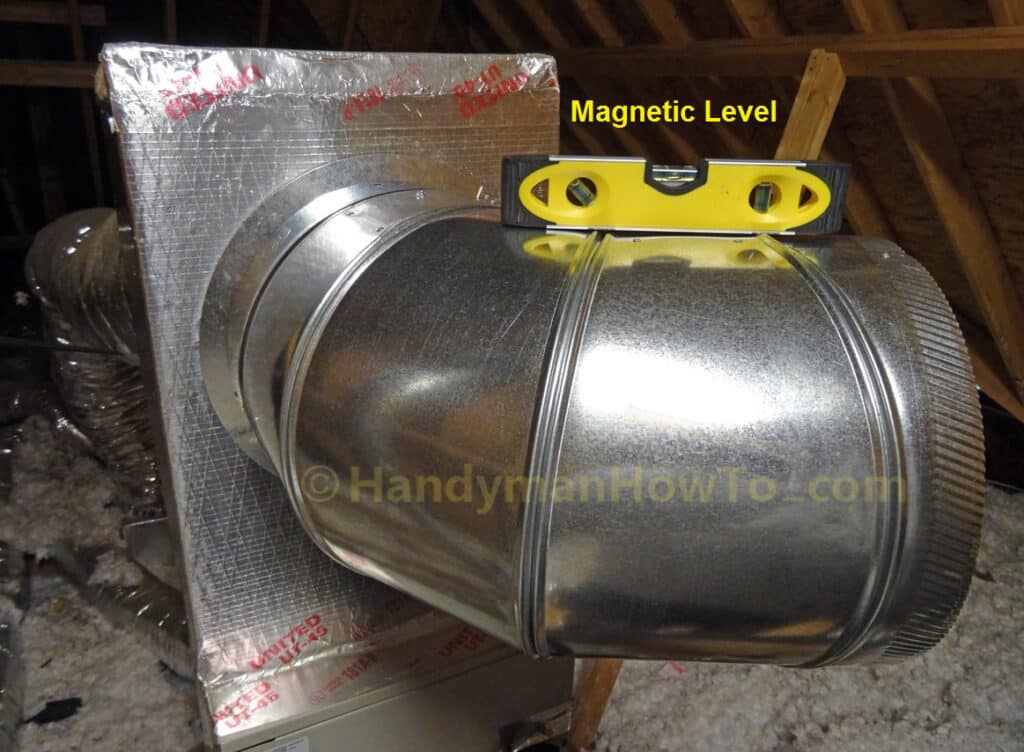
I turned the sheet metal elbow segments to approximate angle that I thought was needed, slipped the elbow over the start collar and leveled the elbow:
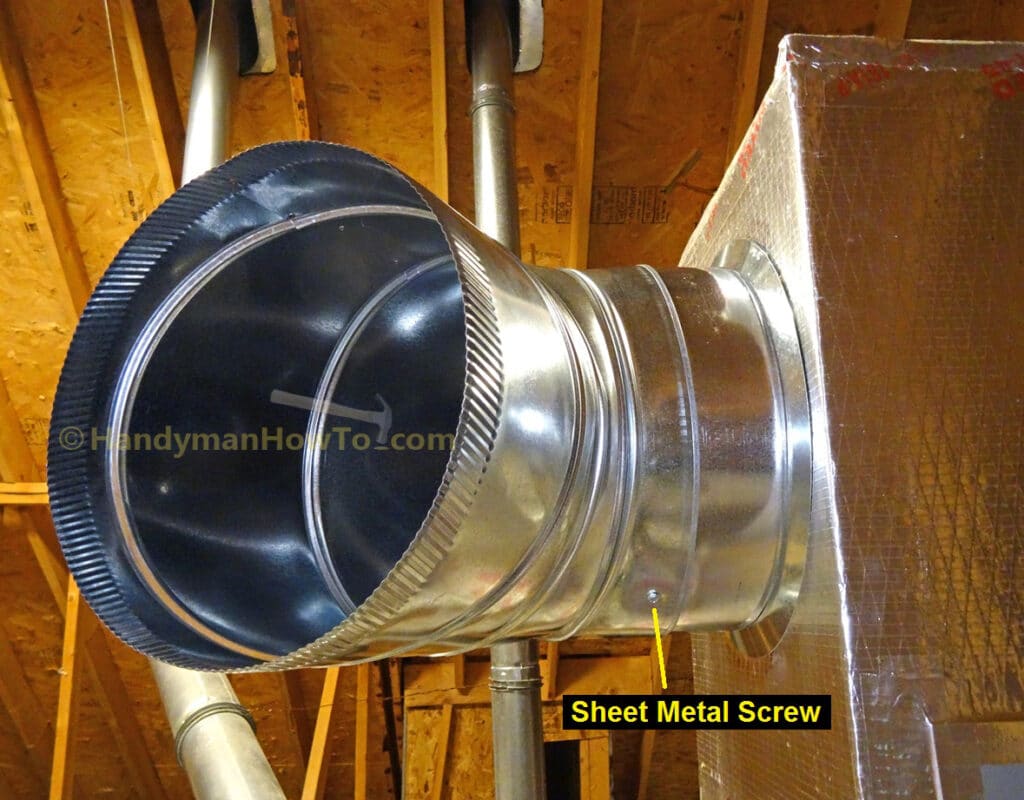
Then fastened the elbow to the start collar with 3 screws more or less equally spaced through the crimp band:
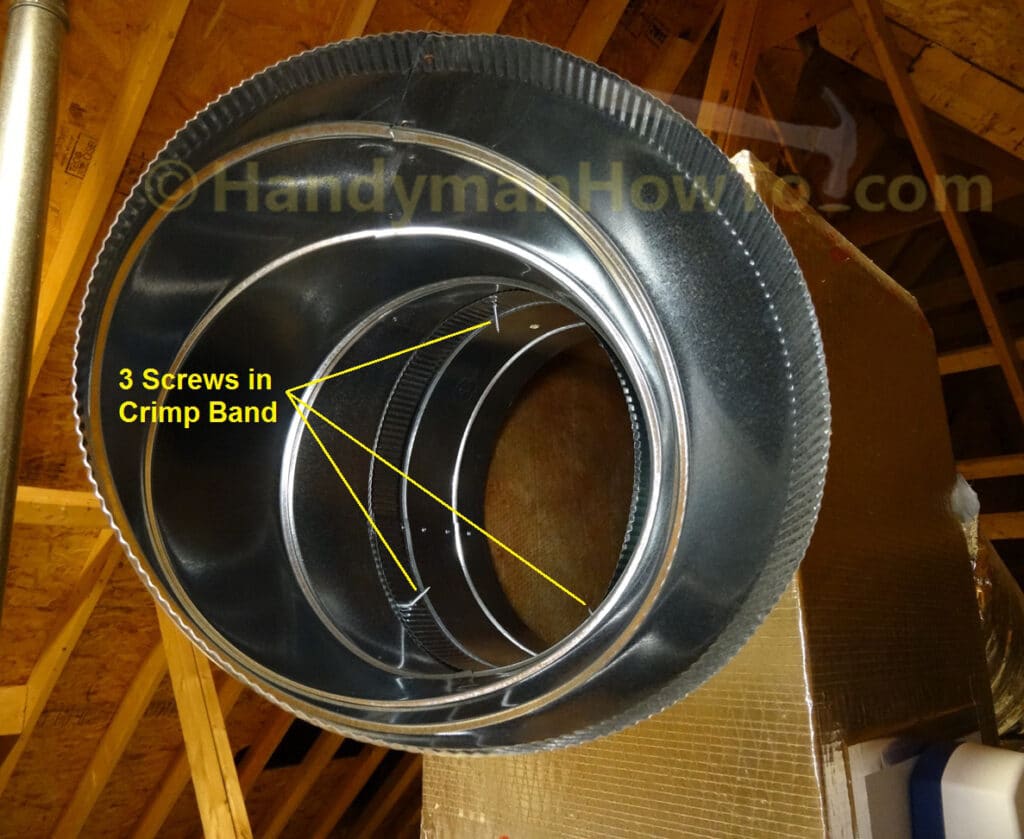
Another view of the adjustable elbow and screw attachment to the start collar:
This project is continued in How to Install Round Sheet Metal Duct – Part 3.
Thanks for reading,
Bob Jackson