Having removed the old bathroom vent fan I can now start work on installing the new Panasonic WhisperCeiling ventilation fan in the upstairs bathroom. This project is continued from How to Remove a Bathroom Vent Fan.
Panasonic WhisperCeiling Vent Fan – Ceiling Mount Problems
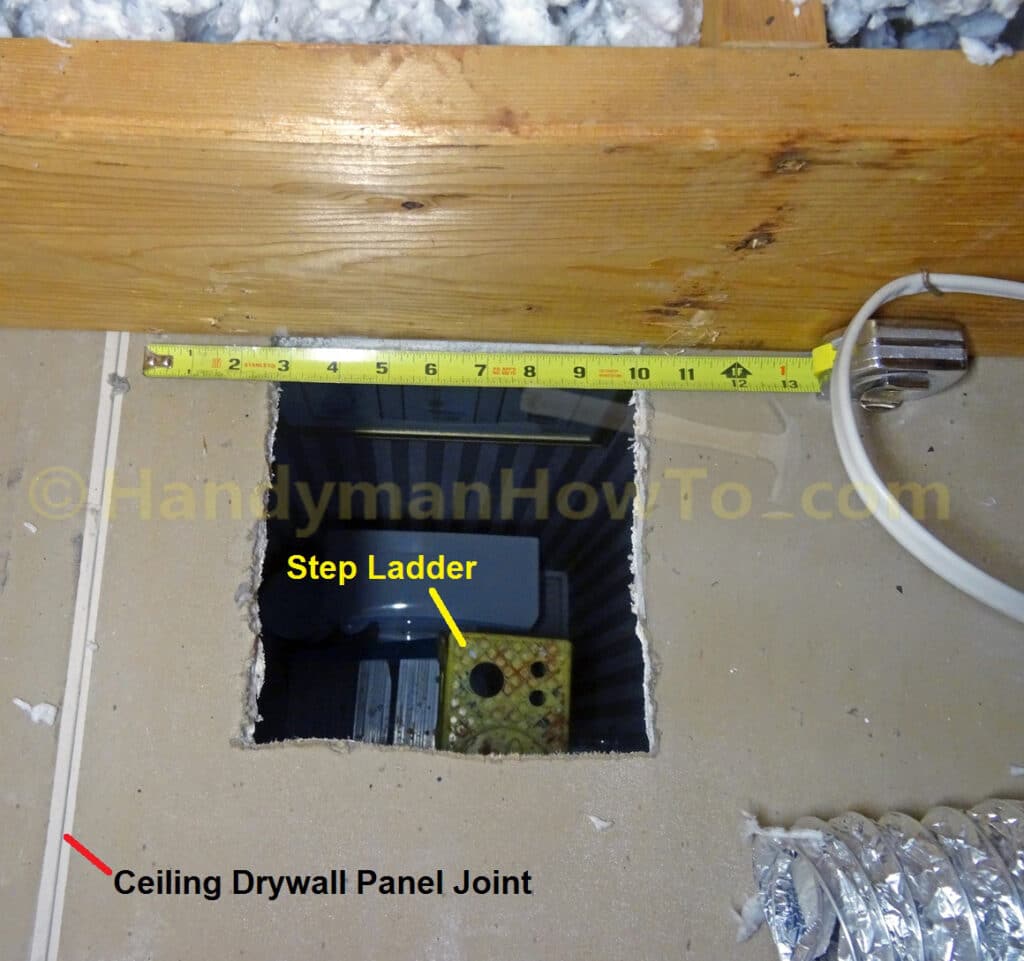
Working in the attic above the 2nd floor bathroom, the new Panasonic WhisperCeiling FV-40VQ4 bathroom fan requires 10-1/2 inch square mounting hole for the fan body versus the ~7 inch existing hole in the drywall ceiling. I don’t want to cut the larger hole too close to the drywall panel joint because it would leave a narrow strip and weak spot that might break off while sawing. My plan is to make the hole larger on the right side:
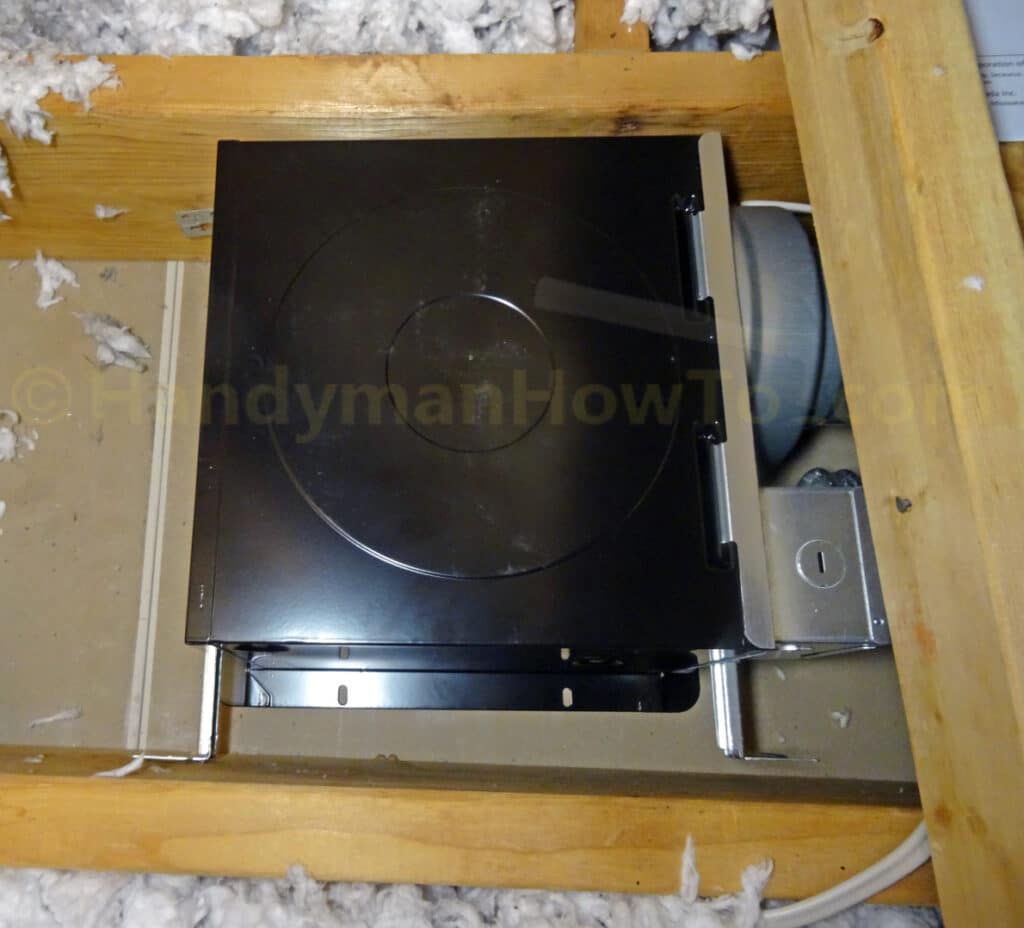
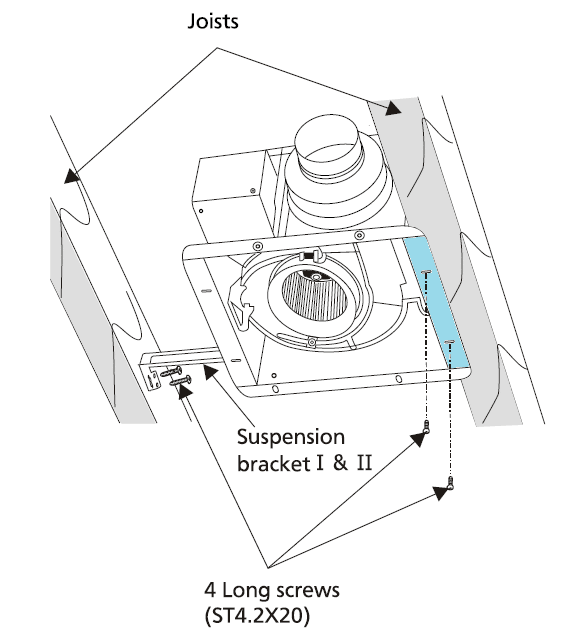
I set the Panasonic FV-40VQ4 fan between the ceiling joists to get a better idea of the installation (see the following photo). A couple of things are apparent:
- The fan body has to be inserted into the ceiling from inside the bathroom for the flanges to rest against the ceiling.
- There’s no way the suspension brackets and duct adapter/electrical box will fit through a ceiling hole sized to fit the fan body as I learned when I installed a WhisperCeiling fan in the master bathroom.
- Suppose I removed the suspension brackets first?
That strategy won’t work because:- The two suspension brackets on the left slide into a bracket cover that attaches to the fan body with two screws. The screws are inaccessible when the brackets are installed. I therefore can’t insert the fan body into the ceiling and reattach the brackets. There’s also no space to slide the suspension brackets into the bracket cover when the fan is between the ceiling joists.
- It would be very difficult to screw the short suspension bracket at the lower right to the ceiling joist.
But I have a plan to solve the mounting problems!
Panasonic WhisperCeiling Vent Fan Old Work Installation Steps
The term “old work” means a renovation job in construction and electrical trades. The problem is the Panasonic WhisperCeiling Installation Instructions are written for new construction where the fan is installed before the drywall, but the fan can’t be mounted in a opening sized to fit the fan body due to the bulky duct adapter assembly.
Update:
Panasonic has since introduced the WhisperFit EZ product line for old work, retrofit and remodeling applications. The FV-08-11VF5 fan without a light is the new equivalent model. See How to Install a Panasonic WhisperFit EZ Bathroom Fan for details.
After reading the Panasonic WhisperCeiling Service Manual that illustrates the parts diagram and examining the fan more closely, I realized the bulky duct adapter assembly (item #4 in the parts list) is easily detachable. If I’d known this earlier it would saved extra time and effort when I installed a WhisperCeiling fan in the master bathroom.
The old work bathroom fan installation steps are:
- Disconnect the duct adapter from the fan body.
- Saw a mounting hole in the drywall ceiling that fits the fan body.
- Build a 1 in x 2 in wood mounting frame to fit between the ceiling joists.
- Connect the house wiring and insulated duct to the duct adapter.
The duct adapter will fit into the ceiling hole made to fit the fan body. - Insert the fan body into the ceiling and mate it with the duct adapter.
- Install the ground screw and plug in the fan motor connector.
- Fasten the fan flanges to the wood mounting frame with screws.
This method will work if the fan is installed between floors or the ceiling below the attic.
Remove the WhisperCeiling Duct Adapter Assembly
To remove the duct adapter:
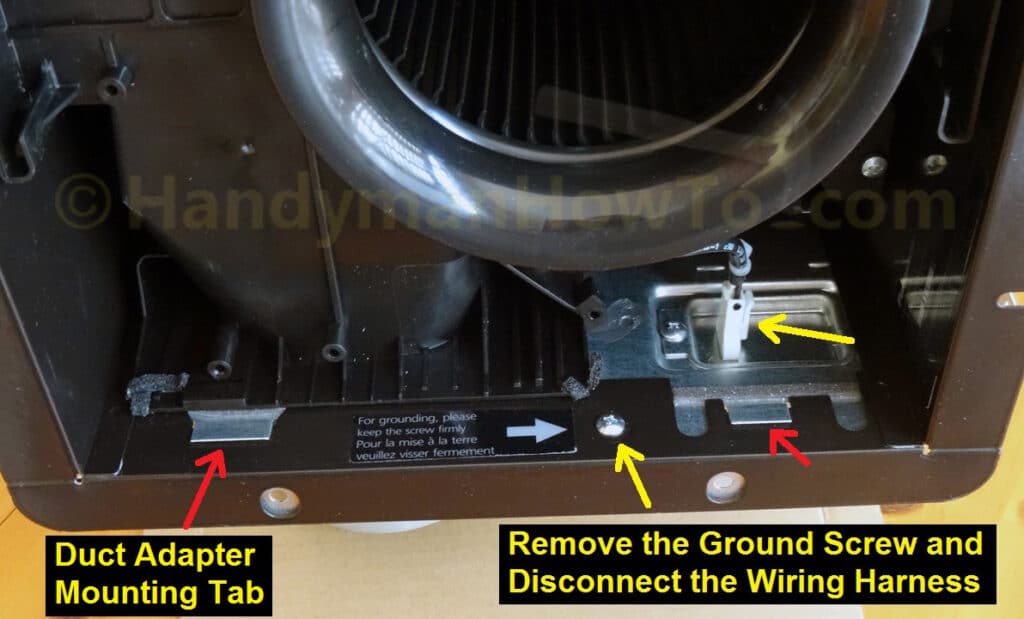
- Unplug the fan motor wiring connector. Just squeeze the connector to release the retaining clip and pull.
- Remove the ground screw.
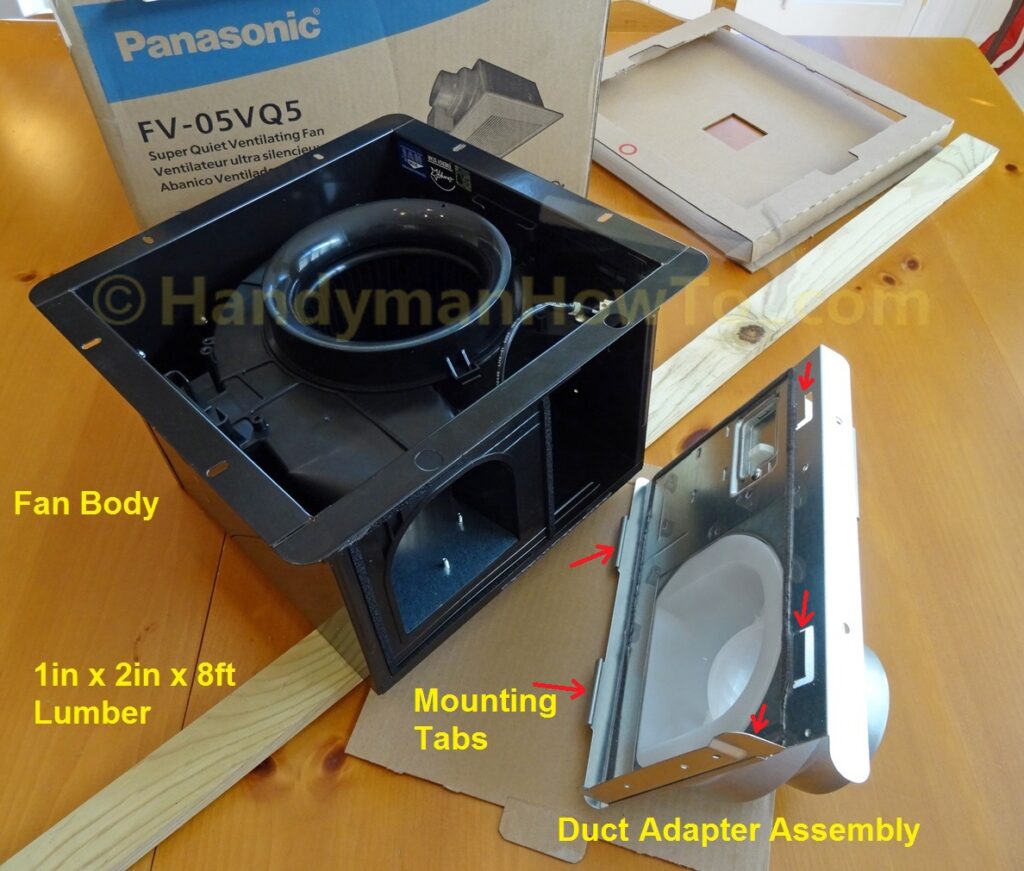
See the yellow arrows in the following photo. Also notice how the duct adapter mounting tabs (red arrows) fit into the fan body for later reassembly:
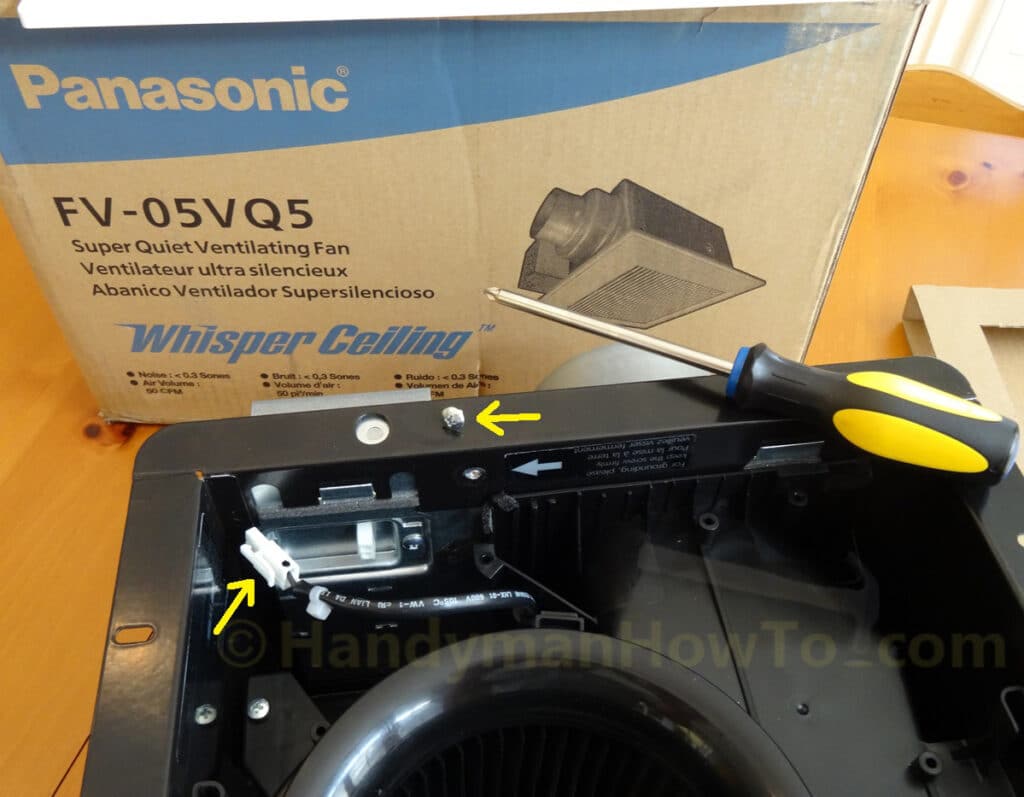
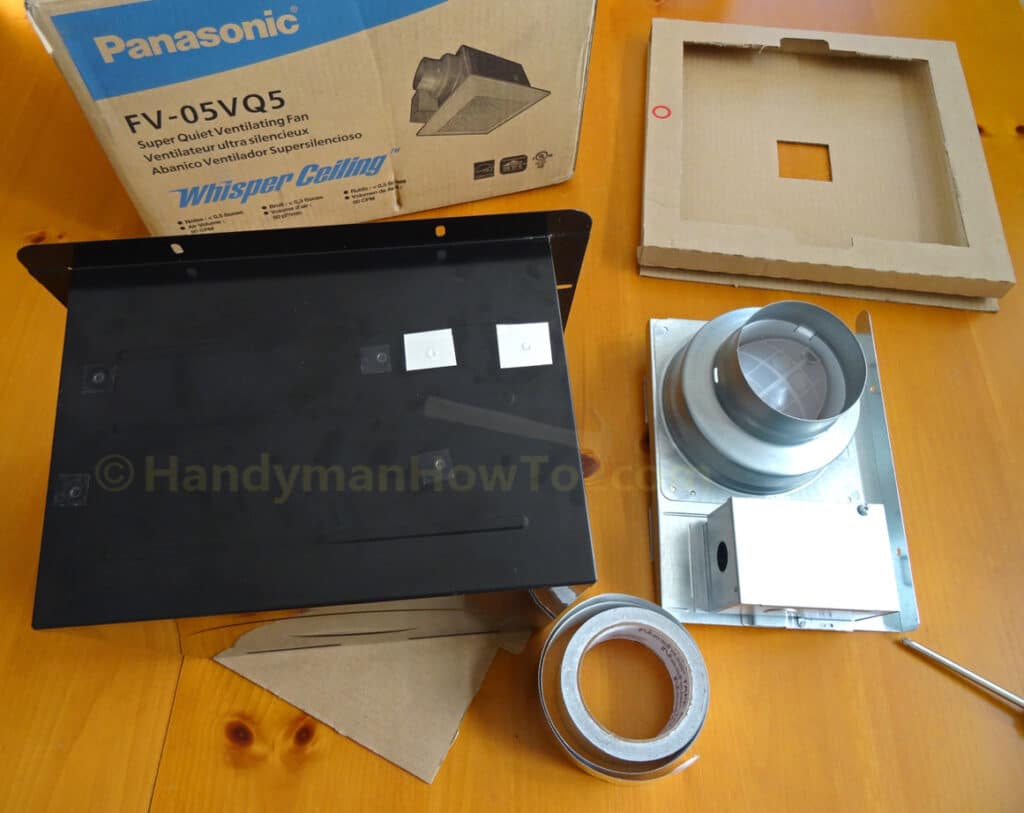
The fan motor is unplugged and the ground screw is removed:
I found it convenient to flip the fan upside down and rest it on 1 in x 2 in x 8 ft piece of lumber (which I’ll use to make the ceiling mounting frame) to elevate the fan off the table. Push down on the duct adapter assembly to slide it off the fan body being careful not to bend it. Mine was a little stiff for the first 1/4 inch of movement then it popped right off.
Take a moment to study the duct adapter mounting tabs (red arrows) in the photo for later reassembly in the ceiling:
Remove the Suspension Bracket Cover
The suspension bracket cover is not needed for an old work installation and must be removed so the fan body will fit into the ceiling opening. Remove the two bracket cover screws:
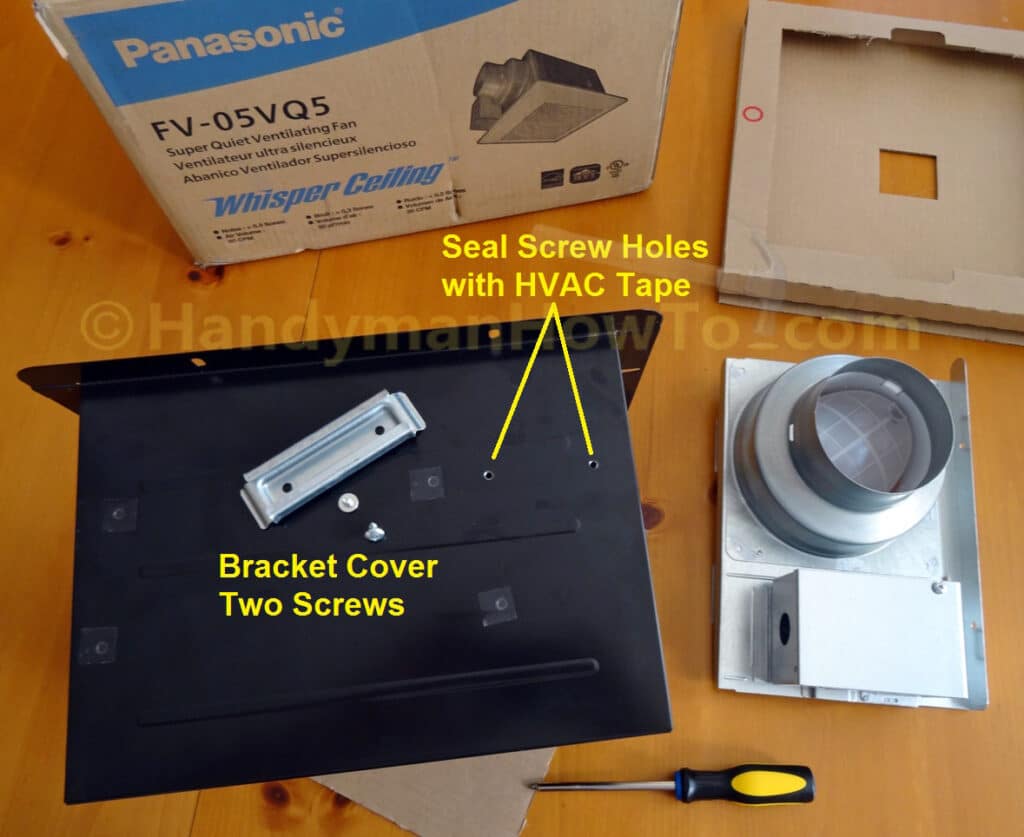
Seal the screw holes with metal foil HVAC tape:
Panasonic WhisperCeiling: Build an Old Work Wood Mounting Frame
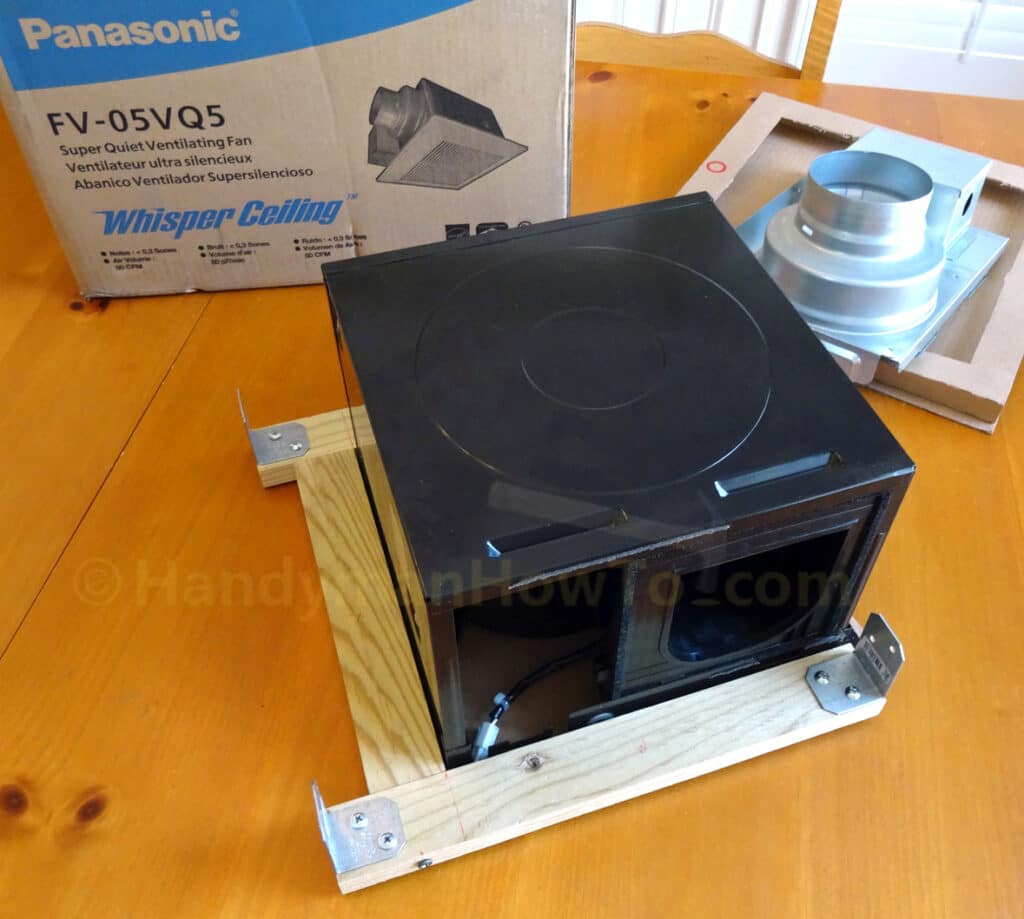
I had previously build a wood mounting frame out of 2 x 2 lumber for the Panasonic FV-11VQ5 installed in master bathroom. This time I made a smaller mounting frame out of 1 x 2 lumber (1 inch by 2 inch by 8 foot board) because a thinner 1 x 2 frame would fit under the large round duct adapter. This allowed me to make the frame smaller so it would fit over three sides of the fan body and flanges for attachment with wood screws.
I cut the 1 x 2 lumber with my DeWALT miter saw, pre-drilled pilot holes for a single 3 inch long wood screw in each cross member so as not to split the wood, applied Gorilla Glue to the joints for extra strength and prevent the joints from twisting, then fastened the boards with a single 3 inch wood screws in each side:
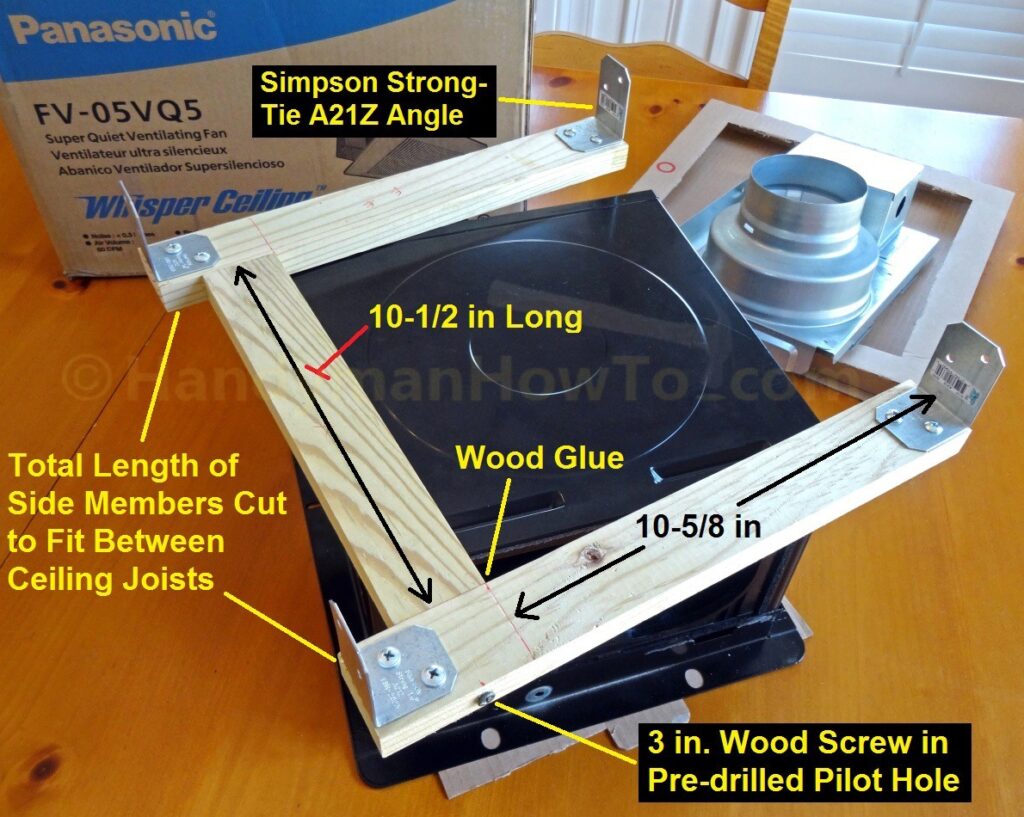
The WhisperCeiling flanges are about 1 inch wide with oval screw slots, so if you prefer the wood frame can be a 1/4 inch larger in all dimensions than illustrated above for the FV-05VQ5, FV-08VQ5 and FV-11VQ5 model vent fans. The interior dimensions of the wood frame correspond to the size of the mounting hole for the fan body in the bathroom ceiling.
Per this illustration taken from the Panasonic WhisperCeiling Installation Instructions, one side of the fan is typically fastened (blue shaded area) to a ceiling joist – which I will also do. Since I can’t use the suspension brackets, my wood frame will support the other 3 sides of the fan:
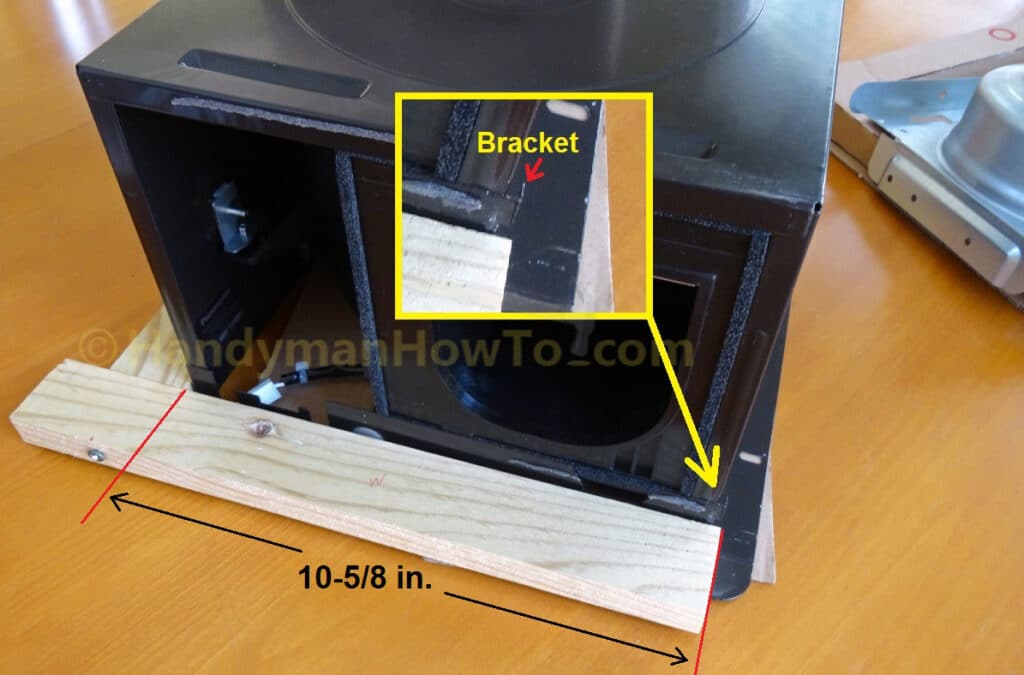
Note the metal bracket that extends about 3/16 inch to align and capture the side of the duct adapter (the duct adapter is seen in the background on the right). These items protrude past the fan body which prevents the fan from sitting flush against the ceiling joist. I allowed for this extra length by making the wood frame long enough to be even with the bracket (see the inset detail):
I used Simpson Strong-Tie SD8 #8 1-1/2 wood screws and A21Z Z-MAX Galvanized Angles purchased at Home Depot for mounting the frame to the ceiling joists. I cut the 1-1/2 inch long wood screws to 3/4 inch with a bolt cutter so they wouldn’t punch through the 1 inch thick boards and prevent the frame from lying flush on the drywall ceiling. I could’ve bought shorter screws but it saved me a trip to the hardware store.
The wood frame and duct adapter are installed in the bathroom ceiling in Panasonic WhisperCeiling Bathroom Fan – Wiring and Mounting.
Thanks for reading,
Bob Jackson