The old and leaky Delta Monitor Series 1300/1400 shower valve cartridge is removed in preparation for installing the new cartridge. Remember the water has been shutoff to the entire house.
This project is continued from How to Replace a Leaky Shower Valve Cartridge.
How to Remove a Leaky Shower Valve Cartridge
Remove the Shower Valve Sleeve
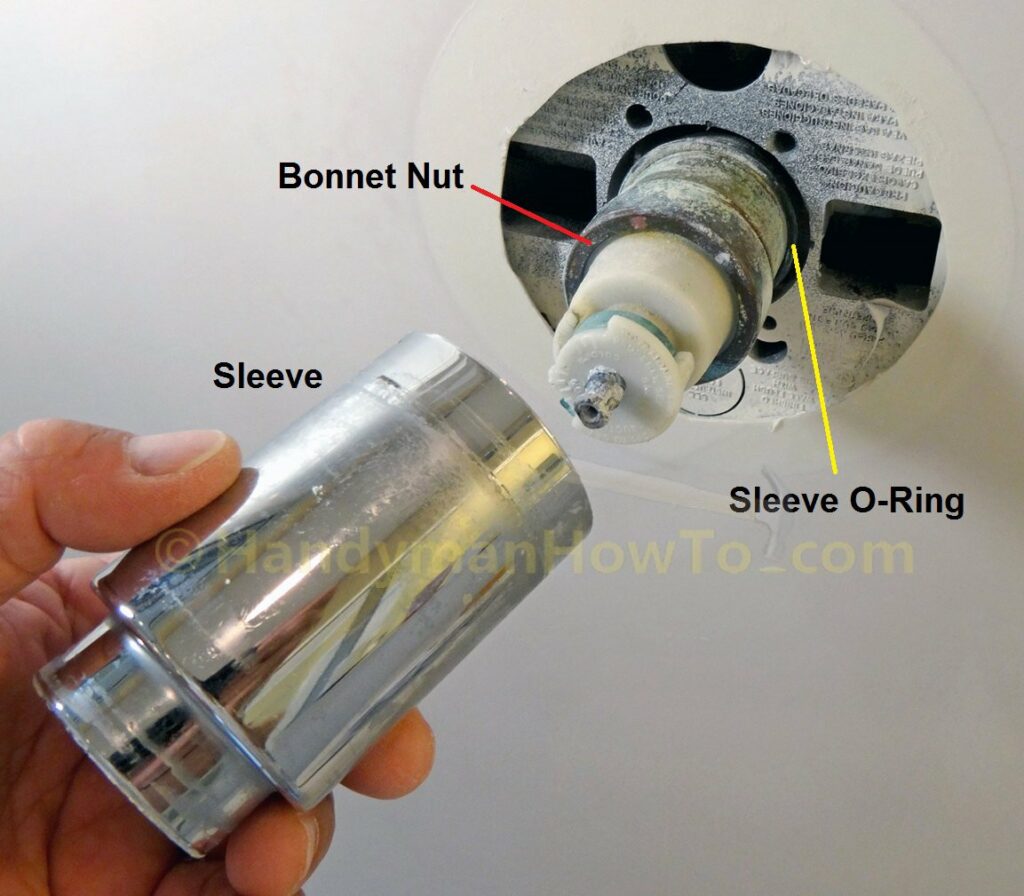
The trim sleeve is removed by simply pulling it off the shower valve body to expose the cartridge, bonnet nut and sleeve o-ring. The o-ring centers the sleeve over the shower valve body and holds it in place:
Remove the Shower Valve Bonnet Nut
The bonnet nut holds the shower cartridge in the shower valve body. The bonnet can be difficult to remove after years of calcium mineral deposits clog the threads. If the bonnet nut is frozen then wrap a rag soaked with white vinegar around the bonnet nut and wait a few hours. Vinegar is mildly acidic and will dissolve the calcium.
I used channel lock pliers to remove the bonnet nut:
- One plier on the shower valve body (left side in photo) is held steady for stress relief.
This prevents the torque (twisting force) from reaching the shower valve mount and copper pipes. - The other plier on the bonnet nut to remove it.
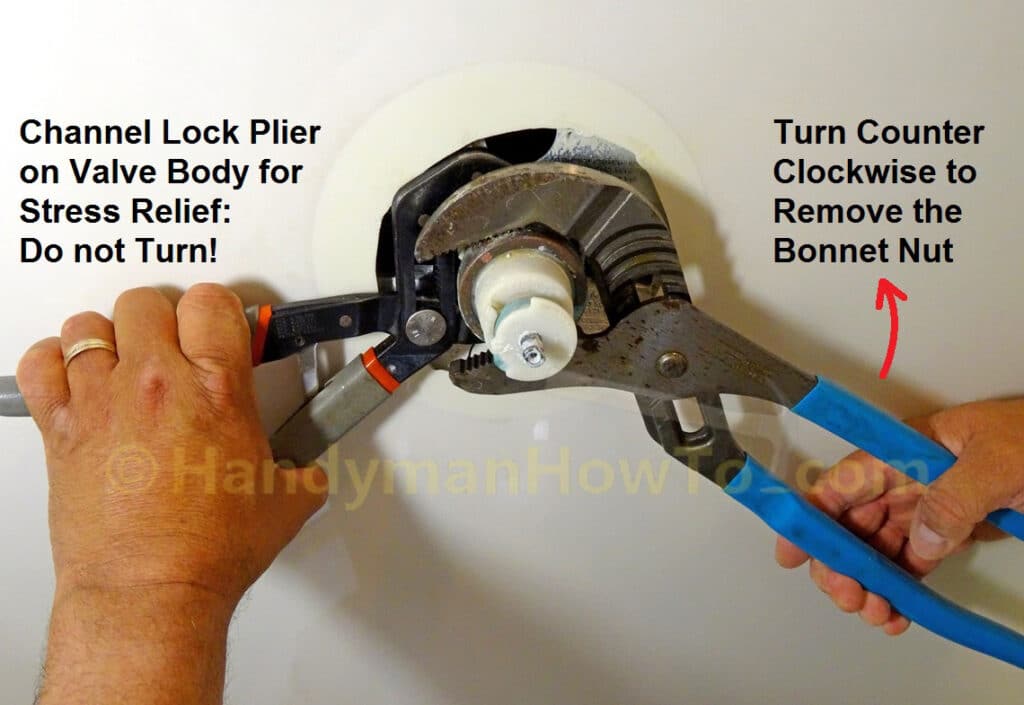
You can also use a pipe strap wrench to remove the bonnet nut but I would be concerned about torquing hard on a frozen nut and stressing the shower valve mount.
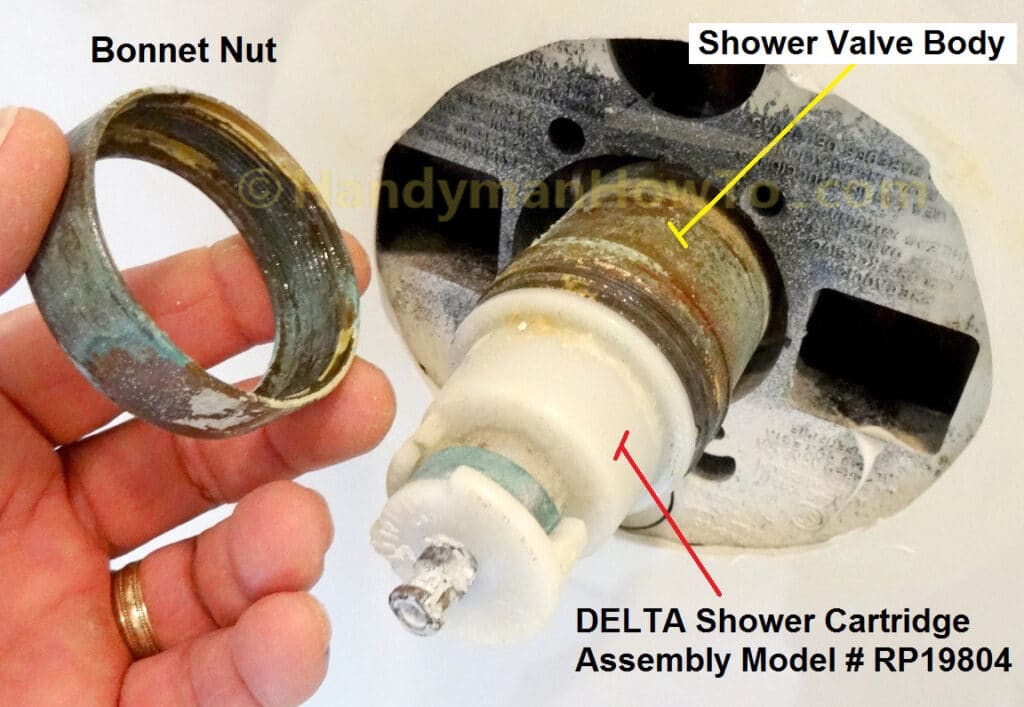
This channel locks worked really well and I got the nut off without any problems. Once the nut breaks free it was easy to spin it off by hand. Lot’s of calcium and green copper oxide deposits on the threads after 12 years of use:
Remove the Shower Valve Cartridge
I thought that removing the bonnet nut would be the biggest challenge. Getting out the old shower cartridge was a bit trickier because it was firmly stuck in the shower valve body. I pulled and wiggled on the shower cartridge but it wouldn’t budge, apparently the O-rings were stuck.
My solution was to press the blade of my pocket knife (don’t twist the knife blade or you’ll break it!) between the flange of the white cartridge cap and the brass shower valve body to open a gap large enough to work in the tip of a flat tip screwdriver. Then I worked my way around cartridge cap twisting the tip of the screw driver to pry out the cartridge:
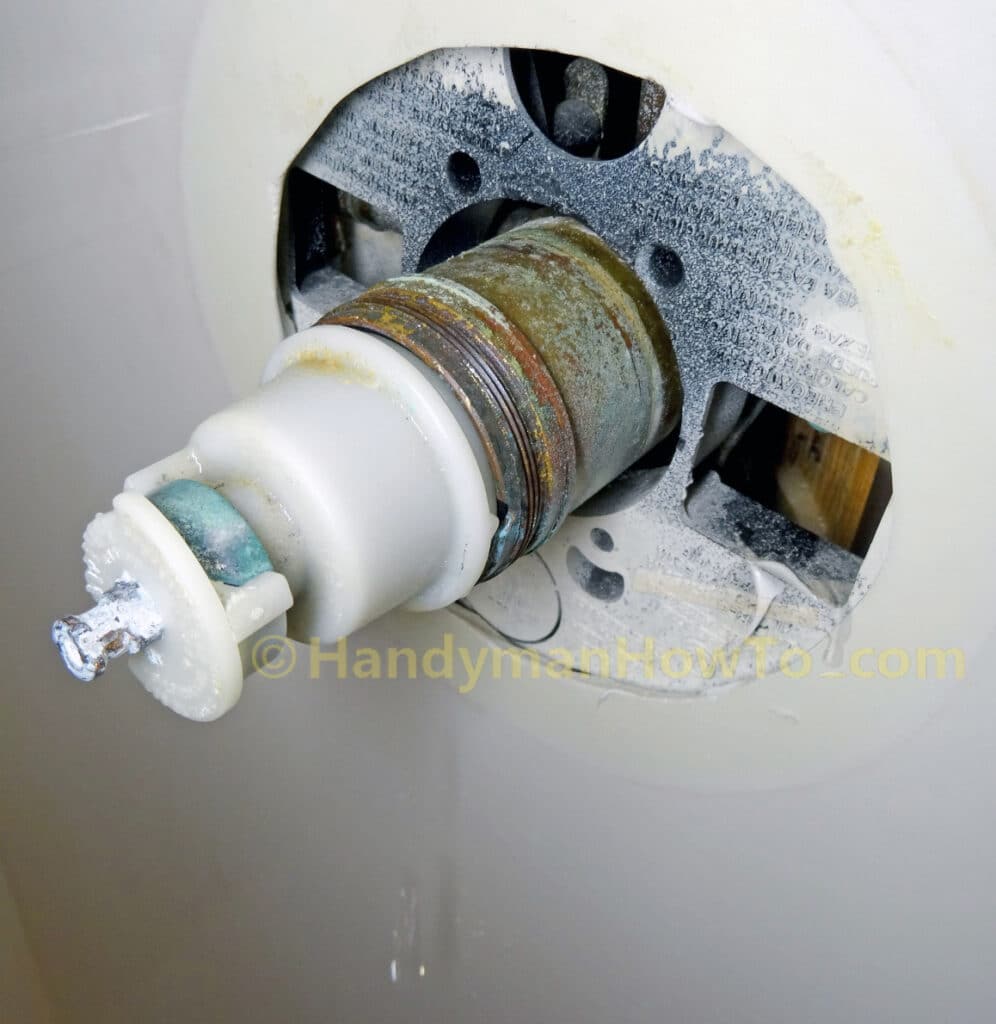
This broke the seal on the O-rings so I could wiggle the cartridge out by hand:
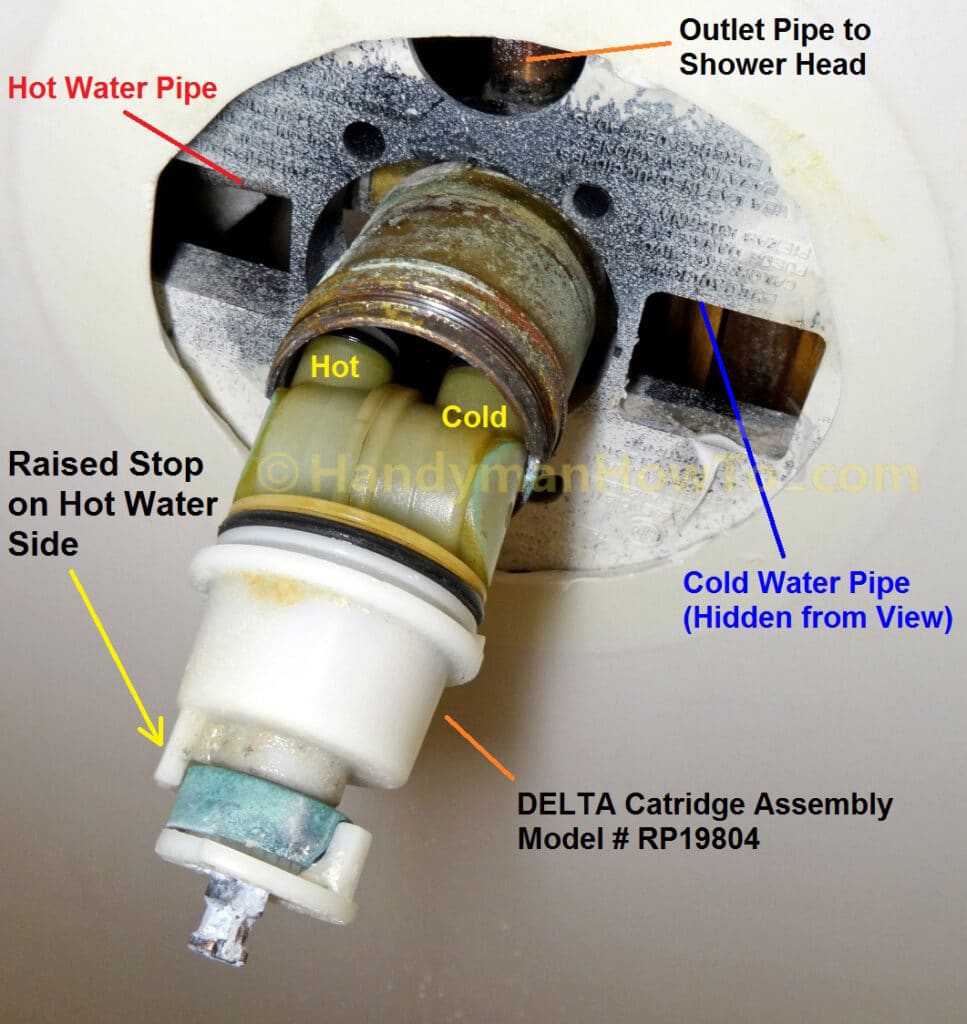
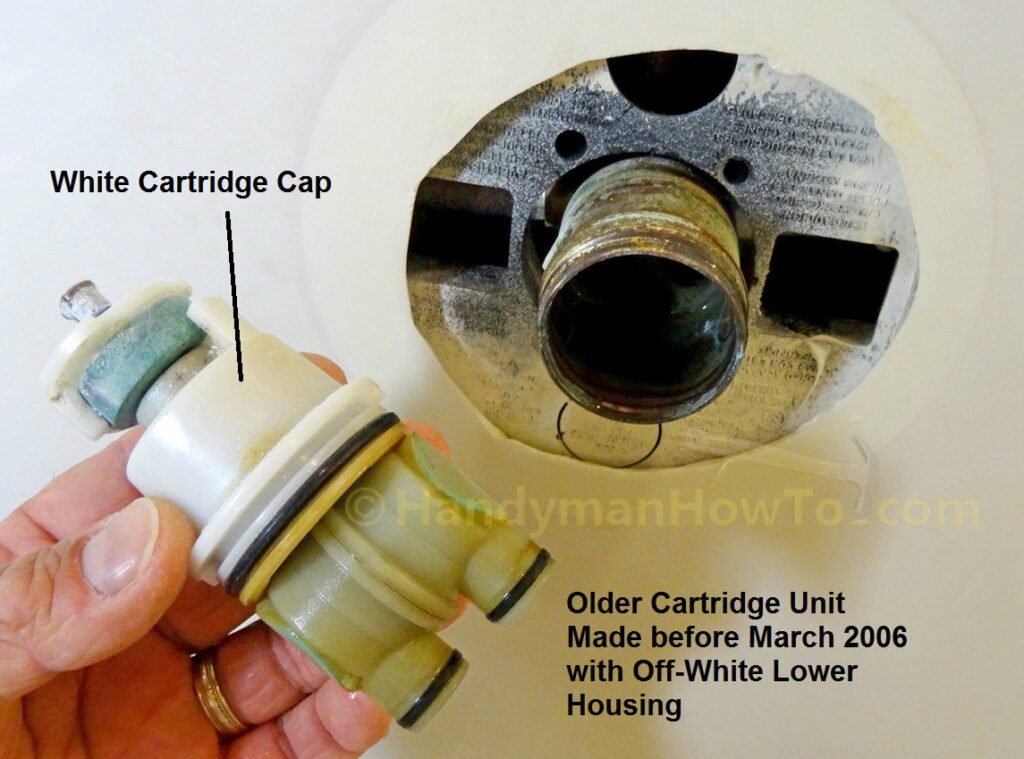
Here’s the old Delta cartridge after removing it from the shower valve body:
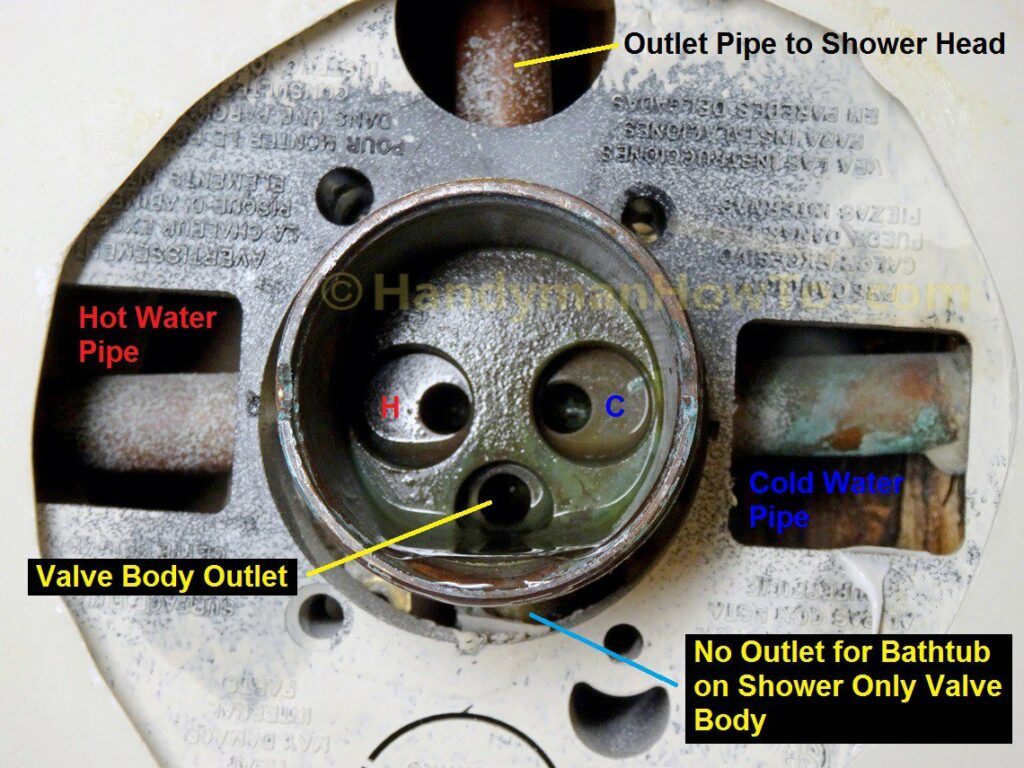
If you’ve ever wondered what’s inside a shower valve body this closeup illustrates how it works:
- By convention hot water is on the left and cold water is on the right.
- Water flows into the shower cartridge through the two valve inlets.
- The cartridge controls the flow and amount of hot and cold water, while mixing the two for temperature control.
- The water flows around the exterior of the cartridge body into the shower valve body outlet to the tub faucet or shower head. My valve is for a shower only and therefore doesn’t have an outlet for a bathtub.
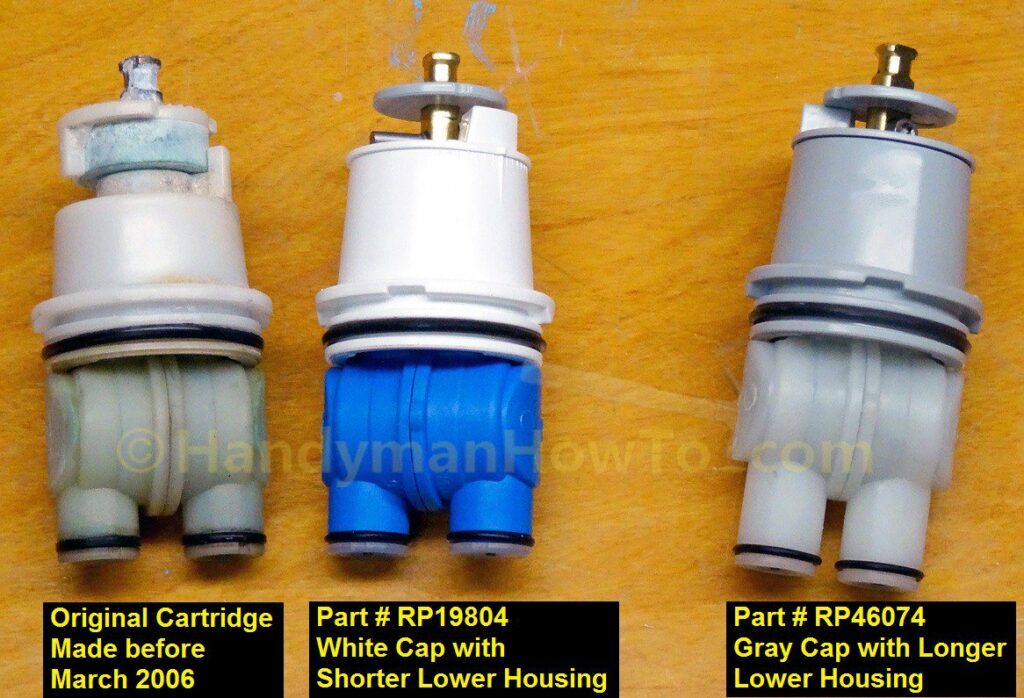
Delta Shower Cartridge Part # RP19804 and RP46074
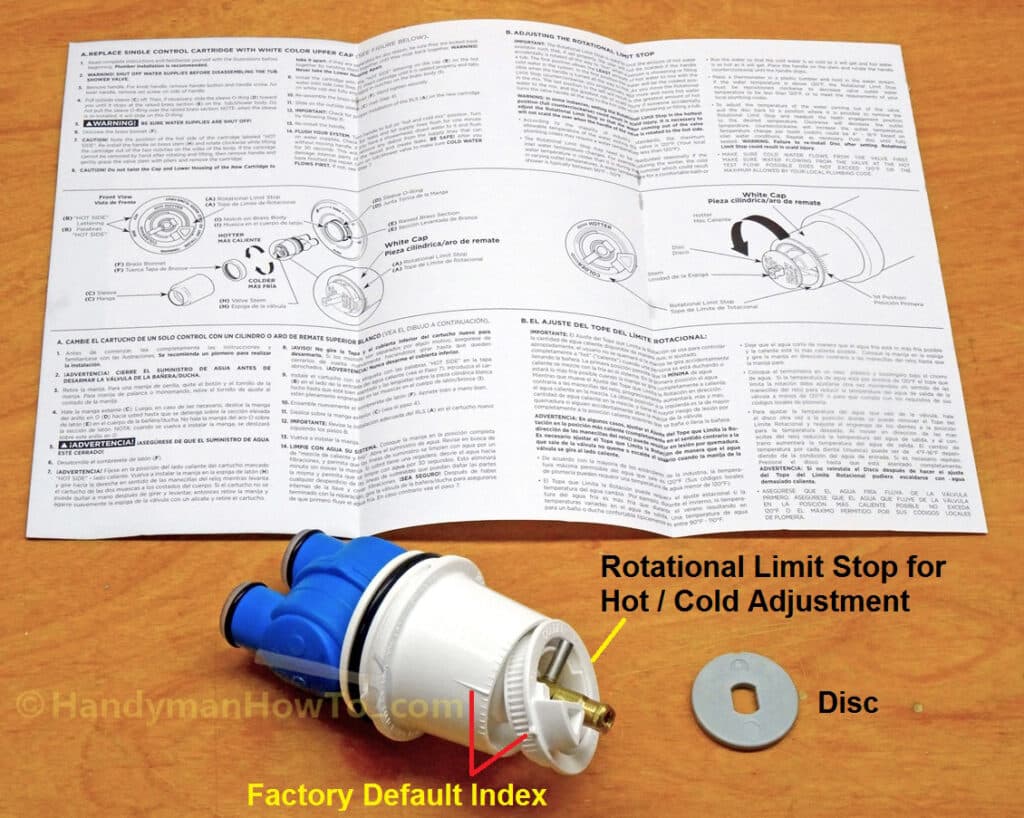
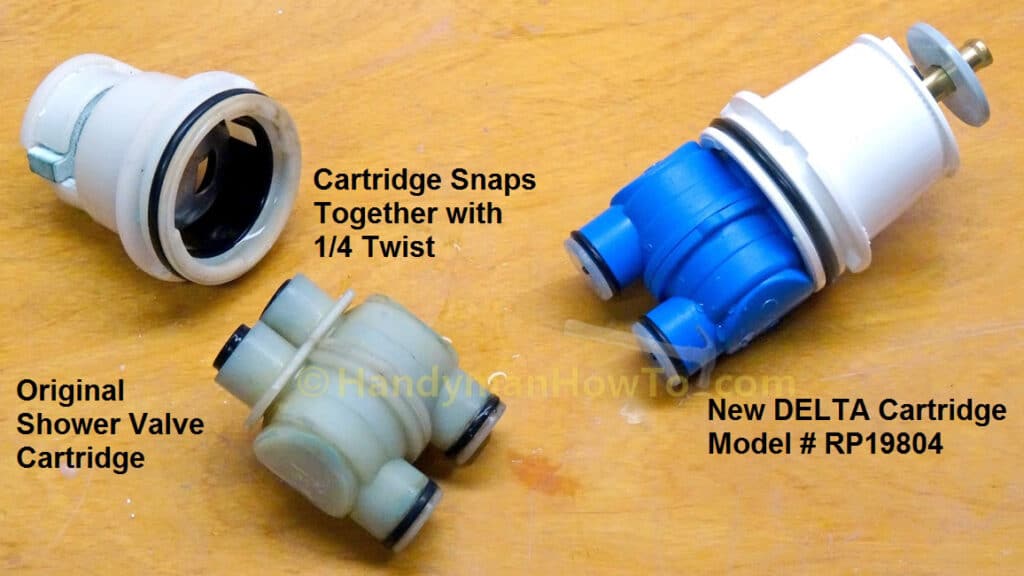
I bought both the RP46074 cartridge for the Delta Multichoice 13/14 Series and the RP19804 for the Delta Monitor 1300/1400 Series shower so I’d have the correct part. The RP19804 with the blue lower housing is a direct replacement for my old cartridge:
The new Delta shower cartridge RP19804 includes one page installation instructions. I’ve removed the grey retaining disc and pulled out the Rotational Limit Stop (RLS) for hot/cold temperature adjustment to better illustrate these parts. I explain the temperature adjustment in How to Adjust a Shower Valve Water Temperature.
Note the lower housing snaps into the cartridge cap with a 1/4 twist and you should be mindful of this when installing the new cartridge in the shower valve body because it’s tempting to twist the new cartridge in to seat O-rings:
This project is continued in How to Install a Shower Valve Cartridge.
Thanks for reading,
Bob Jackson