The sagging wood deck is pulled together with a cable winch, 2×10 deck beams reinforced with steel connectors, temporary support post set and the jack post removed. This project is continued from How to Replace a 6×6 Wood Deck Post.
How to Replace a 6×6 Wood Deck Post – Part 2
Pull the Deck Together with a Cable Winch
The Come-Along cable winch was installed How to Pull Together a Sagging Wood Deck and slightly tensioned to prevent deck movement while jacking, but I’ve waited until raising the deck to fully pull it together. Why wait? Because the deck needed to be separated from the 6×6 corner post so it would not be pulled back away.
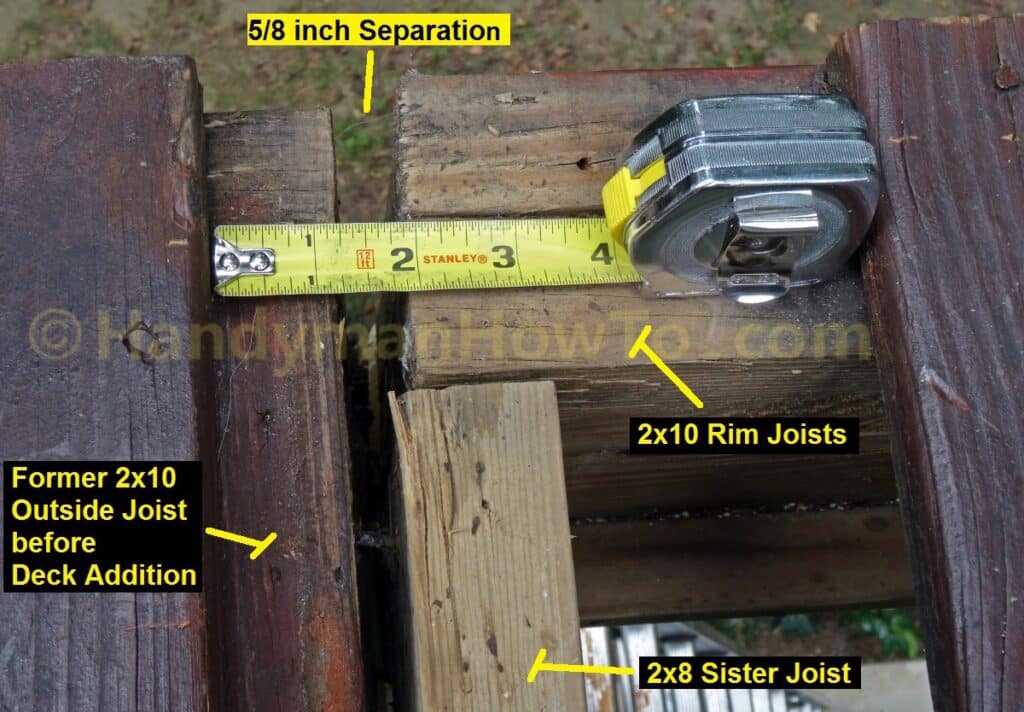
Remember the 5/8 inch gap between the 2×10 deck beams?
Now I’ve cranked the winch to pull the deck together:
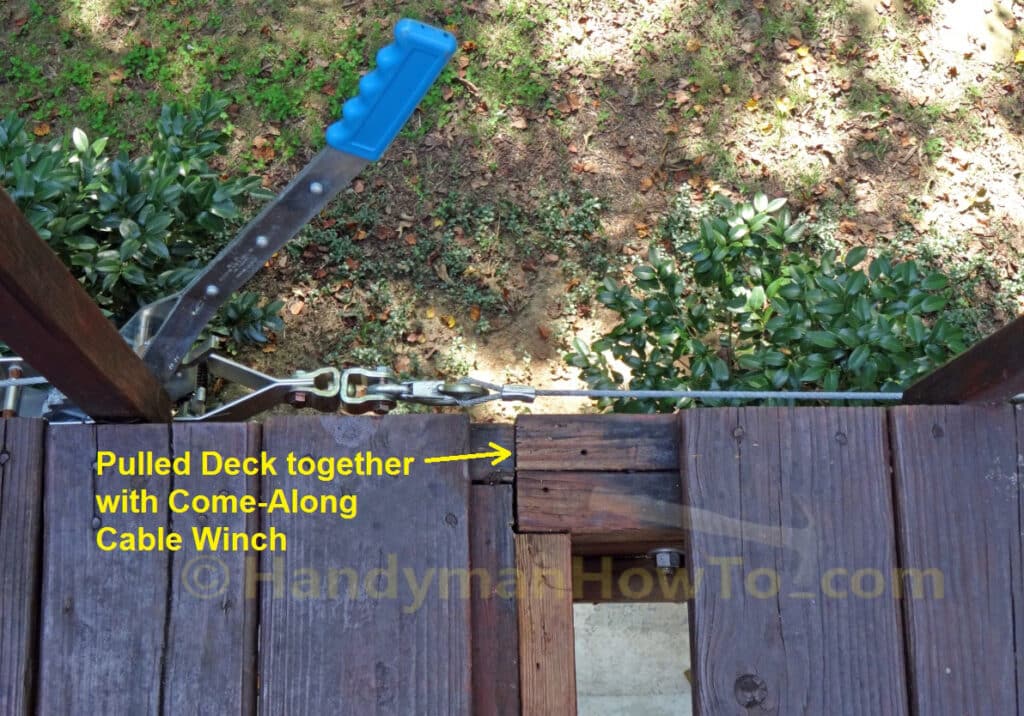
In the above photo, the wood is darker because I’ve poured and brushed on several coats of Copper-Green Brown Wood Preservative (10% copper naphthenate) and taking care to soak it into the old nail holes.
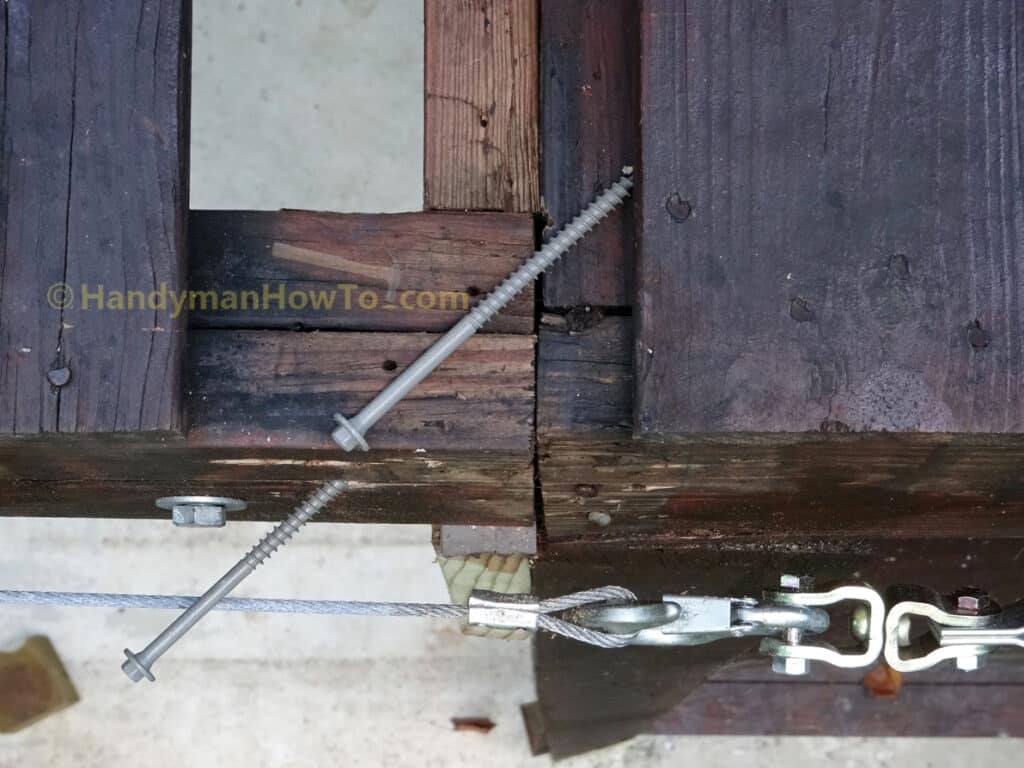
Next I installed two FastenMaster LedgerLok 5 inch long wood screws in a counter sunk holes so the heads will be flush with the 2×10 joist face:
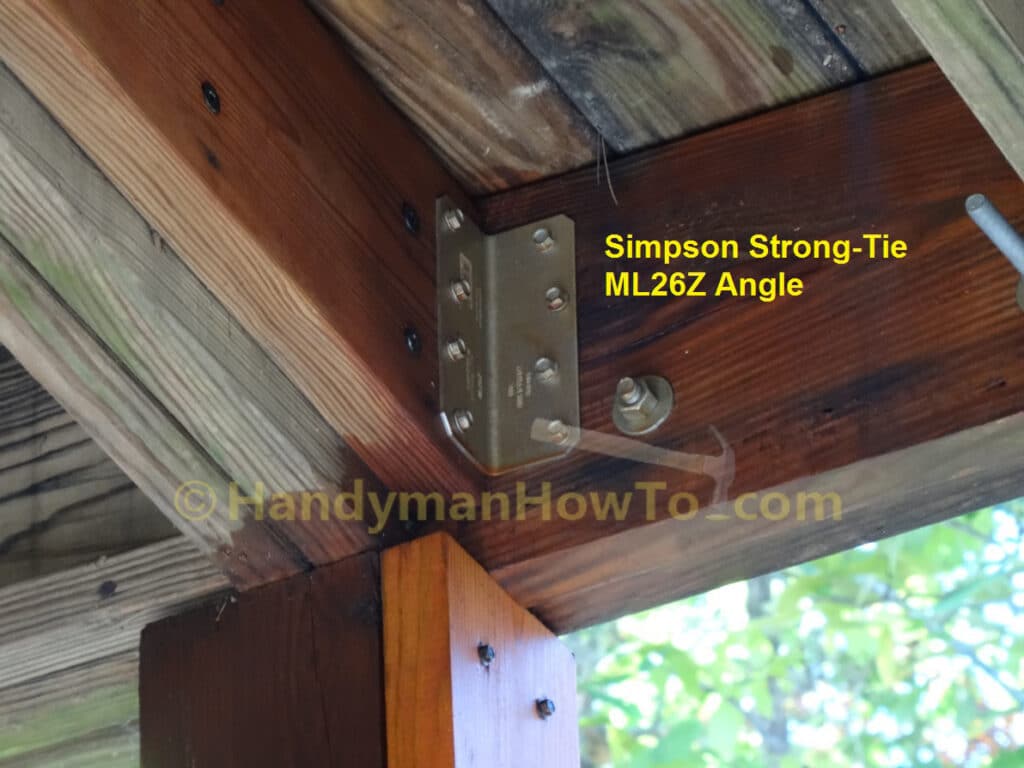
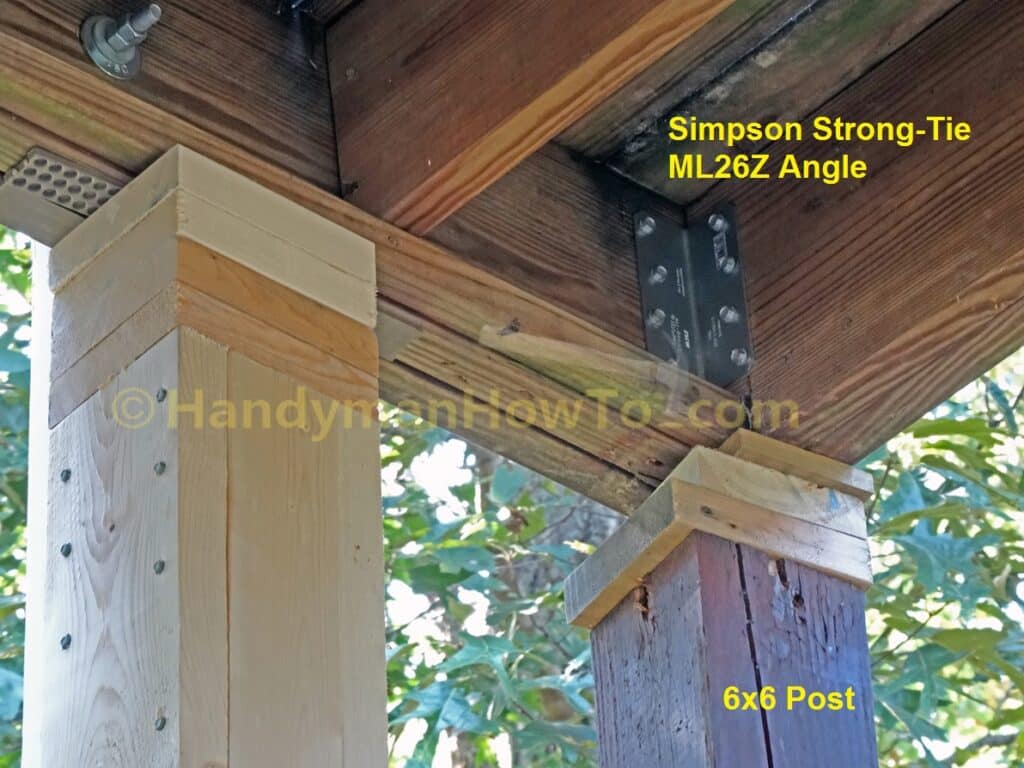
And installed the Simpson Strong-Tie ML26Z Angle with SDS 1/4 by 2-1/2 inch structural screws on the inside corner. (The next photo was taken later in the project). I had to wait until the deck was raised and pulled together before installing the angle:
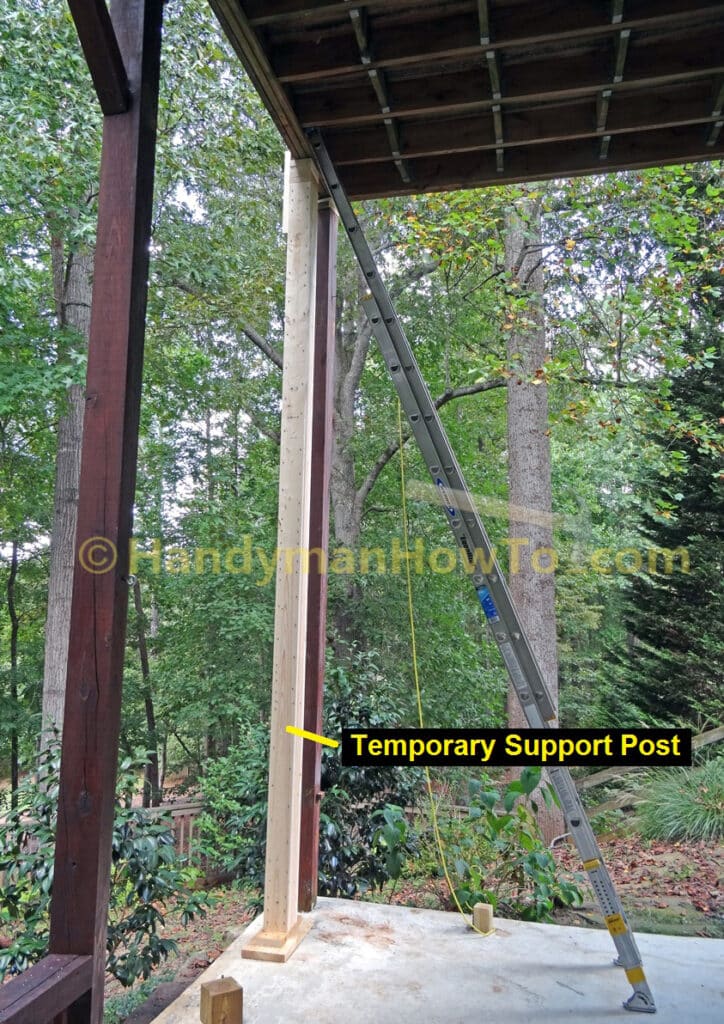
Install the Temporary Support Post
The full height temporary support installation steps are:
- Working with a helper, stand up the support post.
The support post is set back about 18 inches from the corner 6×6 deck post for clearance to saw and jackhammer out the concrete patio slab to dig and pour a new concrete footer. The distance was determined by concrete footer dimensional drawing. - Verify the support post is plumb (vertical) with a 5 foot spirit level on all sides.
- Lower the hydraulic bottle jack so the deck corner is resting on the 6×6 corner post and blocks.
At this point the deck 2×10 beams should be very close to or resting on the temporary support. - Lower the jack then remove the jack and jack post.
Closeup of the temporary support post and 6×6 corner post. A couple of plastic shims were wedged between the support post and 2×10 deck joists to close the gap. I’ve also installed the six remaining Simpson Strong-Tie SDS 1/4 by 2-1/2 inch structural screws in the ML26Z angle. Recall only two screws were installed while jacking to allow movement and prevent stress or binding.
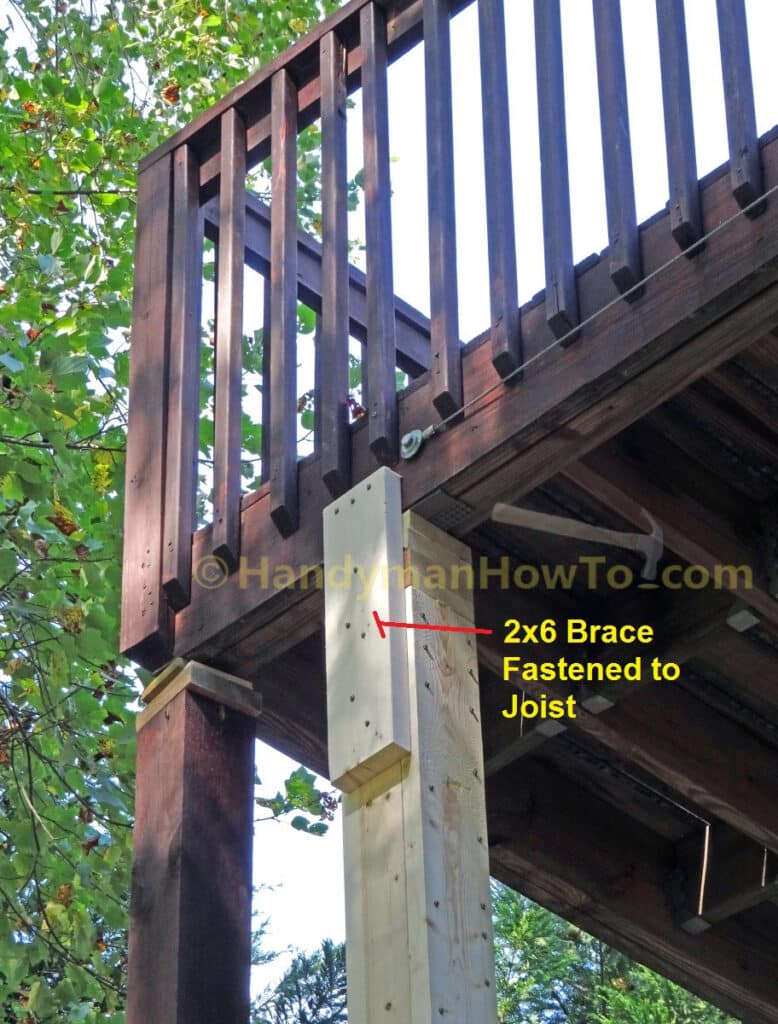
I installed a 2×6 brace to secure the top of the support post to the deck using Simpson Strong-Tie SD #9 x 2-1/2 structural screws:
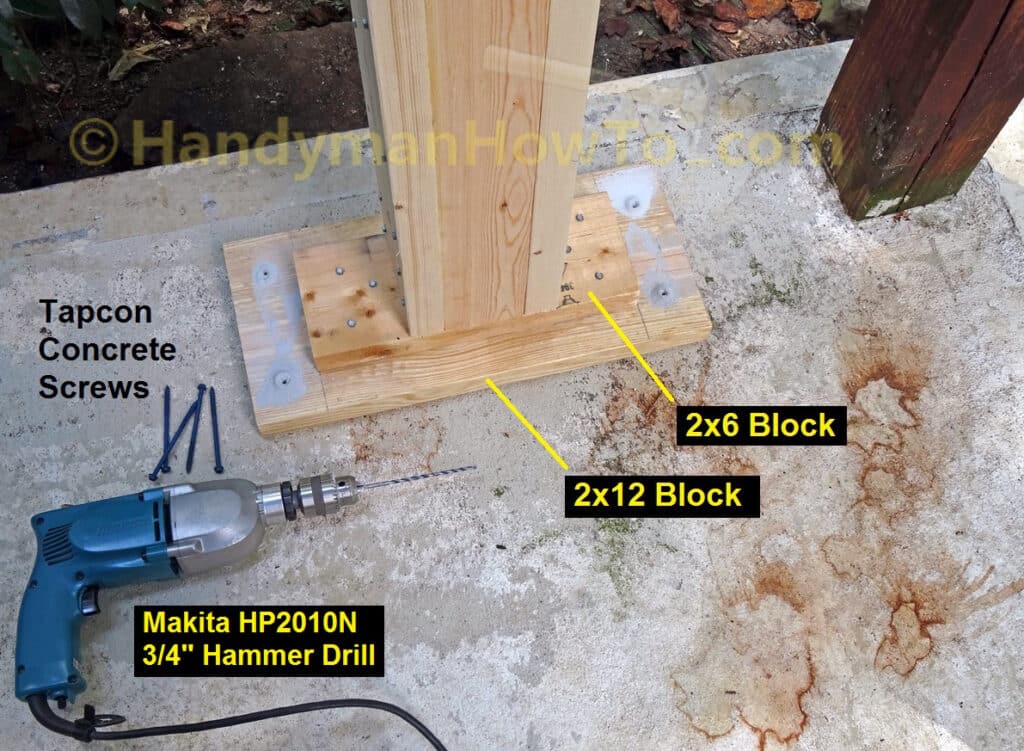
Anchor the Support Post to the Concrete Patio Slab
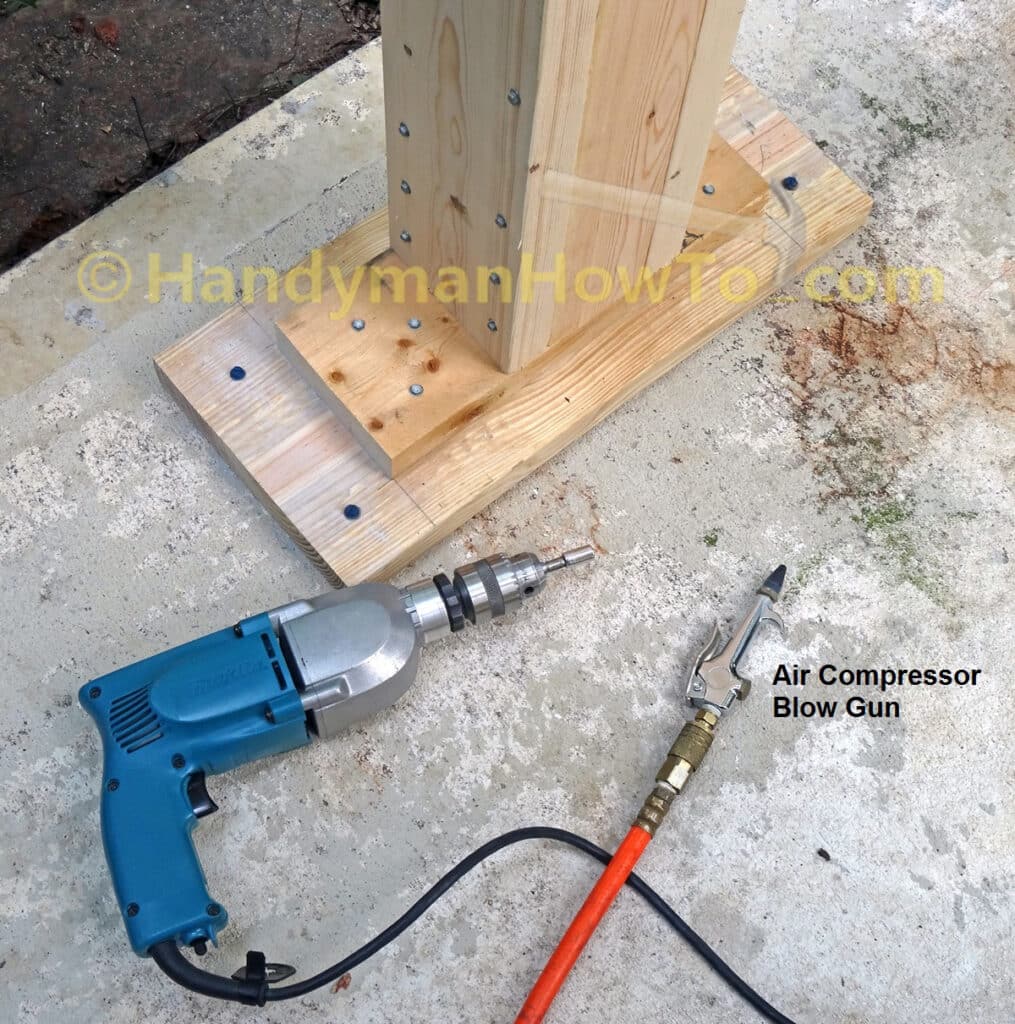
The base of the support post are 2×6 and 2×12 blocks fastened with the SD #9 screws for a wide stable platform. The support post will be in place for several weeks, so I anchored the base with Tapcon concrete screws to prevent movement due to accidental bumping while working with heavy equipment. I’ve drilled four holes with the hammer drill for the Tapcons:
Then blew the concrete dust out of the drill holes with air compressor blow gun and screwed in the Tapcons:
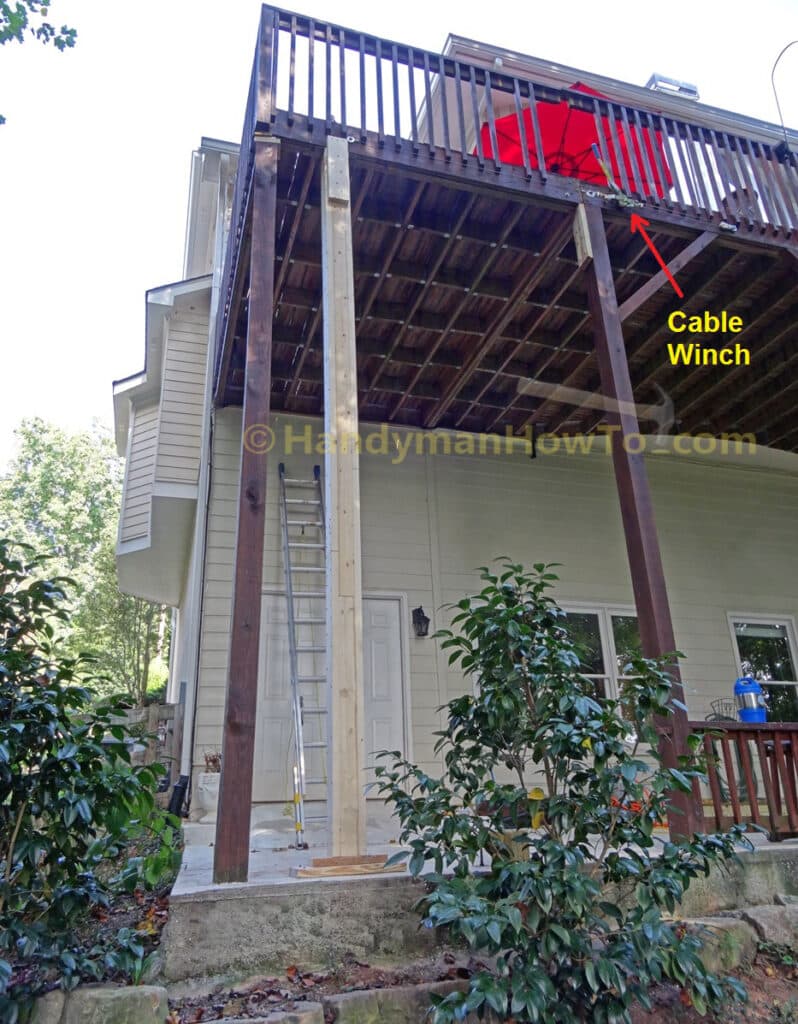
From left to right in the photo, view of the blocks on the corner 6×6 deck post, temporary support post, sister block to support the beam splice and cable winch:
And looking down from the on top of the deck:

This project is continued in How to Remove a Deck Post in a Concrete Slab.
Best,
Bob Jackson