This project shows how to remove old deck boards and install new ones to rebuild the deck. See the sagging deck repair series introduction for the overall scope of work. This project is continued from How to Install Deck Post Knee Braces.
How to Replace Wood Deck Boards
Incorrectly Installed Deck Boards
The home builder expanded the floor plan after the house was completed and incorrectly installed the deck board parallel to instead of across at 90 degrees (or square) to the deck joists as shown in the following photo.
My guess is the workers were in a rush and thought doing so was faster:
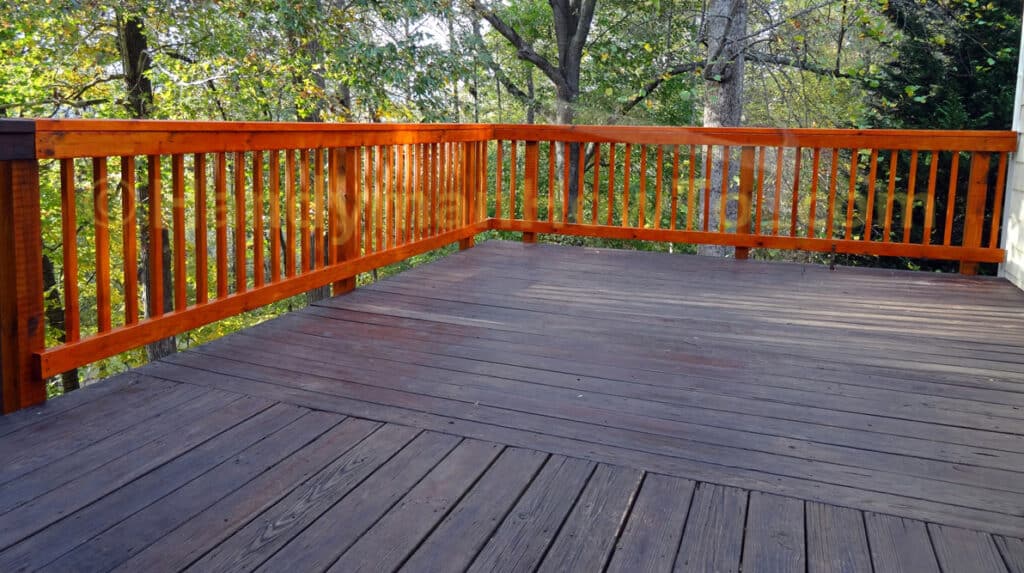
In the above photo, I’ve already rebuilt the deck rail per the current building code requirements:
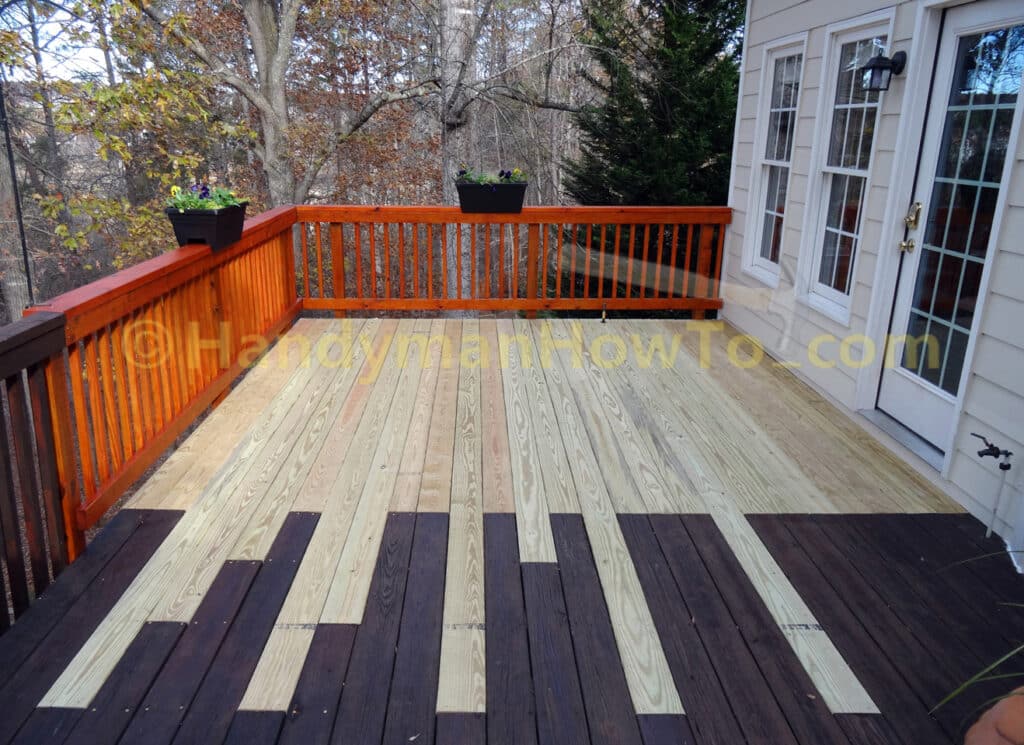
The problem with installing deck boards parallel to the decks joists are:
- The deck board ends are nailed through the ledger board flashing, which create holes that allow water through to rot the ledger board and ultimately cause a deck collapse.
- Deck boards installed across (square) to the joists will strengthen the deck to help prevent swaying, whereas incorrectly installed deck boards parallel to the joists do not.
- Deck boards installed parallel to the joists is deck building code violation. See the Georgia Amendments Prescriptive Deck Details Based on the 2012 International Residential Code on page 3 which states “Wood decking may be placed at an angle of 45 to 90 degrees to the joists“.
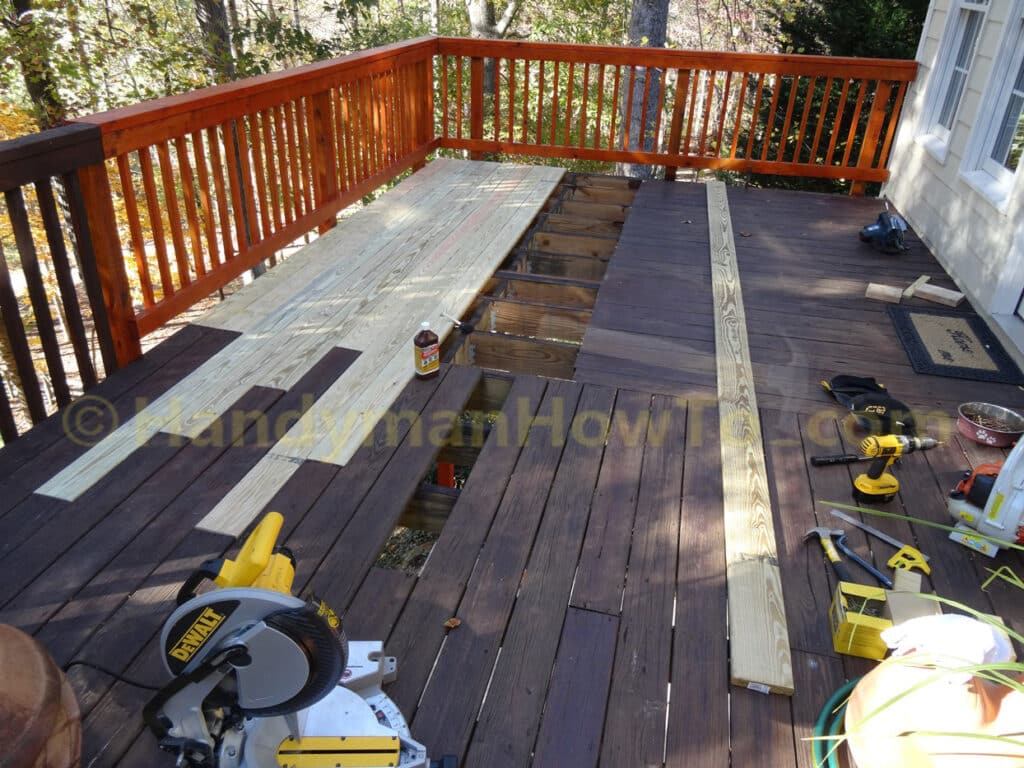
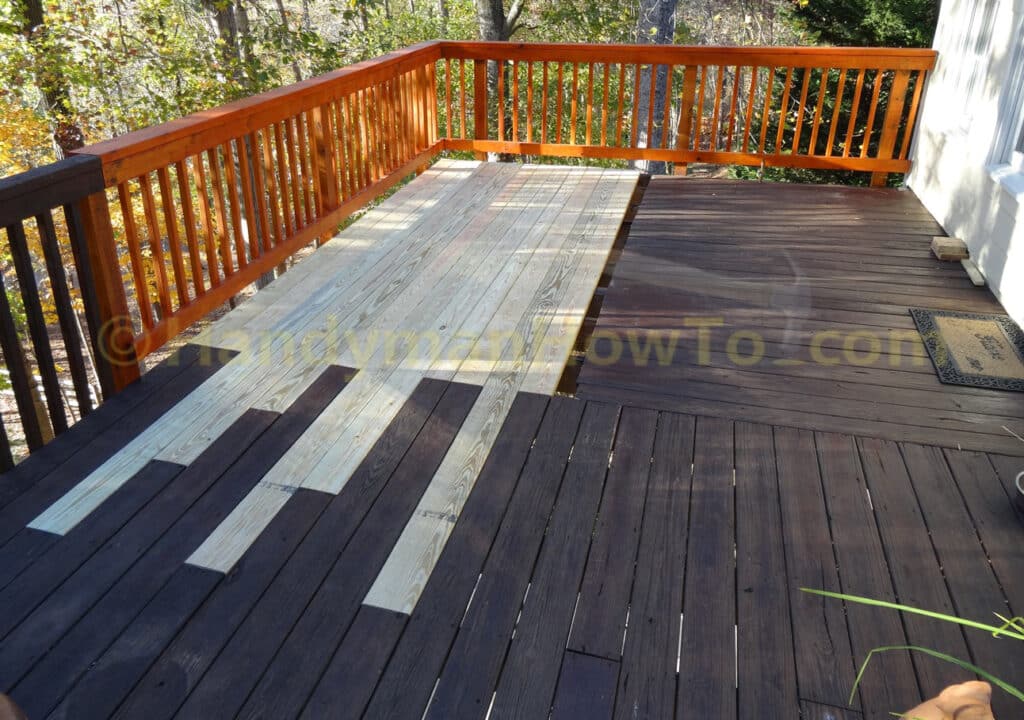
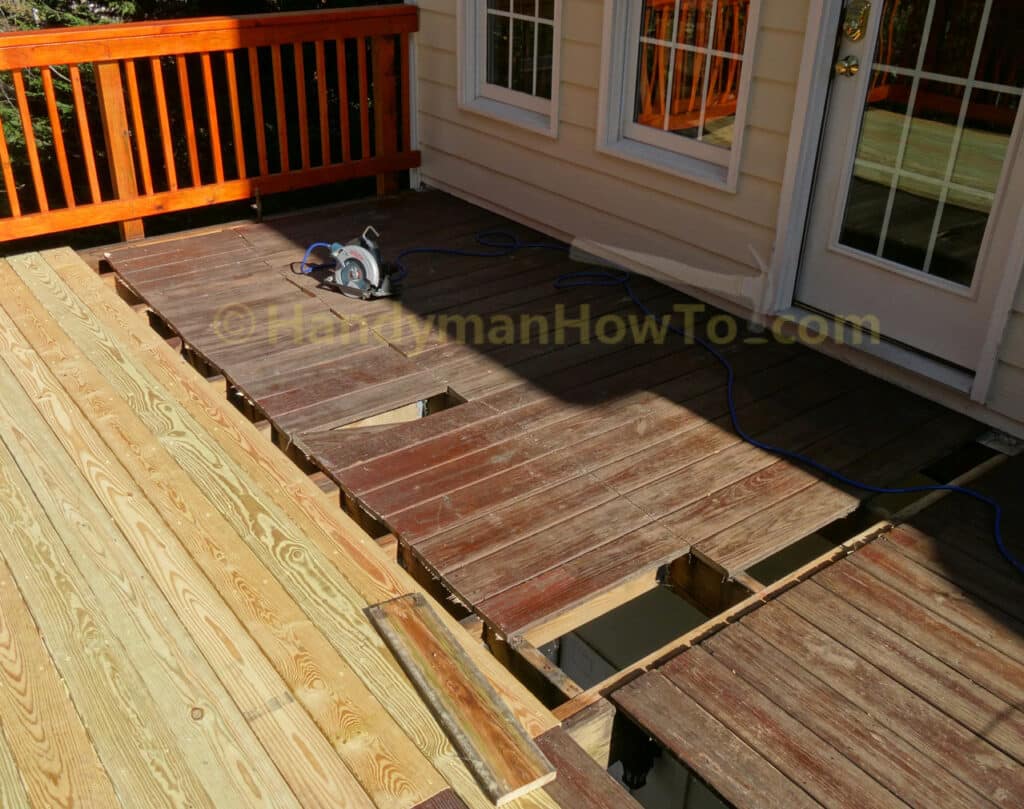
The old deck boards are pried off and new #2 pressure treated 5/4 (five quarter) x 6 inch wide deck boards are installed. The new deck boards are woven in with staggered joints for better appearance and strength:
I bought the new deck boards at the big box home improvement store and hand-picked each board. I rejected about 60% of the boards due to excessive knots, split ends, bark or crooked boards. The lumber department employee offered to help me load boards on the cart, but I said “No thank you” thinking he’d prefer that I take all boards from the stack. I’d never have a load of boards delivered unseen because you’ll probably have to return most the boards.
Install New Deck Boards with Staggered Joints
I’m sawing and pulling up the old deck boards in sections to minimize my chances of falling so I don’t have to walk on the narrow deck joists. The new deck boards are installed with staggered joints by weaving in with the old deck boards:
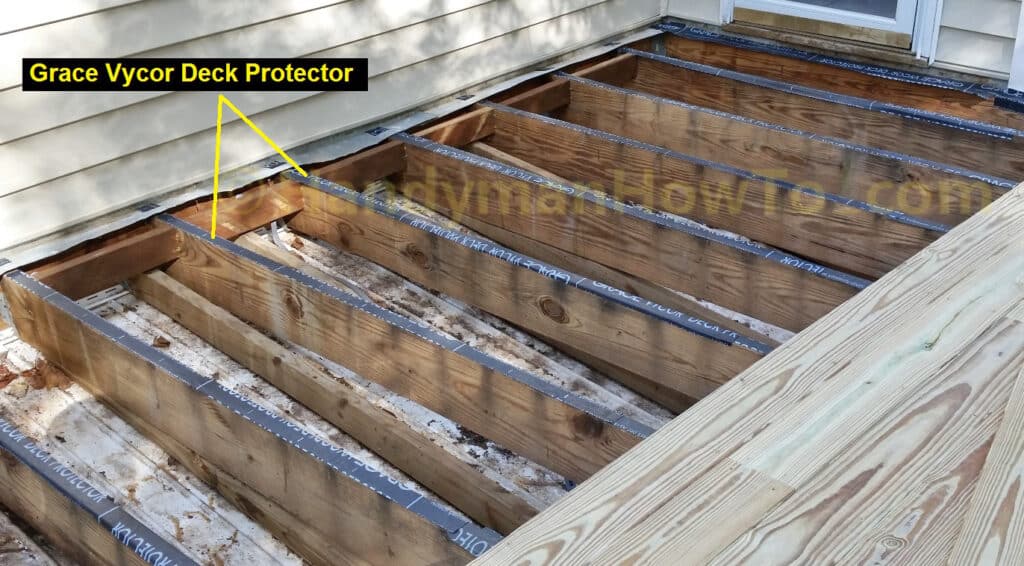
Deck Joist Wood Preservative
In the above photo, I brushed 3 three coats of Copper-Green Brown Wood Preservative on the joists to treat the old nail holes. A better approach is to install an adhesive strip of deck protector for waterproofing and to seal around screw or nail penetrations. This photo with Grace Vycor Deck Protector was taken at another job:
To make a staggered joint, I used two hammers and a blue pry bar to lift the old deck board, pull out the nails and mark the center of the deck joist:

I adjusted the circular saw blade for a shallow 1-1/4 inch deep cut to avoid damaging the other deck boards, then made the cut. Note how the deck board is raised with the blue pry bar for clearance above the deck:
Be sure to wear safety glasses because the circular saw throws dust and splinters everywhere!
The new 5/4 x 6 deck board is measured, cut to length with my DeWALT compound miter saw, then fastened with screws:
I used DECKMATE Star Drive Coated Screws #8 by 2 inches long. The Star Drive head and bit is fantastic – no cam out or broken bits like a Philip’s screw! I fastened each deck board and joist intersection with two #8 screws:
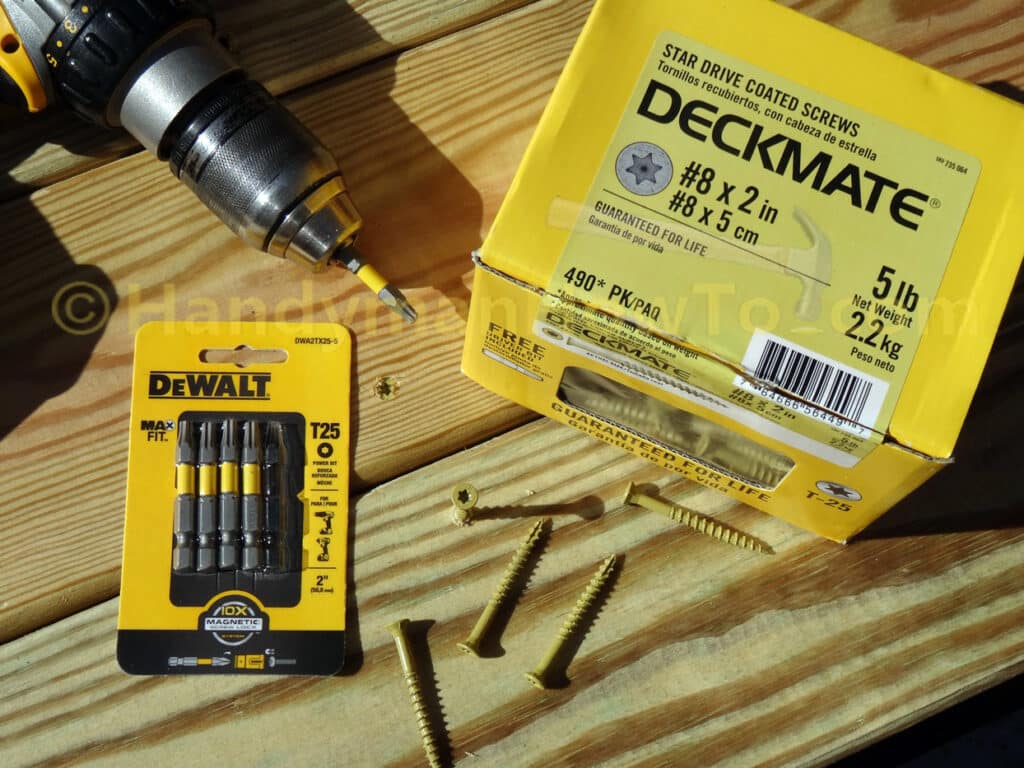
I prefer screws over nails because screws hold better, won’t back out over time and it’s easy to remove & replace board.
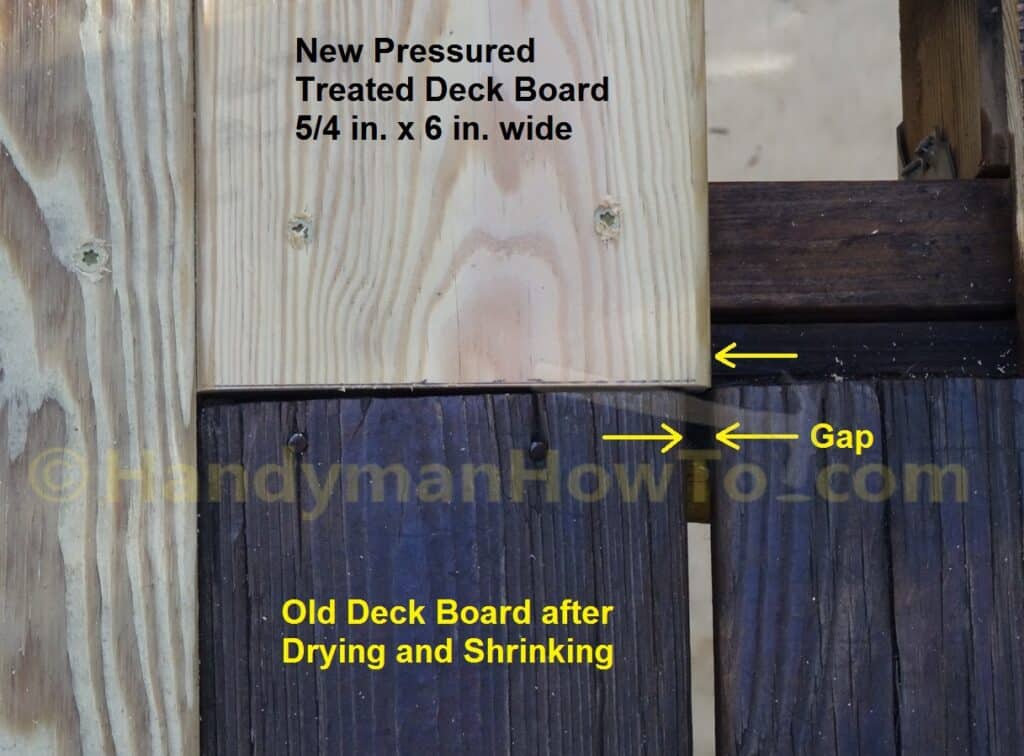
New Pressure Treated Deck Board Shrinkage
A problem with new pressure treated boards is they are moist or even wet from the chemical treatment process and will shrink about 1/8 to 1/4 inch in width as they dry. This causes several problems when weaving in new boards with old ones:
- The new boards won’t line up with the old boards because they’re wider.
- If new boards are installed with a 1/8 inch gap between boards as called for in the deck code, it will open up to an objectionable 1/4 inch or even larger gap when dry.
Compare a new 5/4 x 6 pressure treated board with an old deck board:
I solved the new pressure treated deck board shrinkage and alignment problem by:
- Installing the new deck boards against each other without gaps.
Within 3 weeks the new boards shrunk and opened up a 1/8 in gap between the boards. - Ripped about every 6th board lengthwise to maintain the spacing with the old boards.
- Whenever a new board couldn’t be woven in with the old deck boards because the alignment had walked too far, I skipped that board and installed the next board over. This left an open slot that was less than the width of a new board.
- To fill in the narrow board slot:
- I laid a new board lengthwise next to the joists, measured the width of the slot at each joist and transferred that measurement to the new board.
- Drew a line along the board connecting the width measurements at each joist using an aluminum yard stick.
- Ripped the board lengthwise following the lines with my circular saw.
- Sanded the sharp edge left by the saw with sandpaper and a sanding block to bevel it.
- The narrower ripped board fit perfectly into the open slot.
After only 3 weeks of dry weather the butted together deck boards had shrunk and opened up a 1/8 to 3/16 inch gap between the boards.
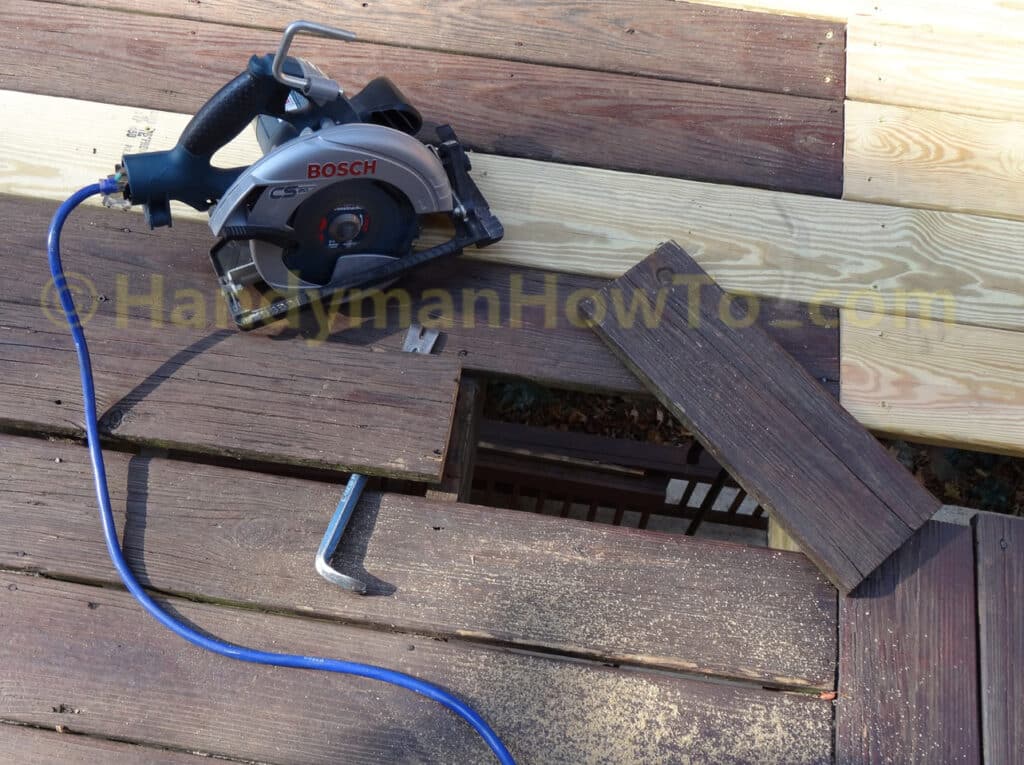
Rip Saw and Remove Old Deck Boards
I continued rip sawing the old deck boards in sections taking care to saw just past the cross blocking so the remaining boards would be supported and safe to walk on. To prevent sawing into the old deck boards that aren’t to be replaced, I pulled up the end of the first board and cut it off with the circular saw:
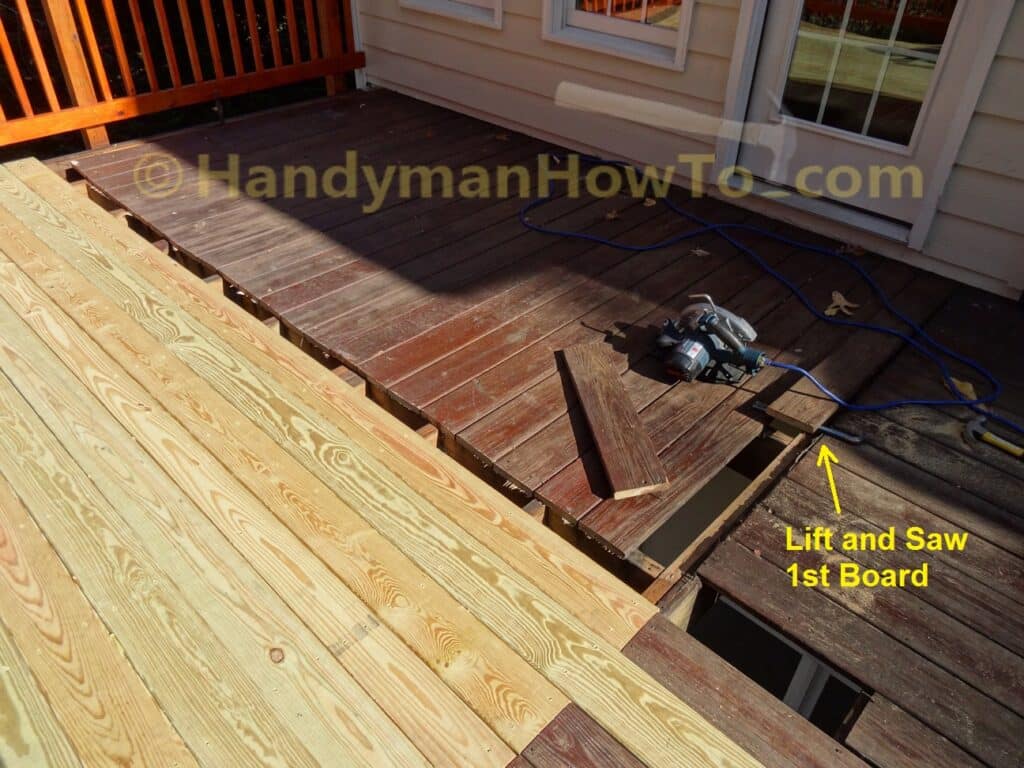
Important! Adjust the circular saw blade depth to cut almost all the way through the deck boards to avoid sawing into the deck joists. I unplugged the circular saw, held an old deck board against the bottom and adjusted the blade.
I rip sawed the old boards by following- and staying to the left side of the nail heads. The section of old boards were easy to break off and pull up. Use the leaf blower to blow off the saw dust which is slippery:
Making progress! The last section of old deck boards are removed to reveal the ledger board flashing:

Nail Holes in the Ledger Board Flashing
The ends of the old deck boards were nailed to the ledger board, leaving holes in the flashing which will allow water to seep in and rot the ledger board. Often the ends would work loose and make a crinkling noise when stepped on, bending the flashing. I found that someone had also driven in drywall screws (which are too short and now rusted!) in a misguided attempt fasten the boards:
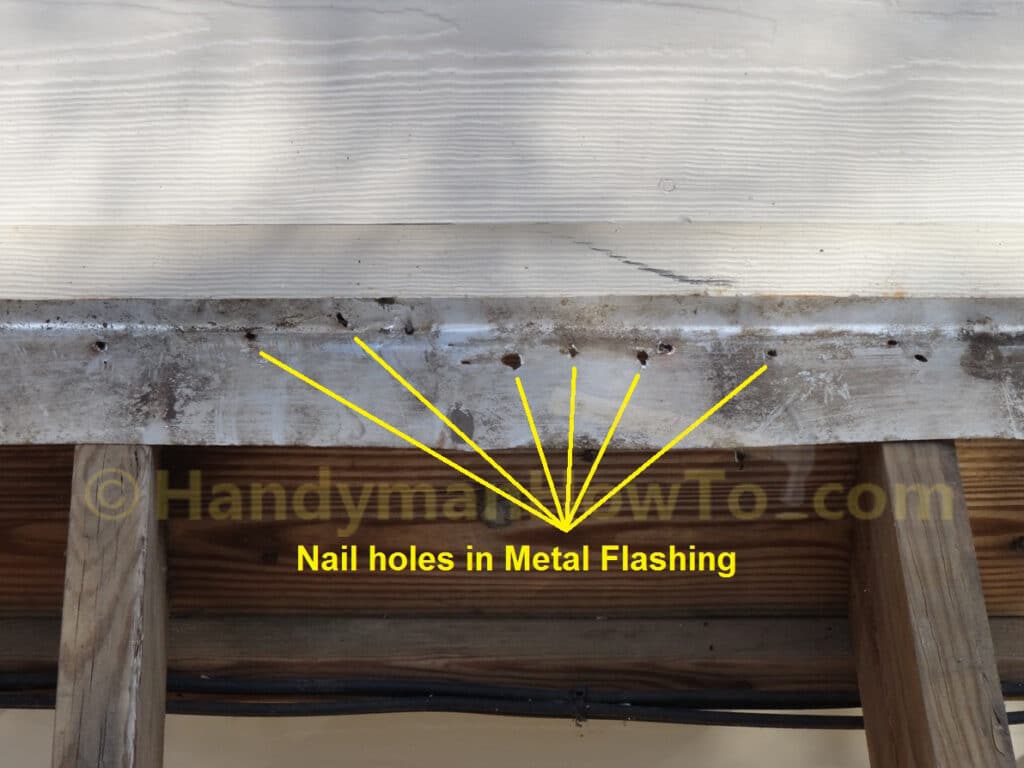
Fortunately the ledger board had no rot and was in excellent condition. The ledger board flashing will be replaced after tearing off the bottom rows of HardiPlank cement board siding:
One item I haven’t mentioned is how I fitted the deck board over the natural gas supply pipe and shutoff valve for the BBQ grill. This task is explained in How to Install a Natural Gas Shutoff Valve for a Grill.
This project is continued in How to Replace Deck Ledger Board Flashing.
Hope this helps,
Bob Jackson