The Tamarack Perfect Balance In-Door Return Air Pathway installs in the bottom of an interior door to pressure balance a room for better heating and cooling.
I installed the Tamarack return air vent because the finished basement bedroom only had a supply air vent but no return vent. This caused the room to become pressurized when the door is closed due to insufficient area under the door for the return air flow to escape. The result was a stuffy room that’s too cold in the winter and too humid in the summer. The return air vent is installed in the door bottom:
Return Air Solutions: Door Undercut, Transfer Grille, Jump Duct and Return Air Duct
There are several return air solutions to pressure balance a room that vary in effectiveness and installation cost.
Door Undercut:
Undercutting a door by sawing off 1 inch from the bottom wouldn’t look good, provides limited incremental return area and usually doesn’t work, especially if the room or hallway has carpet that partially blocks the gap.
Transfer Grille:
A transfer grille is a nice solution and I would’ve installed a Tamarack wall return grille except the basement wall studs are closely spaced on 12 inch centers instead of standard 16 inches due to the deep basement and high walls (my home is on a hillside with a walk out basement). The transfer grille is sized for 16 inch stud spacing and wouldn’t fit between my studs. I also thought about installing a simple set of metal grilles positioned high and low on opposite sides of the wall but that wasn’t possible because the fire stops (horizontal blocking between the studs) blocks the air flow.
Jump Duct:
A jump duct installed in the bedroom ceiling to the open family room on the other side of the wall would work well with excellent sound reduction. The problem is it’s a finished basement with drywall ceilings and I can’t access the far side of the room (opposite the supply vent) where a jump duct should be located. If the jump duct were installed in the ceiling above the door where I can reach into the space above the ceiling, it would be too close to the supply vent potentially causing a short circuit air flow from the supply vent to the return vent.
Return Air Duct:
A return air duct branch line and vent by far the most effective solution and should’ve been installed when the prior homeowner’s hired a contractor to finish the basement. But they didn’t file a building permit thinking it would significantly increase their property taxes and this allowed the contractor to cut corners. Installing a return air duct now has the same challenges as installing a jump duct.
In-Door Return Air Vent:
Given the challenges with the above return air solutions I chose the Tamarack In-Door Return Air Pathway because it has a large area for return air flow, is located at floor level away from the ceiling supply vent to avoid a short circuit, inexpensive and easy to install.
Tamarack In-Door Vent Free Area & Return Air Vent Sizing
The size of the room return vent should be at least as large as the supply vent, if not larger. The basement bedroom has a 6×10 inch supply air grille for a total of 60 square inches.
The free or see-through area (see the photo below) of the Tamarack in-door vent is 96 square inches, which is calculated by:
- Each open space (or slot) between the bars of the grille is 3/8 inches wide by 4 inches high.
- 64 total open spaces
- 96 sq. in. = 3/8 in * 4 in * 64 open spaces
The honeycomb baffle also blocks some of the free area and air flow. The baffle cell walls are about 1/32 inch thick with approx. 15 walls per slot by my count. The baffle reduces the total free area by about 7-1/2 square inches:
- 1/32 inch baffle wall thickness (presented edge-on to the air flow)
- 1/4 inch width per open space (width of the exposed baffle wall edge)
- 64 total open spaces
- 7.5 sq. in. = 1/32 in * 1/4 in * 15 cell wall edges * 64 open spaces,
total square inches blockage due to the baffle.
The net free area of the Tamarack vent is:
- 96 total sq. in. minus 7.5 sq in = 88.5 sq. in. net free area.
Thus 88.5 sq. in. net free area (see-through area) is the available area for return air flow ignoring friction losses. These are my estimates not factory specifications.
Is the Tamarack In-Door vent large enough for the supply air vent?
- 88.5 sq. in. area Tamarack in-door return vent
- 60 sq. in. area of the room 6×10 supply air vent
- 28.5 sq. in. difference in free area = 88.5 minus 60.
The Tamarack in-door return vent has almost 48% more area than the room supply vent. It should work fine.
Tamarack Perfect Balance In-Door Return Air Pathway Review
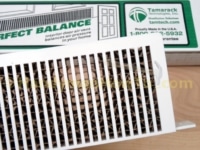
I ordered two Tamarack In-Door return air vents (part # TTi-RAP-Di). The kit consists of the vent and sawing template printed on the back of the box (mounting screws are not included):
The vent is two piece plastic clamshell that snaps together over a honeycomb cardboard baffle:
Closeup of the vent and interior baffle:
Top view showing the baffle and flange which covers the cutout section in the door:
I bought two door vents (one per box). The plastic vent can be painted to match door. I opened the clamshell, removed the baffle, then spray painted the factory off-white plastic vent bright white to match the door and the honeycomb baffle a flat back color. I thought black looks better than the natural cardboard color and makes it harder to see:
Closeup of the flat black spray painted baffle:
The vent is reassembled by placing the honeycomb baffle in the clamshell:
And snapping the two halves together:
To open the clamshell, press the tip of a small screw driver or punch into the hole to release the hook then wiggle the two halves apart.
Opening the vent clamshell may void your lifetime warranty but at ~$35 per vent I wasn’t concerned.
This project is continued in Install a Tamarack Perfect Balance In-Door Return Air Pathway.
Thanks for reading,
Bob Jackson
Is sound or light transference through the baffled grills a problem in your application? Is the in-door vent equivalent to leaving the door standing open one of two inches in terms of sound/noise transfer?