Storing four bicycles in a two car garage can be a problem if you want to park the cars. A wall mounted bicycle rack solved the problem.

I considered several possibilities:
- J-style ceiling hook that catches the rim of the front wheel. Problem is the wife and kids aren’t strong or tall enough to lift the bike on/off the hook.
- Vertical wall hook – this didn’t work for me because the bike sticks out full height into the garage and wouldn’t leave enough room to park the car.
- Free-standing bicycle storage tree. Many styles are available from bike shops that cost $75 to $300. This was more than I wanted to spend and still required too much floor space.
- Ceiling mounted rope and pulley system to raise the bike. These are affordable but I thought a bit too involved for my tastes.
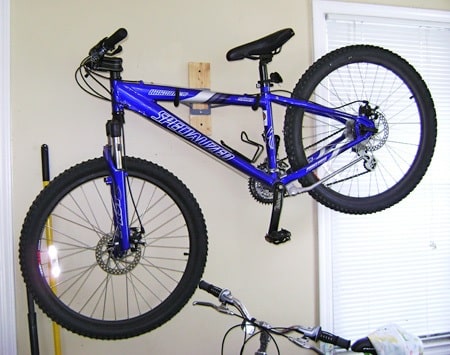
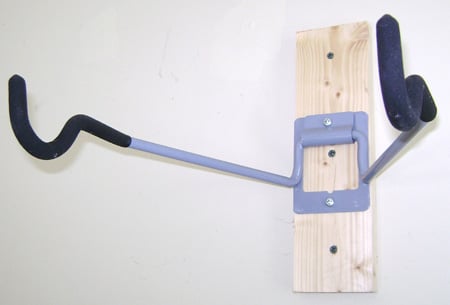
- My choice was a simple, study and inexpensive ($10) folding wall hook that mounts the bike horizontally taking up minimal space. I bought mine at the local home improvement store. Amazon sells a similar Flip Up Storage Rack. This allowed me to store the four bicycles 2 x 2 against the wall. The bikes for my wife and daughter are parked on the floor against the wall where they’ll have no trouble with access. The bikes for my son and I are hung on the wall directly above the wife and daughters, but low enough that lifting the bike off the rack is easy enough.
The folding wall rack is shown here:

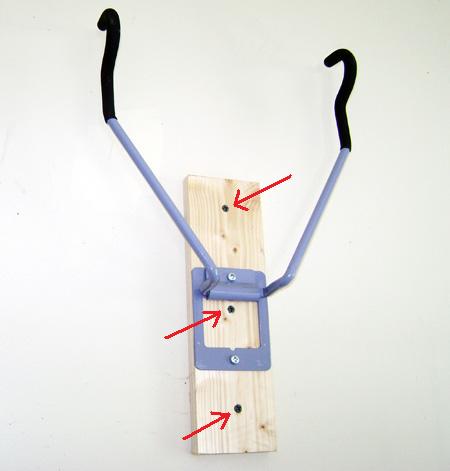
A piece of 1in x 4in x 14in pine board is mounted with three 3-inch wood screws sunk into the wall studs (red arrows in the image below). This spreads the working load and minimizes the bouncing leverage of placing the bike on and off the rack. I didn’t want the rack to come off the wall and drop the bike on someone’s head or the hood of the car.

A Note on Locating Wall Studs
I have an electronic stud finder, an inexpensive model that’s several years old. It’s accuracy leaves much to be desired. My policy is “trust, but verify” with a finishing nail and hammer:
- Mark the probable center line of the stud as indicated by the electronic stud finder.
- Gently drive the finishing nail in the wall at the pencil mark. If you hit the wood wall stud, you’ll know because the nail is stops. Pull out the finishing nail and circle the hole with a pencil.
- Drive the finishing nail about 1/2 inch to the right and left of the 1st hole to confirm the probable center is well within the body of the stud face. If not, move a little further left or right to find the stud location.
- Remark the center line if needed.
- Using a bubble level, draw a vertical line a few inches longer than the pine board to mark the stud center. You’ll need this to ensure the screws will bite into the stud face.
- I also pre-drilled the screw holes in the pine board to avoid splitting.
The bike rack has worked well for two seasons now without a problem. I have about 3 feet of room to walk between the bikes and the front of the car.
Bob Jackson