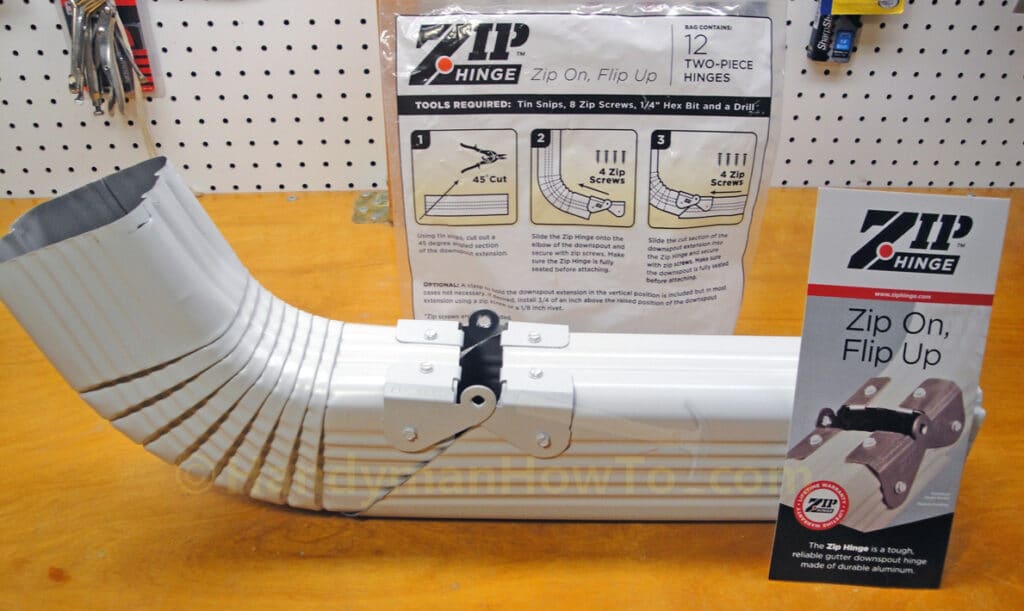
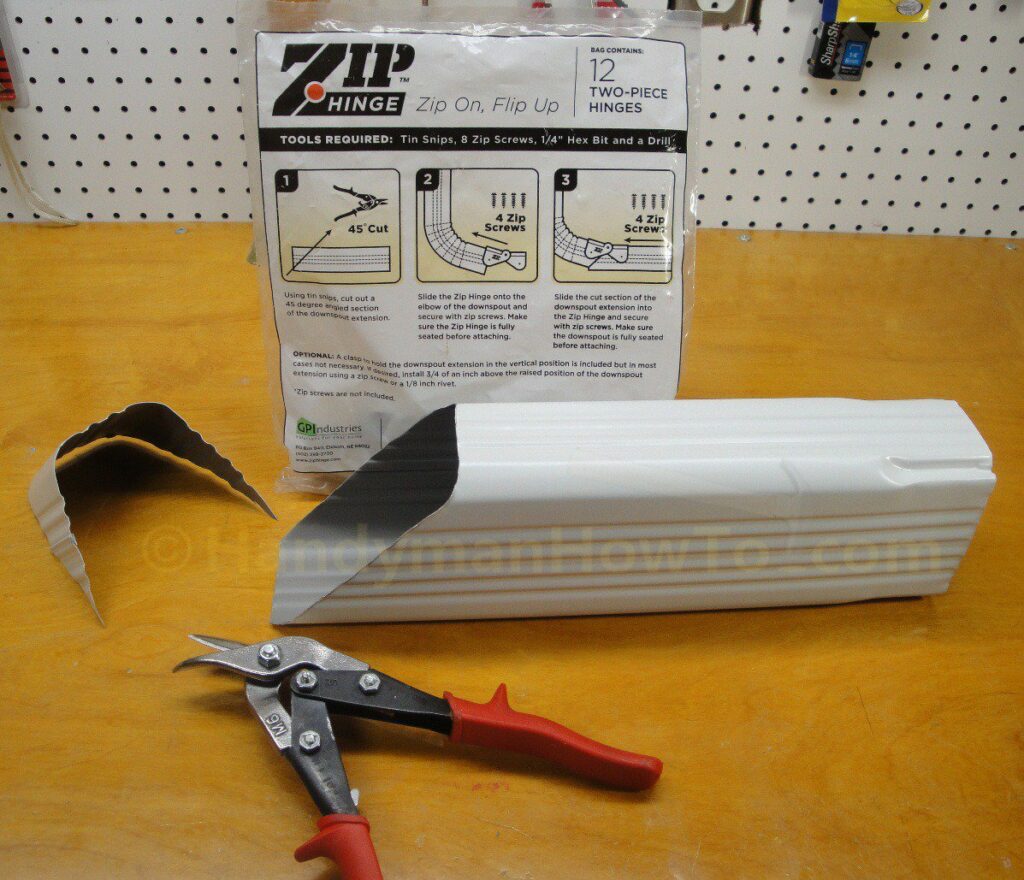
Zip Hinge™ is a gutter downspout hinge that installs quickly so the downspout can be flipped-up and out of the way for mowing and landscaping. This Zip Hinge review illustrates the product installation and benefits.
Gutter Downspout Problems
Gutter downspouts often have straight extensions to release rain water several feet away from the foundation of the home, otherwise the rain water can seep along the foundation and get into the basement, especially if the yard is flat or slopes toward the home. Downspout extensions are also used to cross over landscaped borders to prevent erosion and water ponding.
The problem with downspout extensions is they get in the way of mowing and landscaping. I once lived in a planned development where the Homeowner’s Associations fees included yard mowing. The mowing crew would run into and/or over downspouts laying on the grass; the downspout extensions didn’t last very long. If I’d had Zip Hinge (“Flip Up, Mow Under™”), I could have folded up the downspout extensions on Tuesday’s when the mowers made their rounds or it was time to spread mulch and plant flowers in the landscape border areas. If you mow your own yard or have a careful landscaping crew, then Zip Hinge will make mowing easier for an even cut and nicer looking yard.
Zip Hinge™ Review
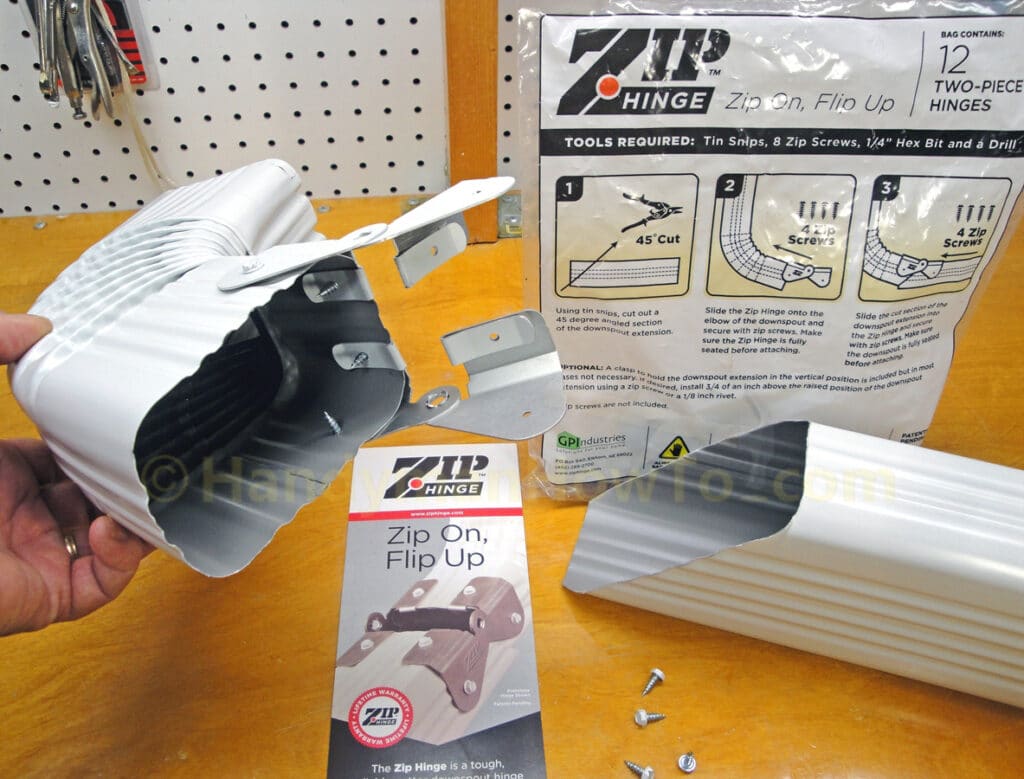
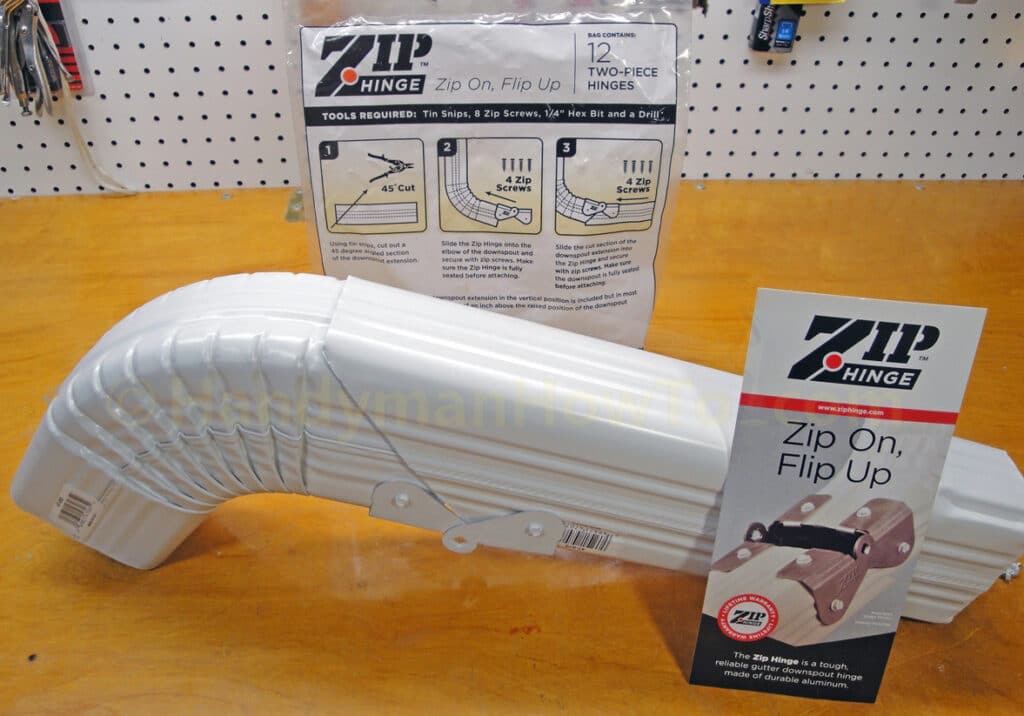
The Zip Hinge kit contains 12 two-piece aluminum hinges and clasps. The hinges have a mounting tab that fits inside the gutter downspout for perfect hinge alignment and to hold it in place while driving zip screws. The “universal fit” Zip Hinge works with both 2″x3″ and 3″x4″ gutter downspout sizes.
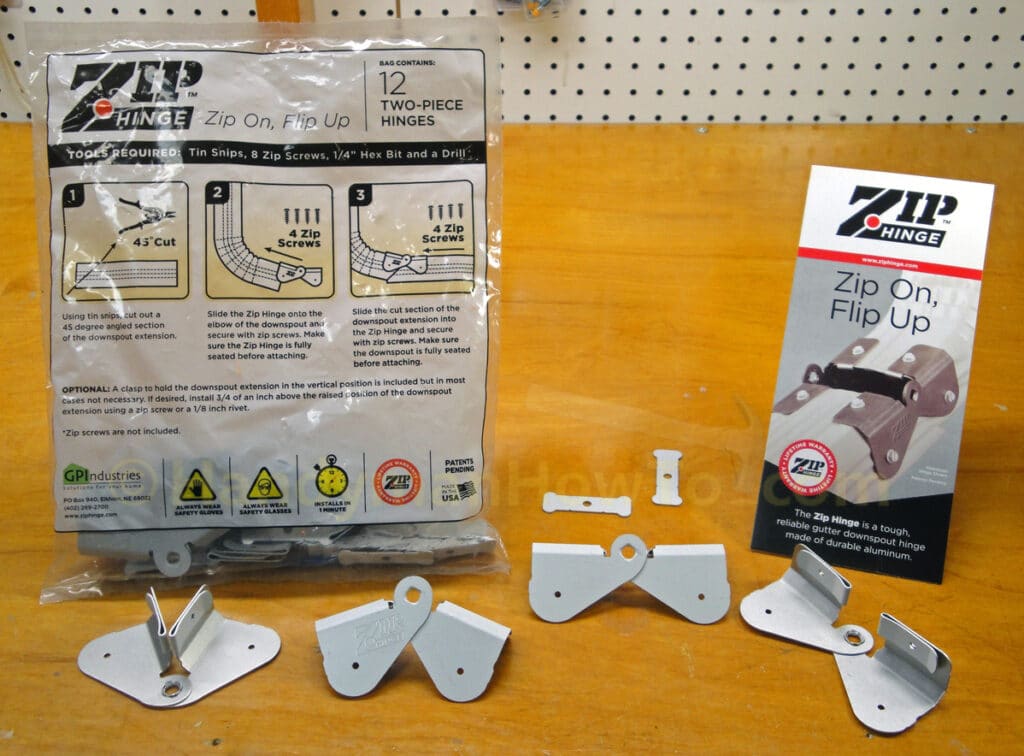
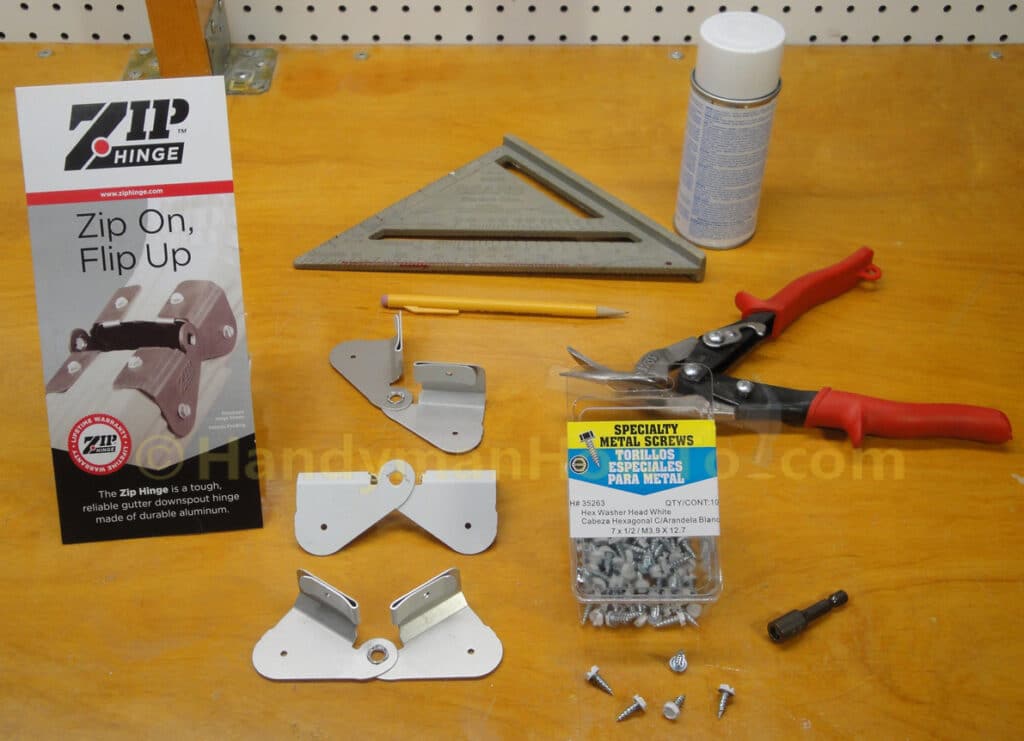
Zip Hinge Installation Tools and Hardware
The following tools and hardware are needed to install Zip Hinge:
- Zip Hinges – two hinges per downspout.
Not included with the Zip Hinge kit are:
- Angle square or combination square to mark a 45° angle.
- Pencil
- Tin snips
- Gutter touch-up paint, or paint to match your gutter colors
- Zip screws – hex-head sharp self-tapping zinc plated weather resistant sheet metal screws for gutters. Available in plain, white, brown, almond and other colors. Available at gutter supply stores. I purchased these screws at Lowes which drove in easily and held fast.
- 1/4 inch nut driver for a cordless drill/driver.
Zip Hinge Installation
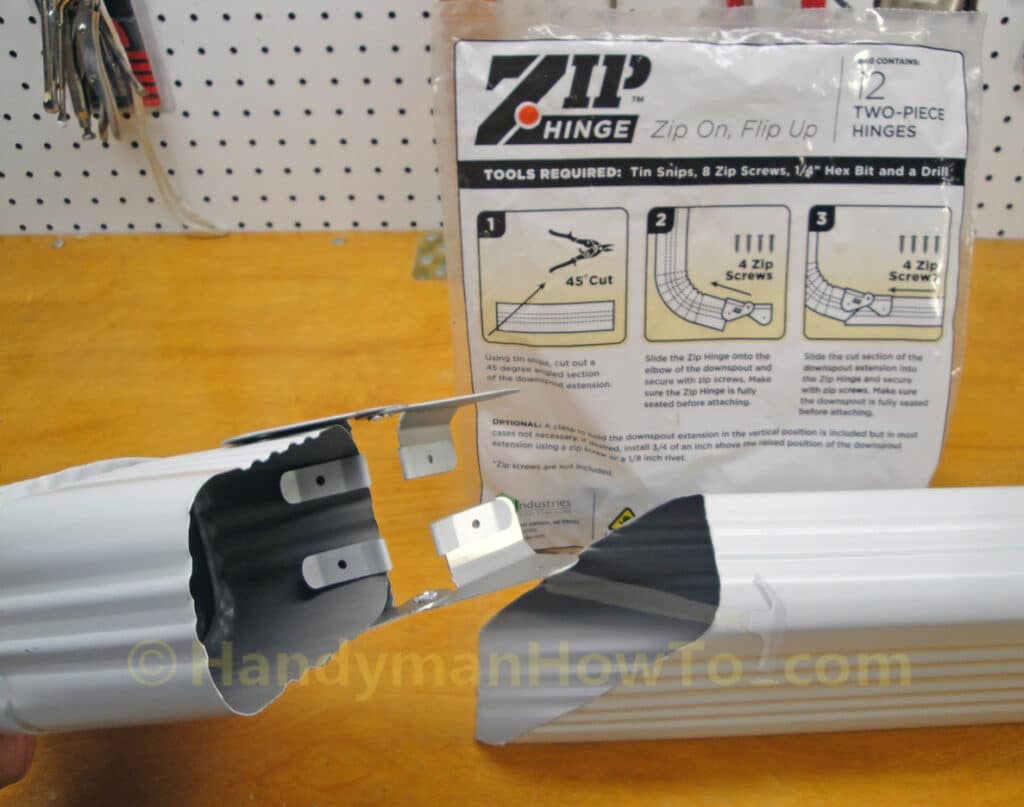
Check the orientation of your downspout before marking the angles. Mark a 45 degree angle with the pencil and square on the straight piece of gutter downspout that will be fastened to the downspout elbow. Mark the 45 degree angle on both sides and draw a straight line across the top of the downspout.
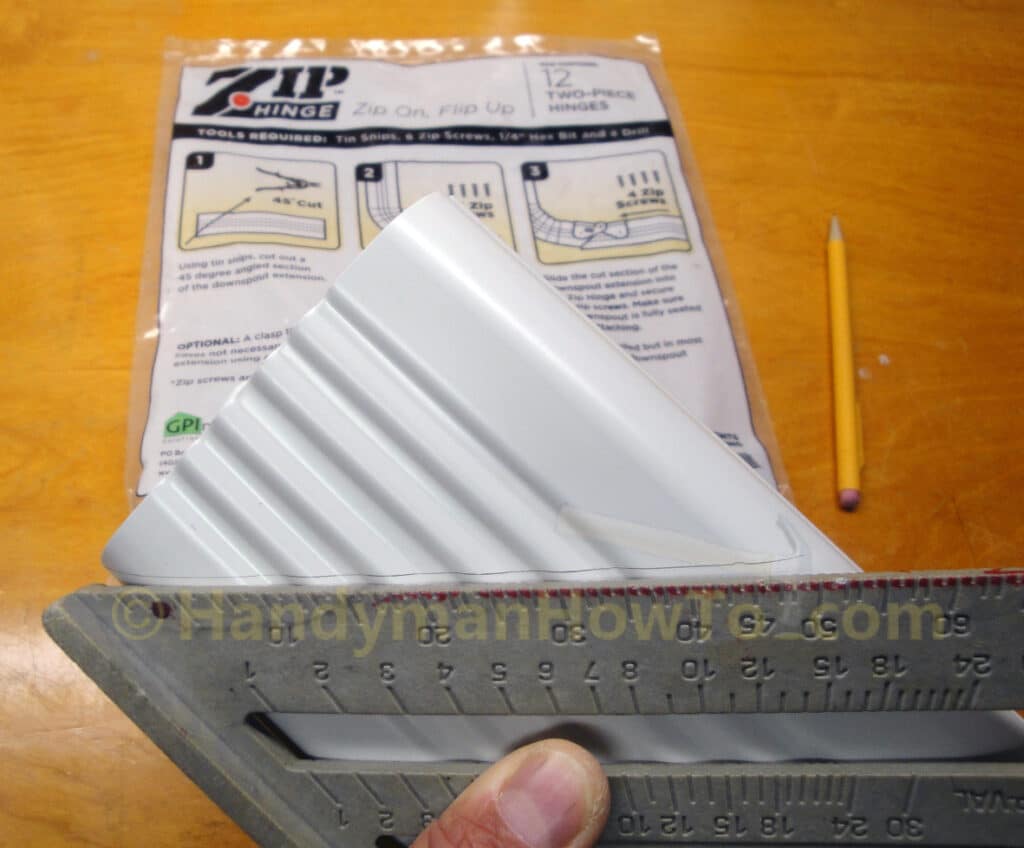
Cut out the angled section marked in pencil with tin snips. Downspouts are easy to cut with tin snips because the thin aluminum is soft. Be careful for sharp edges.
Slip the pair onto the downspout elbow until the hinge tabs are fully seated. The hinges can be installed on the narrow or wide side of the downspout to match the orientation of your gutter downspouts.
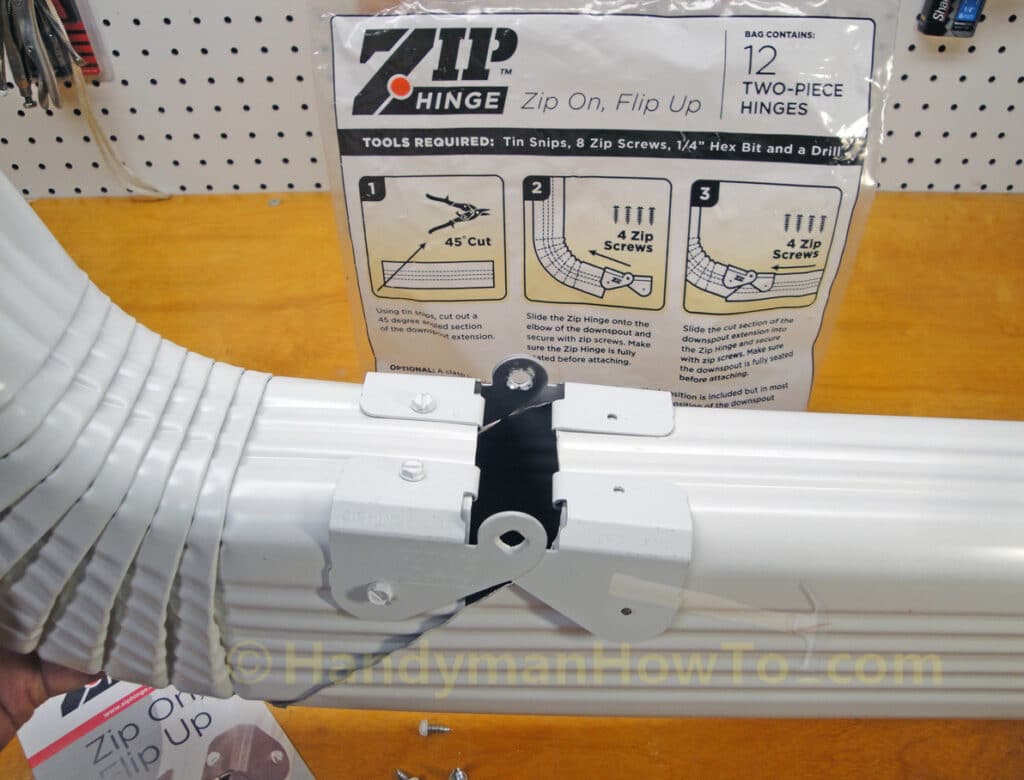
Top view of the Zip Hinge before fastening with zip screws:
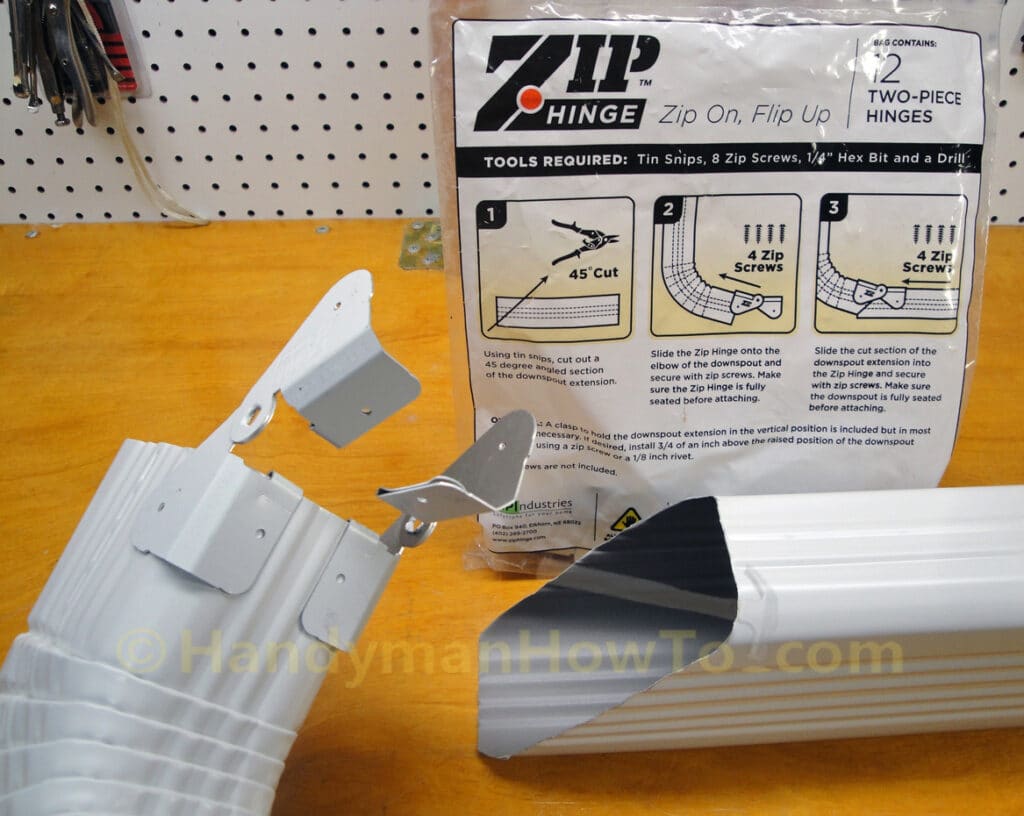
Fasten the Zip Hinge with the 1/4 inch nut driver and zip screws. In practice, I prefer to hold the hinge against the end of the downspout so the tab is fully seated while driving in the zip screw.
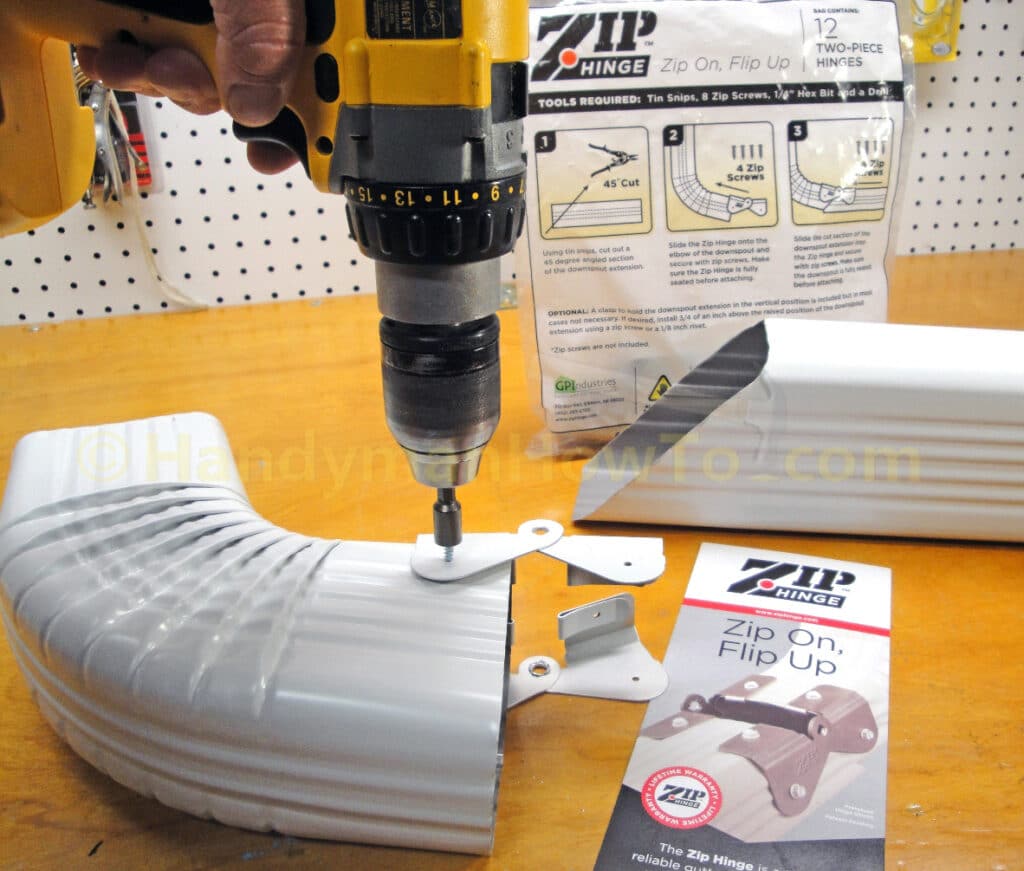
The Zip Hinge after fastening with zip screws to the downspout elbow. I like how the zip screws grabs the hinge tab for a reinforced attachment.
Slide the Zip Hinges onto the gutter downspout extension that will lay in the yard or across the landscaping:
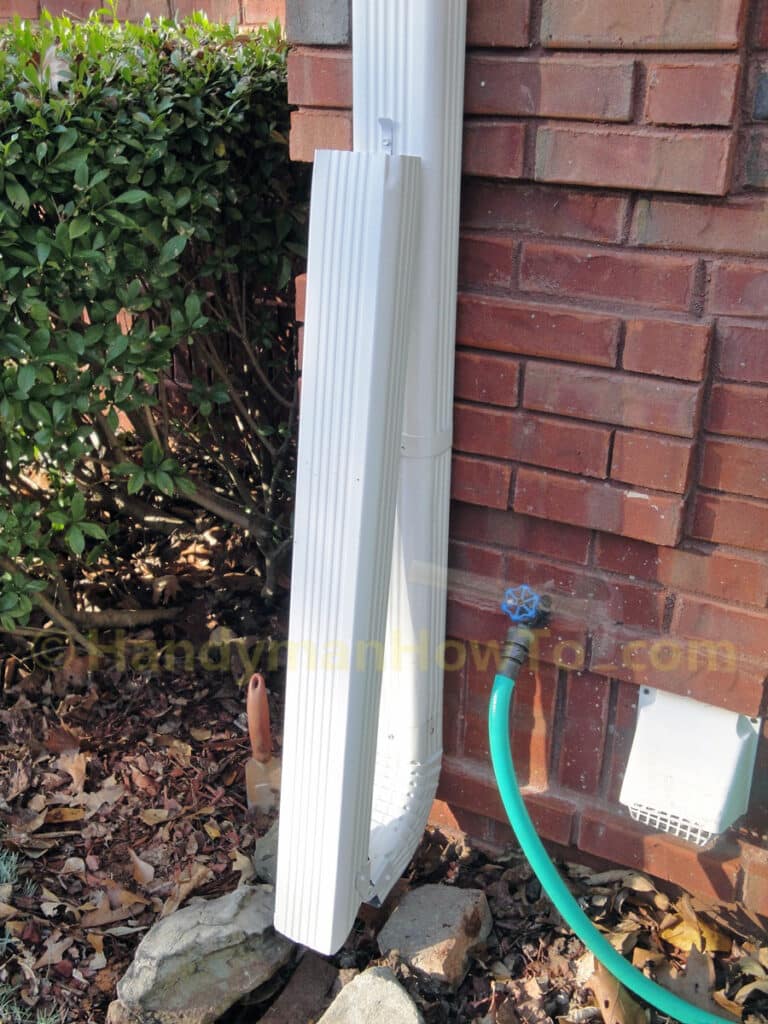
The installed Zip Hinge showing the “flip up” downspout action:
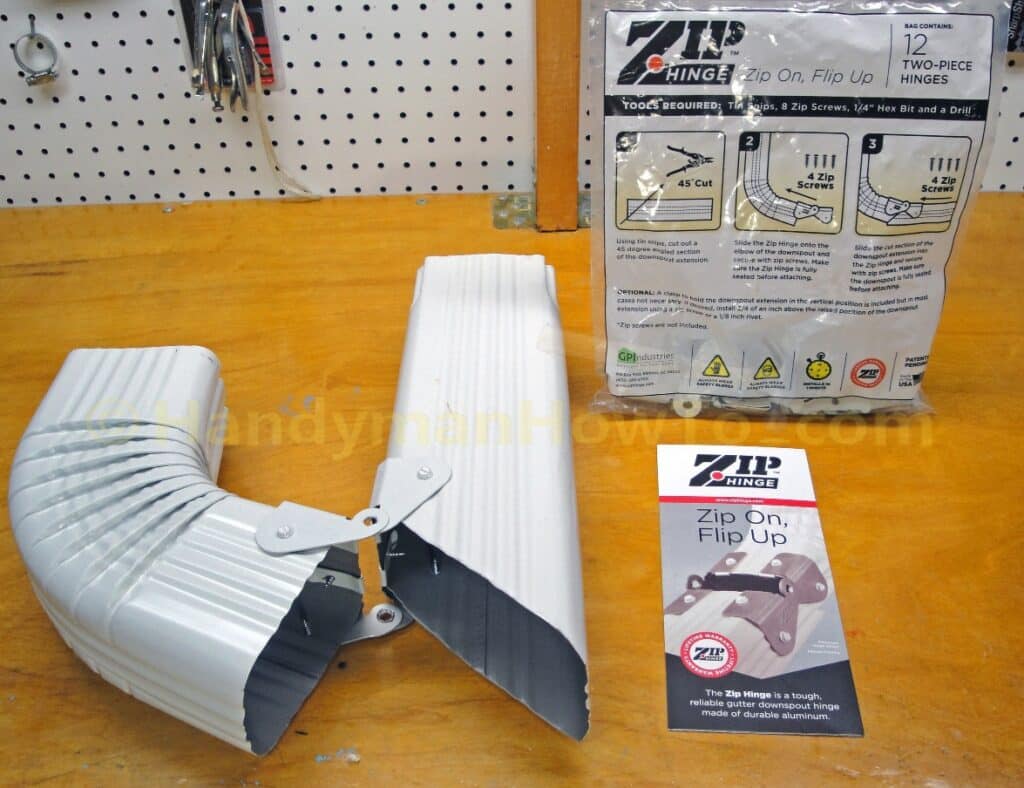
Bottom view of the finished Zip Hinge installation. A very nice fit with no gaps!
Real World Zip Hinge Application
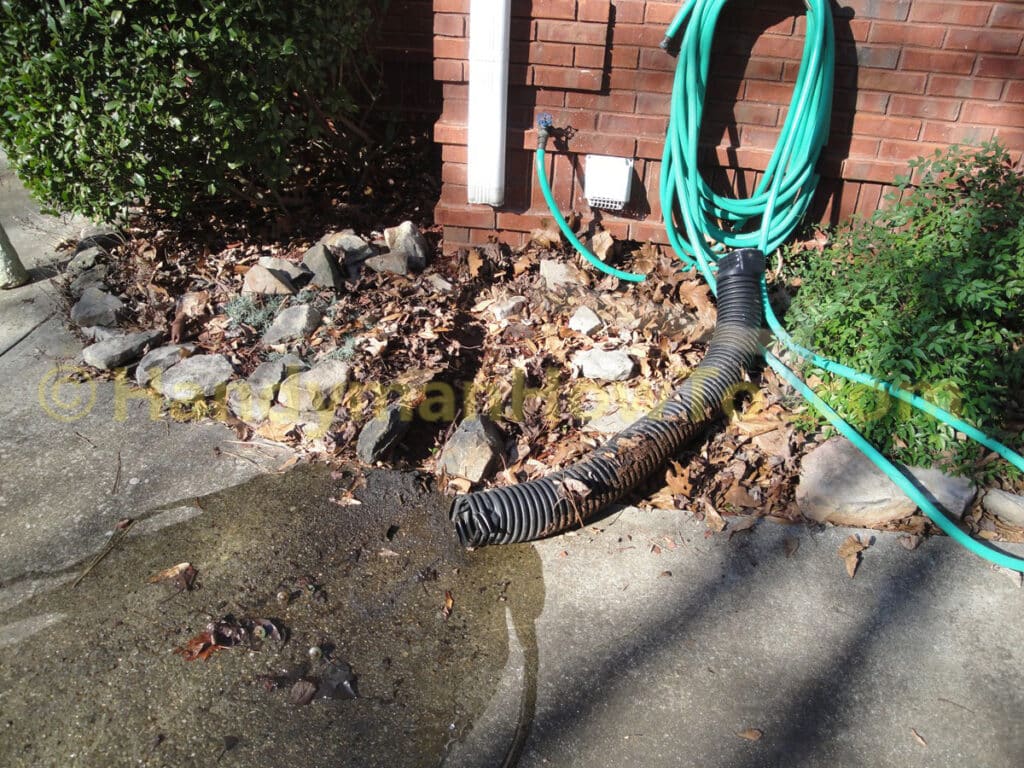
This homeowner needed to direct the rain water away from the house foundation to the concrete driveway. The flexible black plastic downspout isn’t the prettiest and it was partially buried and held down by small stones.
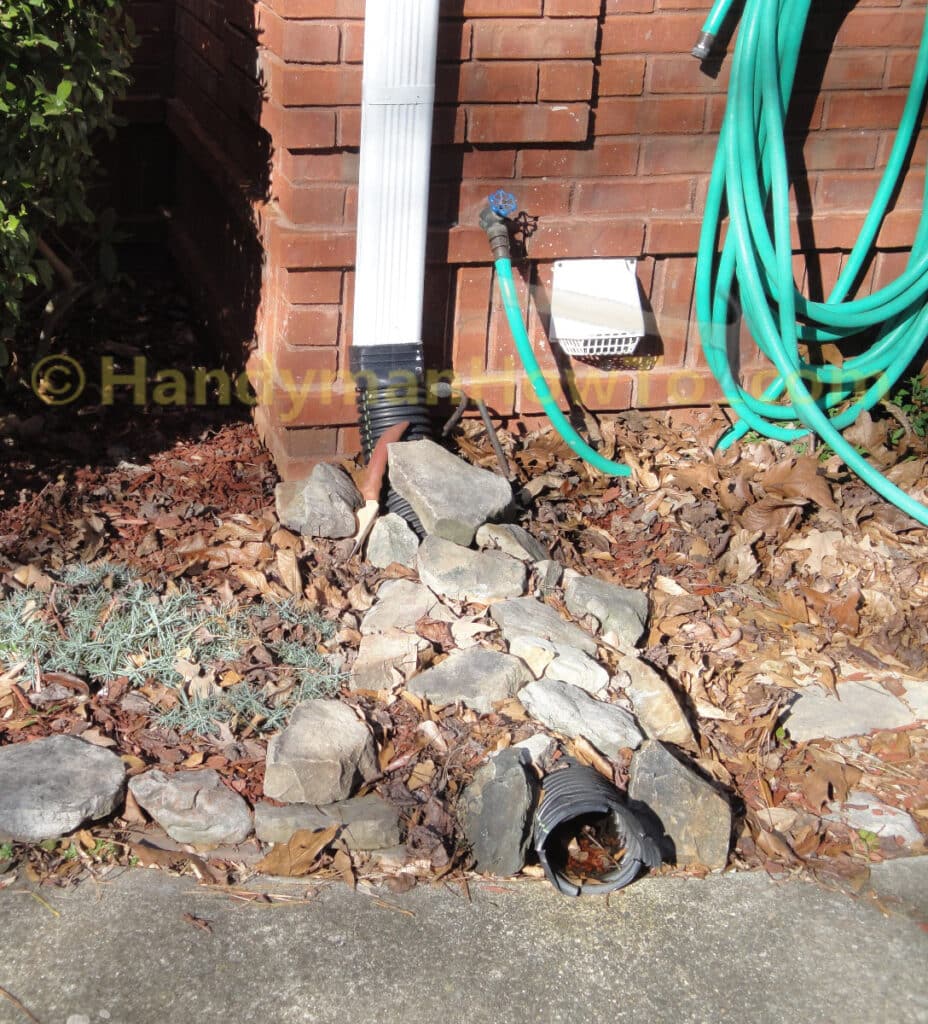
The flexible downspout was full of rain water and a breeding ground for mosquitoes in warm weather.
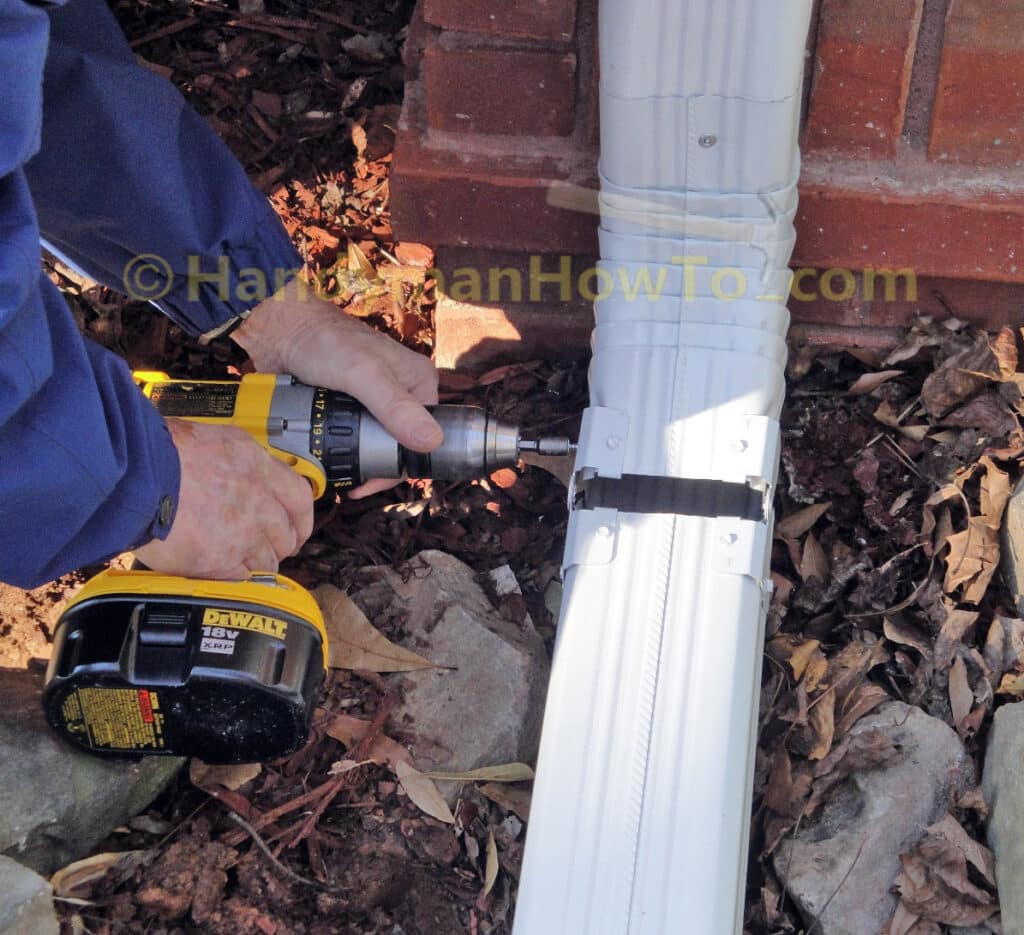
The Zip Hinge installation steps are:
- Attach a new downspout elbow to the main downspout from the gutter with 3/16 inch aluminum pop-rivets (you can also use zip screws here).
- Measure and cut with a hacksaw a ~3 foot length of downspout from standard 10 foot long section gutter downspout.
- Mark the 45 degree angles and cut with tin snips.
Tip: Cut the 45 miter at the that was sawn with the hack saw because this will true-up the hack-sawn end of the downspout. - Install the Zip Hinges with zip screws.
I took photos while the homeowner installed the Zip Hinges; it’s that easy.
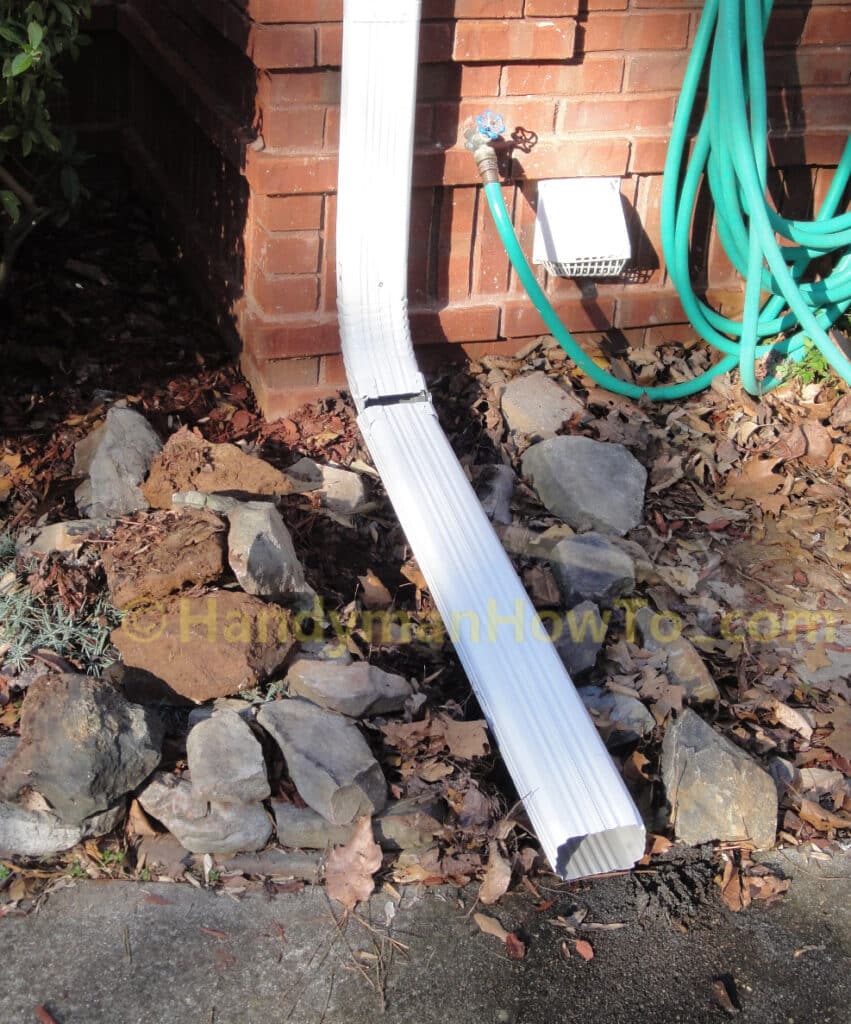
The new Zip Hinges and downspout extension to the driveway. Looks much nicer and no more standing water.
The Zip Hinge™ Clasp isn’t normally needed because the Zip Hinges have a natural stiffness to hold the downspout in the flip-up position, but can be helpful on windy days or longer term storage. The Zip Hinge Clasp installs in seconds with a single zip screw and rotates 90 degrees to hold the downspout.
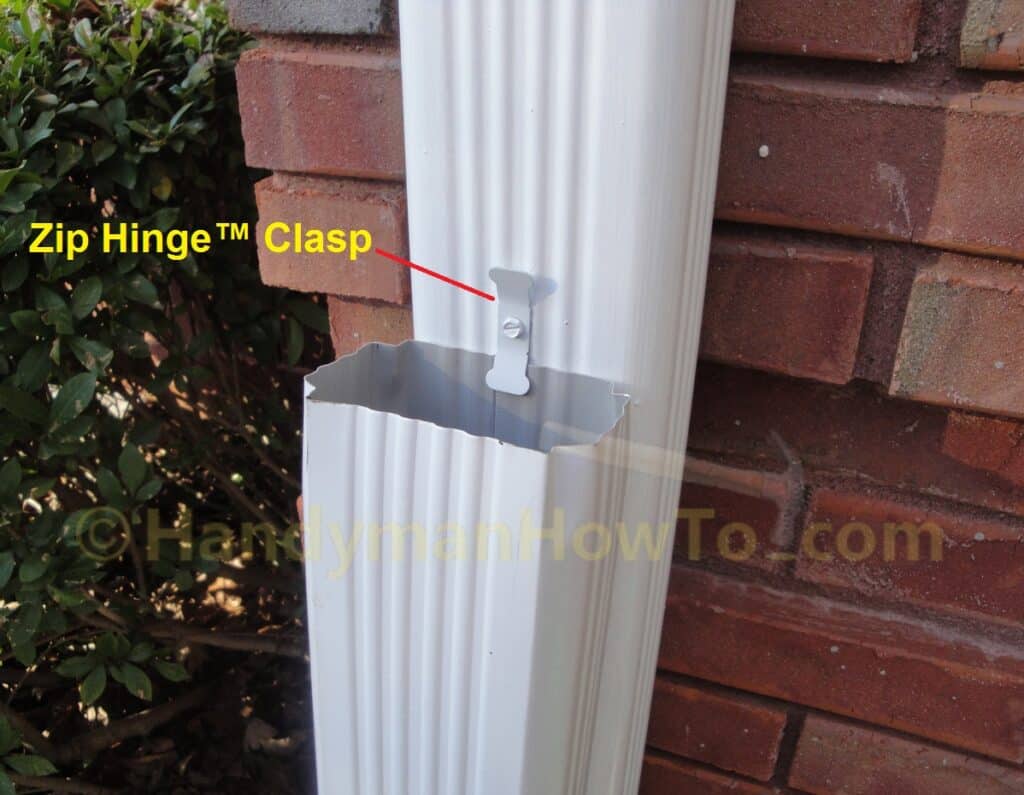
Downspout held in the flip-position with the Zip Hinge™ Clasp:
Zip Hinge™ is a well made and easy to install product. I hope you found this Zip Hinge review helpful.
Thanks for reading,
Bob Jackson