I’m ready now for the final Waste King L-8000 Garbage Disposal garbage disposer installation. Recall the Waste King® was temporarily mounted in Part 1 of this series to fit the plumbing connections and is now just hanging in the “supported” position on the mount ring. In Part 2, the electrical outlet was installed to plug in the power cord. Now I’ll install the sink flange, mount the new unit, connect the waste arm and plug-in the new garbage disposer.
How to Install a New Garbage Disposal
I begin the final installation by swinging the waste arm plumbing out of the way as shown for unobstructed access to remove the disposer, having loosened the slip joint nuts on the waste tee.
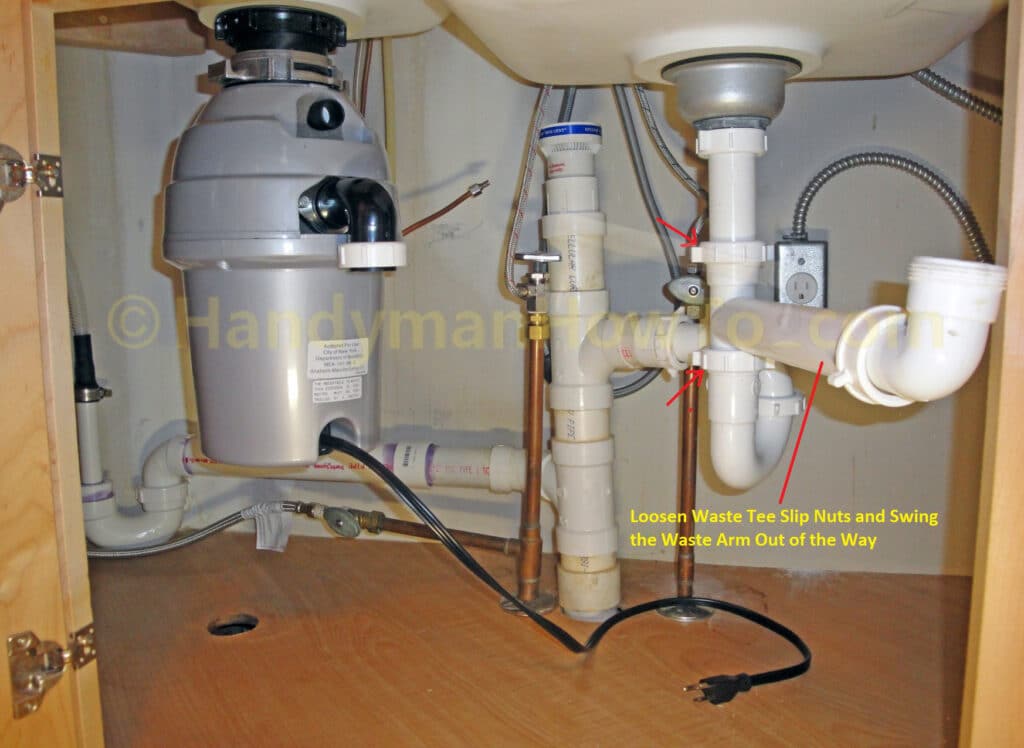
Install the Garbage Disposal Sink Flange
After dismounting the garbage disposer from the mount ring, I unscrewed the support ring and took out the sink flange.
The rim of the sink flange is packed with a generous bead of plumber’s putty for a watertight seal against the sink drain.
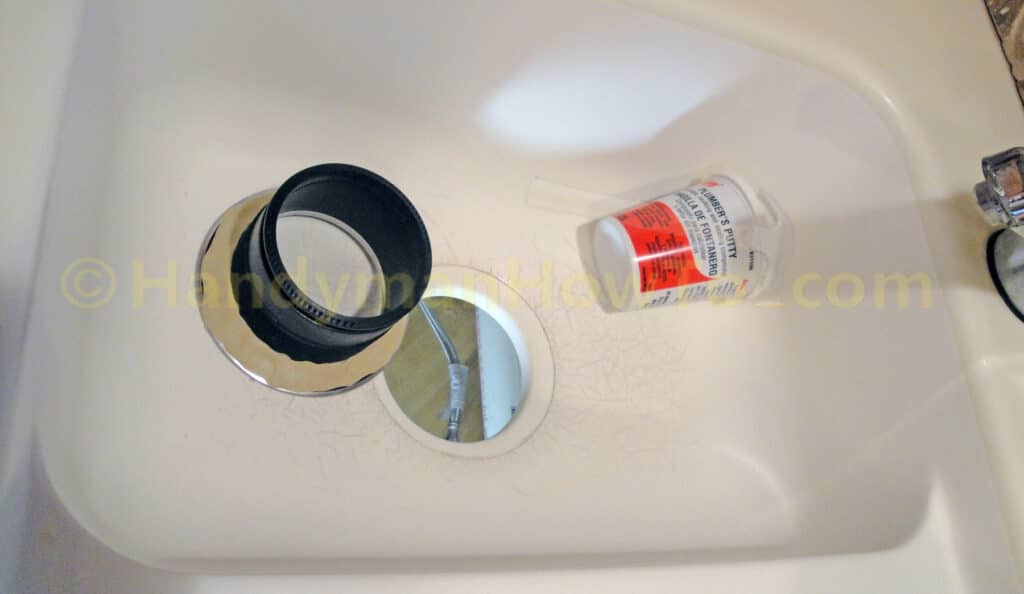
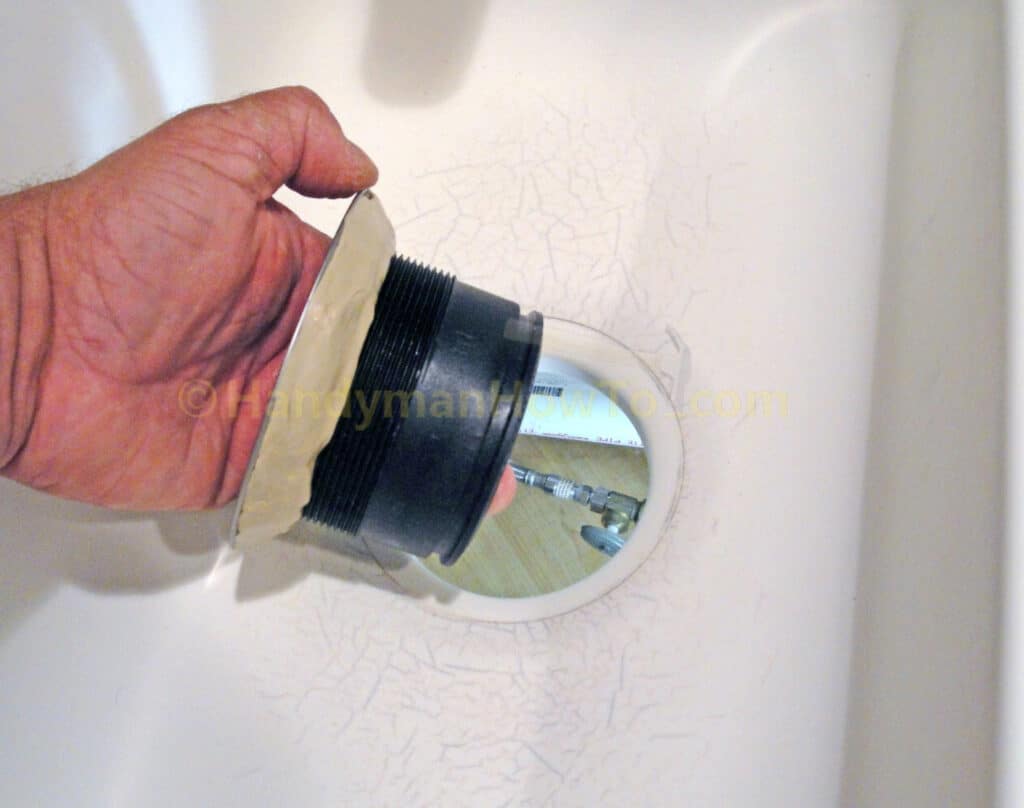
Insert the sink flange into the sink drain hole and press it down with even pressure to seat it until the plumber’s putty just begins to squeeze out around the rim.
Position the anti-friction fiber gasket on the support ring and thread the support ring on the sink flange. Note the Up arrow printed on the support ring for correct orientation.
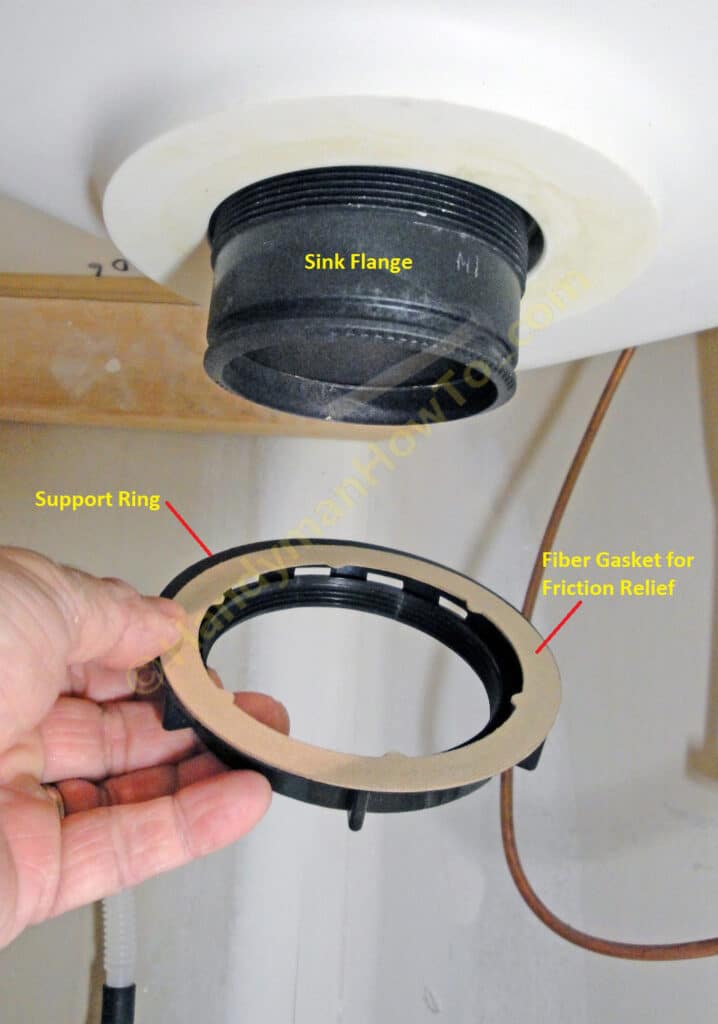
The plumber’s putty will squeeze out as the support ring is tightened, pressing the sink flange against the drain hole. Slowly tighten the support ring, pausing a few seconds between turns to allow the putty to squeeze out. You’ll feel when the flange is fully seated against the sink and support ring is stays tight with no more “give” as the putty squeezes out.
Look for an even squeeze out of the plumber’s putty like this photo to ensure there are no gaps or voids between the flange and sink bottom.
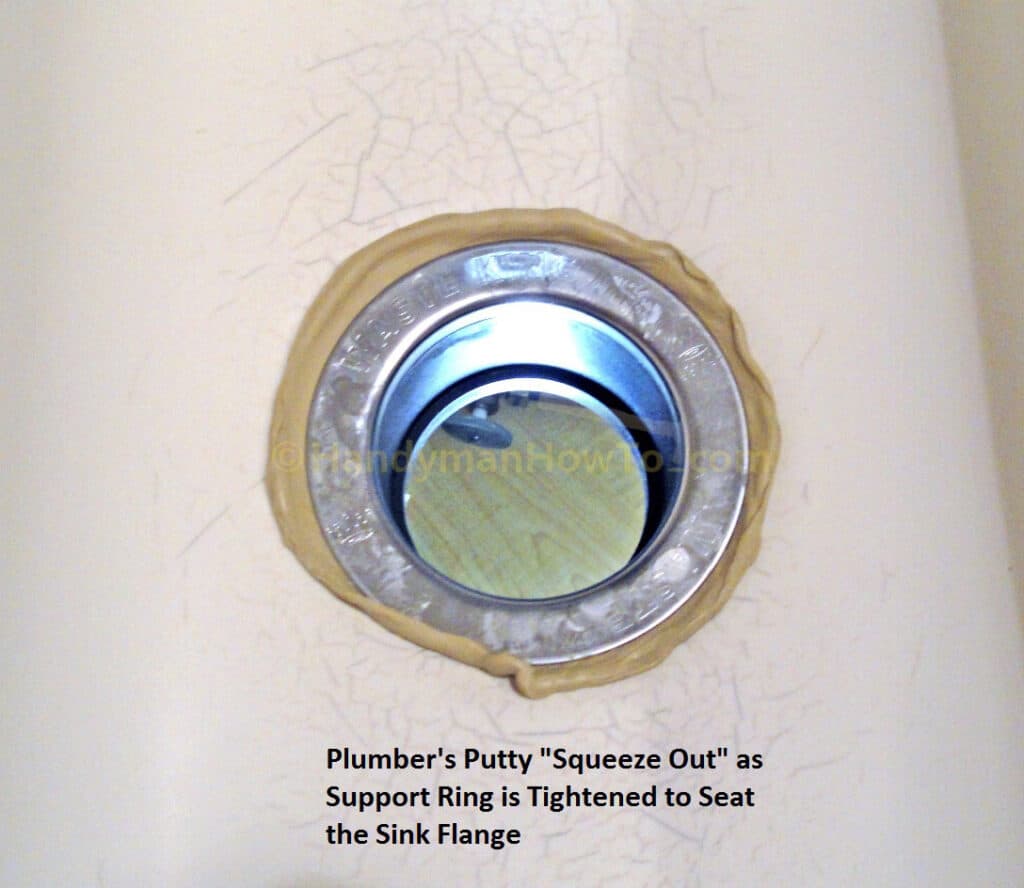
Use the edge of the putty knife to trim away the excess plumber’s putty:
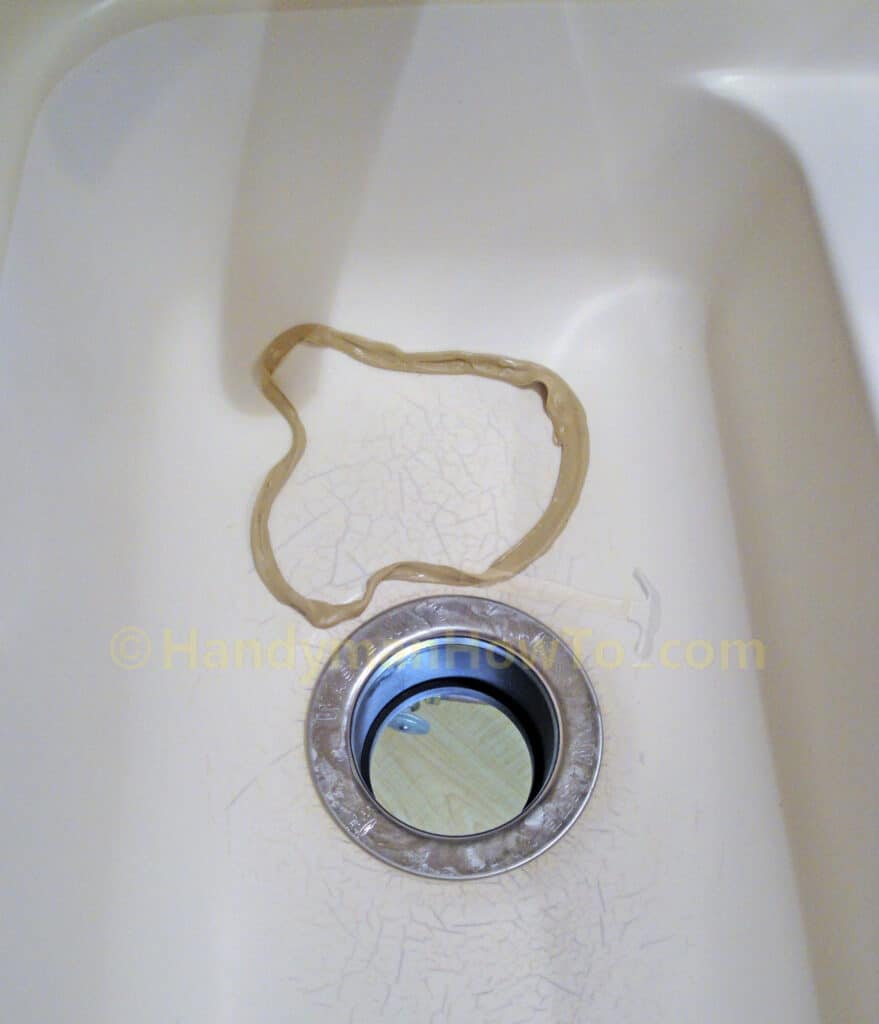
Install the Waste King Sink Mount
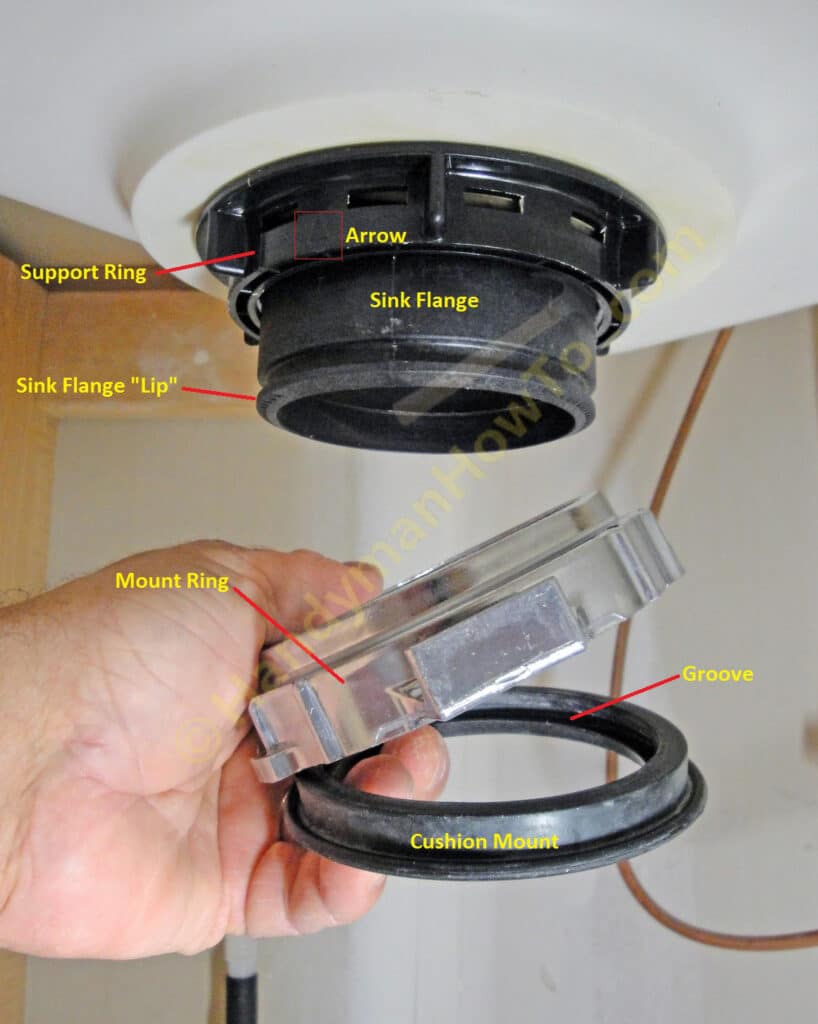
Orient the mount ring and cushion mount as shown and attach it to the sink flange. Work the inner groove of the cushion mount over the lip of the sink flange.
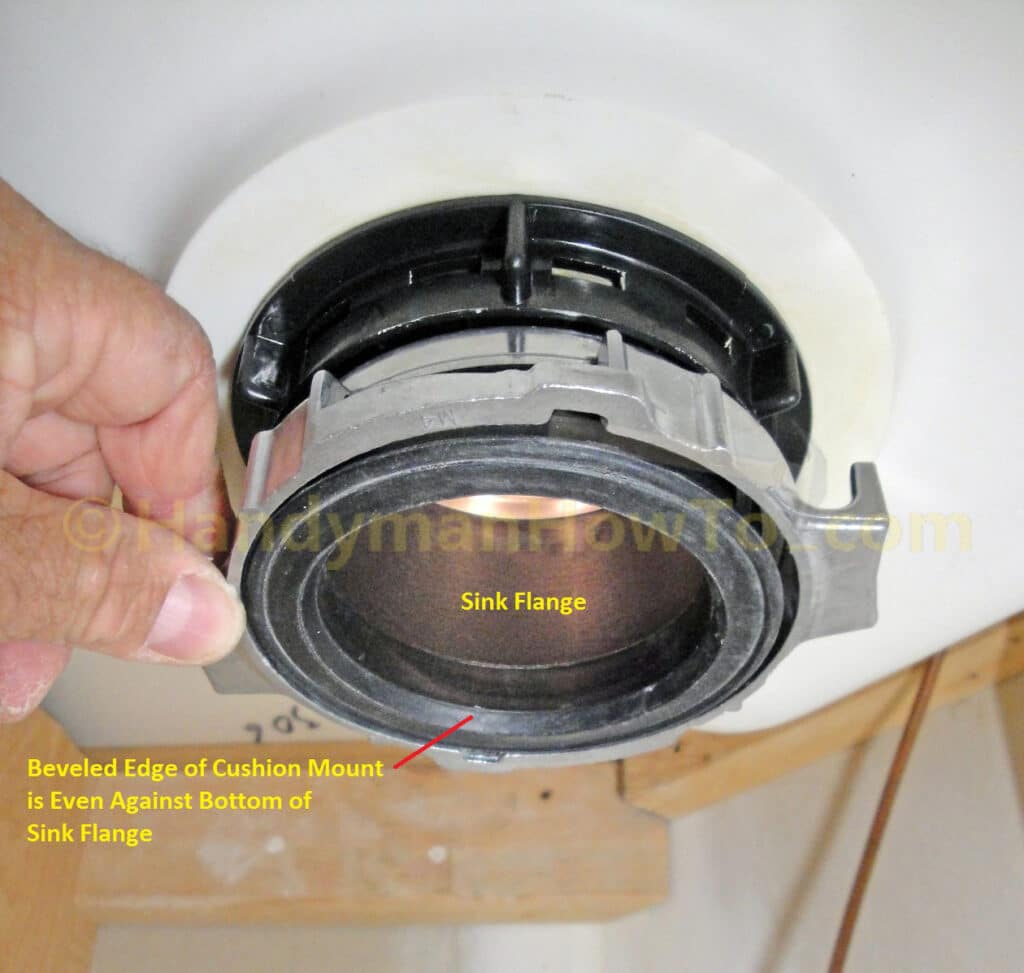
Inspect the cushion mount to verify it’s installed correctly on the sink flange. Note how the inner beveled edge is seated evenly against the flange.
Mount the Waste King Garbage Disposer
Align the Waste King hopper projection and mount ring slot so it will slide into the mount ring when you raise it up. The Waste King is a bit on the heavy side at ~14 lbs and you’ll be working in an awkward position reaching inside the cabinet, so proper initial alignment will minimize the effort.
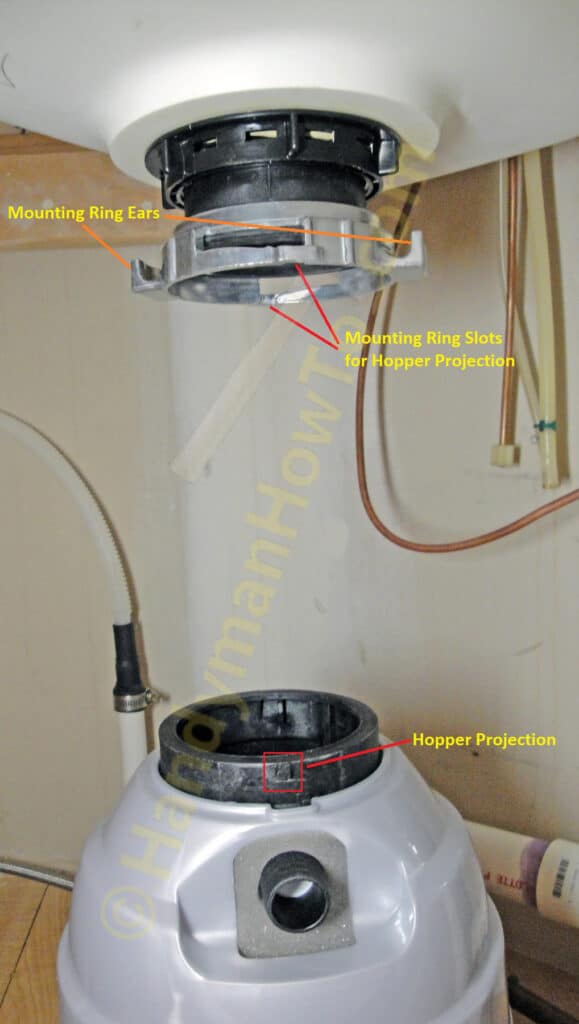
Lift the Waste King into the mount ring and set it in the “Supported” position. Check the unit alignment such that the discharge elbow is pointing where you want it to meet the waste arm plumbing.
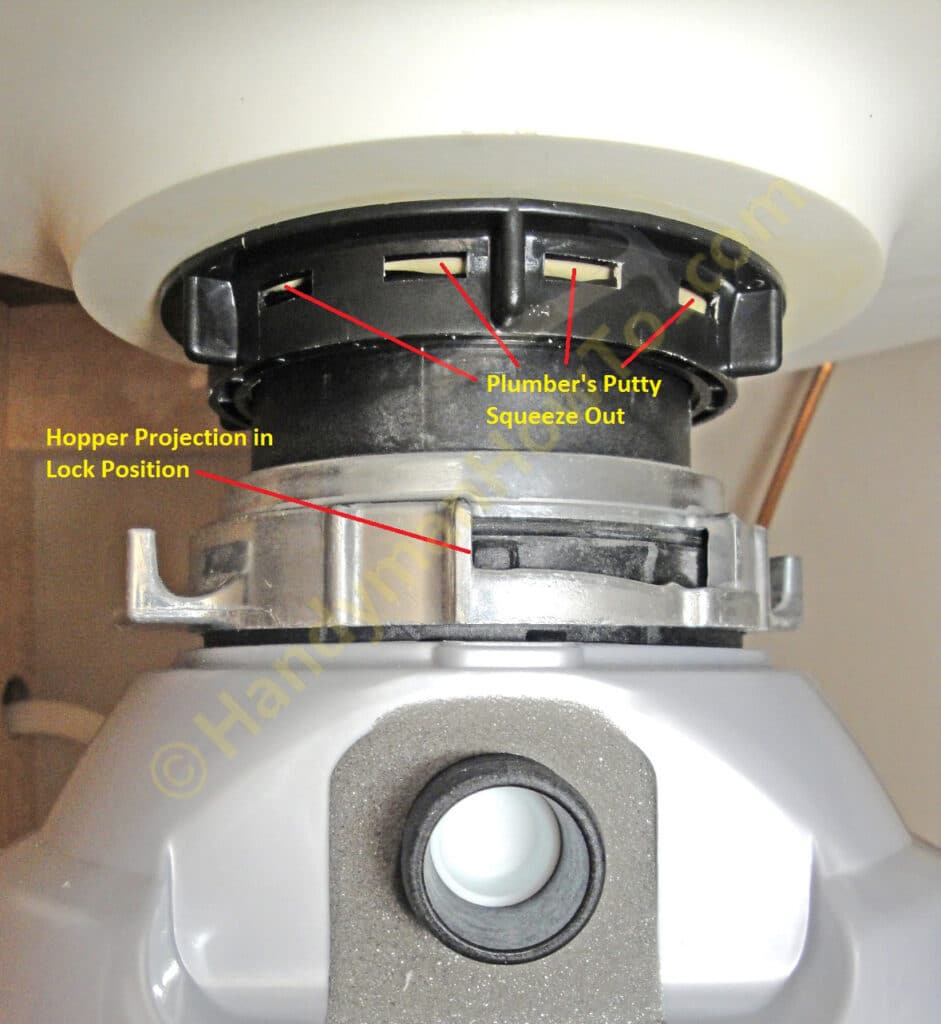
Twist the mount ring until the hopper projection is in the “Lock” position. Take care not to turn the disposer unit, only turn the mount ring. I found it not too difficult to twist the mount ring with my thumbs on the mount ring ears. You can tap the ears with a hammer if needed until it’s locked.
If you need to realign the garbage disposer, loosen the mount ring first so as not to twist the sink flange which will break the seal with the plumber’s putty.
Connect the Waste Arm to the Discharge Elbow
Swing the waste arm around to the disposer discharge elbow, adjust the telescoping slip tube and insert the discharge elbow into the waste arm plumbing. Check the slip joint washers and tighten the slip joint nuts on the elbow, telescoping arm and waste tee joints.
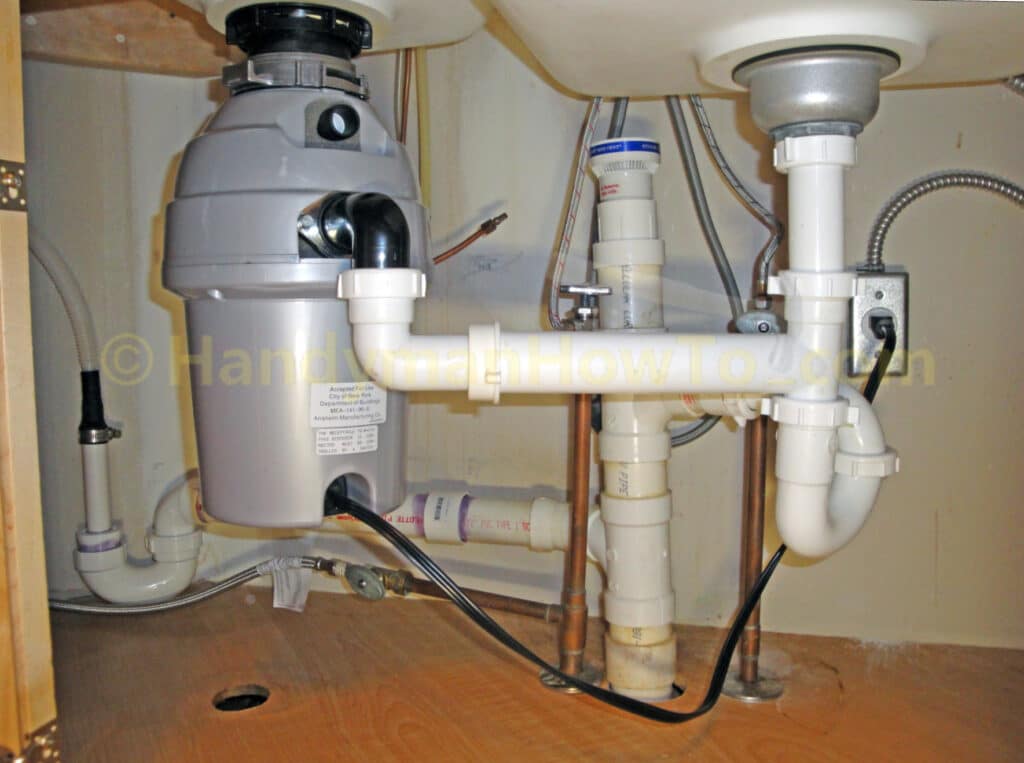
Check that the disposer on/off switch by the sink is off.
Plug the power cord into the electrical outlet.
Garbage Disposal Splash Guard
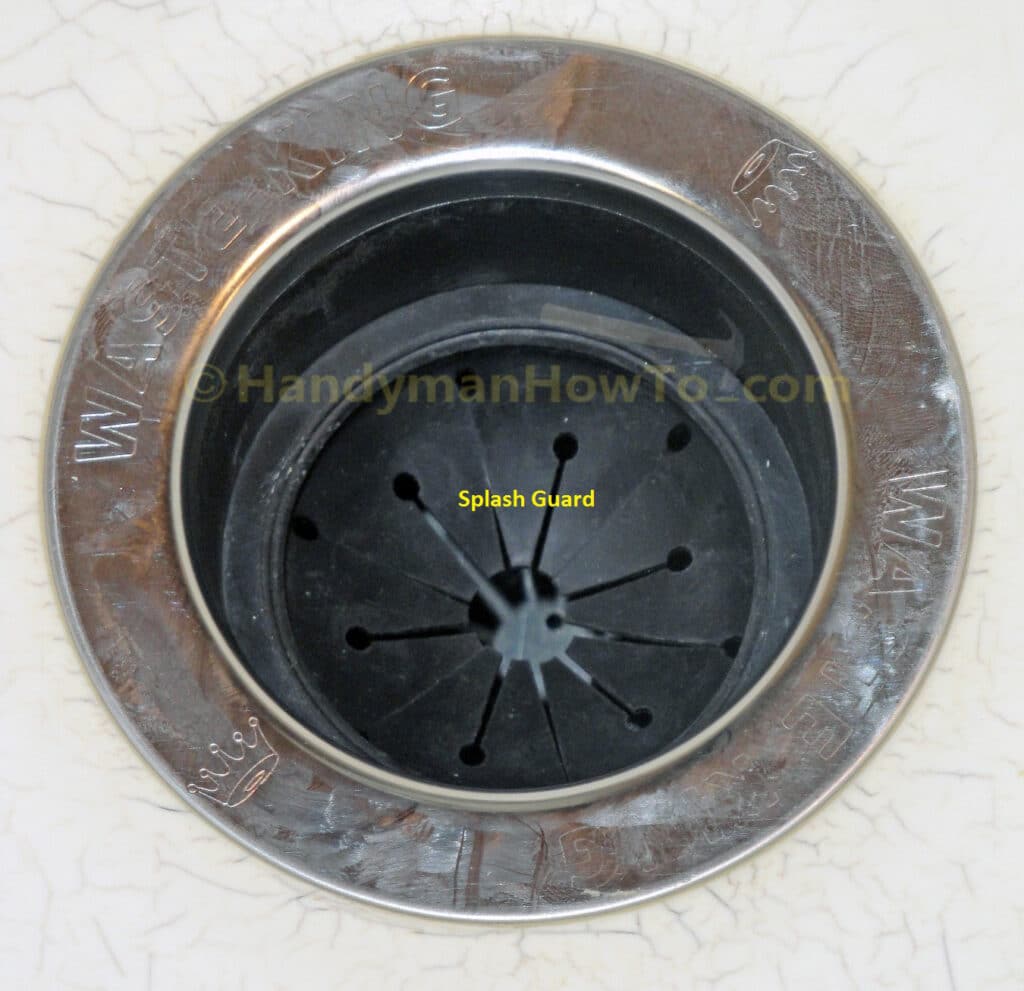
Press the rubber splash guard into the disposal drain.
Leak Check and Operation Testing
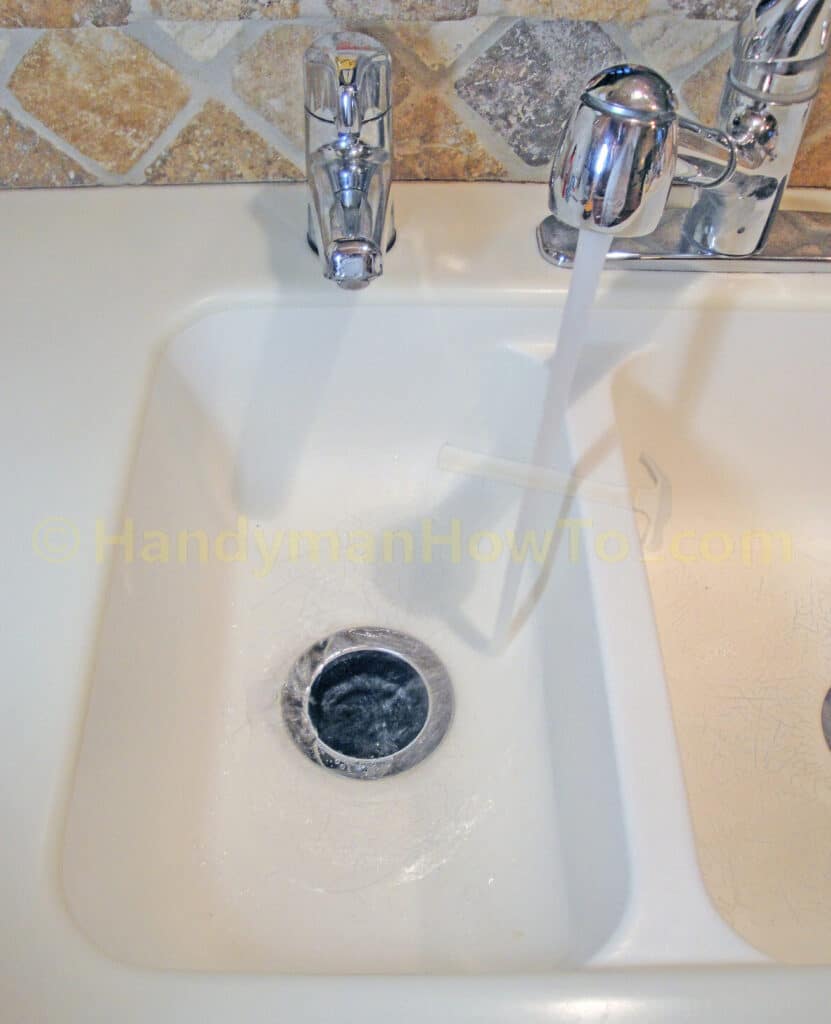
Run the water for a couple of minutes and check all the plumbing connections and sink flange for leaks.
Insert the stopper, fill the sink with several inches of water, let is stand for around 15 minutes while checking the flange for leaks under the sink.
- If you have a leak, unplug the power cord, check and tighten the slip joint connections.
If the slip joint continues to leak, make sure the slip washer is installed correctly and/or
replace the plastic slip washer. - If the leak is coming from the sink flange, tighten the sink flange if you feel some “give”.
Worst case, you may have to remove the sink flange and repack it with plumber’s putty.
Turn on the disposal switch, run the water and listen to the motor run. You’ll hear a loud click (this is normal) as the grinders swing into position.
Waste King Legend 8000 Product Review
I’ve had the Waste King Legend 8000 for a month now. My thoughts are:
- The #1 Rating by Consumer Reports (August 2009) greatly influenced my purchase decision.
- The Lifetime In-Home Service Warranty is unbeatable. The lifetime warranty is printed right
on the box and not buried in fine print. All you need is the original purchase receipt for warranty service.
Consumer Reports convinced me there was no catch for this high-end quality product. - Compared to my old 1/3 HP disposer, it’s much quieter – you can have a normal conversation while it’s running.
- The 1 HP motor effortlessly ground up everything we put in it.
- I really liked the EZ Mount system because it was sturdy and assembled without tools or complicated parts.
- I’m glad I removed the old 3-bolt mount & sink flange because:
- The plumber’s putty beneath the old flange was dried and brittle, and eventually would have leaked.
- Reusing the old 3-bolt mount with the optional Waste King 3-bolt mount adapter isn’t worth the risk
of having dried out plumber’s putty if your old disposer is several years old. - The extra effort of removing the old 3-bolt mount and cleaning the old putty only took 15 minutes. I therefore
can’t imagine why you’d want to keep the old mount; or at least reinstall it with fresh putty.
- The plug-in power cord is a better way to go in my opinion and installing the electrical outlet under the sink was no problem.
- Removing the Waste King will much quicker when I install a new instant hot water dispenser.
- The unit is a bit on the large and heavy side, but that’s due to the 1 HP motor, and a minor consideration only
during installation. The “supported” position on the mount ring means you can hang the disposer
to take the weight off your arms while adjusting the plumbing alignment. This is a nice feature for the
installer.
Take care,
Bob Jackson
Your step-by-step guide to garbage disposal installation is incredibly detailed and helpful for DIY enthusiasts. The clear instructions and visuals make the process seem much less intimidating. Thanks for sharing such a comprehensive resource!