This project explains how to repair a damaged electrical wire by splicing in a new section of NM-B 14/2 wire with junction boxes.
The 120VAC wire splice fix is illustrated in the following diagram:

This splice repair technique is useful for fixing damage when there’s not enough slack in the electrical cable to rejoin the ends together with wire nuts in a single junction box. For example, if a squirrel or rodent has a chewed through an electrical cable in the attic, or in my case, I also had to reroute the wire to correct a building code violation.
How to Repair a Damaged Electrical Wire
Damaged Electrical Wire and Building Code Violation
This run of 120VAC Romex NM 14/2 (Non-Metallic 14 gauge, 2 conductor with ground wire) electrical cable in the finished basement has several problems:
- National Electrical Code (NEC) violation because it’s hanging unsupported outside the 2×4 studs. An example of sloppy work by the former homeowner.
- The insulation has been cut on both the outer sheath and inner hot wire conductor then wrapped with electrical tape which is a improper repair method.
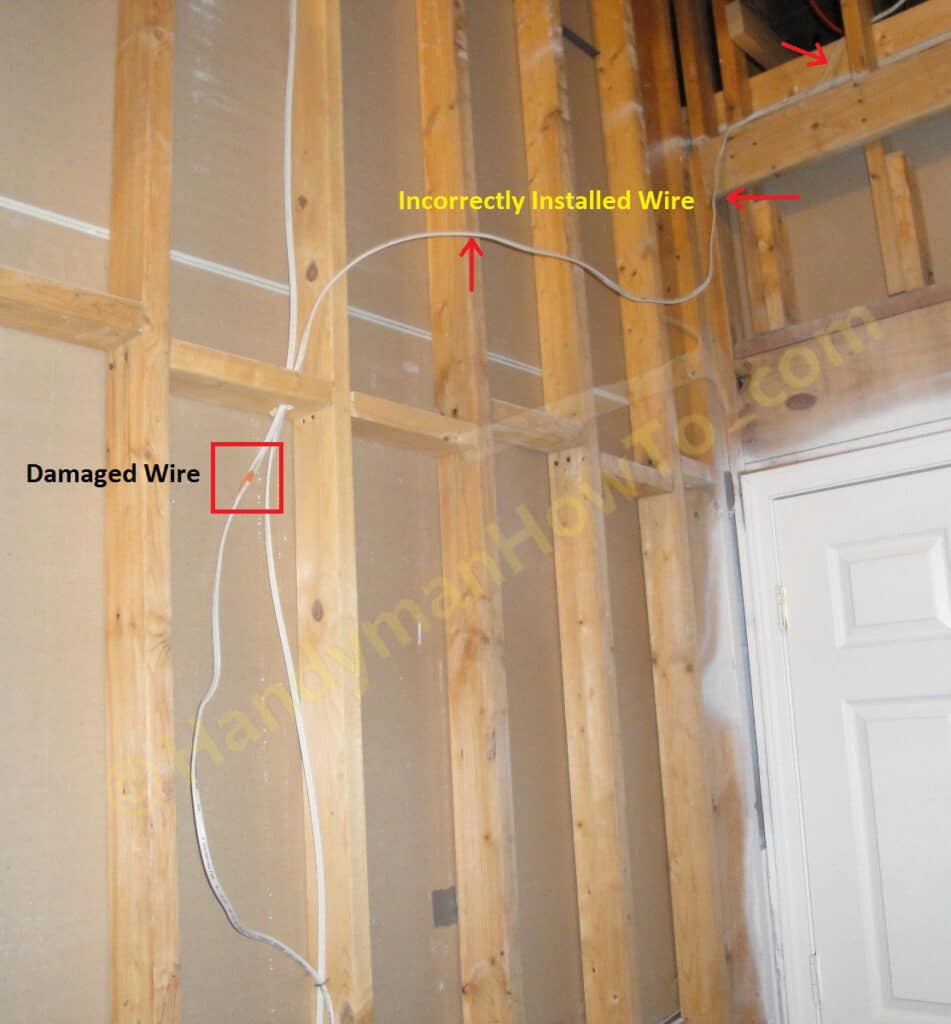
Close-up of the damaged insulation. My guess is the the goober who installed the cable planned to cut it but changed his mind. It doesn’t explain why the hot wire (black) insulation is exposed. If you’re going to cut a wire, you don’t need to hack away at the insulation.

NM 14/2 Wire Splice Repair
The house electrical wire is repaired by:
- Cutting the cable in two at the damaged area.
- Rerouting the upper portion of the cable inside the crawlspace and 2×4 wall studs to correct the building code violation.
- Splicing in a new span of NM 14/2 wire with two junction boxes.
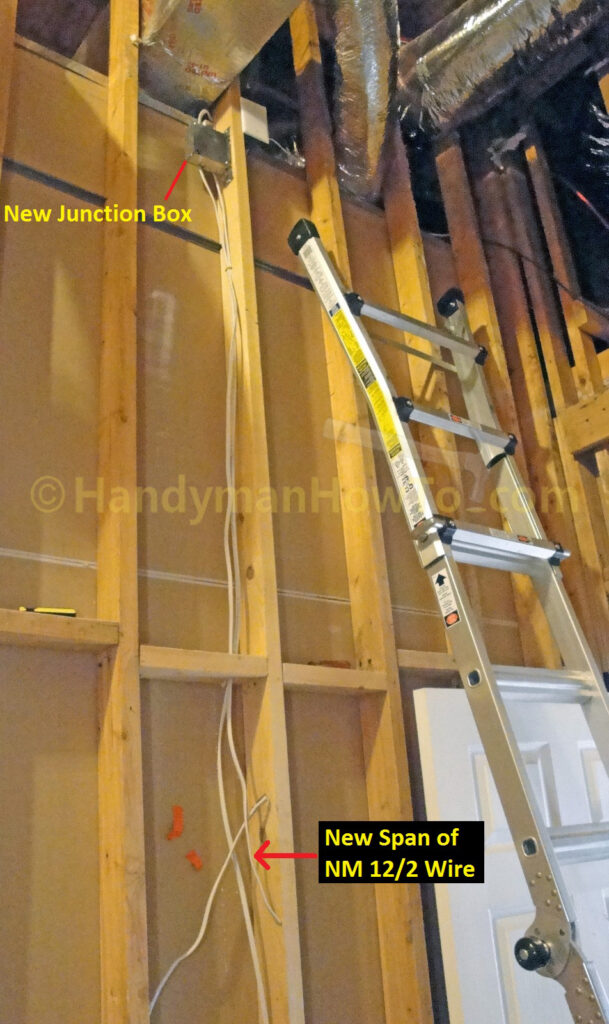
The result is shown in this photo:
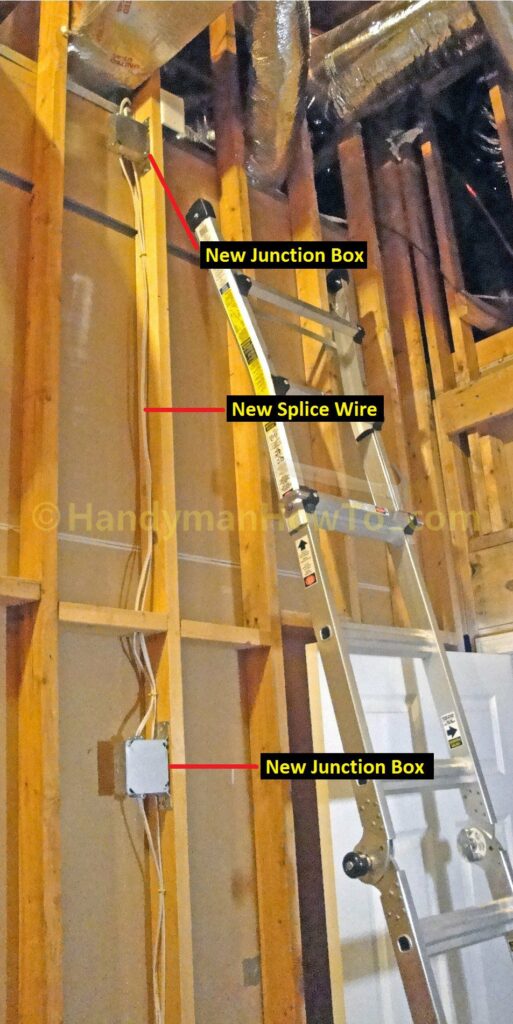
A keen eye will note the black cable crossing in front of the 2×4 studs at the top right corner in the above photo – that’s the cable TV coaxial cable. I wouldn’t have routed it that way, however it’s not a safety or code problem.
NM-B 14/2 Electrical Cable Repair Parts and Tools
Two flush mount 4″ square by 1.5″ deep electrical junction boxes are required to splice in the repair span of NM 14/2 electrical cable. There are two types of steel electrical boxes:
- with built-in cable clamps (left box in photo below)
- without cable clamps (right box in photo below)
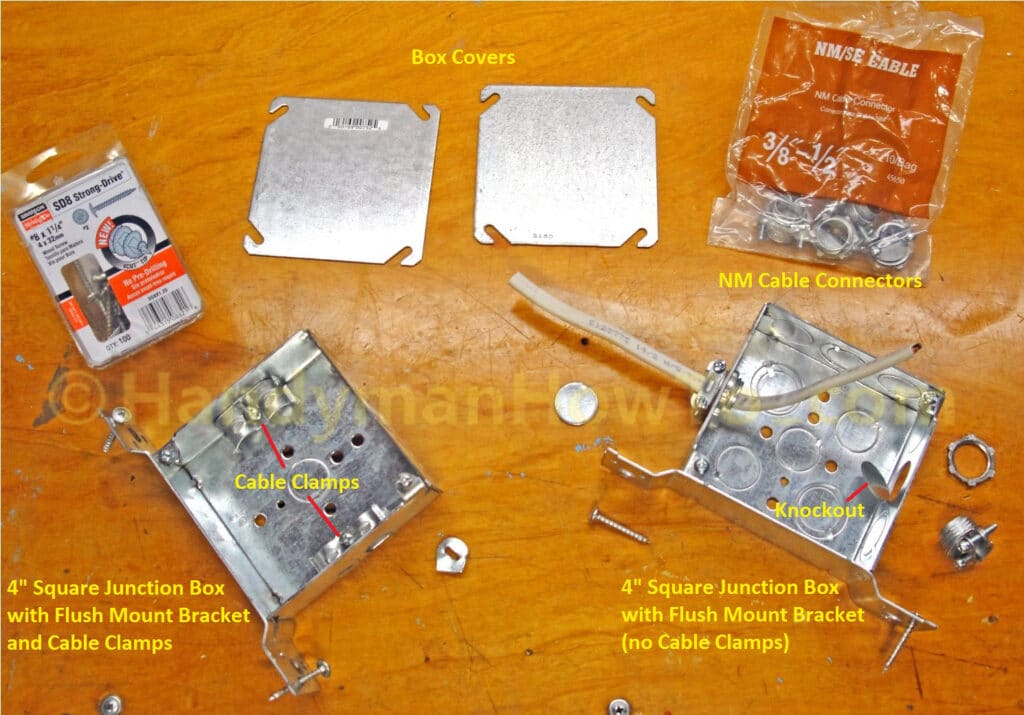
For this repair I only needed the box with built-in cable clamps, although I used both types because I happened to have a box without clamps left over from a prior job. If you buy a box without clamps or need to bring in wires from another direction, the 1/2″ NM Cable Connectors are necessary to secure the wire in the knockout hole.
The parts are inexpensive, the electrical box with internal clamps cost $1.19 and a box cover is only 57 cents.
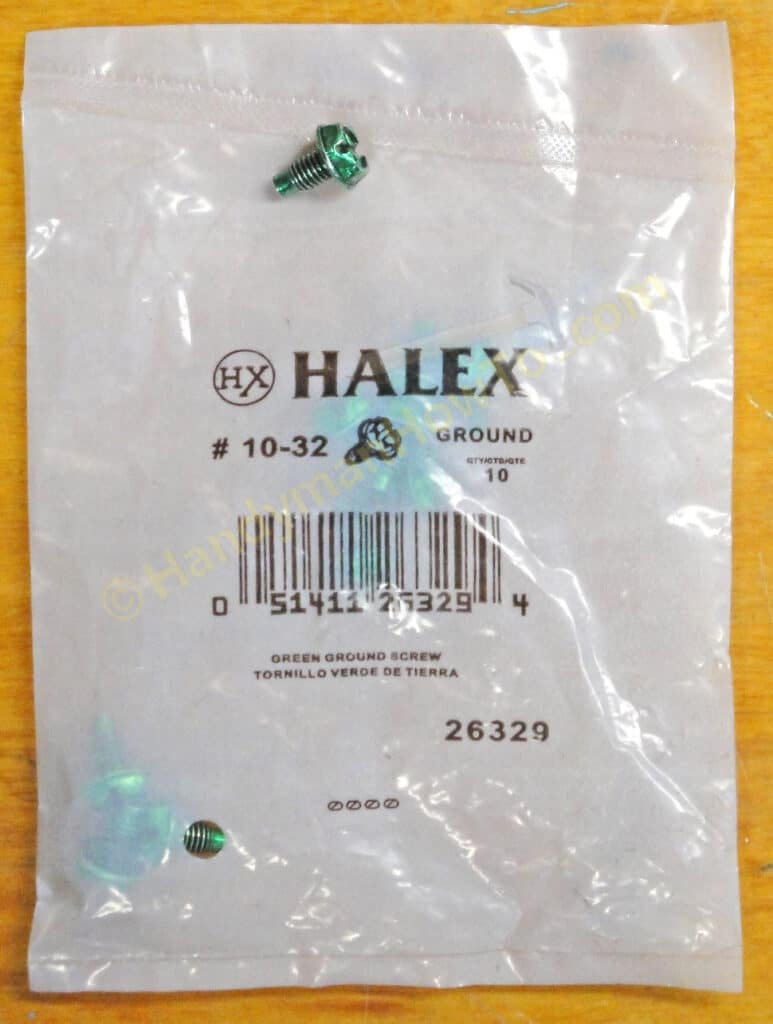
The steel junction boxes must be grounded but do not include the ground screw, so I bought a 10-pack of #10-32 green ground screws for $1.31. The #10-32 ground screw fits the smaller hole near the center of the steel electrical box.
Closeup of the how the 14/2 NM electrical wire and NM Cable Connector are installed in the steel junction box. To install the cable, remove the 1/2″ inner knockout, attach the cable connector and lock nut, insert the wire and tighten the clamp screws until the cable is snug.
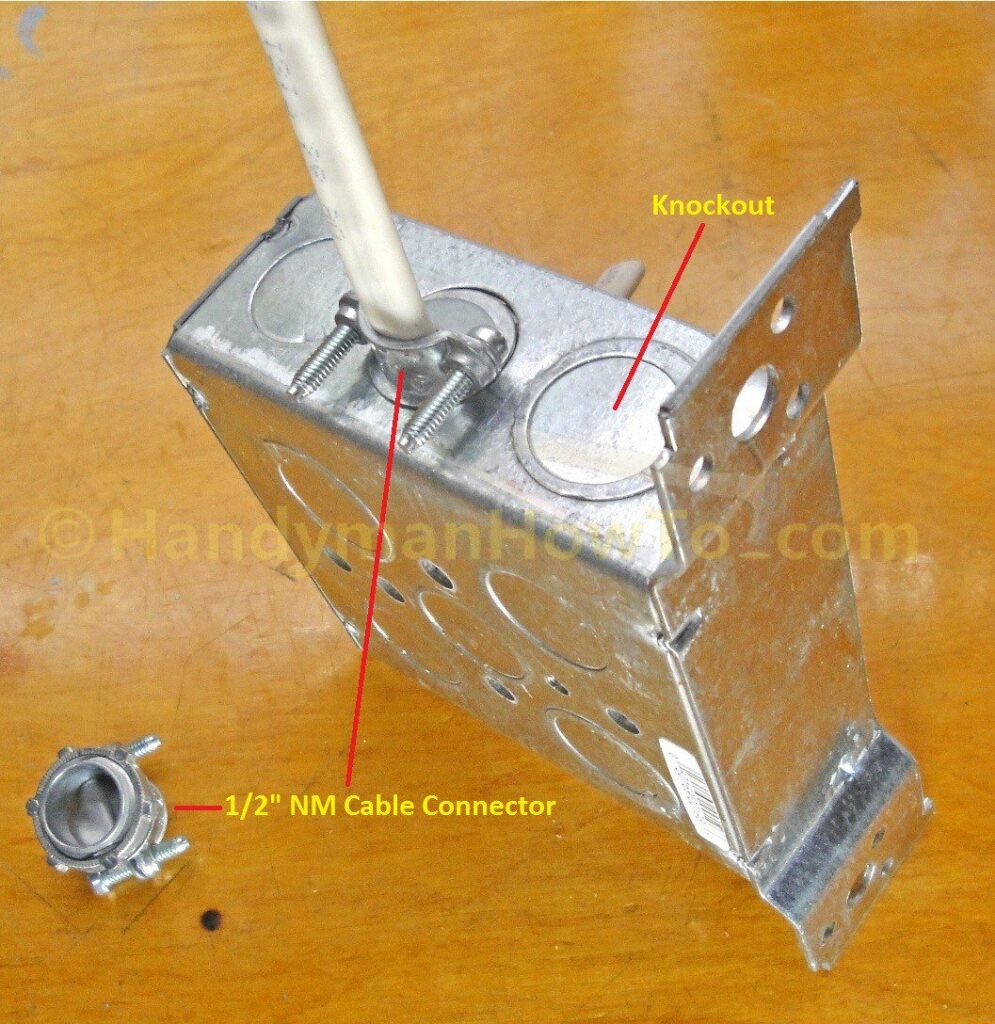
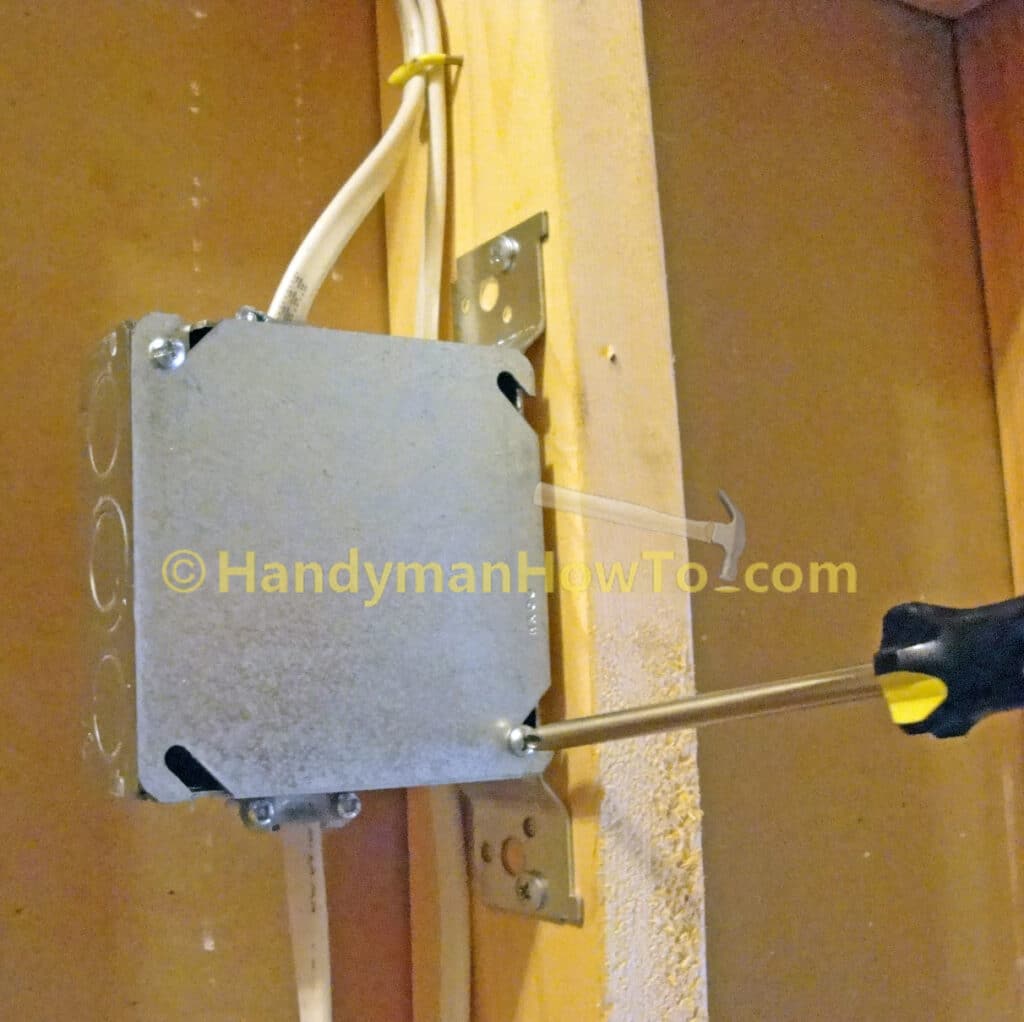
Knockouts are the several dimpled circles in the box sides. To remove a knockout, just hit it near the inner edge with the tip of a screw driver then bend it back and forth until the disc tab breaks.
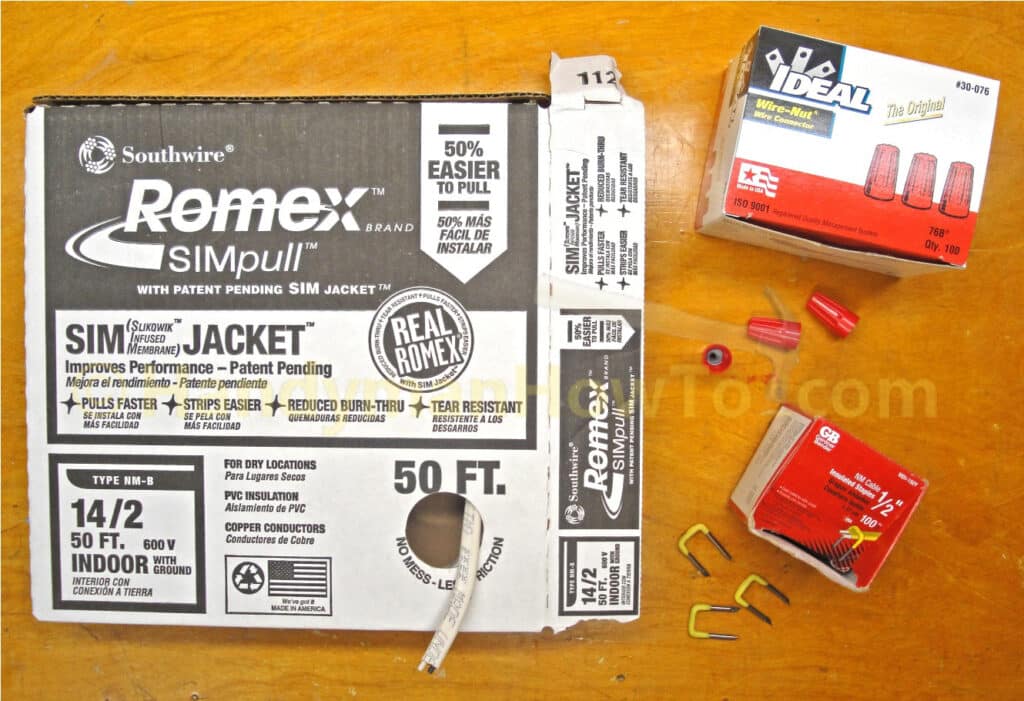
A box of Romex NM 14/2 electrical wire, wire nuts and cable staples are needed. You can buy Romex in 25, 50 and 100 foot length boxes and coils at the home improvement store. Copper wire is getting expensive to rising metal prices, so only buy the minimum length of wire needed for your repair.
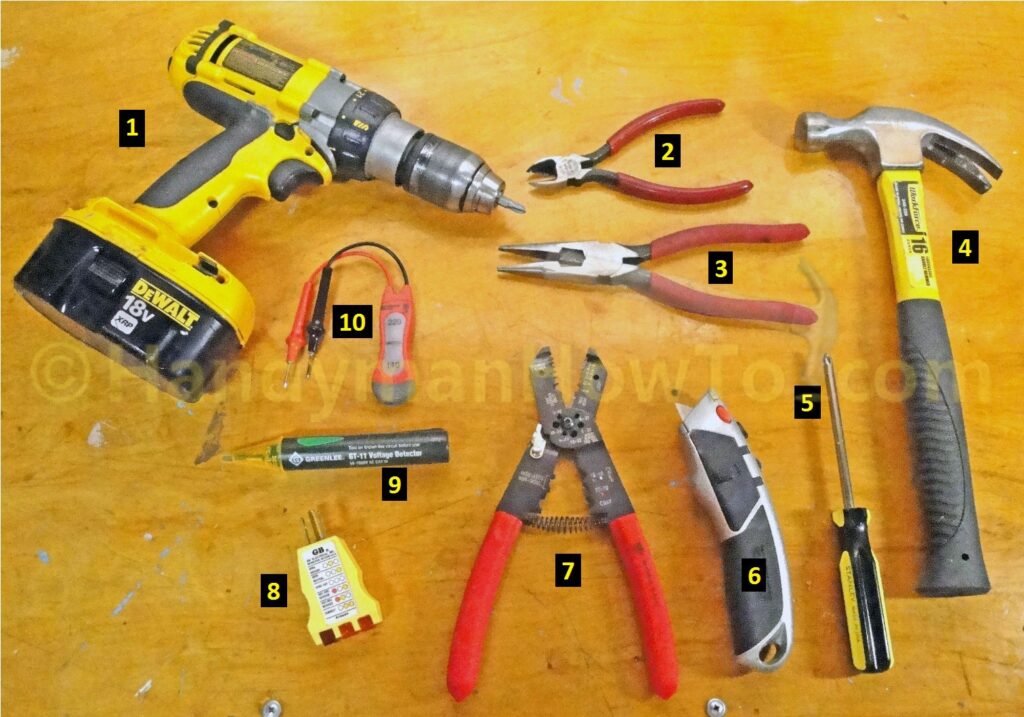
I used the following tools in this electrical wire repair job:
- Cordless drill/driver to attach the junction boxes to the 2×4 studs with wood screws
- Diagonal cutting pliers
- Needle nose pliers with cutter (you can get by with this only if you don’t have #2)
- Hammer for the cable staples
- Philips screw driver
- Utility knife
- Multi Tool wire stripper and cutter (does a better job stripping wires than the utility knife)
- Receptacle tester
- Non-contact voltage detector
- AC Voltage Tester (if you have #9 then you don’t need this tool)
Shut Off The Electricity
Before doing any work I verified the wire was “live” with the non-contact voltage detector. The purpose here was two fold:
- To confirm the battery operated voltage detector was working
- To watch the detector go silent when the electricity is shut off at the main electrical panel as confirmation the power is Off.
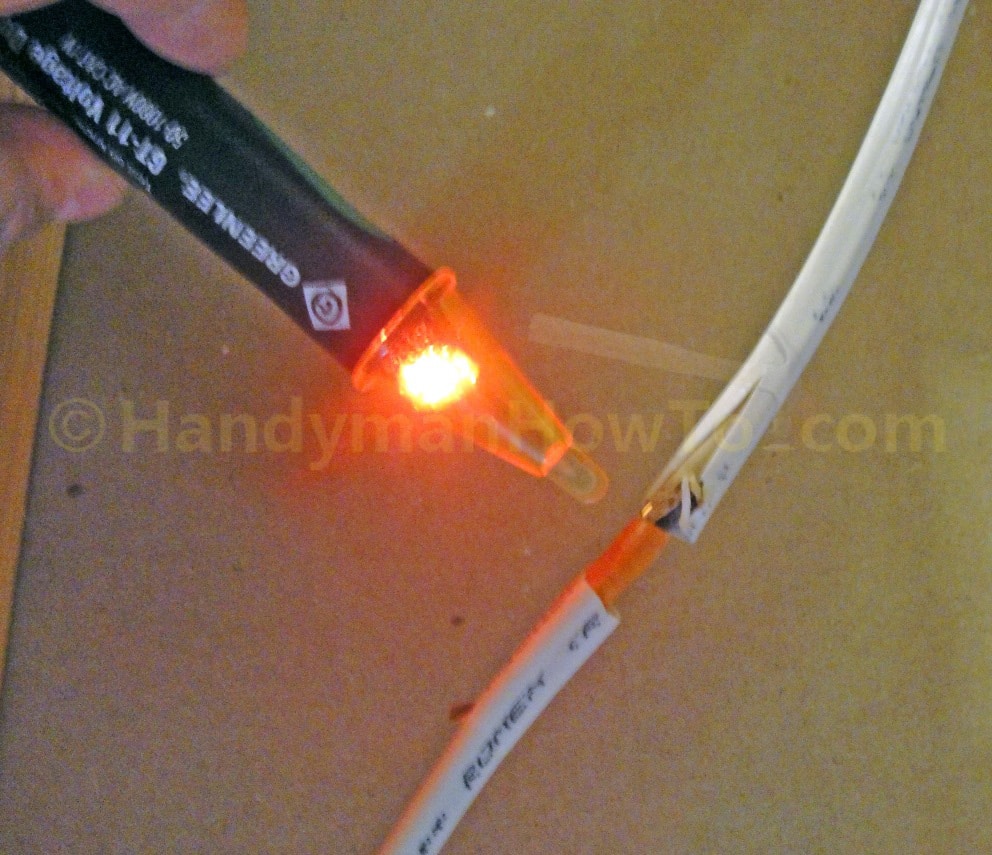
While watching the voltage detector, my helper located and switched off the circuit breaker; I was now confident the wire was dead.
Cut and Splice the Electrical Wire
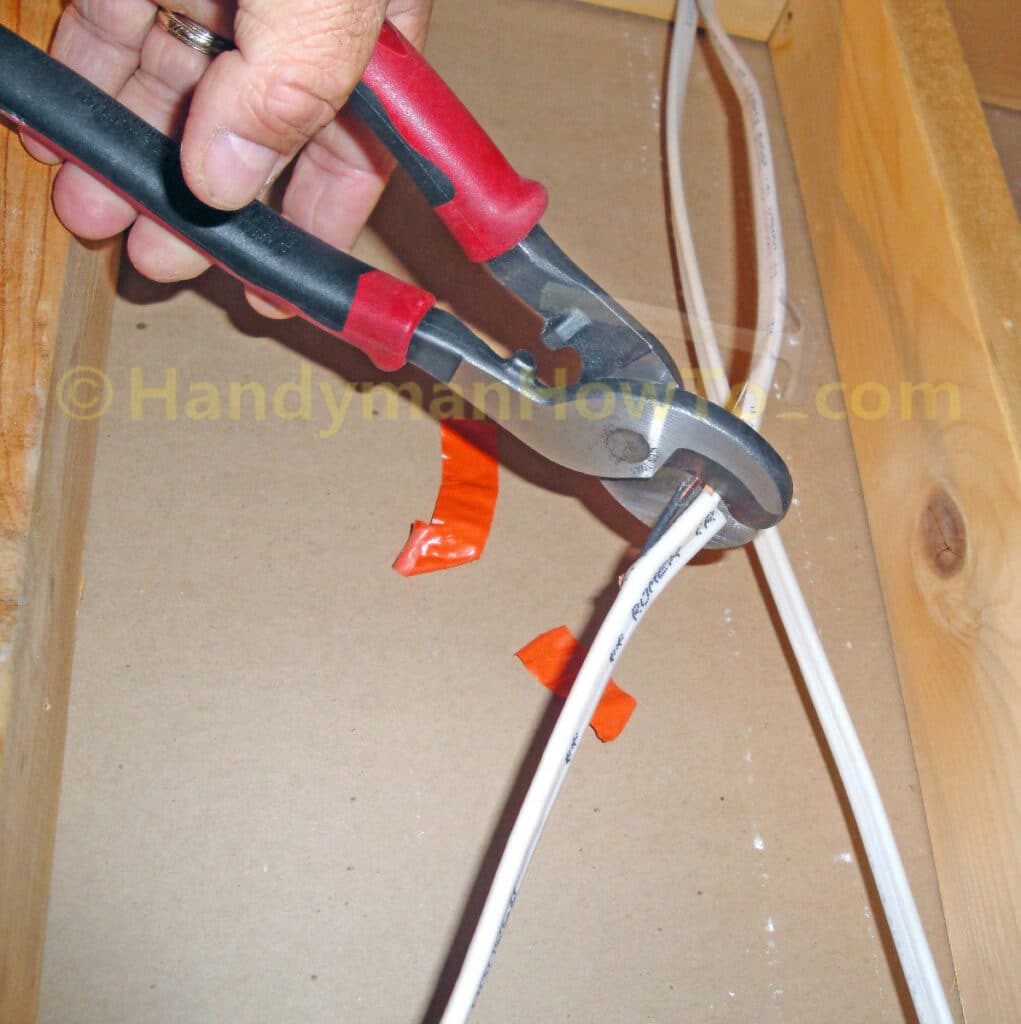
After verifying the electricity is shutoff, I cut the wire in two at the damaged area:
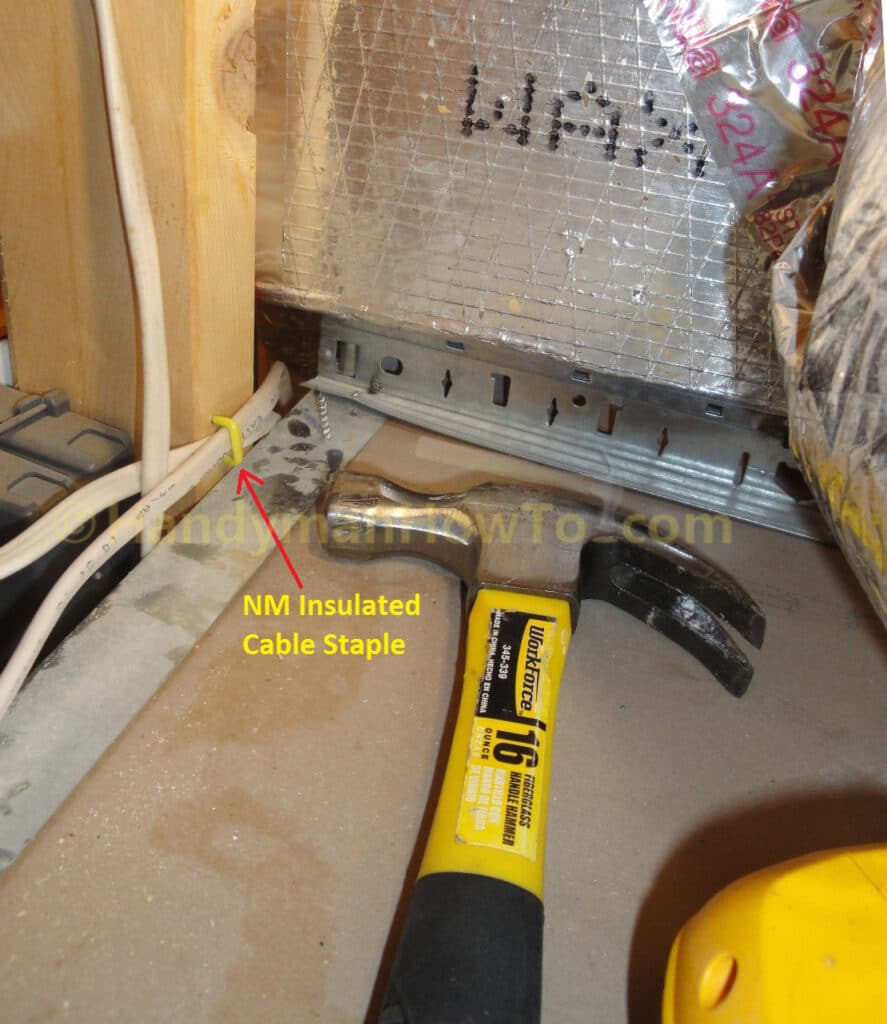
To correct the Building / Electrical Code violation where the unsupported NM-B 14/2 cable was hanging outside the 2×4 wall, the upper section of wire is pulled up and rerouted through the ceiling crawlspace, fastening it every 4 feet to the 2×4 studs with an insulated cable staple just above the edge of suspended drywall ceiling:
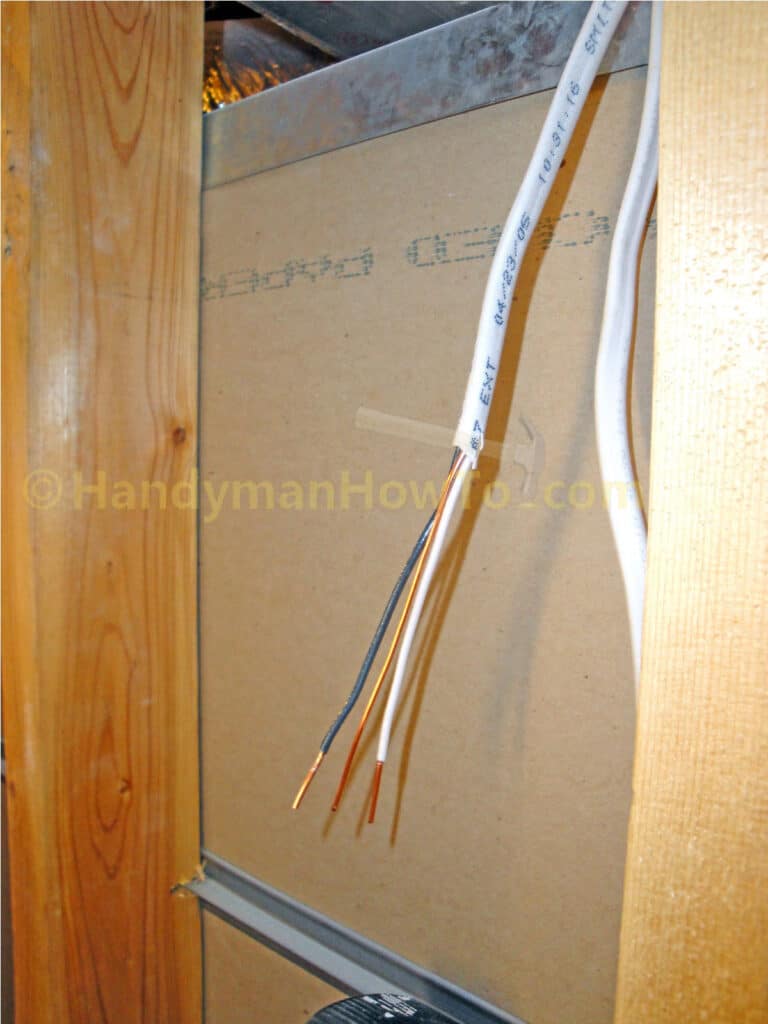
Since I was working with the upper end of the severed cable and had no extra slack to work with, I stripped and prepared the wire in advance so I could better locate the splice junction box:
Electrical Junction Box Wire Splice Repair
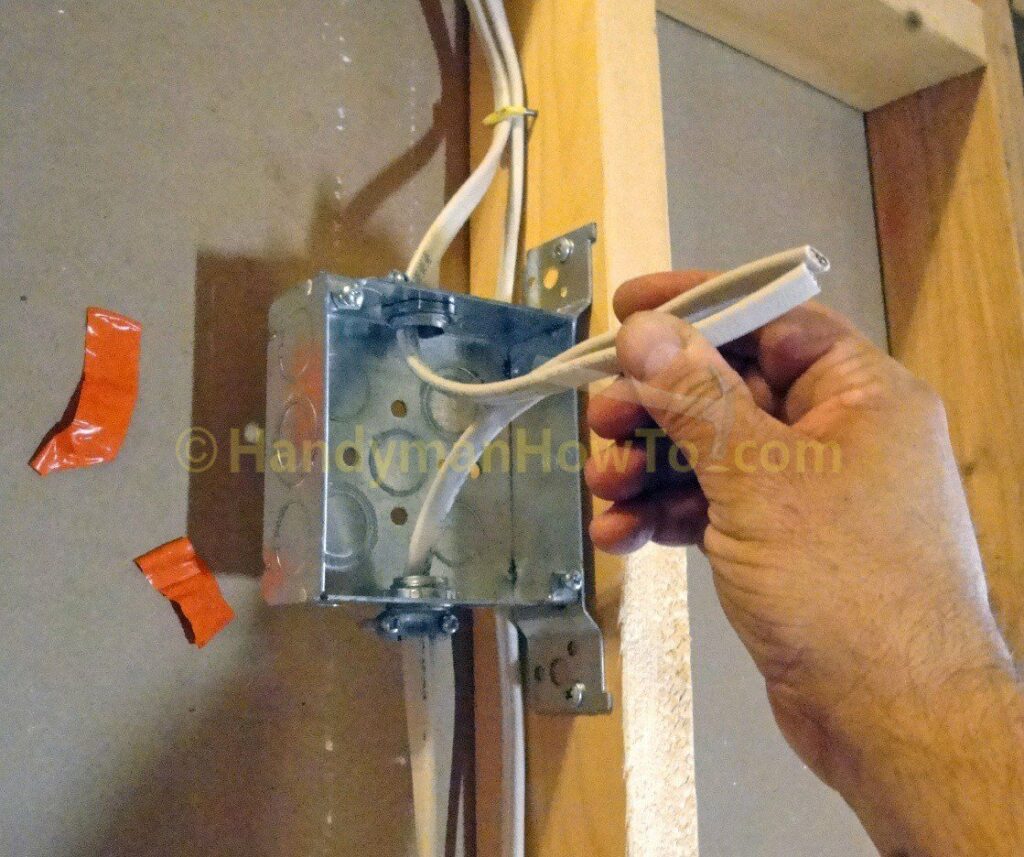
The upper end of the NM-B 14/2 wire is inserted into the steel junction box, then the junction box is positioned against the 2×4 wall stud and fastened with two pan-head wood screws. This sequence ensured the junction box was located correctly given the limited length of upper wire.
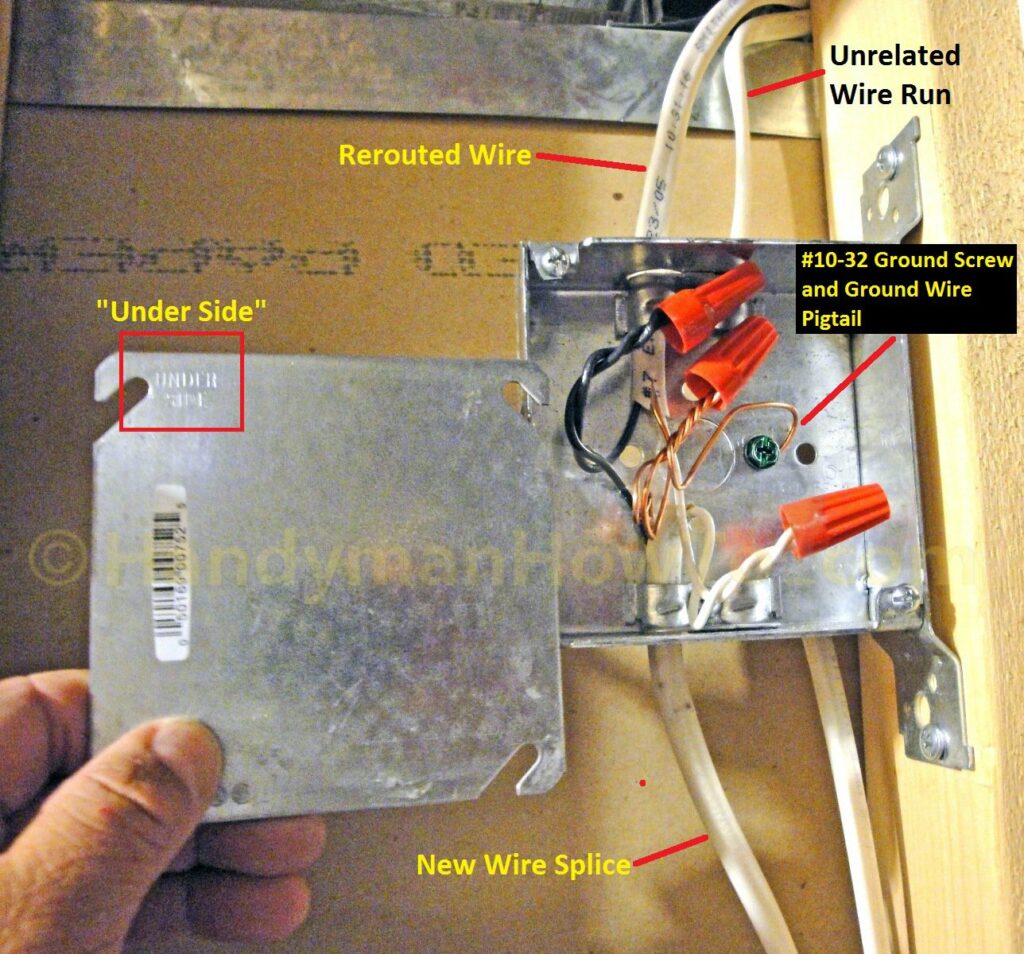
I cut a generous 10 feet length of new Romex NM 14/2 cable for repair wire splice and connected the wires by first twisting the ends together with pliers and securing with wire nuts. The steel box is grounded by installing a #10-32 ground screw and a bare copper wire pigtail tied to the other ground wires. I set the junction box back about 1/4″ from the face of the 2×4 stud in case I decide to install drywall at some time in the future.
Note: Junction boxes must not be concealed; if drywall is ever installed then an access panel is required to reach the junction box.
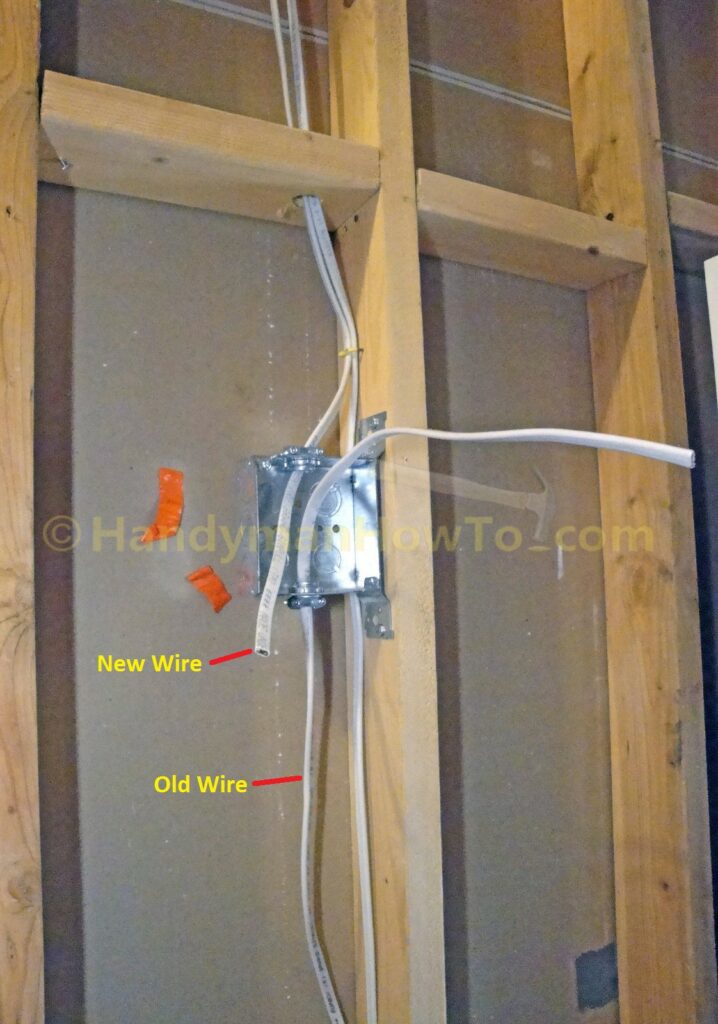
Progress thus far: Upper junction box installed and new drop of NM-B 14/2 electrical wire for the wire splice repair.
The lower junction box is attached to the 2×4 stud and the wires secured with NM cable clamps.
NM-B 14/2 Junction Box Splice Wiring
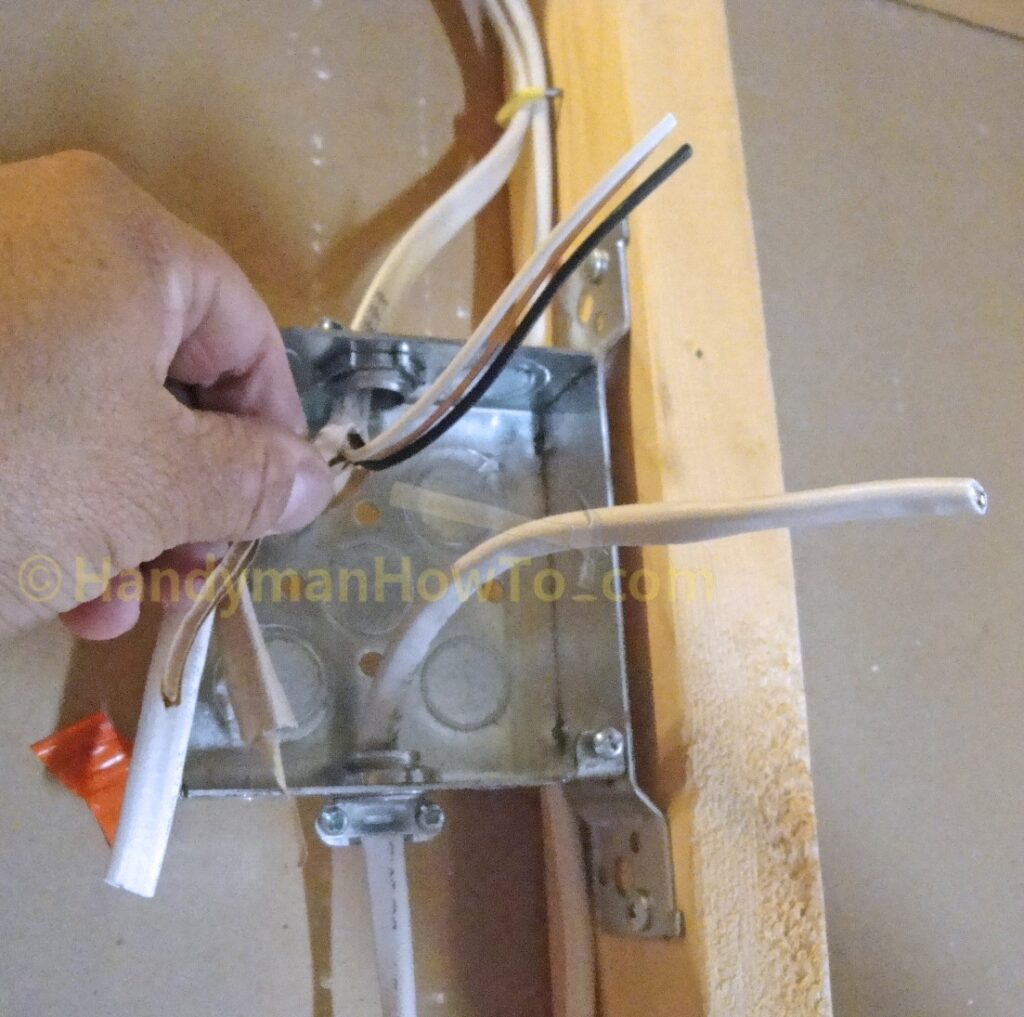
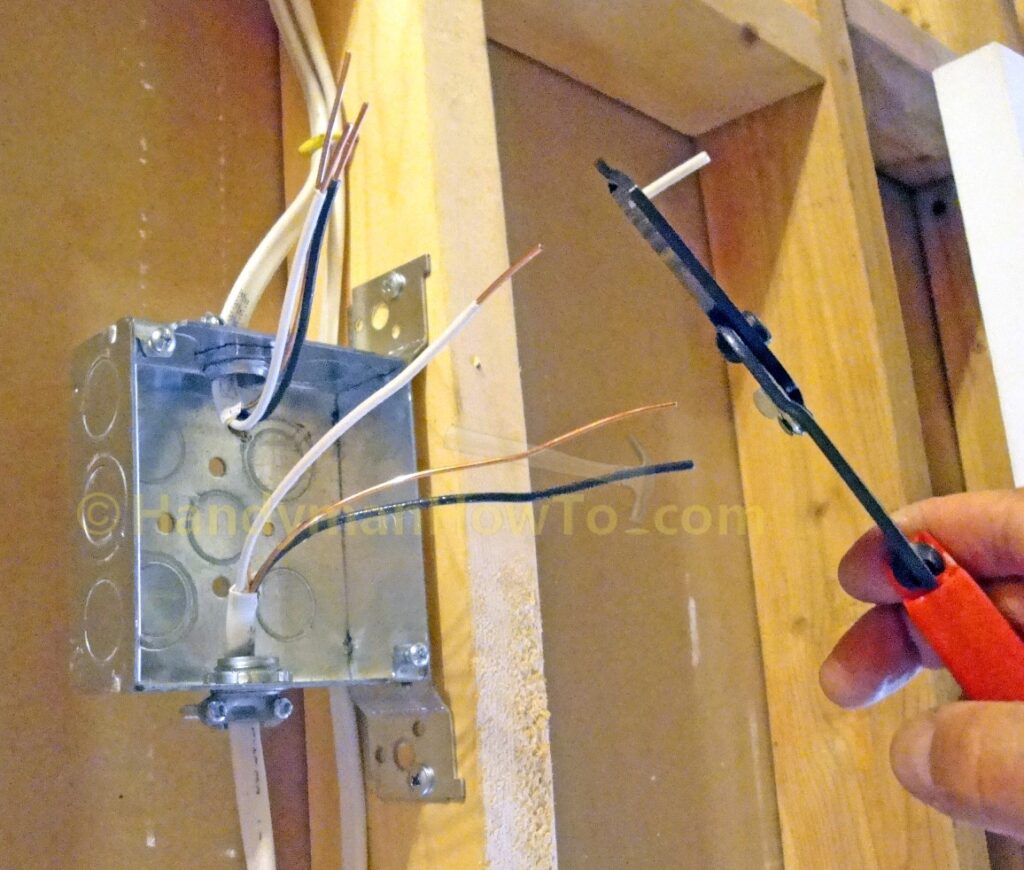
These next steps explain how to wire the junction box. Begin by cutting the two Romex NM 14/2 electrical cables evenly to about 8 inches long as shown:
Strip at least 6 inches of insulation from the wire leads by cutting a 3/4″ long slit in the outer insulation sheath with the utility knife as shown, drawing the knife from the body of the wire towards the end. Per NEC 300.14, all conductors must extend at least 6 inches in the box and at least 3 inches beyond the box.

Pull to peel the outer insulation off like a banana from the NM 14/2 wires, then cut the insulation “peel” off at the base with the knife blade facing away from the inner wires so there’s no chance of nicking the insulation of the hot (black) and white (neutral) wires. The NM-B 14/2 outer jacket must extend at least 1/4 inch past the cable clamps into the junction box.
Using either the utility knife or the wire strippers, remove 3/4″ of insulation from the hot and neutral wires:
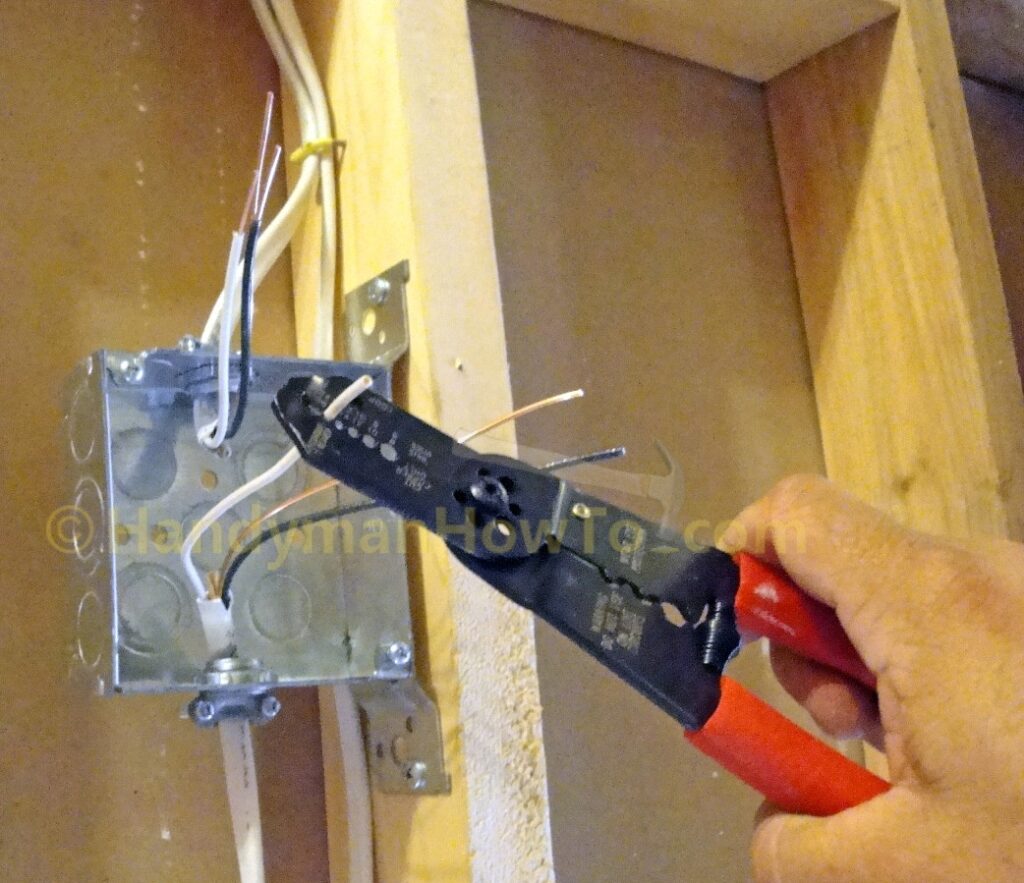
Wire strippers work great, just fit the wire in the 14 gauge slot, close the jaws and pull. A perfect cut every time!
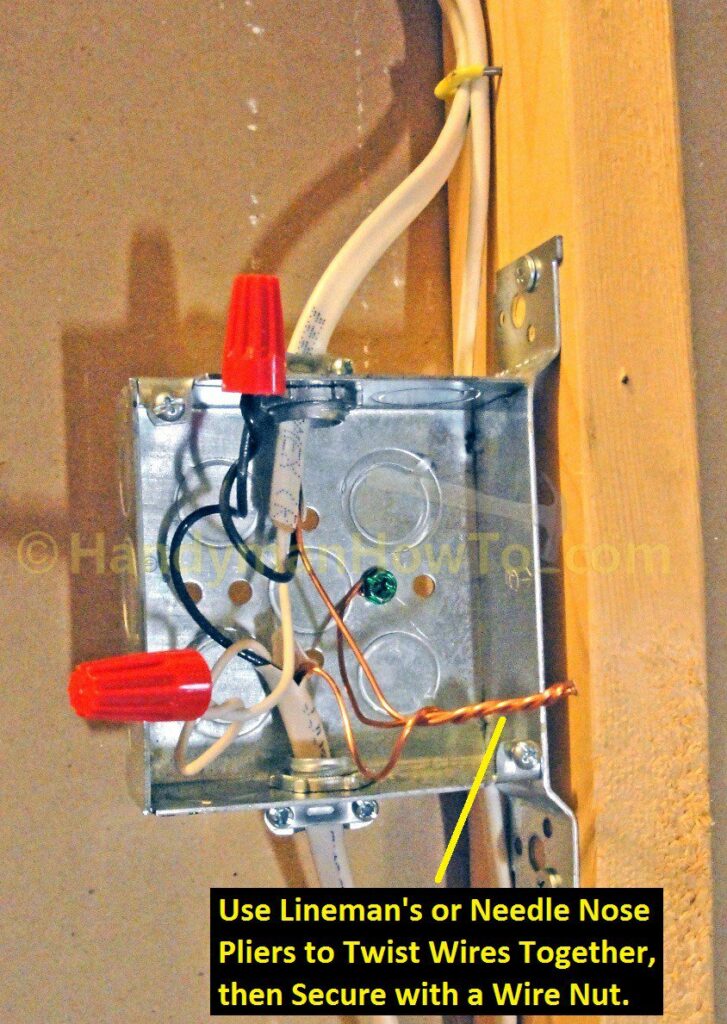
Use the needle nose pliers to twist the wire leads together, matching the hot (black), neutral (white) and ground (bare copper) wires. You should have about 5/8″ of exposed copper wire after twisting the leads together. If the twisted section is too long, snip off the end so it’s 5/8″ long such that the copper conductors are completely covered by the wire nut. The junction box is grounded by installing a #10-32 green ground screw to attach a bare copper wire pigtail that is wire nutted to the other ground wires.
Secure the wires by twisting on a wire nut until tight.
Fold the wires into the junction box as shown, using gentle bends to avoid stressing the wires.
The junction box cover plate attaches with two screws that are provided with the box. Note the cover plate has “Under Side” stamped on the lid to indicate the side that faces the box.
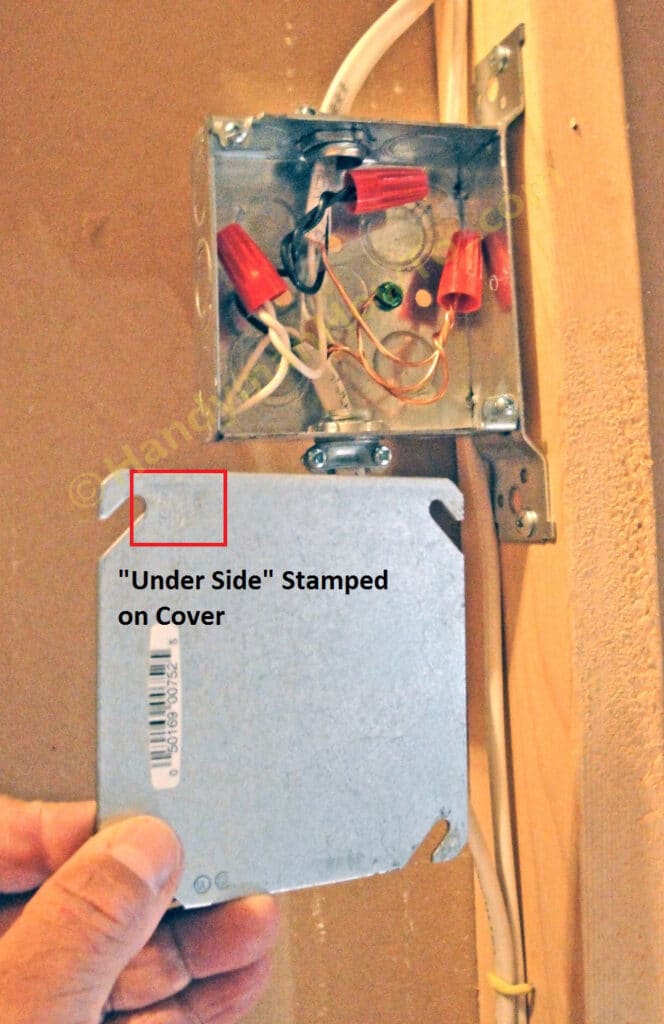
Slide the cover plate on the junction box and tighten the two screws. Cover plates are required by the National Electrical Code.
Electrical Wire Repair Splice
After the junction box wiring is complete turn on the circuit breaker to restore the electricity. Use the non-contact voltage detector to verify the wires are powered. Check that the lights and/or electrical outlets are functioning. If outlets are powered by the circuit, verify the outlets are working and wired correctly with the receptacle tester.
Thanks for reading,
Bob Jackson