How to Wire an Electrical Outlet Under the Kitchen Sink: Install a Ground Fault Circuit Breaker and wire it to the neutral bus bar. This project is continued from How to Wire an Electrical Outlet Under the Kitchen Sink – Part 2.
Ground Fault Circuit Breaker
I bought an Eaton Cutler-Hammer Type BR 20 AMP Ground Fault Circuit Breaker, Part # GFCB120CS, that is approved for my Cutler-Hammer BR3040L200 panel for the new under kitchen sink branch circuit. The Ground Fault Circuit Breaker (GFCB) sells for about $40 at my local home improvement store. It is important to use only circuit breakers that are approved for your panel; check the manufacturer’s label inside the panel door for the types of breakers that match your particular panel.
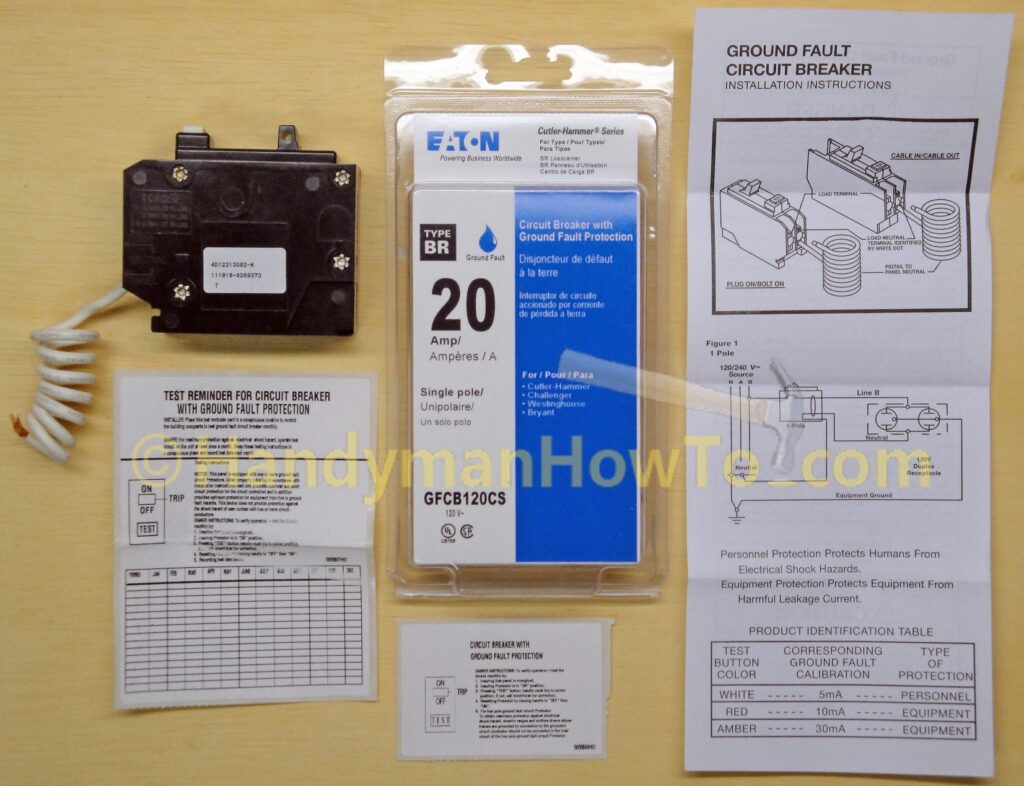
The Ground Fault Circuit Breaker protects the under sink kitchen outlet instead of a GFCI receptacle.
The ground fault circuit breaker (GFCB) is wired differently compare to a standard single pole circuit breaker:
- The branch circuit hot and neutral wires connect to the load terminals on the breaker. Note the white dot painted on the circuit breaker indicating the circuit neutral (white) wire terminal on the right.
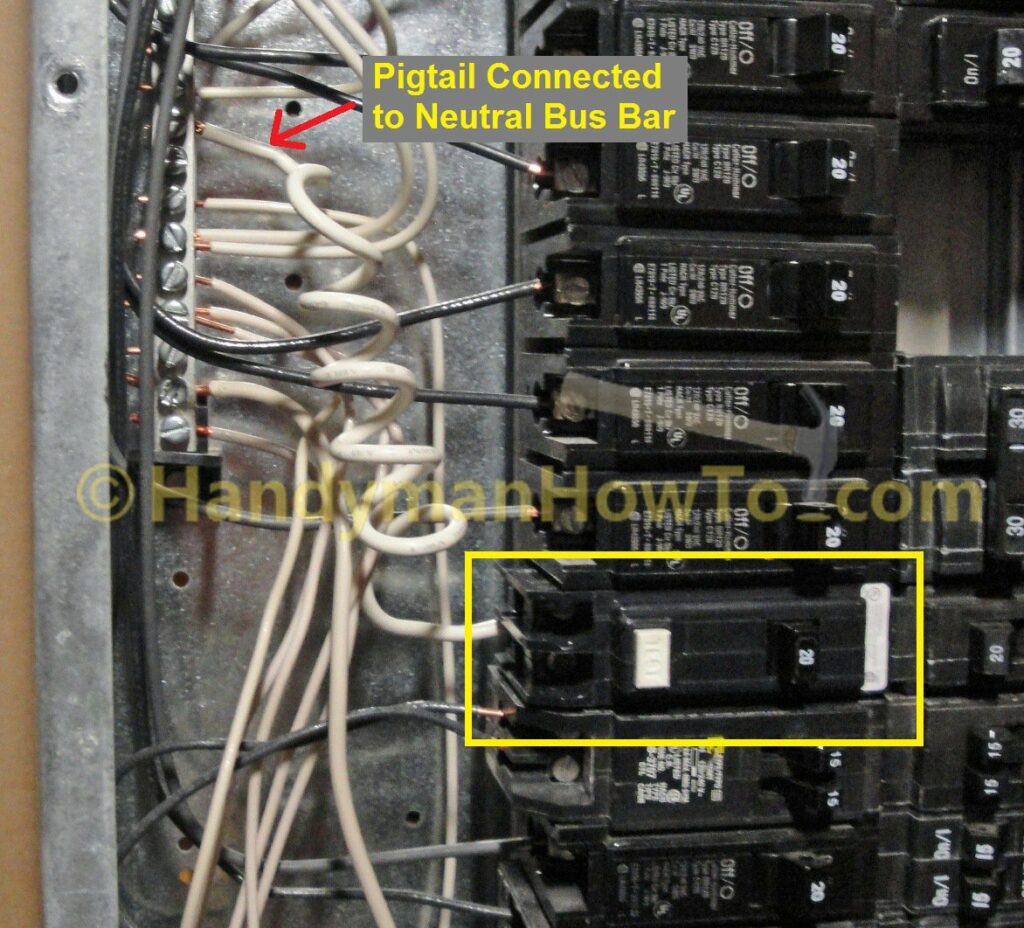
- A white pigtail is built into the GFCB. The pigtail connects to the neutral bus bar of the breaker panel.
15 versus 20 AMP Circuit Breaker
The Waste King Quick & Hot Elite Series Hot Water Dispenser that I’ll be installing pulls 10.8 AMPs. I could have used a 15 AMP ground fault circuit breaker because 10.8 AMPs is a 72% load factor on a 15 AMP circuit, well below the recommended 80% circuit loading in the National Electrical Code (NEC).
So why install a 20 AMP circuit breaker instead of a 15 AMP breaker? It’s mainly a personal preference because I wanted a dedicated 20 AMP outlet in the kitchen. A 20 AMP circuit would be convenient if I wanted to run a heavy power tool in the future, just unplug the hot water dispenser and run an extension cord to whatever I’m doing.
Comparing the 15- versus 20 AMP branch circuits:
- The price of the 15 AMP and 20 AMP ground fault circuit breakers are the same.
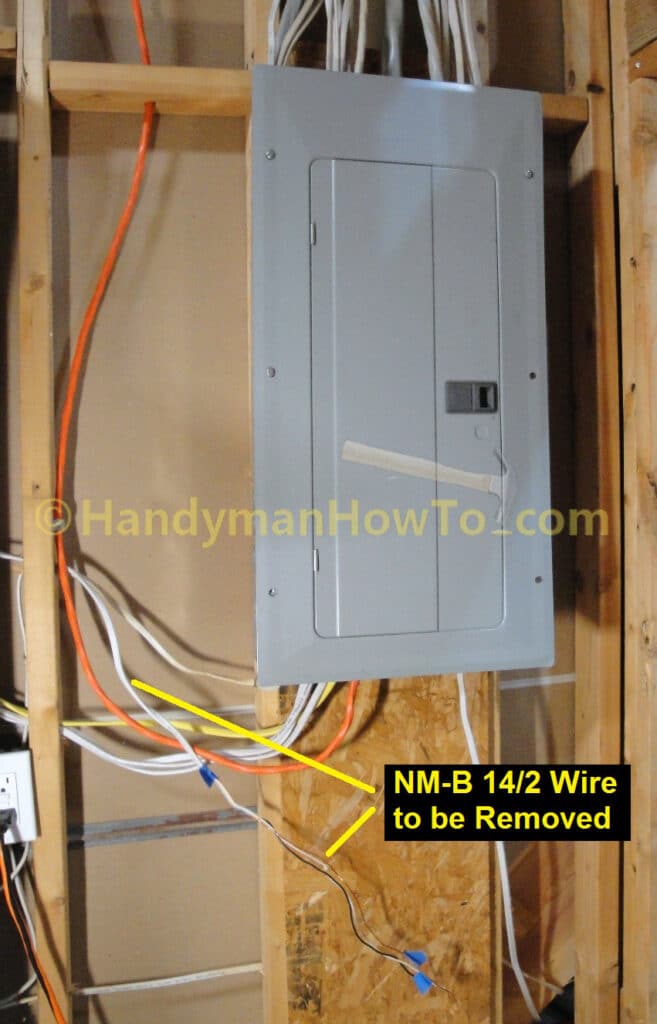
- A 50 foot roll of NM-B 14/2 wire costs about $19 and can be used with a 15 AMP breaker.
- A 50 foot roll of heavier gauge NM-B 12/2 wire costs about $32.50 and is required with a 20 AMP breaker.
- NM-B 12/2 cable is stiffer and heavier compared to 14/2 and a bit more difficult to work with.
- The 20 AMP rated Leviton single receptacle is only 50 cents more expensive than the 15 AMP rated model.
The 20 AMP circuit is about $13.50 more expensive in materials compared to a 15 AMP outlet, mostly due to the cost of the copper wiring.
As a homeowner I don’t mind the extra $13.50 for a 20 AMP upgrade. A home builder or electrical contractor sees it quite differently because $13.50 equals a 33% increase in material cost for something most people won’t care about.
Wire a Ground Fault Circuit Breaker
Reminder – the service disconnect switch at the electric meter box is in the OFF position to kill the power to the entire house and circuit breaker panel. Do not attempt to install a circuit breaker in a panel when the electricity is on because this can result in arcing or electrocution! I am working by the light of a battery powered lantern in the following photos.
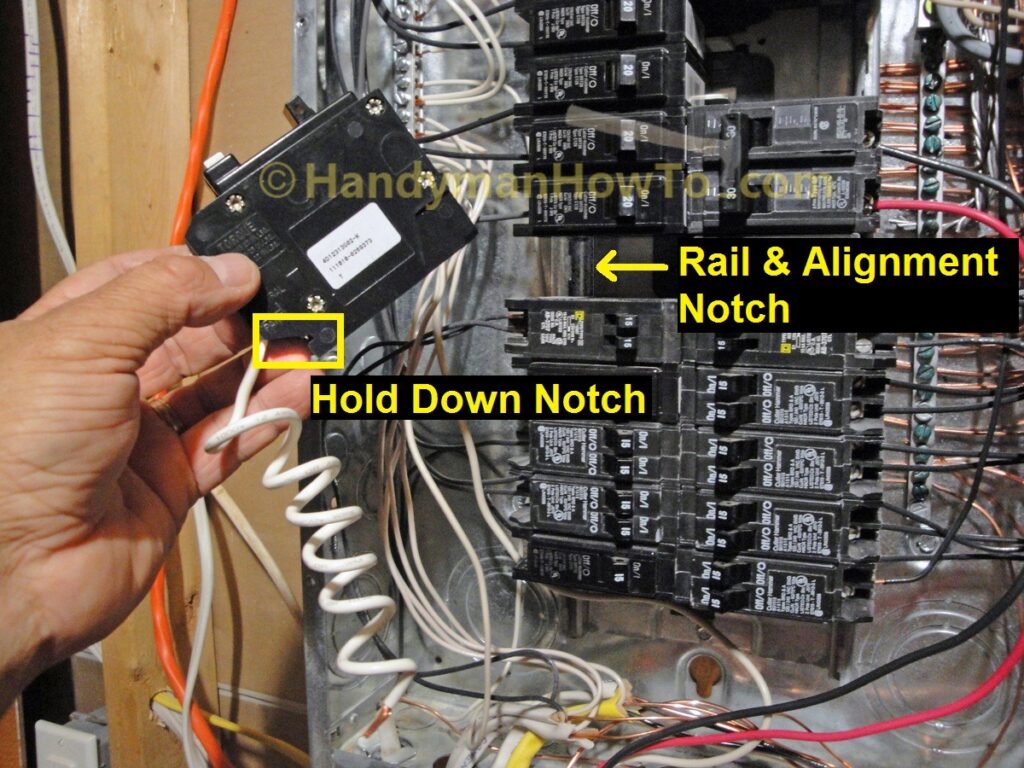
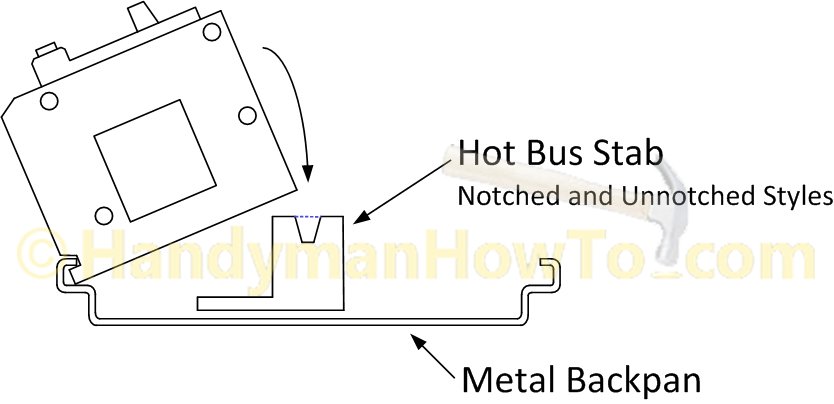
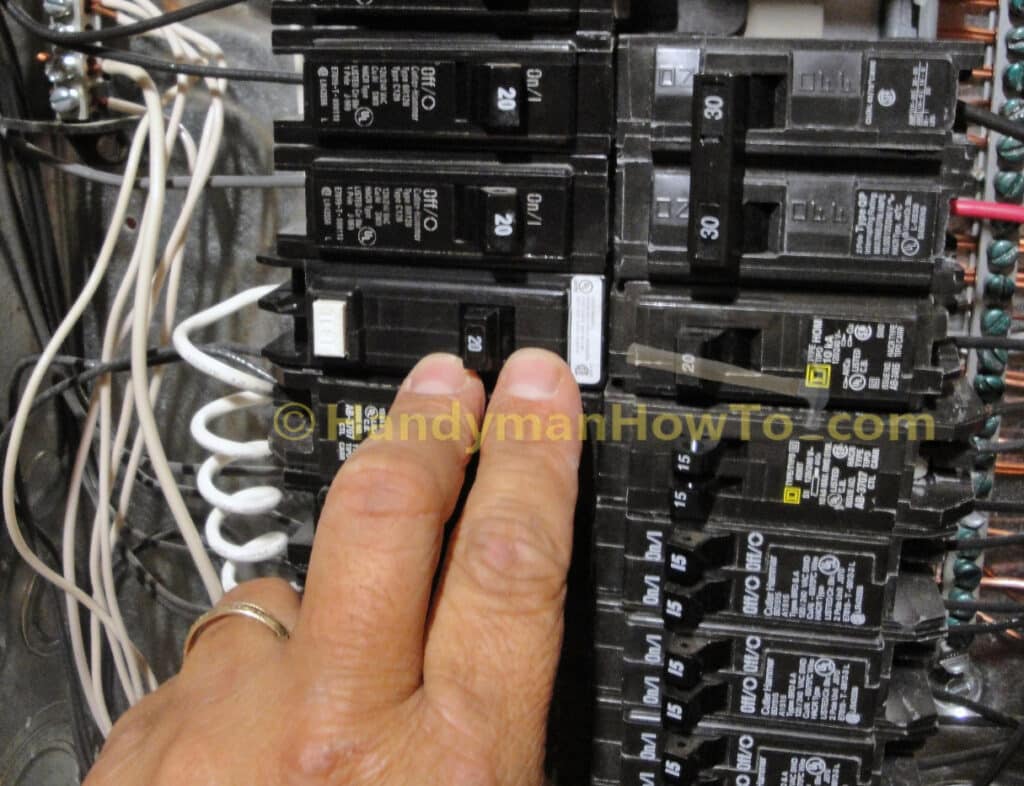
Circuit breakers have a hold-down notch that engages the outside rail of the metal backpan. This notch or “toe” of the breaker is inserted at an angle to engage the rail and the breaker is pressed down on the hot bus stab to secure it in place.
This diagram illustrates how the circuit breaker is installed in the panel:
Slide the circuit breaker in the panel so the toe engages the outside rail:
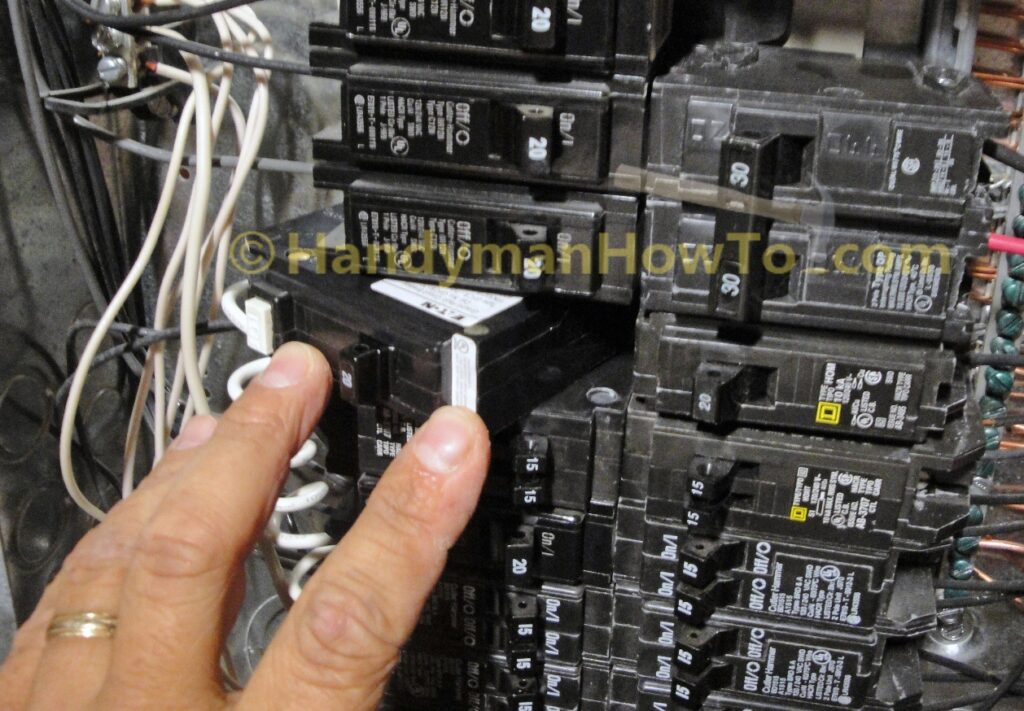
Press the circuit breaker down firmly to secure it on the hot bus stab:
The neutral (white) pigtail of the GFCB is inserted in the empty position where the neutral wire from the old branch circuit was removed then the hold-down screw is tightened to secure the wire. The manufacturer’s label on my panel says to torque the “wire pressure screws” for 14 to 10 gauge wire to 20 lb-in. This is tighter than you may think such that the wire and screw doesn’t become loose over time should the wire get hot under load – metal expands and contracts with heat and cold. Use a torque wrench if you’re uncertain.
There’s nothing more to do in the circuit breaker panel until the old branch circuit NM-B 14/2 cable is removed and I’ve fished new 12/2 cable to the circuit breaker panel. I therefore:
- Reattached the circuit breaker panel cover and door for safety.
Don’t work around an energized open panel! Protect yourself and the family – put the panel cover back on. - Turned the power back ON at the service disconnect switch at the electric meter.
I double checked the old NM-B 14/2 cable with my non-contact voltage detector to ensure the cable was dead because it may be wired to another circuit that I’ve missed and electrified. The cable was indeed dead and safe to work on.
This project is continued in How to Wire an Electrical Outlet Under the Kitchen Sink – Part 4.
Thanks for reading,
Bob Jackson