This project shows how to jack up a wood deck and install a sister block to repair an unsupported beam splice (or rim joist splice) made next to the 6×6 deck post. This project is continued from How to Repair a Sagging Wood Deck.
How to Sister a Wood Deck Post for Beam Splice Support
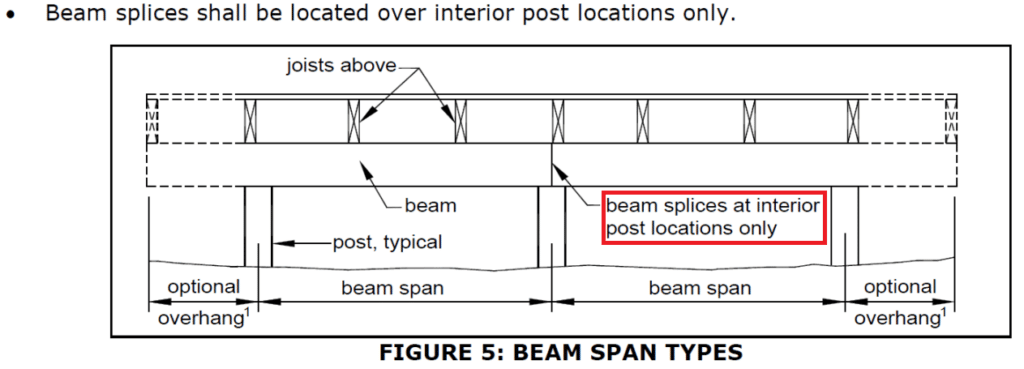
In the previous part of this project series I explained the problems with the sagging wood deck and how the 2×10 rim joist splice was unsupported and slipping down the side of the 6×6 deck post. This is a major structural problem that could cause the deck addition to collapse. The Georgia Amendments Prescriptive Deck Details based on the 2012 International Residential Code states “Beam splices shall be located over interior post locations only”:
Short of tearing down and rebuilding the deck addition made by the builder, the other way to fix this is to install a sister block (a.k.a. “cleat”) against the 6×6 deck post to provide a ledge to support beam splice. Because the rim joists have slipped, I’ll have to jack up the deck before to sistering the wood deck post.
How to Build a Wood Deck Jack Post
I measured and fabricated a jack post out of 2×6 and 2×4 kiln dried lumber fastened with 3 inch wood deck screws:
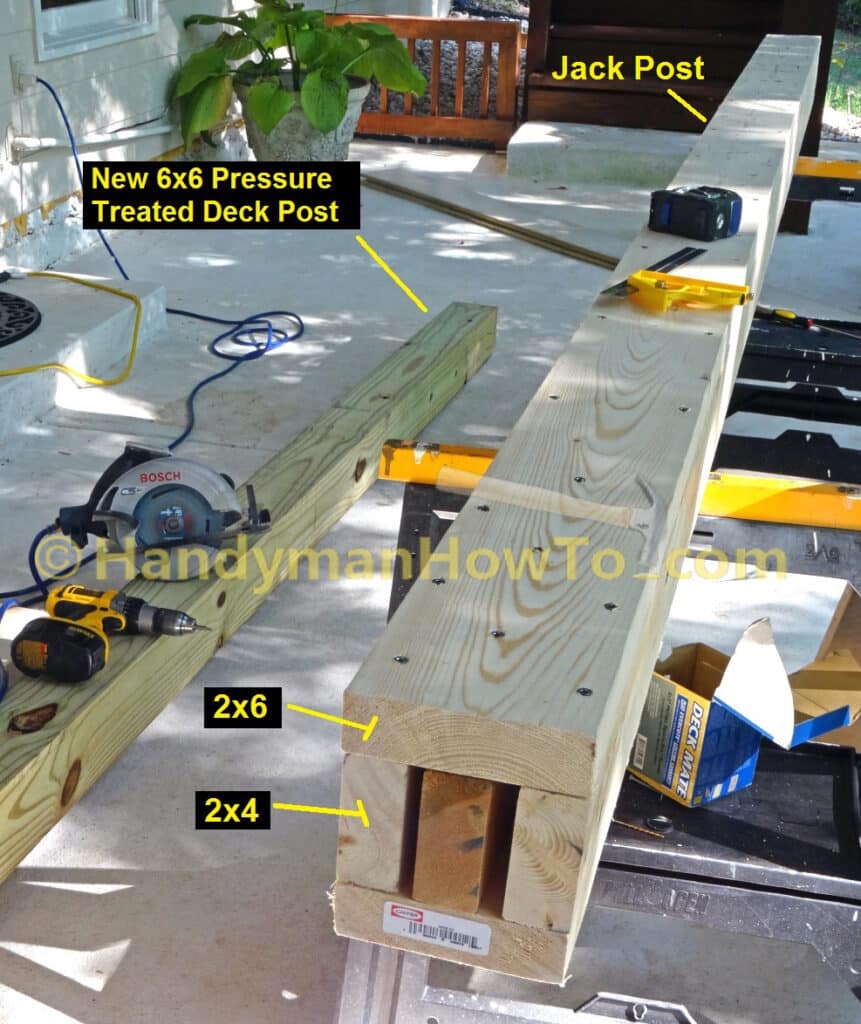
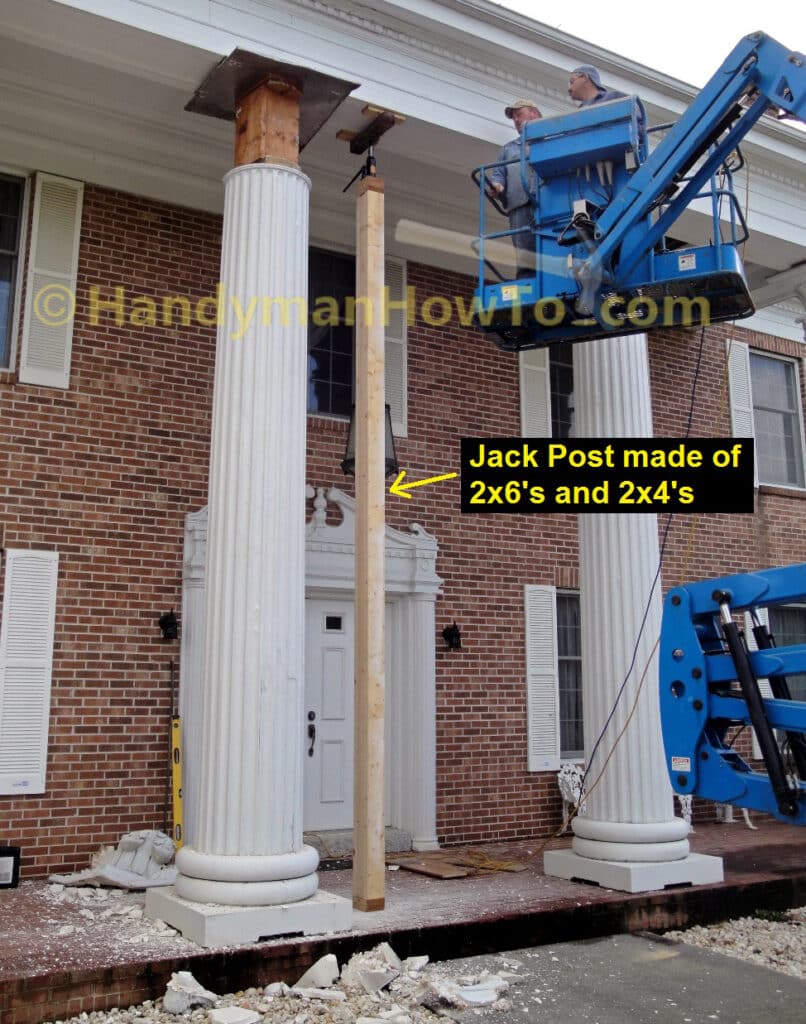
I borrowed the jack post construction method from how my father (a retired Mechanical Engineer) made his jack posts when we replaced the colonial columns on his house. This proved to be a stiff and strong design.
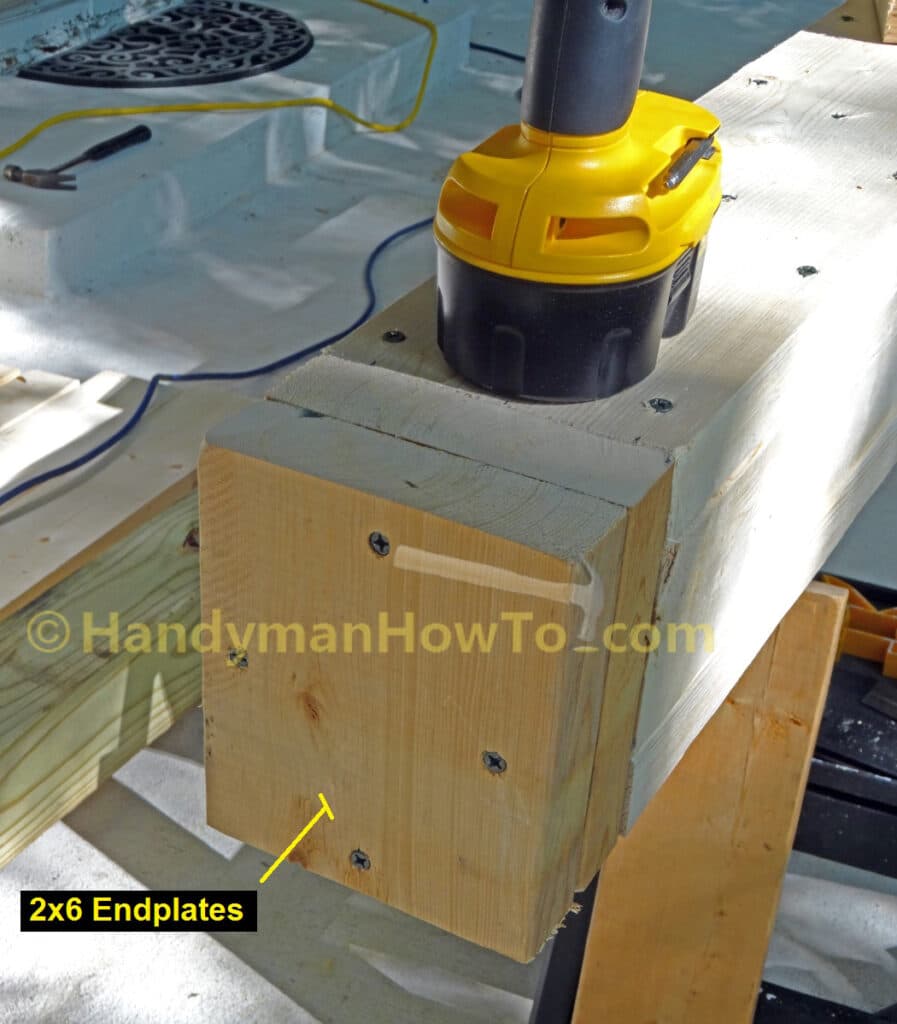
Several 2×6 end caps are fastened to the jack post for several purposes:
- To provide a base for the hydraulic bottle jack and bottom support.
- To distribute the load across the post members.
- To allow for some adjustment of the overall length if I need to add or remove an end plate.
Take care to alternate the screw patterns between the corners and centers (shown here) from one end cap to to the next to avoid fastener collisions:
Field Treatment with Copper Naphthenate Wood Preservative
The deck building code requires:
“Field cut ends, notches and drilled holes of preservative treated wood shall be treated in the field in accordance with AWPA M4”.
AWPA M4 further states:
“As a best practice, drilled holes and cut ends need to be treated with a preservative, such as copper naphthenate or oxine copper“.
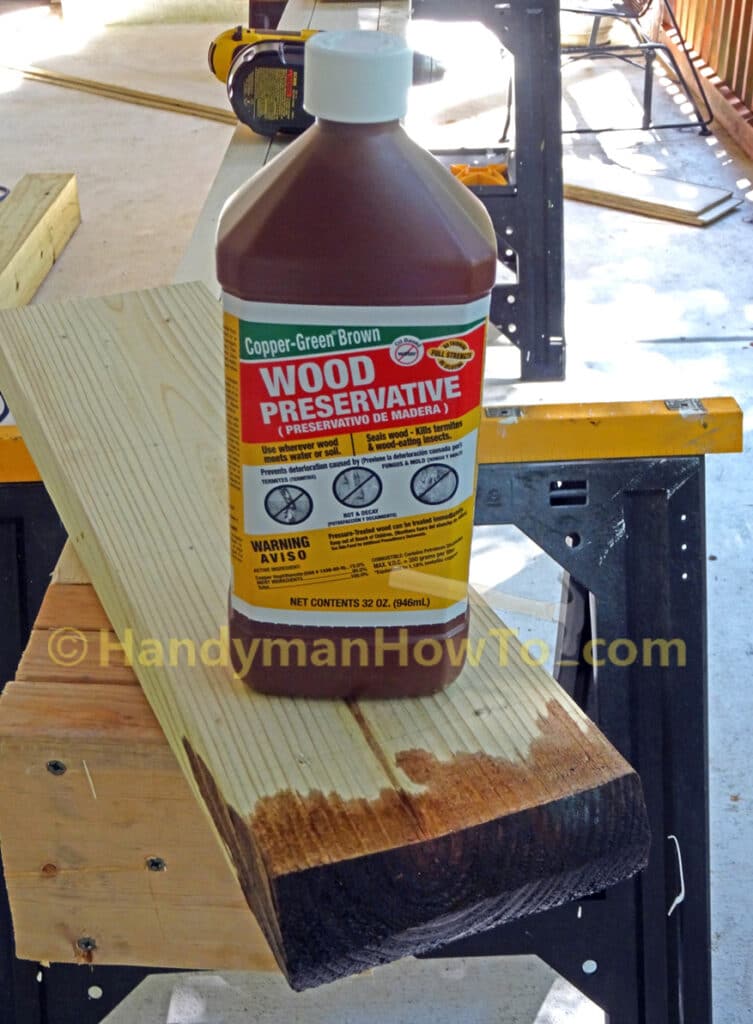
Copper-Green Brown Wood Preservative contains 10% copper naphthenate and is a oil-based product that can be brushed on the wood cuts. Copper-Green Brown smells similar to tar and the odor dissipates after a couple of days. The wood can be painted or stained after Copper-Green Brown is dry.
I sawed a #2 Pressured Treated Southern Yellow Pine 2×6 inch board and beveled the end for a drip edge to make the sister block, then brushed on several coats of Copper-Green Brown wood preservative on the cut end:
Raise the Wood Deck with a Hydraulic Bottle Jack
Caution: This part of the job can be dangerous if done incorrectly could result in property damage, injury and/or death. Your situation may be different and it’s extremely important your deck is structurally stable to avoid a collapse. Please consider hiring a professional deck builder if in doubt.
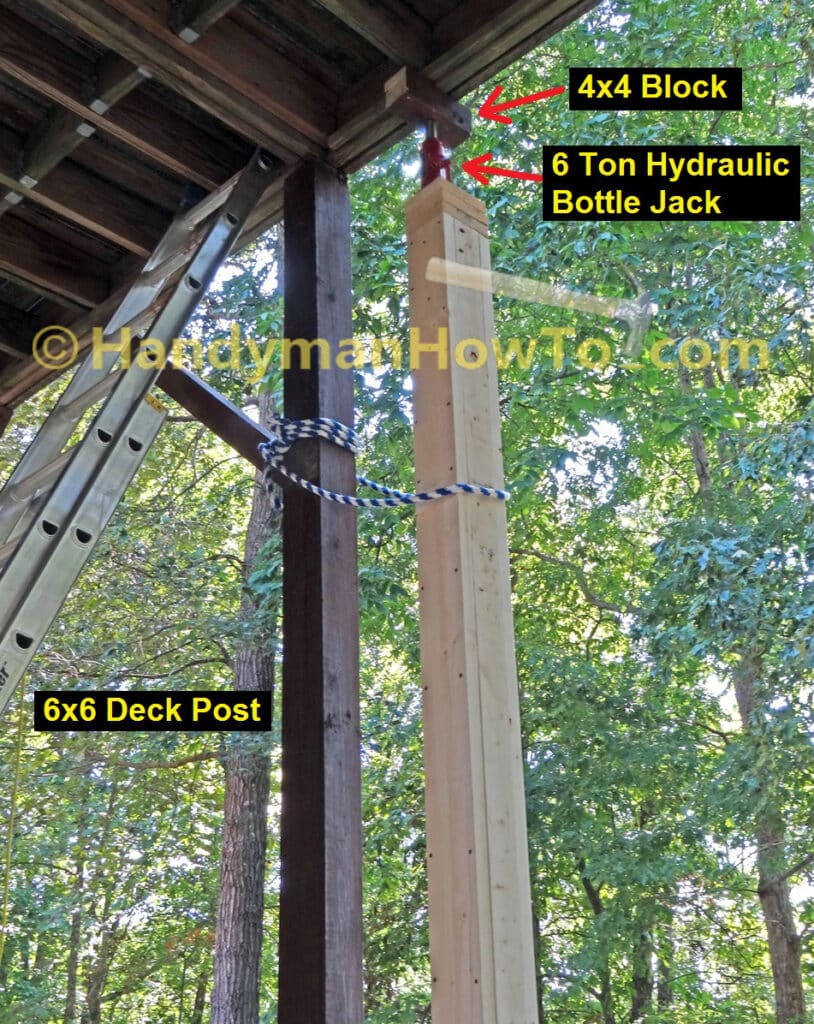
The 2×10 rim joists (a.k.a. “deck beams”) have slipped below the top of 6×6 deck post and must be raised before I can install the 2×6 sister block support. Working with a helper:
- We stood up the jack post and tied a safety rope around the 6×6 post to prevent the jack post from falling if something went wrong.
- Placed the Torin 6 ton hydraulic bottle jack on the center of the jack post.
- The jack post must be plumb and centered under the 2×10 joists.
- Your helper on the ground will be holding the jack post steady until a load is put on the jack and must keep their eyes on the jack to get out of the way should the jack or jack handle fall. Once you start jacking, the helper will stand far back in the clear.
- Set a 4×4 block with a pocket hole drilled to accept the bottle jack saddle (i.e. the top of the jack piston).
I set the jack post about 14 inches or so away from the 6×6 deck post so I’d have room to work when mounting the sister block:
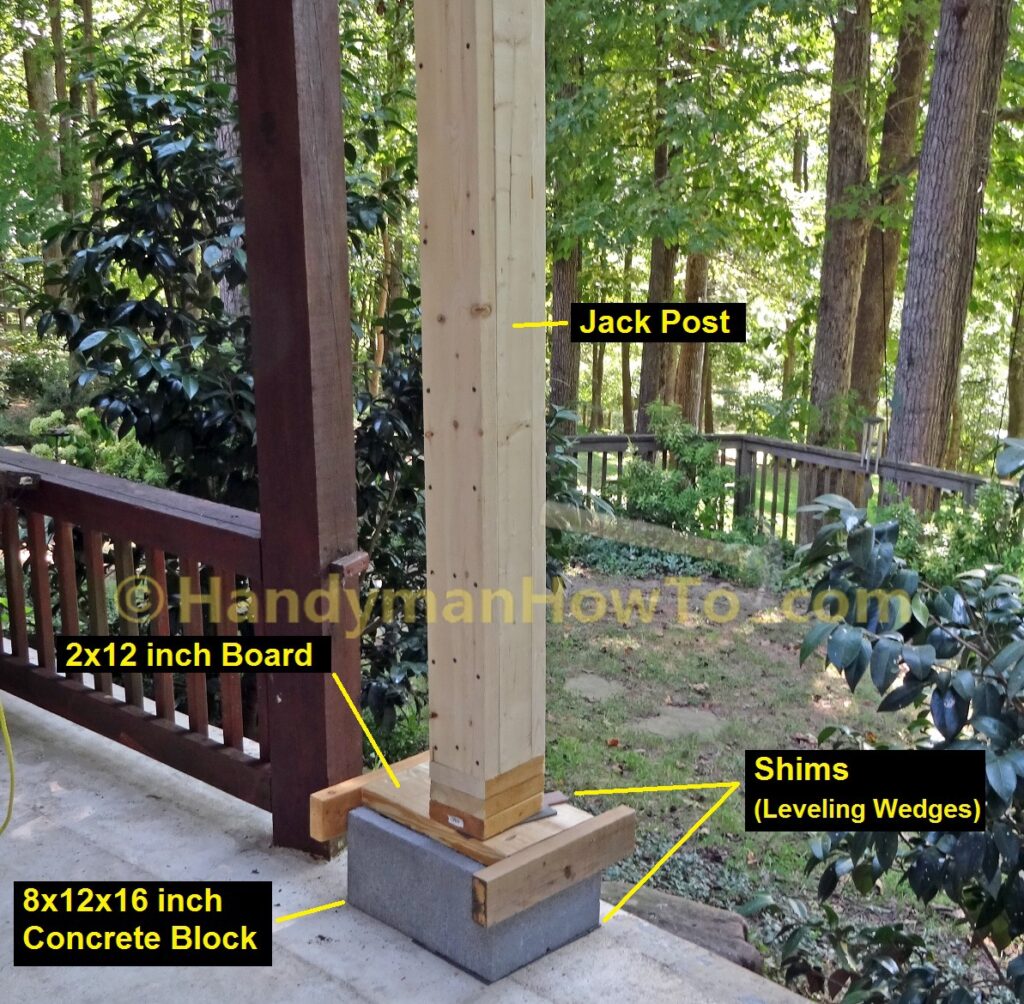
I made the jack post shorter than the 6×6 deck posts because the height of the deck varies above ground level and I’ll use the deck post in several places while rebuilding the deck. It’s necessary to also leave room for the 6 ton hydraulic jack, which has a minimum height of 8-1/2 inches with the piston retracted and a total lifting height (include the adjustable screw) of 7-3/4 inches.
The jack post is set on a 8 x 12 x 16 inch cement block and a 2×12 board with 2×4 end braces. The 2×12 fit very snug over the cement block. Shims were added to level the cement block and jack post because the patio slab is sloped for drainage:
Sister the 6×6 Wood Deck Post
Jacking up the deck with the 6 ton bottle jack was surprising easy and took very little effort. I jacked slowly while checking the deck for any signs of unexpected movement or pulling away from the ledger board.
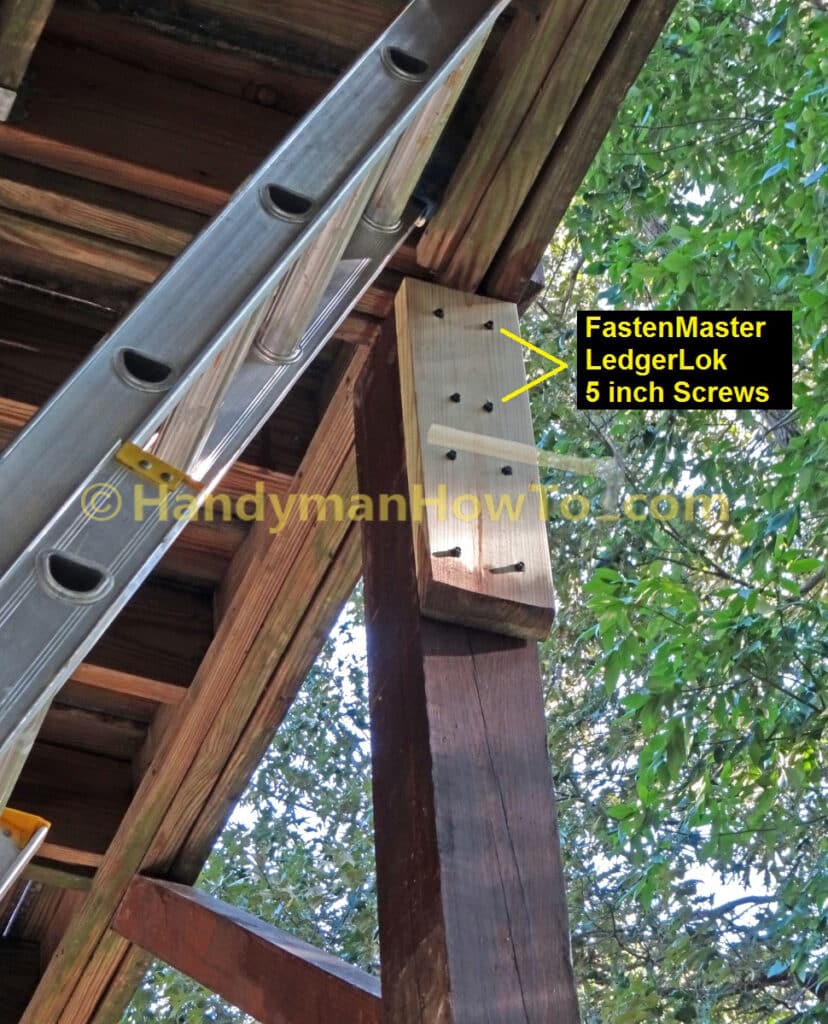
I raised the deck until the 2×10 rim joists were about 1/4 inch higher than the top of 6×6 deck post, then fastened the 2×6 sister block (cleat) to the 6×6 deck post with eight (8) of the 5 inch long FastenMaster LedgerLok structural wood screws which have “Stronger design shear values than 1/2 inch lags“. I drilled 1/8 inch pilot holes in the sister block to prevent splitting. The screw pattern is staggered so if a crack were to develop in the 2×6 sister block it wouldn’t propagate to the other LedgerLoks. Driving in the LedgerLoks was fairly hard into the 6×6 deck post and I had to use a socket and wrench.
After installing the sister support block, I gently lowered the jack and removed the jack post:
Fortunately (or maybe unfortunately) the 2×10 rim joists are fastened to the 6×6 deck posts with smooth shank 16 penny nails, which sank bank into the deck post when I lowered the jack.
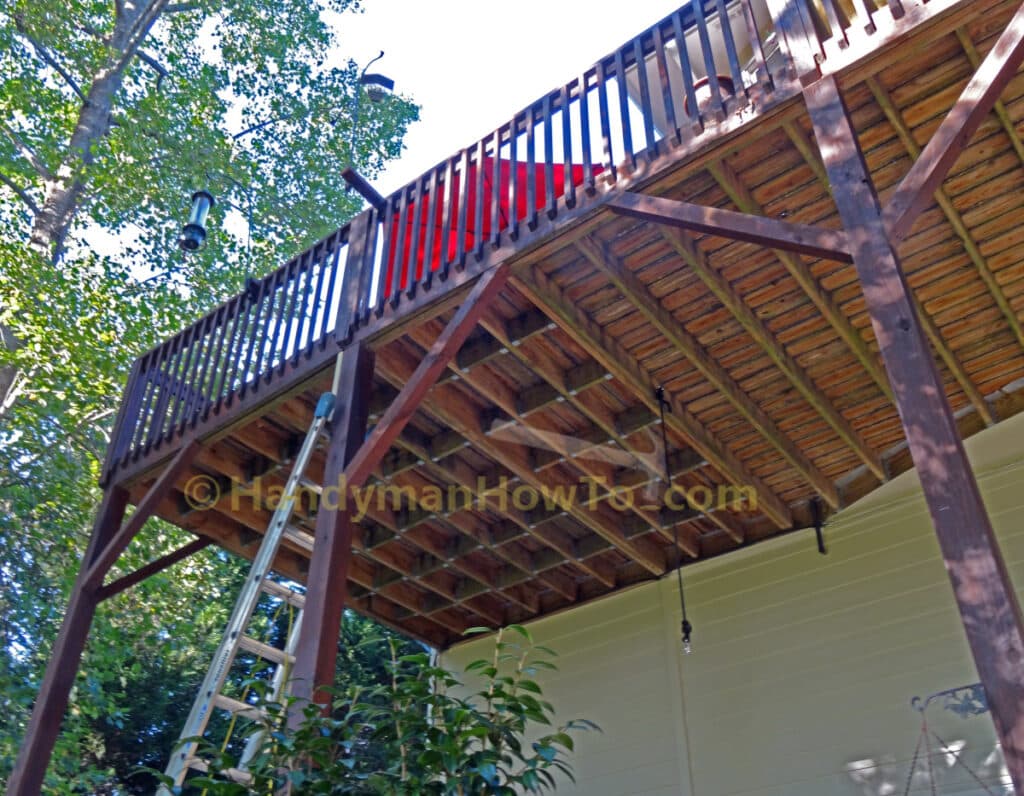
The new sister support block can be seen at the top of the ladder. The 2×10 rim joists now rest upon the 1-1/2 inch wide ledge of the sister block.
A beam requires a minimum of 1-1/2 inch bearing support at the ends, which is met by the 2×6 cleat. An alternate approach would be a 4×6 inch sister block (cleat) fastened with several 1/2 inch through-bolts with nuts and washers to the 6×6 deck post for a beefier looking solution. The 4×6 lumber would provide a 3-1/2 inch wide ledge for the 2×10 rim joists to rest upon. (Recall a 4×6 actual size is 3-1/2 x 5-1/2 inches). I felt a 4×6 cleat was unnecessary for the 8 foot long rim joists in question at the left end of the deck in the above photo. Also, if the deck were to somehow separate more than the 1-1/2 inch width of the 2×6 sister block then I have much greater problems!
This project is continued in How to Pull Together a Sagging Wood Deck.
Be safe,
Bob Jackson