Concrete Slab Crack Repair photo tutorial. Apply Emecole 555 mixed with sand followed by finish grinding. This project is continued from Concrete Slab Crack Repair – Part 1.
Table of Contents
- How to Repair a Cracked Concrete Patio
- Surface repair technique with concrete repair caulk.
- How to Repair a Cracked Concrete Patio – Part 2
- Concrete Slab Crack Repair
- Large crack structural repair with polyurea resin and sand for a hard durable surface.
- Concrete Slab Crack Repair – Part 2 (this project)
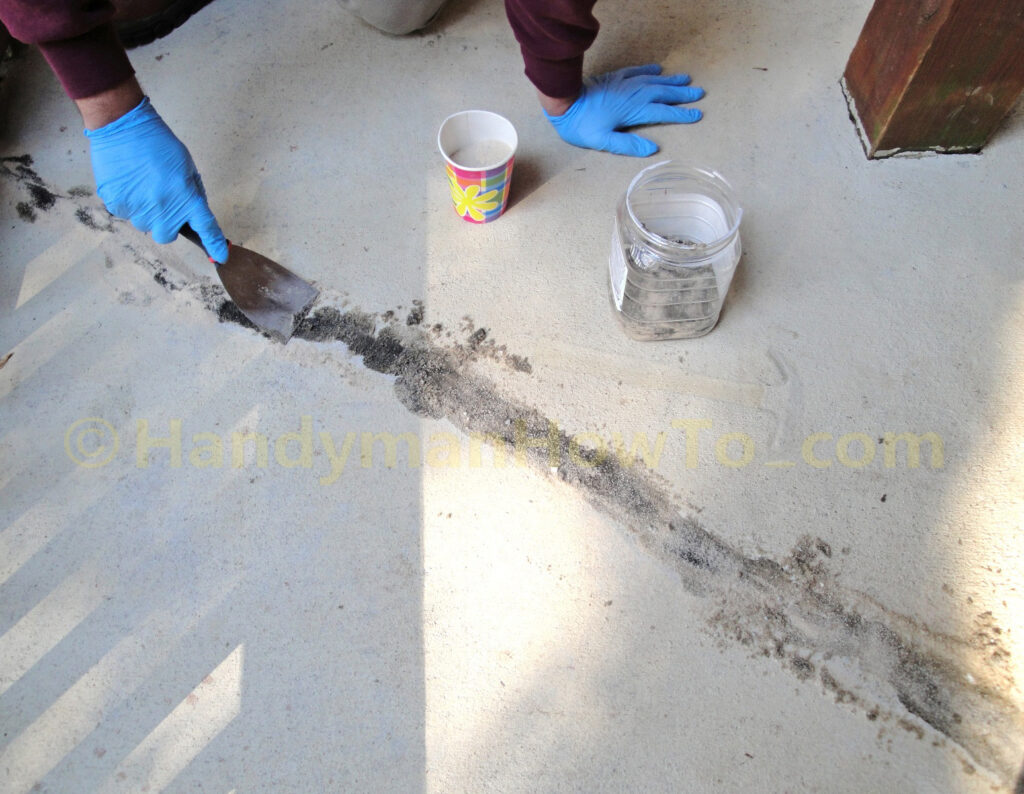
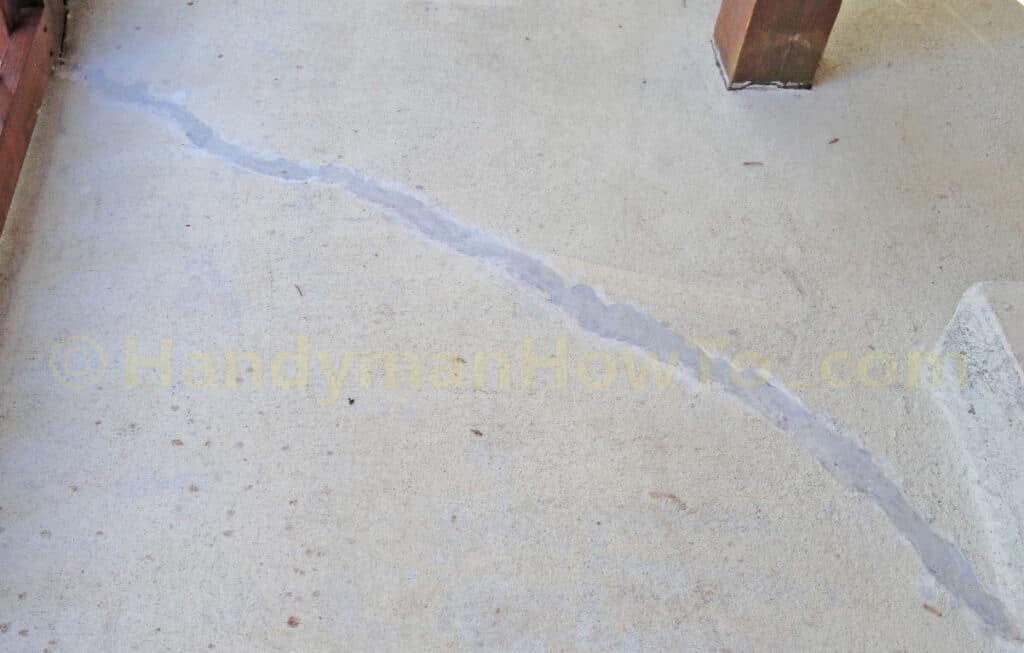
The crack in the outside corner of the patio slab was filled with sand to within 1″ of the surface forming a channel to hold the Emecole 555. Some run out from the side of the slab occurred, but not so much that I though it too wasteful.
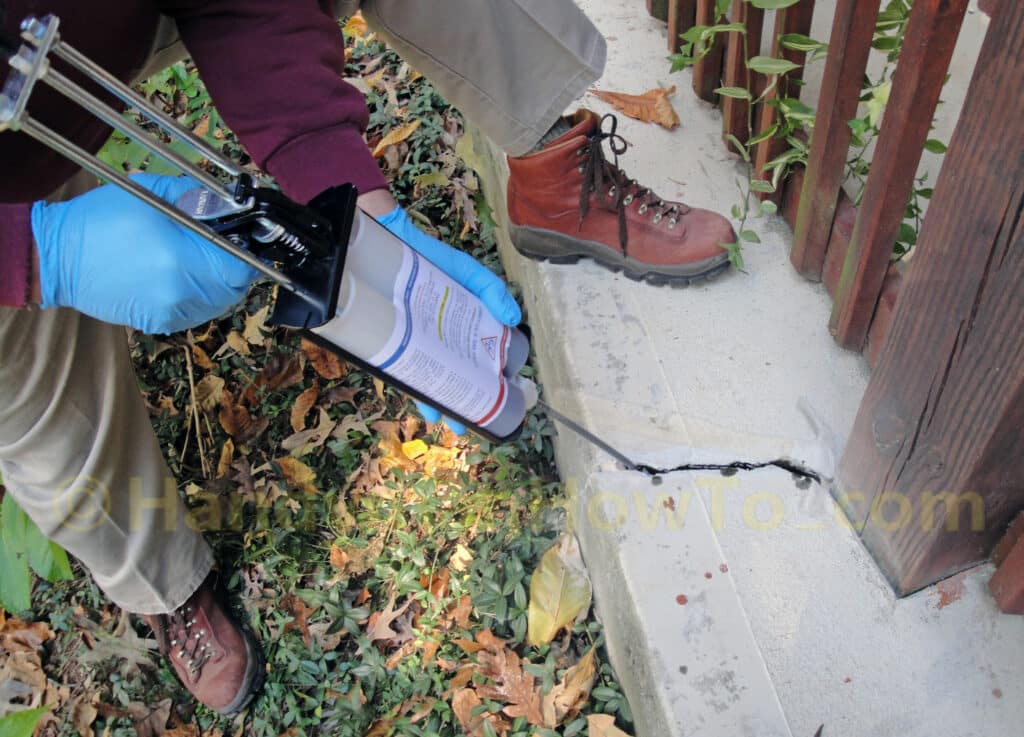
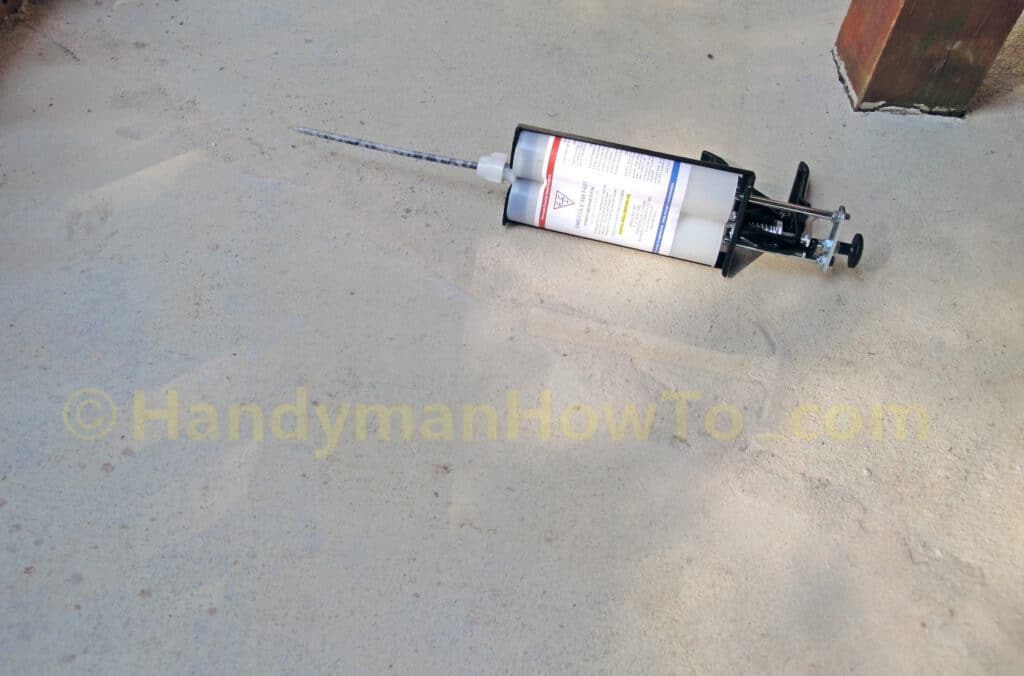
I made three passes over the crack, refilling the channel with the Emecole 555 as the material soaked into the crack. A cartridge of Emecole 555 is normally good for 100ft to 200ft of narrow cracks. I emptied over half the cartridge into a 7 foot long, wide and deep crack in the 6″ to 10″ thick concrete slab.
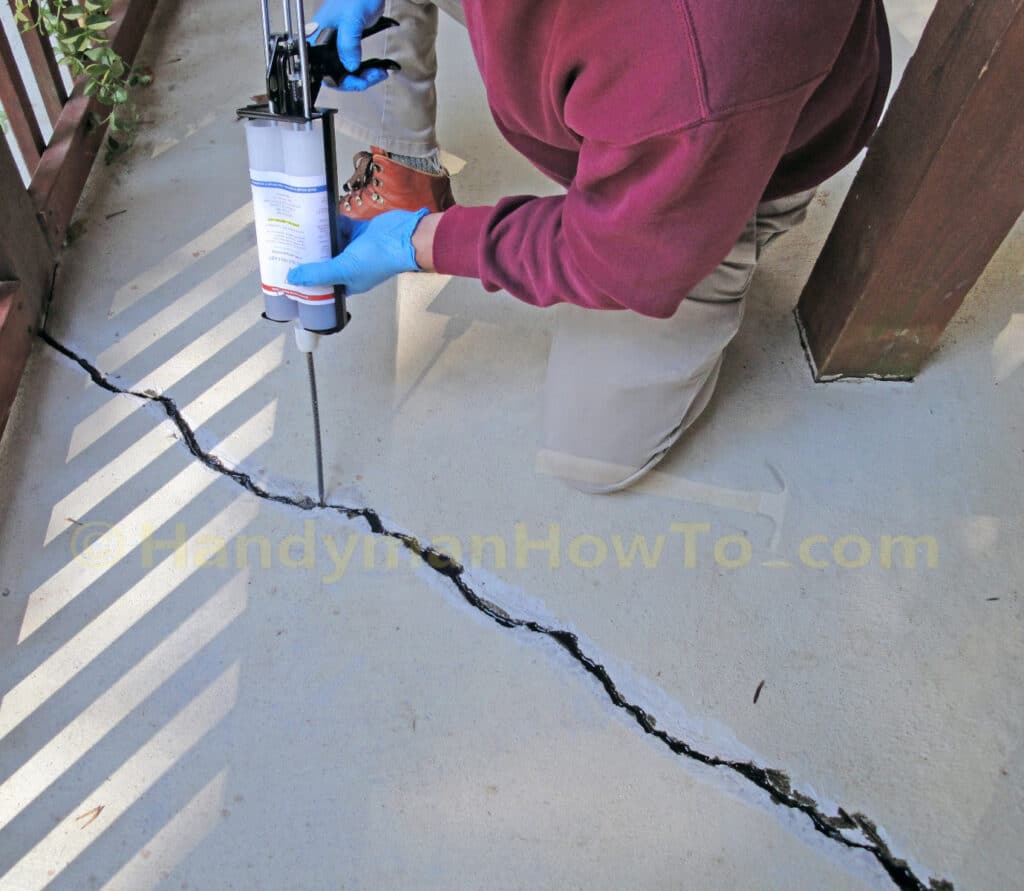
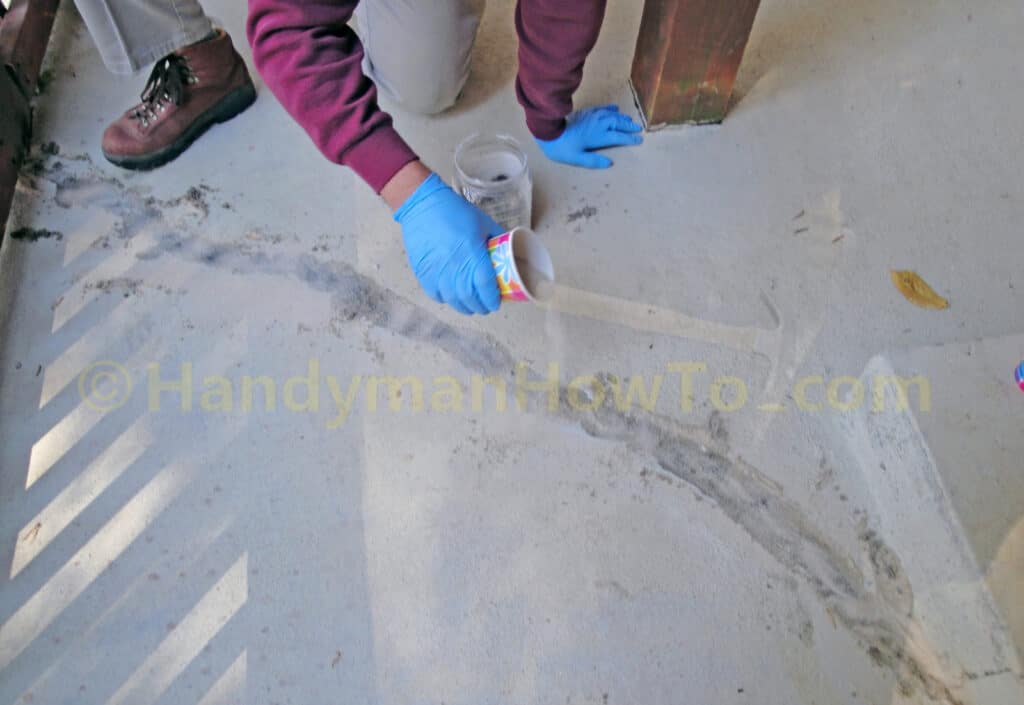
The concrete crack was topped off with more sand to soak up the Emecole 555 and bring it even with the slab.
Several more passes of Emecole 555 were applied to the top coat of sand. It was better to make several light passes so the Emecole could soak into the sand, rather than a single heavy pass that would largely run off.
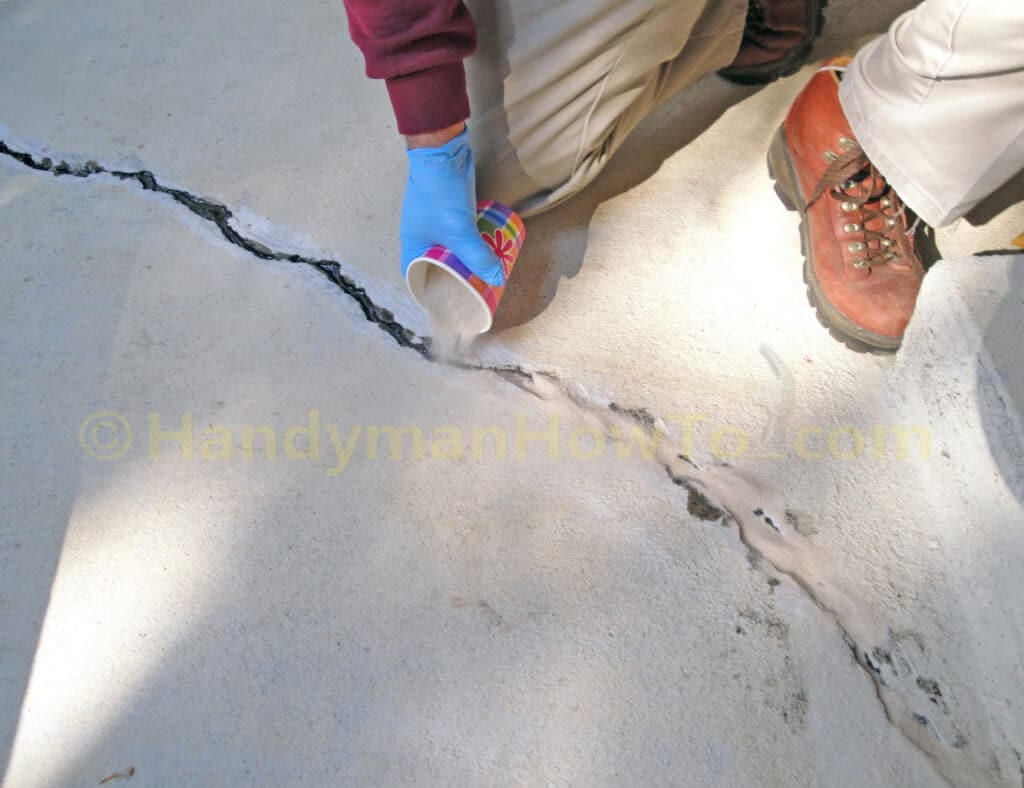
The crack was beveled off and tailored with a putty knife. The Emecole and sand forms a grout like mixture that was smoothed down for an even transition between the uneven slabs. Excess grout is tossed in the plastic jar. I packed some of the wet grout into the vertical crack along the edge of patio slab (see the first photo on this page).
A light dusting of sand is spread over the curing Emecole 555 after scraping up the excess with the putty knife.
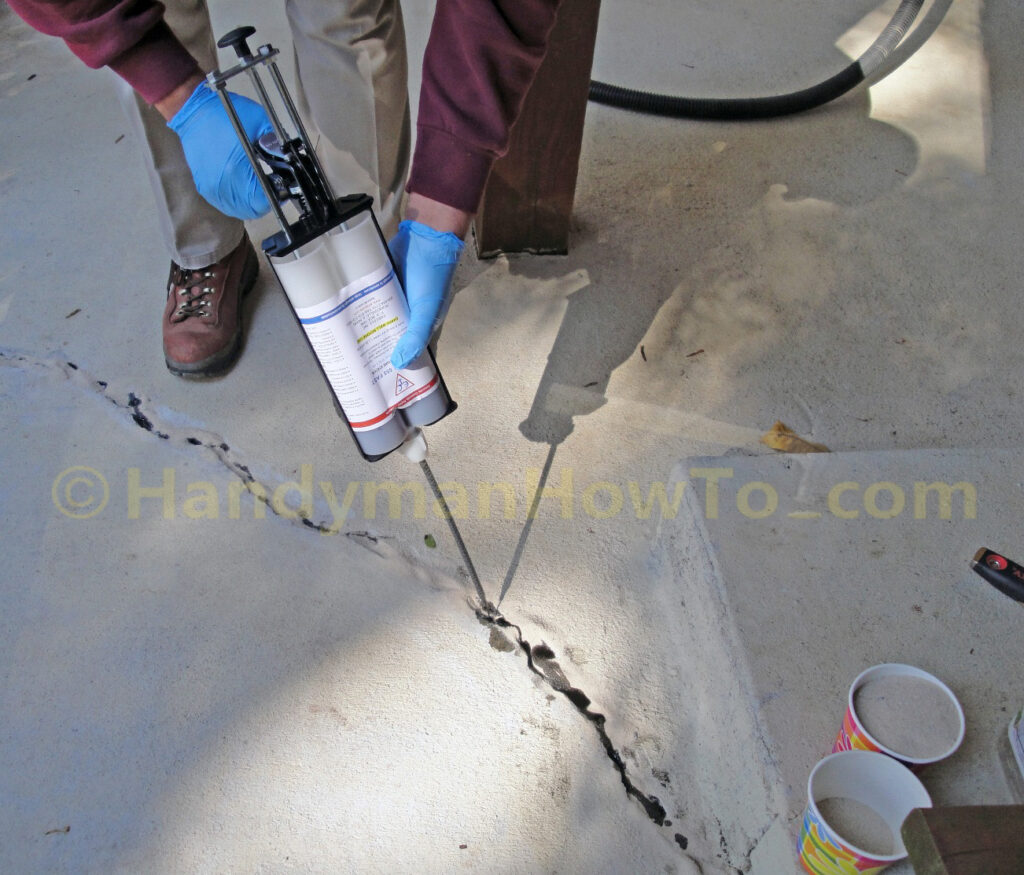
I used the entire cartridge of Emecole 555 to fill this wide and deep crack.
Emecole 555 Finish Grinding
The outside temperature was 48 degrees and dry on this early November afternoon. The Emecole 555 gelled within a few minutes, but took longer to fully cure and harden as judged by the Emecole sand/grout I saved in the plastic jar. With the temperature dropping to the high 20’s overnight, I left the Emecole to harden overnight.
The next morning I swept off the loose sand and ground the cured Emecole 555 until the edges were smooth:
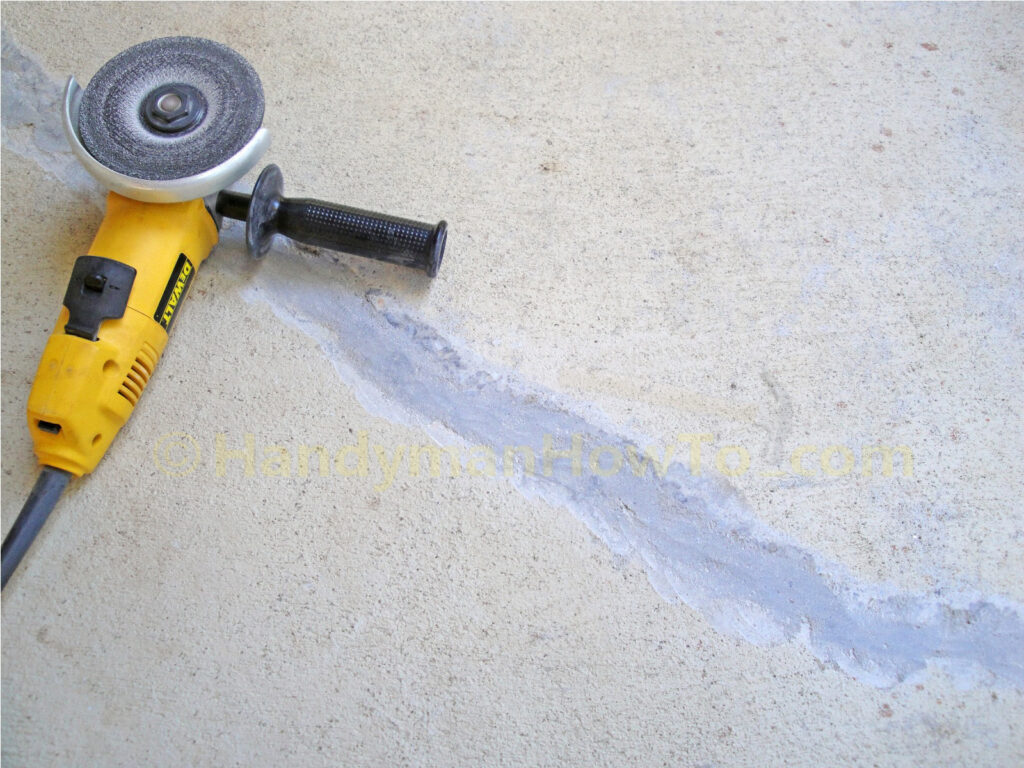
The results were amazing! The Emecole was rock-hard, felt like concrete, ground to smooth feather edge and turned to a concrete gray color.
The buffed Emecole is paintable and will blend with the rest of the slab when I re-stain the patio.
The Emecole 555 DIY Basement Floor & Slab Crack Repair Kit is available in a single cartridge containing both resin and hardener for use in a standard caulk gun.
Application Tip
If I were to do this again – I would prime the beveled edges of the crack that I had ground on the concrete slab with some Emecole 555 squirted into a cup and painted on with a disposable foam brush. The primed concrete edges would have sealed more easily as I smoothed down the Emecole / sand grout mixture.
Update: It’s been 3 years since the concrete crack repair. Emecole 555 has welded the crack closed with no movement.
Hope this helps,
Bob Jackson
Copyright © 2019 HandymanHowTo.com Reproduction strictly prohibited.
Great report on the use of this product. I have a similar issue w/ my stamped patio. I’m curious how the repair has held up over the course of time. Any updates would be appreciated. Thanks again. After reviewing all the commercial material of this product and seeing a report from a diy as yourself. I feel better about pulling the trigger.
It’s been a hard winter with extended periods of subfreezing weather, snow and ice, yet Emecole 555 has performed well with no signs of cracking or slab movement.
I read both your Concrete Slab Repair and Cracked Concrete Patio articles. I really appreciate the detailed photos and comments “along the way” enough so that I feel I can take the task of repair on. Thanks for a fabulous job on these articles.
So glad i found your site bob. Heat in Texas this summer has caused cracks in slab foundations. Cost to jack or pump under is just sky high
and this should do the trick.
Great 2 articles and thanks agin.
JIM
Thanks for such a detailed report…its nice to have people take so much time to help!
We’ll be trying it in a few weeks, hope all goes well!
I have a cracked patio that I plan to fix following this. Do you think I could tile the patio after I fix the crack?
Awesome article, and thanks in advance for your help!
Tile will be fine it the patio is dimensionally stable and the concrete surface is clean and unpainted. If the patio slab continues to settle and crack, the tile will crack, too. The concrete slab must be unpainted for the thinset mortar to bond properly. I prefer Laticrete thinset and grout products.
I figured out what caused my patio slab to crack: chipmunks burrowed under that section of the concrete slab & steps on two sides, causing it to settle and crack. I installed metal yard edging to prevent them from tunneling under the slab.
Great article. Have you stained your concrete yet? I’m curious how your concrete looks now and how well the stain will hide the repaired crack.
The original coat of concrete stain was flaking off in places after 4 years or so. I recently pressure washed the concrete patio to remove the loose stain and dirt, then applied two coats of Sherwin Williams Exterior Porch & Floor Enamel. The Sherwin Williams store manager said the Porch & Floor Enamel would stick to old stain and do a better job. The results look great and it’s a much more substantive coating compared to concrete stain. Meets ADA requirements for slip resistance on floors. It stuck to the Emecole 555 epoxy just fine.
Bob,
I recently purchased a home that I’m going to be doing a crack repair and had found the Emecole web site your report and Dec 13 follow up really help me to decide to use the Emecole product. I will also be doing some concrete floor leveling as part of my project and wondered if you can recommend any products for that part of the project.
Hi Tom,
Is this an interior or exterior (outdoors) concrete floor? Will the concrete floor be unfinished or covered with tile, wood, epoxy or paint?
Interior Concrete Leveling Compound:
I once used Ardex K 15 Premium Self-Leveling Underlayment a number of years ago to level the concrete slab floor in a former home before laying a glue-down wood laminate floor. It was amazing stuff that flowed like a thick syrup. Ardex K 15 is an interior product with a black/dark gray color that definitely won’t color match the existing concrete and it must be covered with tile, carpet, wood, etc. because it’s not a permanent wear surface. The home improvement stores generally stock the “interior underlayment” concrete leveling products so study the product specification.
Exterior Concrete Leveling Compound:
ARDEX K 301 Exterior Self-Leveling Concrete Topping does not require a floor covering and is a light gray color that probably won’t color match the existing concrete floor, but it can be tiled, epoxy or painted. I’ve not used this product myself, but based on the K 15 performance would try it.
Great article, thank you. I have a large patio with a large crack (more than an inch wide is some places) with uneven edge heights caused by a tree root. The patio is old and likely whoever laid the concrete did not use reinforcement like rebar or mesh of any kind as my neighbors found out when they experienced similar cracking in their driveway without the aid of tree roots. Will be working with an arborist to see what can be done to keep the tree from creating further lift in the future. In the meantime, since removal/replacement of the patio and the tree is cost prohibitive at the moment, I plan to give repair a try with chiseling/grinding the edges even and using the Emecole product that I found here on your discussion site to fill in the crack. If that works out well, then may follow that with an exterior leveling compound to even out some low spots on the patio where rain water pools and then paint/stain. Thanks again for the informative discussion. It has provided a possible avenue of improvement for my back yard that is affordable.
How do I repair concrete driveway with Crack all the way down it seems to have some drainage under it driveway is slanted sight
If subsoil has eroded causing the driveway to settle and crack, it should be leveled first by pressure grouting, mudjacking, foam injection, etc. See this YouTube video for an overview. Then the crack can then be repaired as shown here after the slab has been stabilized.
Really helpful article, thank you. I’m interested in adding some embellishments to my patio as I do the repair…like a river of glass bits or colored mosaic pieces with sand. It seems like this would work after pouring sand and the first round of Emecole, but I wondered if you had any thoughts on if it could work or tips.
That would be “Terrazzo Glass” concrete flooring. It’s a fairly involved undertaking: mixing decorative glass stones in concrete, finishing then diamond grinding after the concrete is cured; see DECORATIVE CONCRETE USING GLASS AGGREGATES.
American Specialty Glass (ASG) has illustrated instructions How to use ASG Glass glass chips in DECORATIVE CONCRETE. Concrete grinding machines and diamond pads are available tool rental stores.
Terrazzo glassing a fairly wide crack would require stabilizing the crack with Emecole, floating in 2 inches of concrete to embed the glass chips, then grinding the surface smooth. If your concrete patio has a semi-rough broom finish like mine, the polished crack would be 6 to 18 inches wide depending on the size of the grinding pad and very noticeable in a bad way.
I have a 2 car garage floor with 2 cracks, 1 is a hairline and the other is one quarter inch wide. No rebar or wire in the cement. Part of the floor also slopes 1 and a half inches down over a 10 foot span. The slumped part runs the length of the garage along 1 wall. That section is bounded by the quarter inch crack. This crack ranges from 2 feet from the wall to about 10 feet out from the wall at the far end of the garage. Soils here are expansive clay. I had 190 lb.s of expansion foam injected under the slump in 12 places hoping to bring the floor back to level. The foam did indeed raise most of the slumped area, but only by about 50% due to several factors beyond anyone,s control. In the hope of getting the slumped section fully level, i called ardex. Their guy came to look but did not provide an estimate. Also, even though the ardex exterior product is highly touted, i wonder how it holds up with cars rolling in and out over a lot. Also, where i live near Raleigh, very, very few contractors have ever heard of ardex. Experienced installers of ardex are scarce and prefer to work on mega projects like leveling a hospital floor, for example.
So, anyway, my question is any thoughts on any other possible approaches to level this slump? Other products to use? What else might be tried to level the slumped section? That is, short of having a concrete contractor replace the entire floor side to side and end to end. In my middle class area of NC a new floor with rebar costs about 15000 to 20000 plus tax which seems astronomical to me. If i wanted to just throw money at this, i would not ask my question. Thank you.
The “expansive clay” soil beneath the garage slab floor expands and contracts as the moisture content rises and falls. This is why foam injection concrete leveling was a temporary fix because the slab & foam does nothing to stabilize the soil. “Getting Control of Expansive Soil” explains the issue with several solutions.
I hired Atlas Piers to fix my sagging porch foundation. They pressure grouted to fill the void between the porch slab and soil. Atlas also offers residential soil permeation grouting and serves North Carolina. Contact Atlas or search for “soil permeation grouting” contractors in your area. It should be the less expensive compared to tearing out the old slab.