The Fluke Networks LinkSprinter 300 Network Tester is used to test the Ethernet cable while installing a Hikvision mini-dome network camera. This project is continued from the Fluke LinkSprinter 300 Network Tester Review.
Hikvision DS-2CD2532F-IS 3MP Mini Dome Camera Ethernet Wiring
The Hikvision DS-2CD2532F-IS 3MP Mini Dome camera is an outdoor rated PoE network camera with an on-board RJ45 Ethernet port. An RJ45 crimp connector plug will be wired on the Cat5e Ethernet cable drop and tested with the LinkSprinter 300:

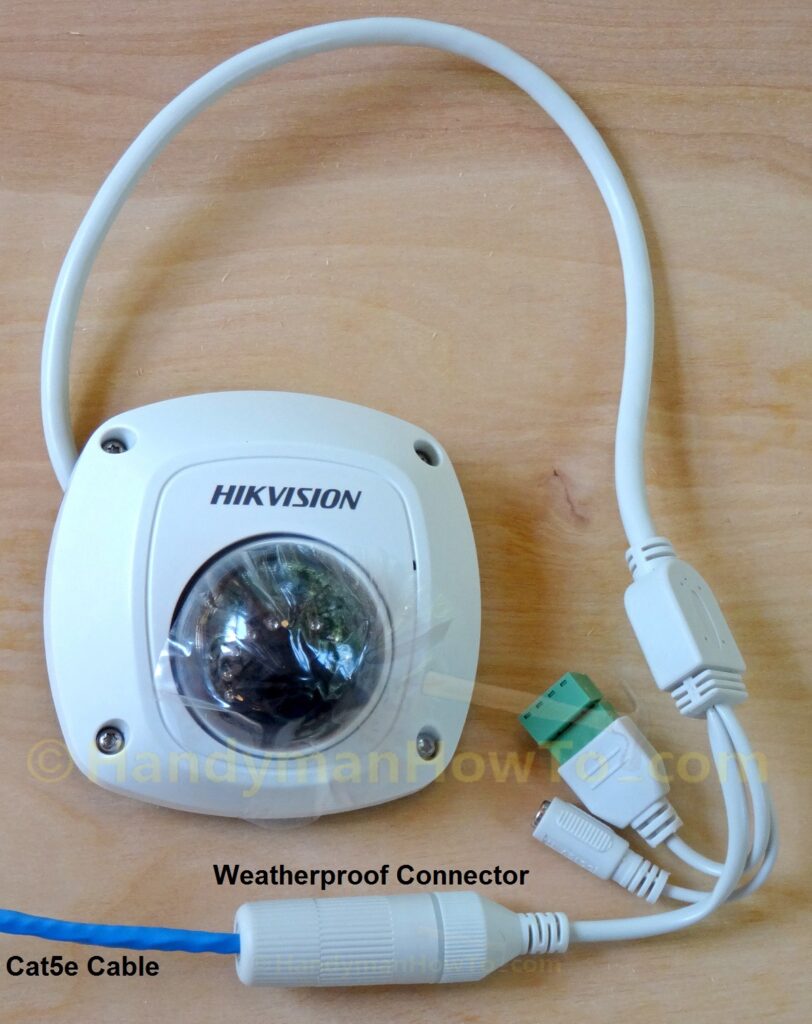
Hikvision DS-2CD2532F-IS Weatherproof Ethernet Cable Connector
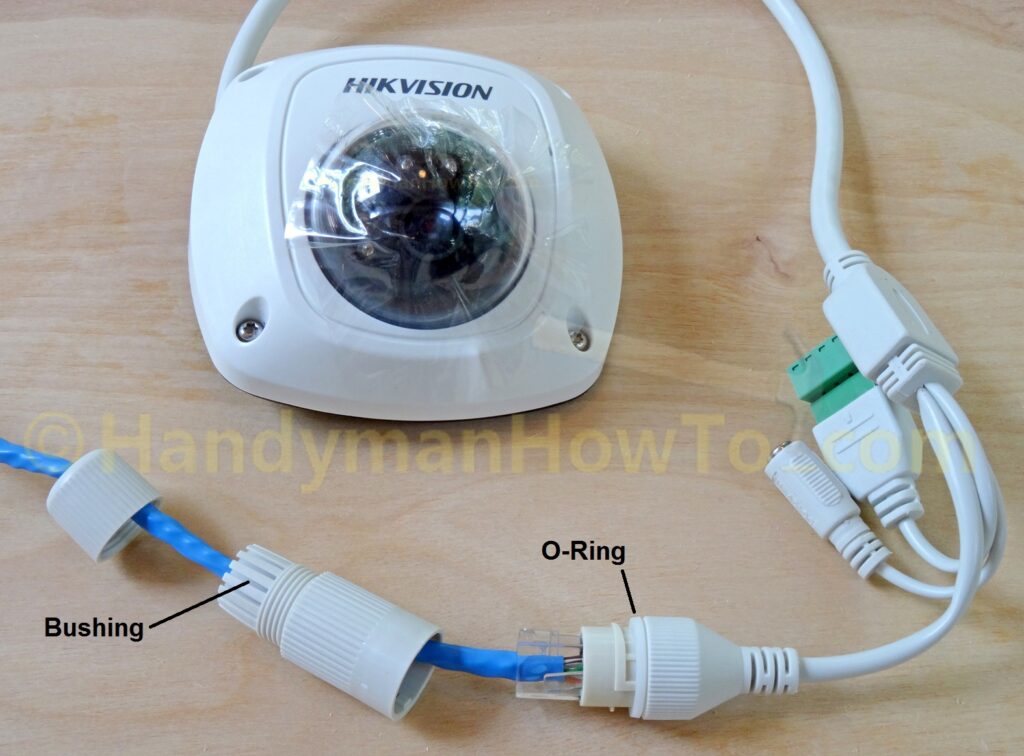
The Hikvision camera has a weatherproof Ethernet connector housing that works really well, but how it all fits together is poorly documented in the camera instructions. The trick is to assemble the parts in the correct order and then wire on the RJ45 crimp connector plug on the cable drop:
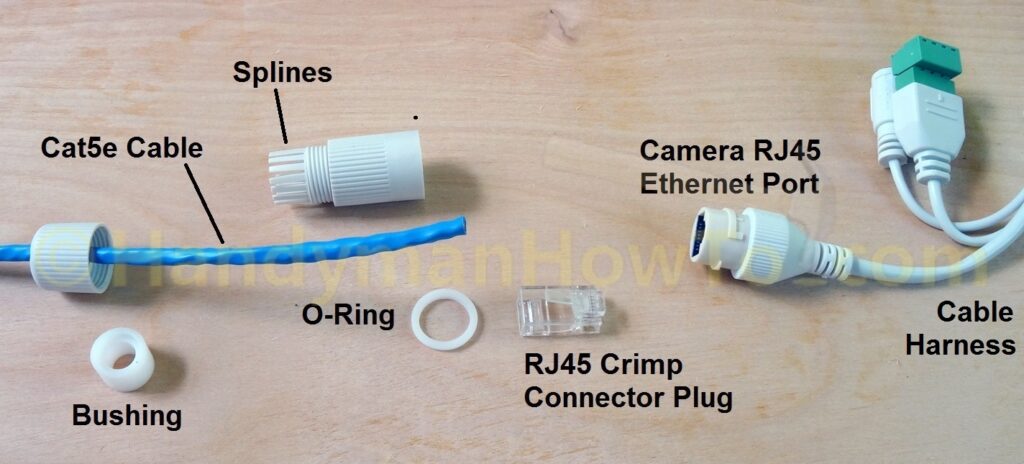
The correct assembly order is:
- Slip the screw cap over the Ethernet cable (leftmost part in the photos above & below).
- Insert the bushing into the splines of the main housing.
Note the bushing only fits one way. - Slide the main housing over the end of the unterminated Ethernet cable.
- Wire a RJ45 crimp connector plug on the end of the Ethernet cable.
- Install the O-ring on the camera cable harness.
- Twist-lock the main housing onto the cable harness.
- Screw the end cap over the splines to compress the bushing and make a watertight seal on the Cat5e cable.
The fully assembled weatherproof Ethernet connector:
I purchased my Hikvision cameras and network video recorder (NVR) from Nelly’s Security who provides excellent technical support and a 3 year warranty. All cameras have the USA (English) firmware.
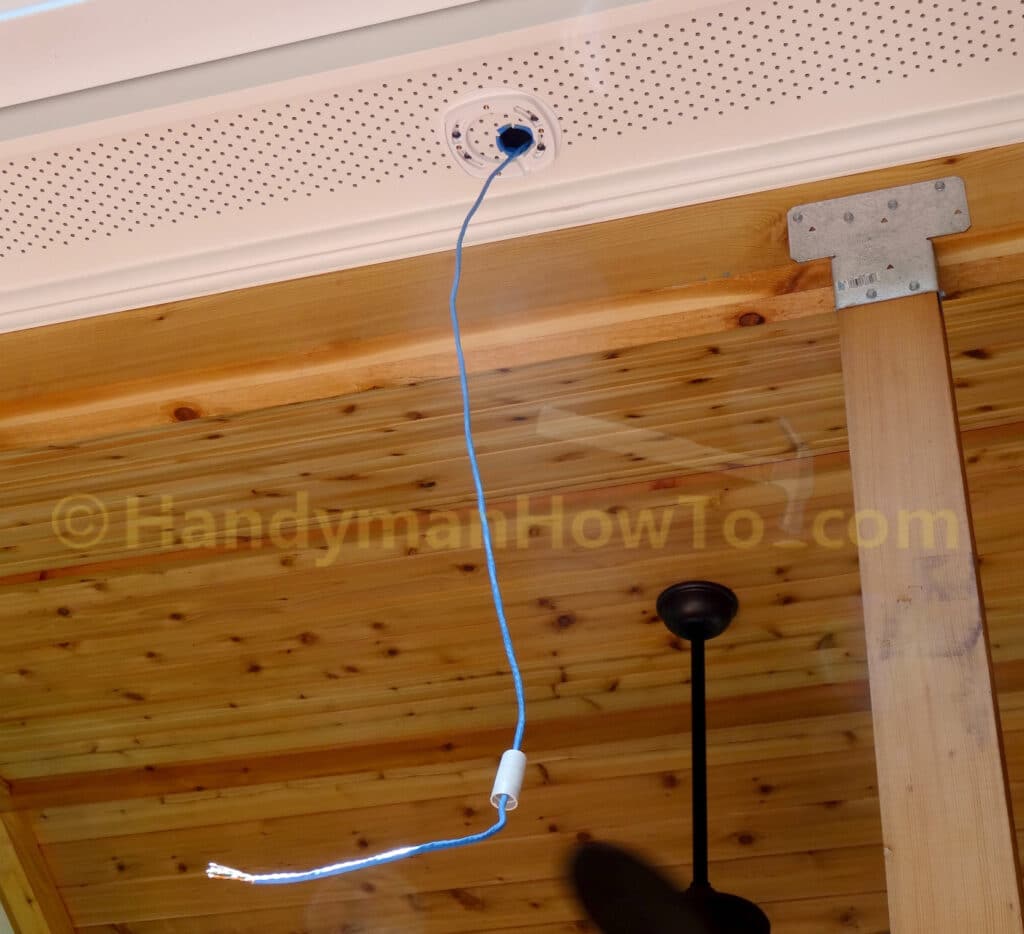
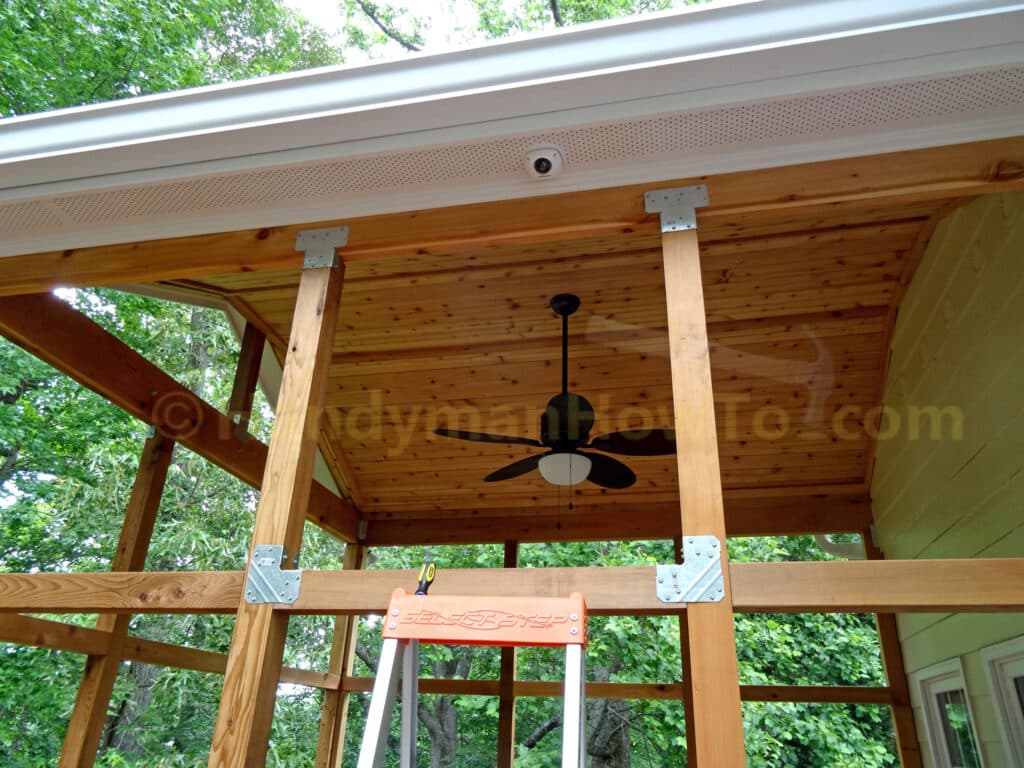
Soffit Cat5e Ethernet Cable Drop
I had previously installed over 100 feet of Cat5e Ethernet cable in the attic and roof of my new covered porch. The builder finished the construction and I can now install the cameras. I used a diamond hole saw on my cordless drill to cut a 1-3/8 inch diameter hole in the HardieSoffit, poked in a hooked wire and pulled out the Cat5e cable. To make it easy on myself I’d taped a loop of yellow construction string on the cable before the builder closed up the roof:
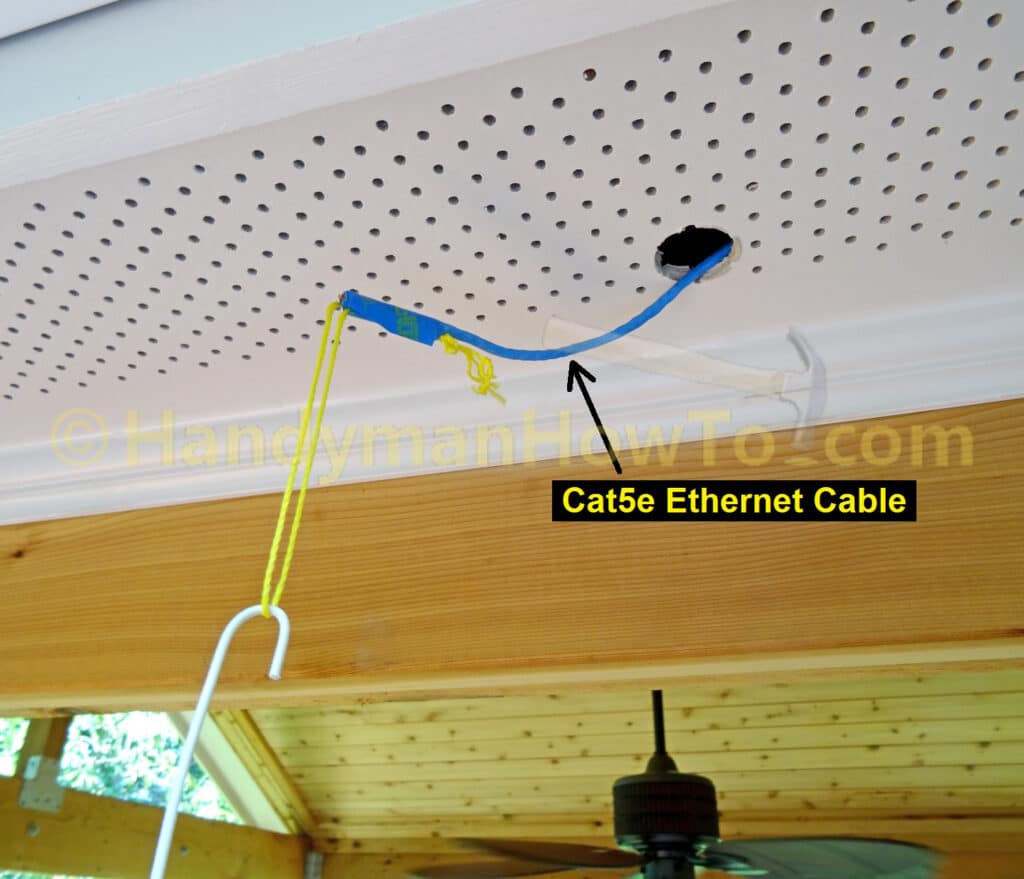
About 4 extra feet of Cat5e cable was looped inside the soffit to make the camera installation easier. The Hikvision weatherproof connector is slipped over the cable, then the RJ45 plug is wired on:
Fluke LinkSprinter 300 Network Tester – IP Camera Install
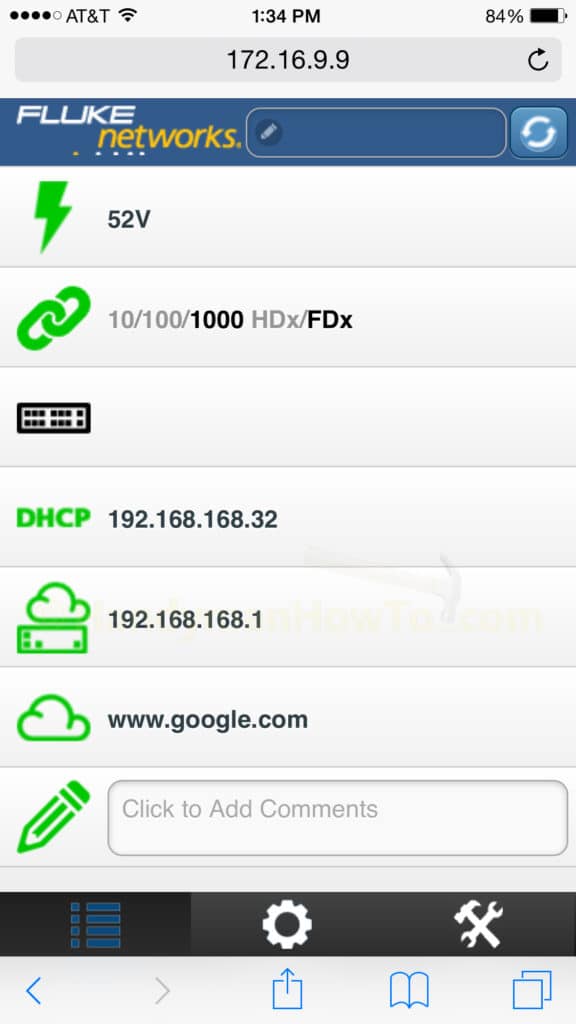
A final check before installing the camera is to test the cable with the Fluke LinkSprinter 300. This will verify:
- The RJ45 jacks / plugs are wired correctly and the cable drop is good.
- Power over Ethernet (PoE) voltage: 52 volts
- Ethernet port speed: 1Gb/sec
- DHCP, DNS and LAN IP address
(The camera will be assigned a static LAN IP address above the DHCP range.) - Internet connectivity and website response time.
It’s great seeing the test results in real-time via WiFi on my iPhone:

LinkSprinter 300 network test results screen grab:
With the LinkSprinter 300 still connected to the cable drop at the soffit, I went inside and disconnected the camera patch cable from the switch and ran a cable test. The cable length is about 108 feet:
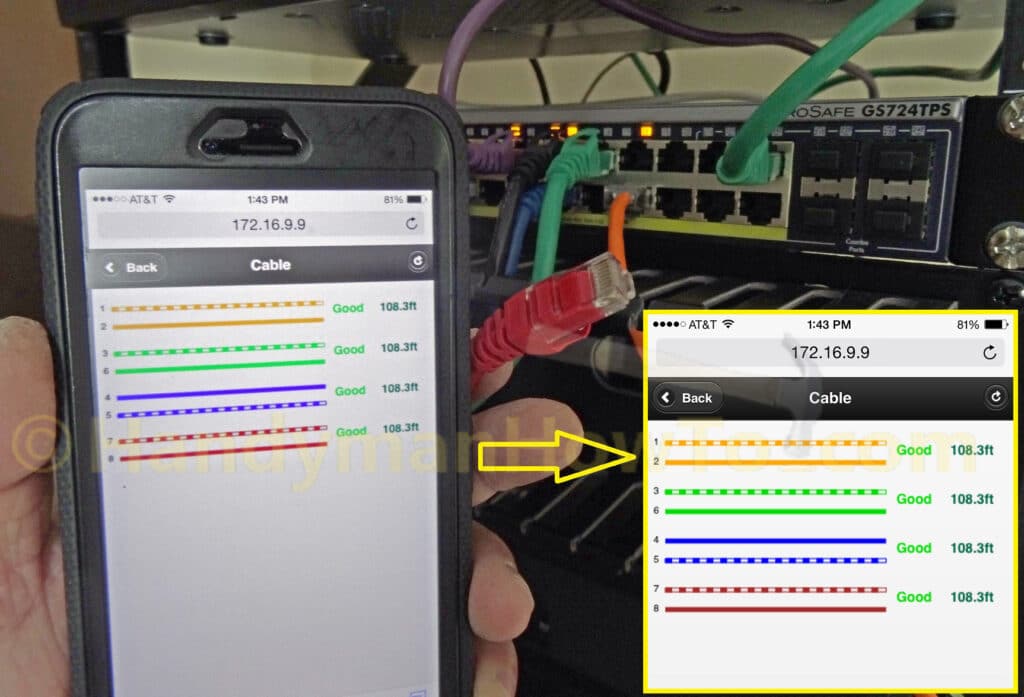
The worst situation would be to connect the camera and it doesn’t work. The LinkSprinter 300 let’s you know the cable and network are fine so you can focus on the camera configuration (IP address, NTP, port forwarding, recording options, etc.).
Hikvision DS-2CD2532F-IS Camera Mounting
The Hikvision camera weatherproof Ethernet connector is assembled, then the cables are pushed back into the soffit:
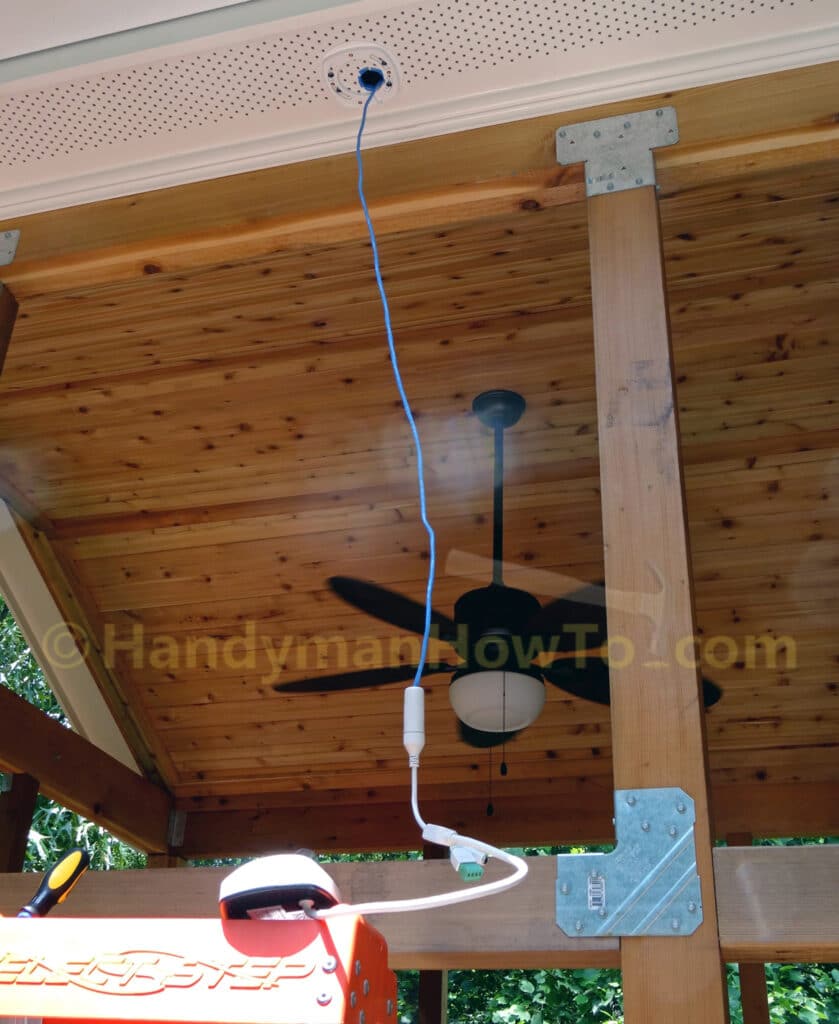
After configuring the camera network settings and adjusting the lens, the camera housing is installed to complete the job:
Cheers,
Bob Jackson