A Solatube skylight is installed to brighten up bedroom with small windows. Locate the skylight on the ceiling and roof, cutting holes and install the skylight.
My daughter’s bedroom needed more light than the two small dormer windows could supply. To solve the problem, I installed a Solatube 290 DS skylight (here’s a comparable item available from Amazon). The Solatube tubular skylight – or sun tunnel – that is relatively easy to install, has a slim profile and does a fantastic job at delivering natural light to a room. I installed one of these years ago and was very pleased with its performance, so I choose Solatube again for this project. Aside: I also installed the HVAC ceiling vent to the right of the skylight in the Adding a Room Air Duct for Heating & Cooling project.
Solatube Skylight Kit
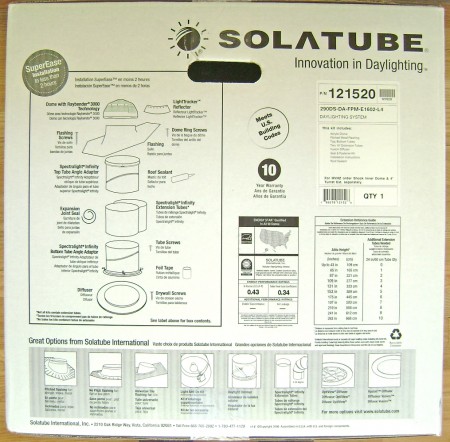
The Solatube skylight comes in a complete kit with everything you need to install it, including roofing caulk and metal foil tape.
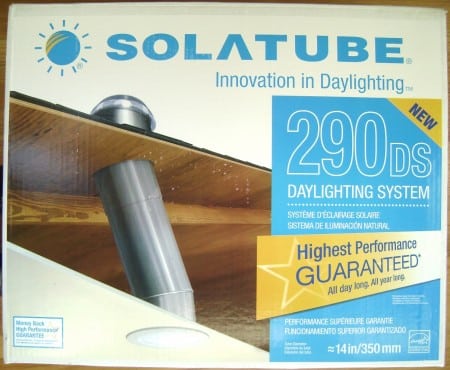
Diagram on the back of the Solatube shipping box.
Working on a Steep Roof
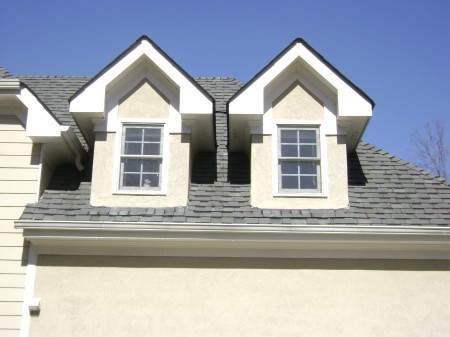
My house has a 10/12 pitch roof, meaning it rises 10 inches for every 12 inches of horizontal run. This works out to a steep 40 degree slope that is impossible to walk on. I’ve tried crawling up the roof and I just slide off. If it weren’t for the fact that the area I’d be working has two dormers that made it easier to access, I’d would have given this job over to professional installer. In fact, if I were to do this job again on such a steep roof, I’d hire a professional.
My area was hit by a major hailstorm last spring and several homes in the area had their roofs replaced. I watched how the roofers got around on these steep 10/12 pitch roofs. Roof brackets, toe boards and safety ropes are necessary – but the trick to staying put is a piece of foam rubber. The roofers take block of foam rubber from a cushion and kneel on it while working to stay put the steep roof. The foam rubber does a great job of gripping the shingles.
Poor Man’s Roofing Shoes
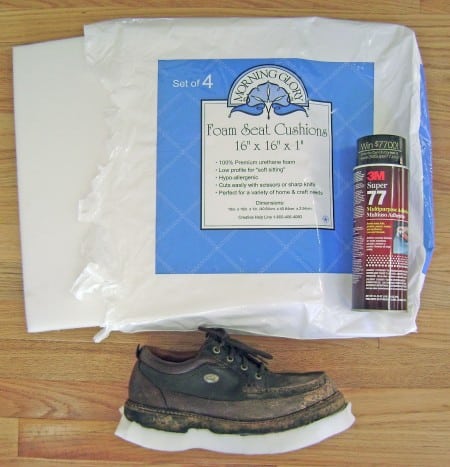
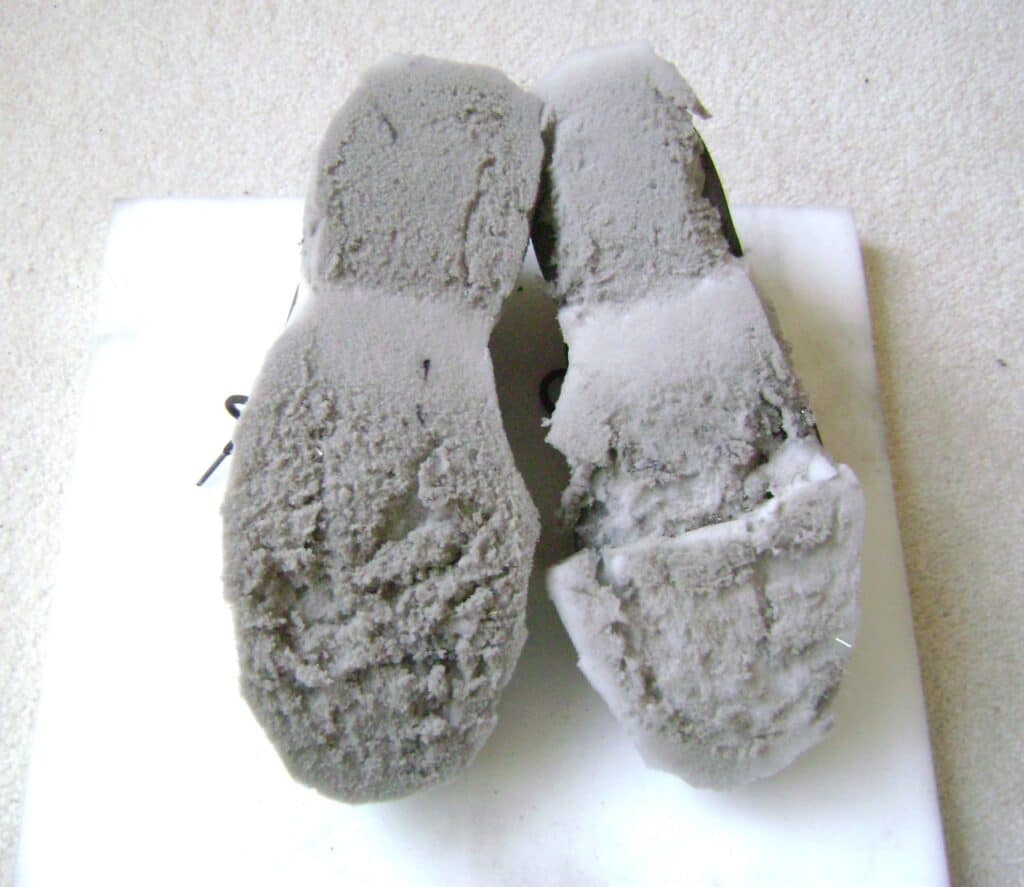
A block of foam rubber to kneel on is only part of the solution for working on a steep roof. I knew that soft soled shoes were necessary to get any kind of footing and none of my sneakers would get a grip. Google searches turned up Cougar Paws™ Roofing Boots that use a patented and replaceable sole designed for working on roofs. If I were working roofs all the time, I’d buy a set of Cougar Paws.
Inspired by the block of foam rubber used by the roofers and the Cougar Paws Roofing Boots technology, I decided to a make my own pair of poor-man’s roofing shoes.
I bought a foam rubber seat cushion, traced the outline of an old pair of shoes, cut out the foam soles and sprayed the shoes and foam rubber with 3M™ Super 77 Spray Adhesive. I let the 3M adhesive tack up for about 10 minutes for an extra strong permanent bond and glued the foam to the shoes.
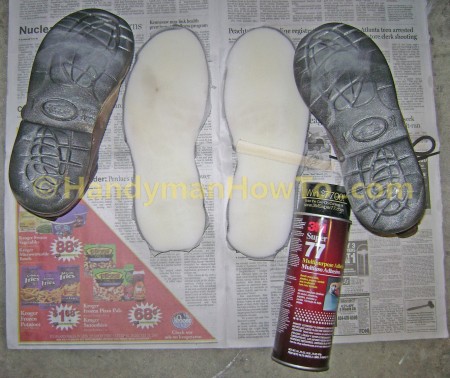
Here’s the materials for the poor man’s roofing shoe:
The downside is the improvised foam shoe soles wear out quickly, but it got me through this project.
How to Install a Solatube Skylight
The skylight will be located on the roof between the two dormers and I needed to take exterior measurements to determine the position of the skylight from inside the attic.
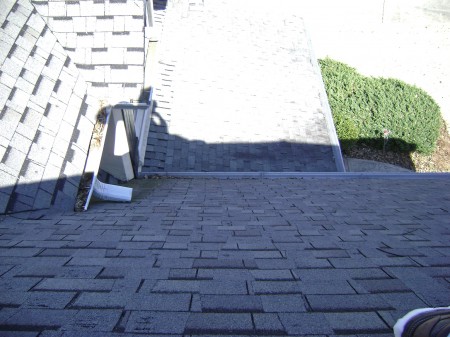
Armed with a block of foam rubber and my home made roofing shoes, I exited the 2nd floor window onto the shallow roof of the covered porch. The foam-lined roofing shoes worked great as I was able to crab walk up the roof, using the block of foam rubber in one hand to maintain my grip. This is a view of the entry to roof. You can see my shoe heel at the extreme bottom right of the photo. I discovered that I don’t like heights.
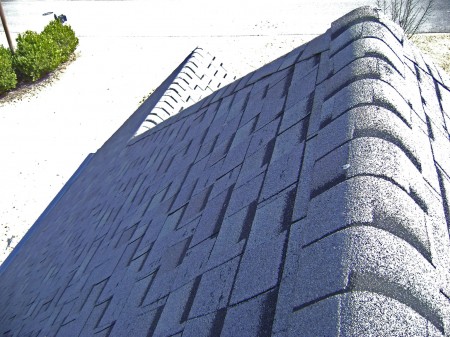
View roof ridge over the bedroom. A 40 degree roof slope is quite steep! I liked it better if I didn’t look down.
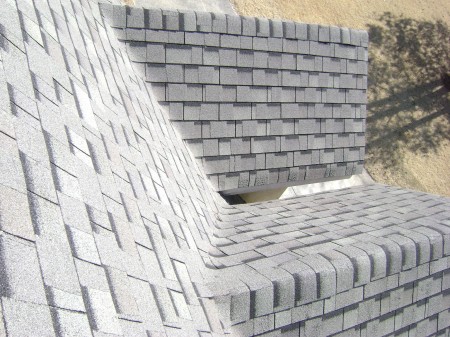
I took measurements to determine where the dormers are in relation to main roof. The measurements are necessary avoid the dormers when fixing the position of the skylight inside the attic. The key measurements are:
- The horizontal distance from the main roof ridge to the valley between the two dormers.
- The vertical distance from the main roof ridge the top ridge of the dormers.
Ground level view of the dormers:
Solatube Placement in the Bedroom Ceiling
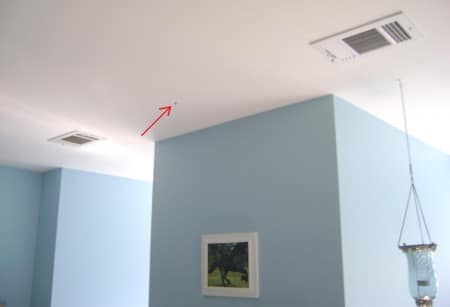
A tape measure and carpenter’s square are used to find the center of the wall between the two dormers and draw center line in pencil along the ceiling. A 3-1/2 long screw was driven into the ceiling about 18 inches out from the wall as indicated by the red arrow. This will be the center of the skylight.
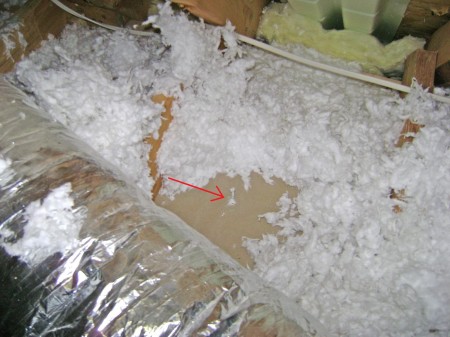
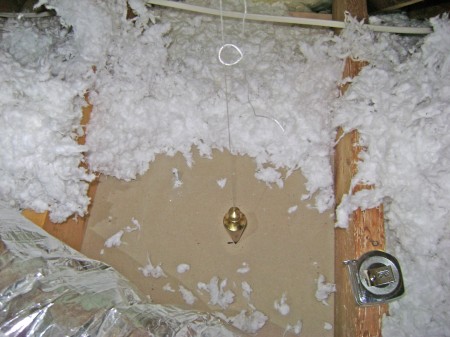
Working in the attic above the bedroom, the screw for the center of the skylight is somewhere beneath the insulation.
The insulation is brushed away revealing the screw in the ceiling. Several problems are immediately evident:
- The screw is not centered between the ceiling joists.
- The ceiling joists are offset and don’t align with the roof trusses.
- There’s not enough room for me to work so close the edge of attic.
To remedy these problems, I decided to locate the skylight higher on the roof and verified this location would be clear of the dormers based on the previously made exterior roof measurements. A 3-1/2 inch screw was centered between the roof trusses and driven through the roof deck to mark the center of the skylight on the exterior roof.
The center of the skylight is transferred from the roof deck to the bedroom ceiling by plumb bob and line as shown.
Because the ceiling joists are offset relative to the roof trusses, the skylight in the roof will be offset by 1-1/2 inches to the base in the ceiling. Fortunately the Solatube skylight has two adjustable “knuckles” or joints to accommodate this situation. I therefore marked only the distance from the edge of the attic as shown.
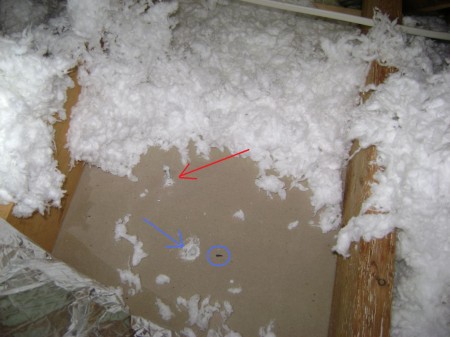
The initial location of the skylight is the screw at the red arrow. The mark for plumb line from the roof is circled in blue. The final skylight location as centered between the ceiling joists is the hole made at the blue arrow.
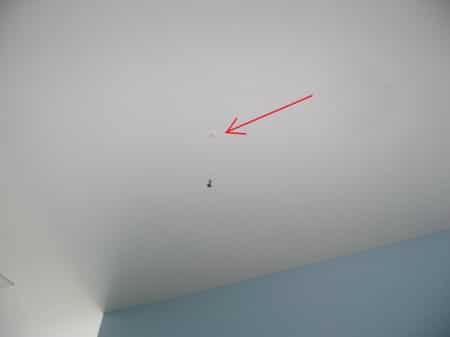
This is the adjusted center of the skylight on the bedroom ceiling:
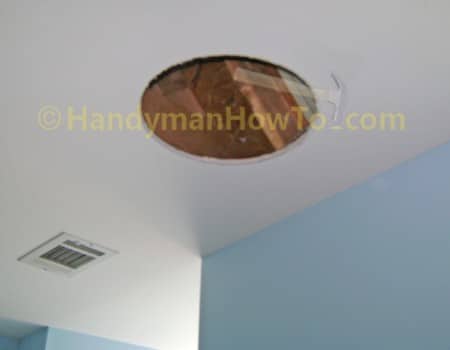
A 14-3/4 inch hole must be cut in the ceiling for the skylight lens. To do so, a foot long piece of string is taped to a pencil and the string is marked at 7-3/8 inches (the radius is 1/2 the diameter) with permanent marker. The string is wrapped around a screw in the center hole to the mark at 7-3/8 inches to make an improvised drafting compass. The resulting circle is 14-3/4 inches in diameter.
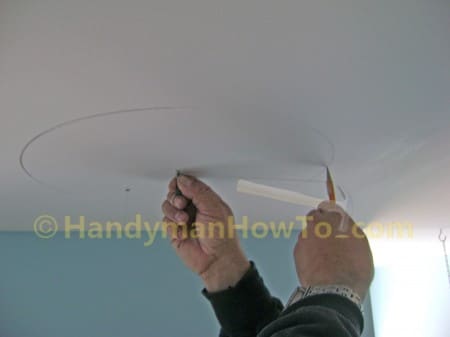
Circle to be cut out for the skylight.

The hole in the ceiling is cut with a Rotozip spiral saw. The Rotozip does a wonderful job without cracking or tearing the drywall as a hand saw is prone to do.
Per the Solatube Instructions, the bottom tube assembly is temporarily inserted in order to adjust the top tube assembly later when working on the roof.
Solatube Roof Installation
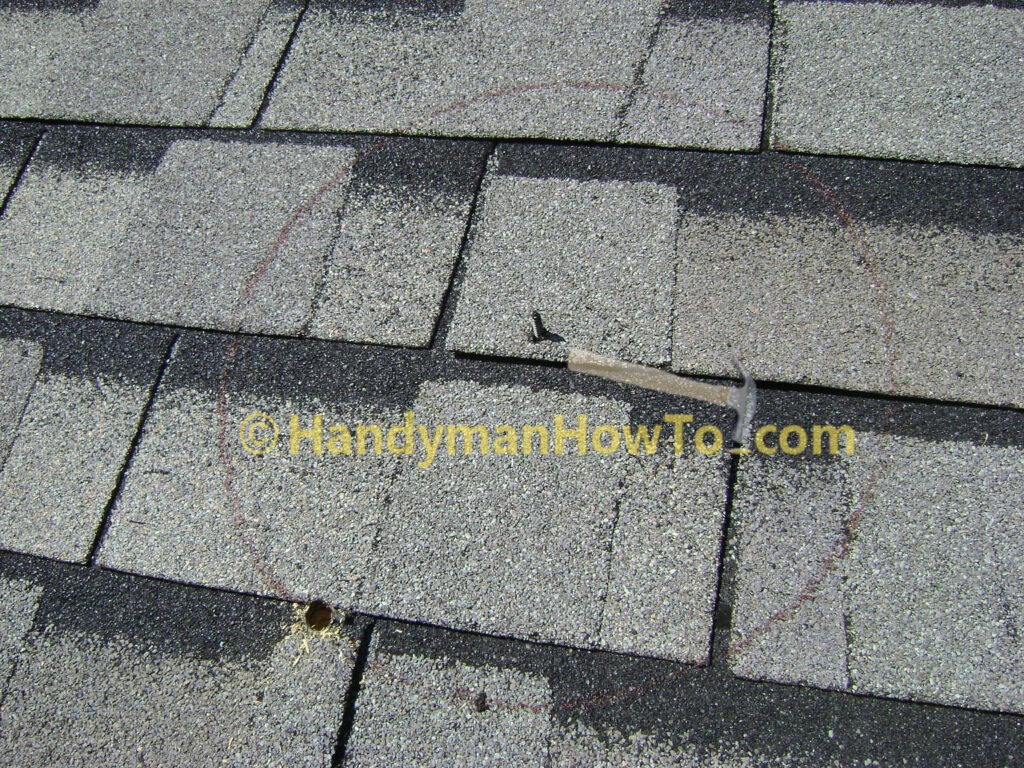
The screw that driven through the roof deck from inside the attic is located and a circle drawn in crayon using the Solatube flashing as a guide. Carefully observe the Solatube installation instructions to cut the hole 1/2 inch larger than the marked circle.
A 1/2 hole is drilled through the roof deck at the 7 o’clock position to start the saw blade. Take care not to cut along the circle, but 1/2 inch outside the circle.
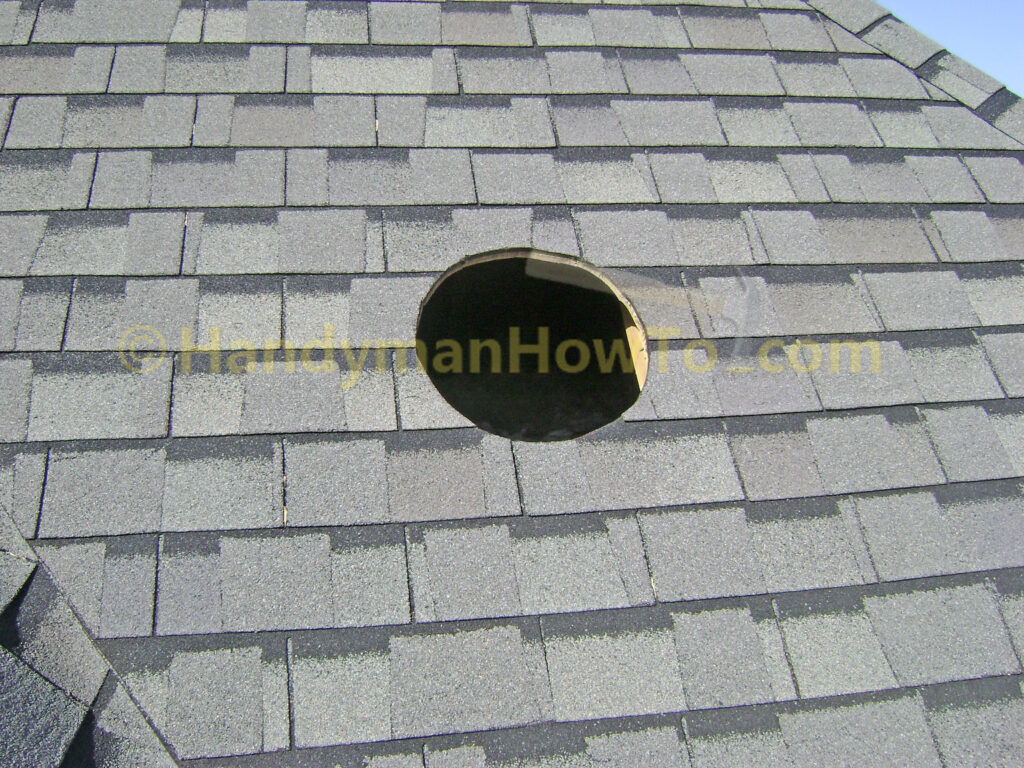
The hole in the roof is cut with a sabre saw. Note to self: bring extra saw blades because the gravel shingles dull blades very quickly. I went through two (2) wood blades cutting this hole.
I’m missing a couple photos for the next steps due to the difficulty of working on the steep roof.
Install the Solatube Flashing
Per the Solatube installation instructions, use a pry bar to break the glue tabs of the shingles from the mid-point to the top of the hole, removing roofing tacks and staples as needed. The top half of the flashing will slide under the shingles but on top of the roofing felt. The shingles also need to be cut back about 3 inches from the mid-point and along the top arc to make room for the curb of the flashing.
Installation Tips:
Before applying roof sealant to the underside of the flashing base, do the following:
1) Dry fit the flashing to ensure the path is clear under the shingles and the shingles are cut back enough to center the flashing over the hole.
2) Test fit the top tube assembly to verify clearance through the hole in the roof and adjust the flashing position if needed.
3) Mark the bottom edges of the flashing on the roof with a crayon to quickly and precisely realign the flashing for final installation after the roof sealant is applied.
A bead of GeoCel® 3300 Polyurethane Sealant that came in Solatube kit is applied with a caulk gun to the underside of the flashing. The GeoCel product is “Miami-Dade County approved for hurricane-tough adhesion”.
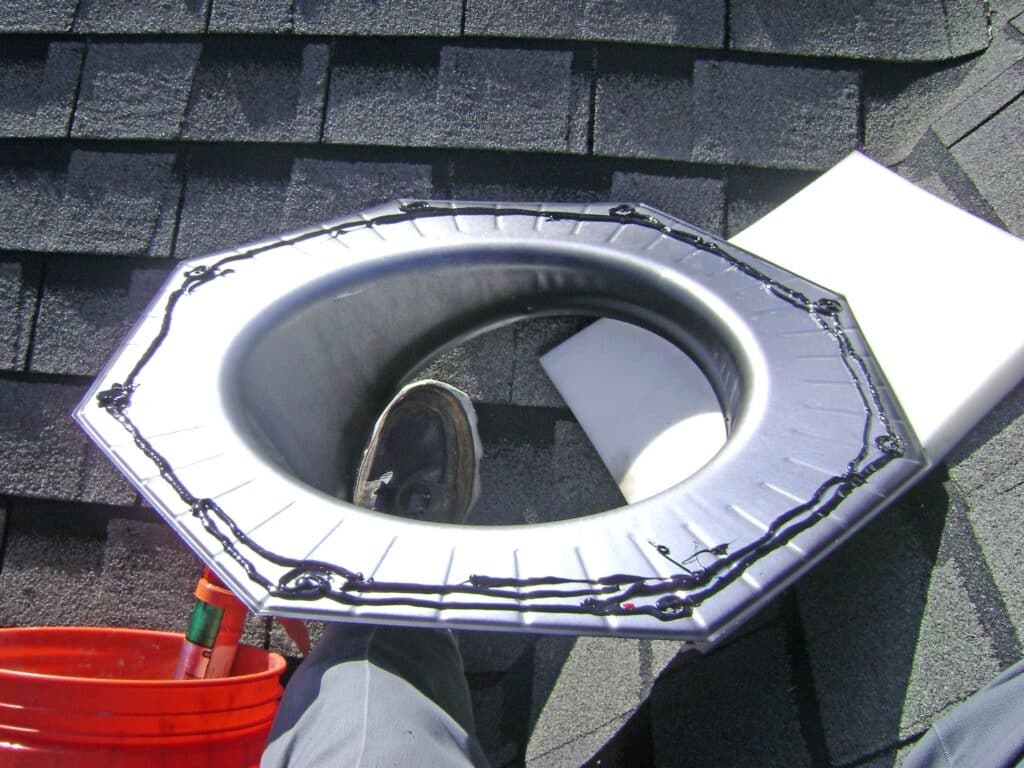
The Solatube flashing is installed and fastened with eight 2 inch screws. The head of each screw head is sealed with the GeoCel 3300 roof sealant. I also applied a bead of caulk along the outside edge of flashing and underneath the shingles.

Next the top tube assembly is fitted and the adjustable knuckle rotated to align with the bottom tube assembly in the bedroom ceiling.
Installation Tip:
An “Attic & Weep Seal Kit Instructions” in a separate package from the main instruction booklet. The foam attic seal must be inserted into the rim of the top tube assembly at this point before fastening the four screws. I discovered this package after I’d already come down from the roof. I had make another trip onto the roof, remove the dome and top tube assembly to install the foam seals.
Remember to peel off the protective plastic liner inside tube before installing the dome.
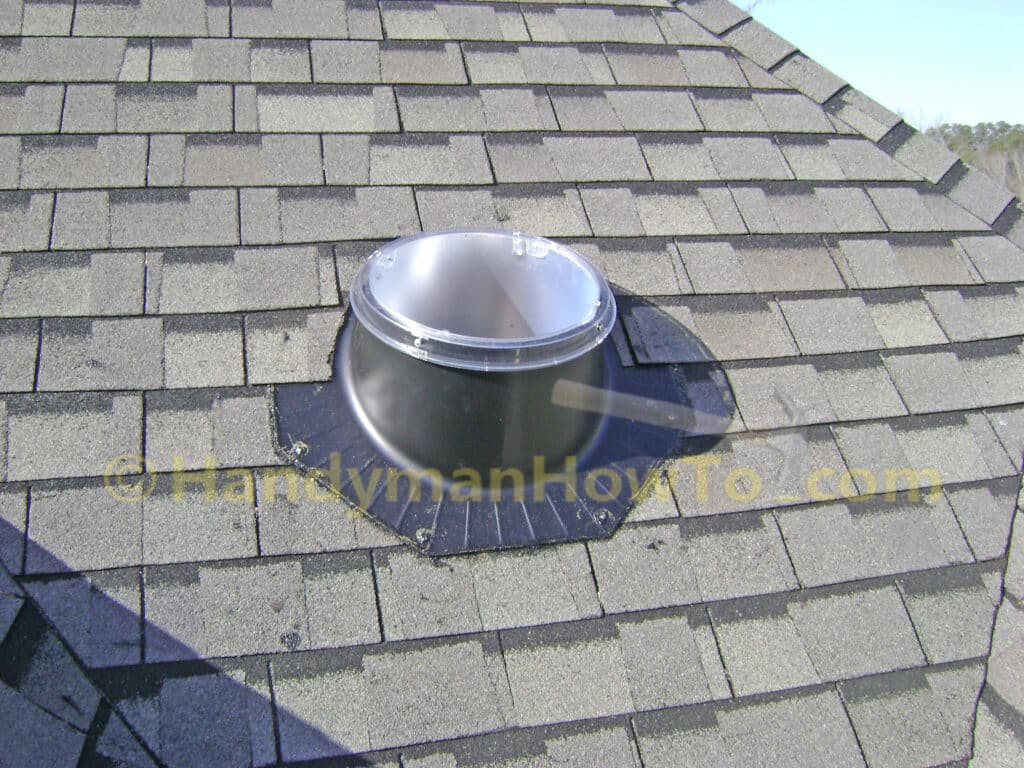
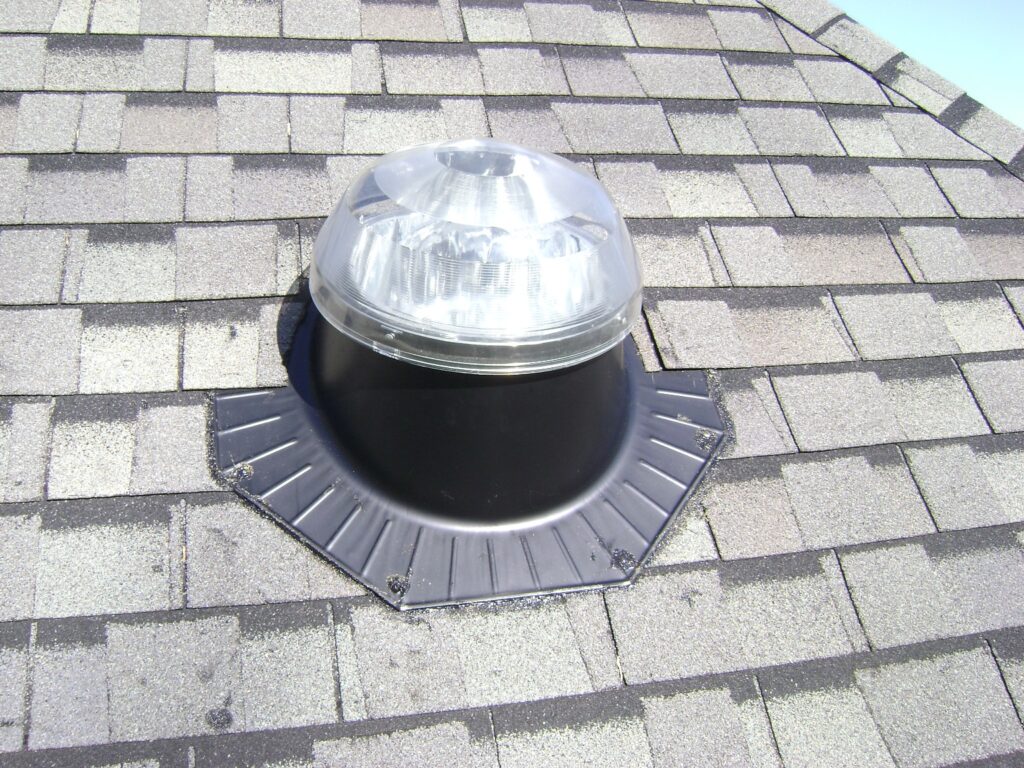
The fully assembled Solatube 290 DS (14 inch) skylight.
This is the top- and bottom tube assemblies at this stage of the project. The bottom assembly is only temporarily installed such that the knuckle on the top assembly could be adjusted.
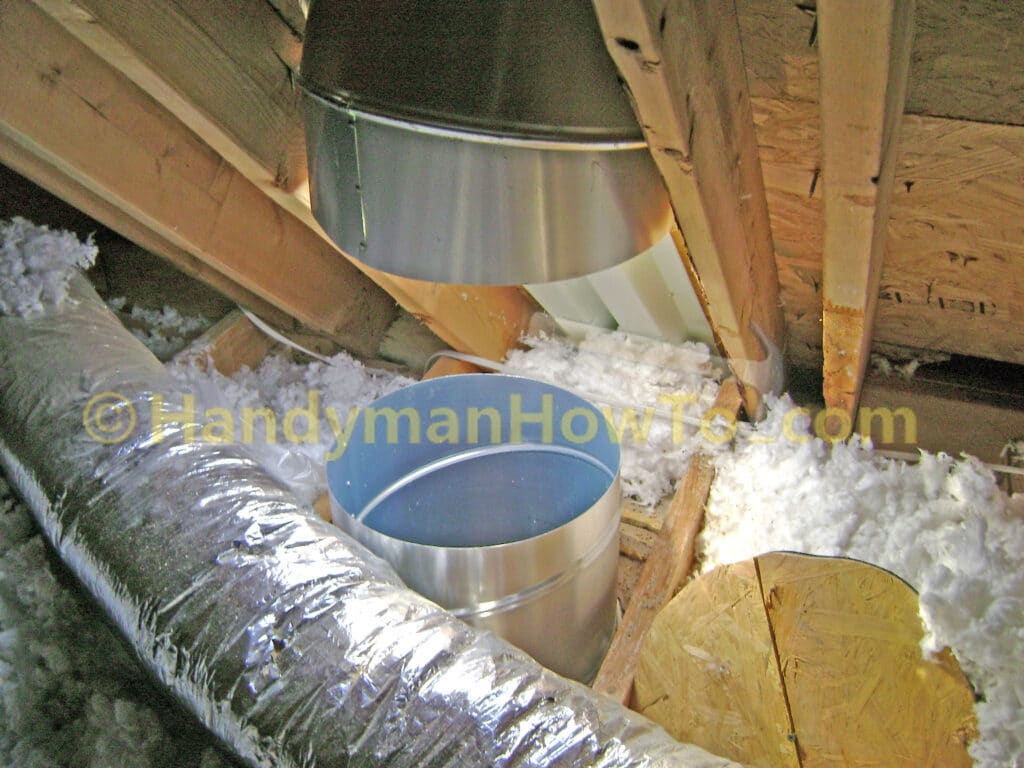
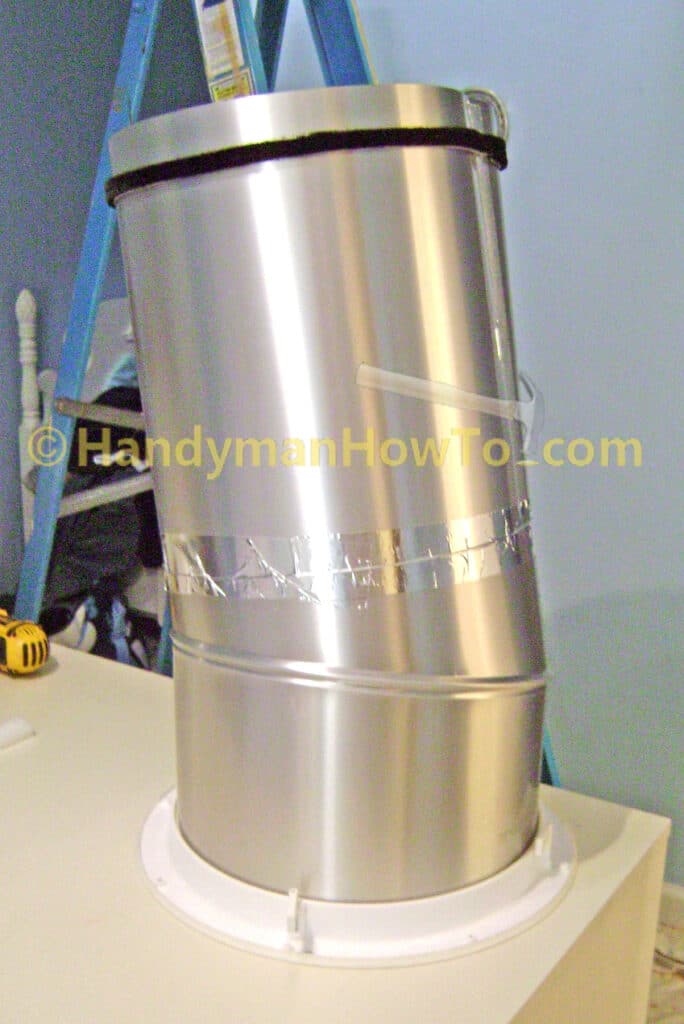
The smaller end of the 16 inch extension tube is inserted inside the bottom tube assembly and taped. Next, the expansion joint seal is taped to the end of the extension tube as shown below. The expansion joint seal is a single-sided tape with a brush-like material on the outer surface. The purpose of the expansion joint seal is to seal out bugs and dust when the bottom tube is inserted into the roof top tube assembly. The bottom tube assembly is test fitted with the top tube in the roof and the knuckle rotated to achieve proper alignment. (I didn’t need the second 16 inch extension tube that came with the kit.) Finally, the bottom assembly inserted through the ceiling into the top tube at the roof and fastened to the drywall ceiling using the built-in “old work” style mounting screws and wings.
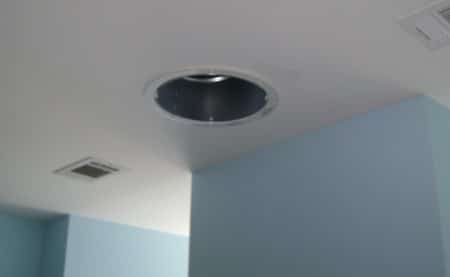
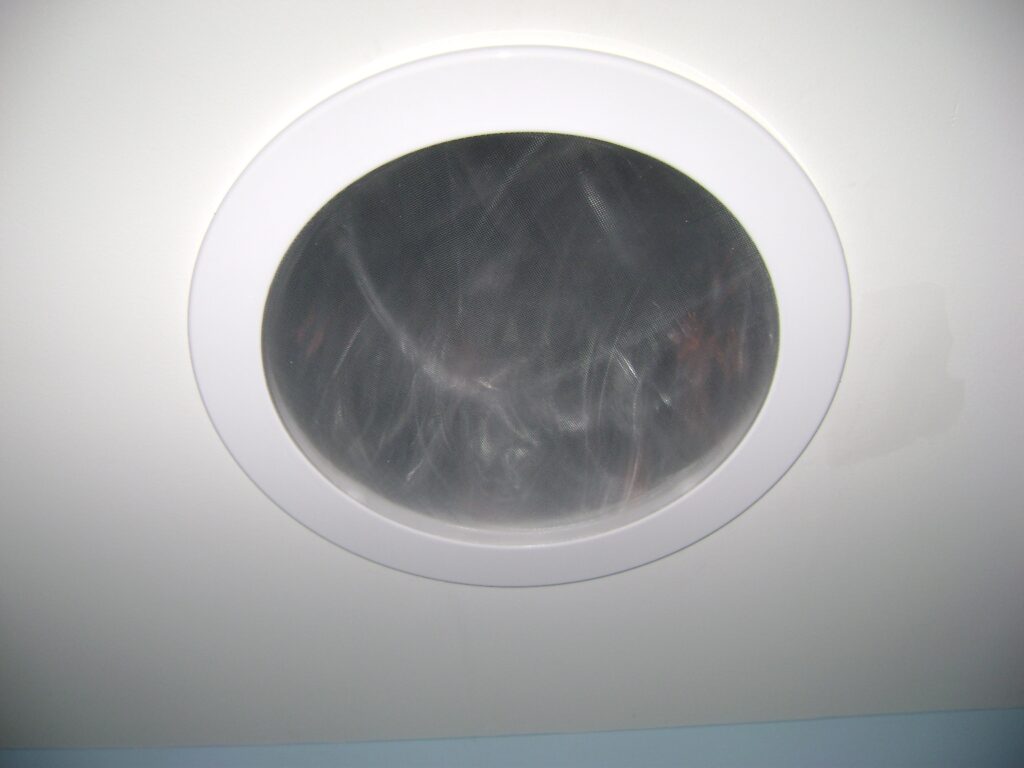
The glazed diffuser lens simply snaps in place. This photo was taken at night because it’s too bright to photograph it during the day.
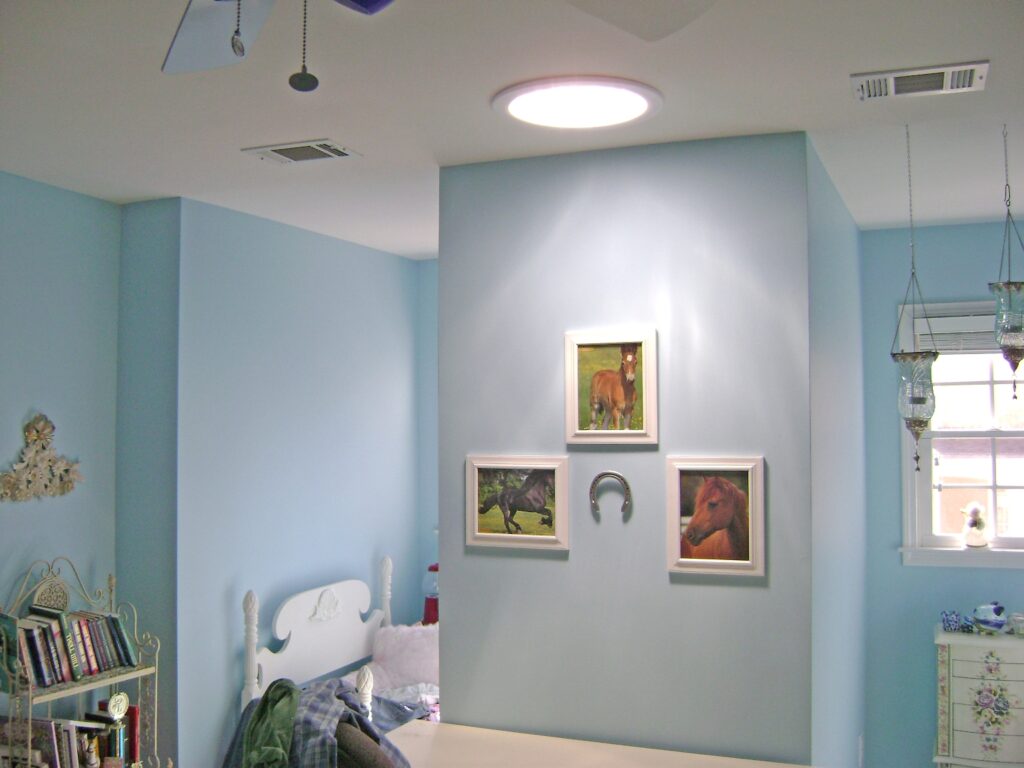
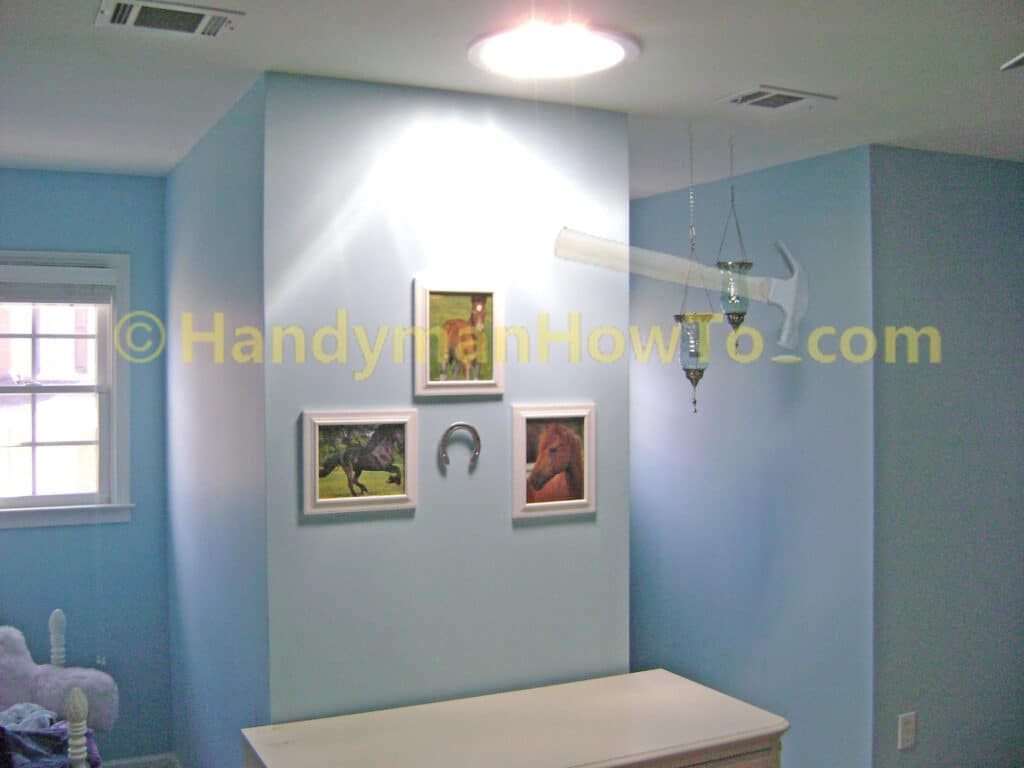
The Solatube 290 DS (14 inch) at work in the morning. The photo taken at 9AM doesn’t quite convey the full brightness the skylight brings to the entire room. I’m very pleased with the improvement!
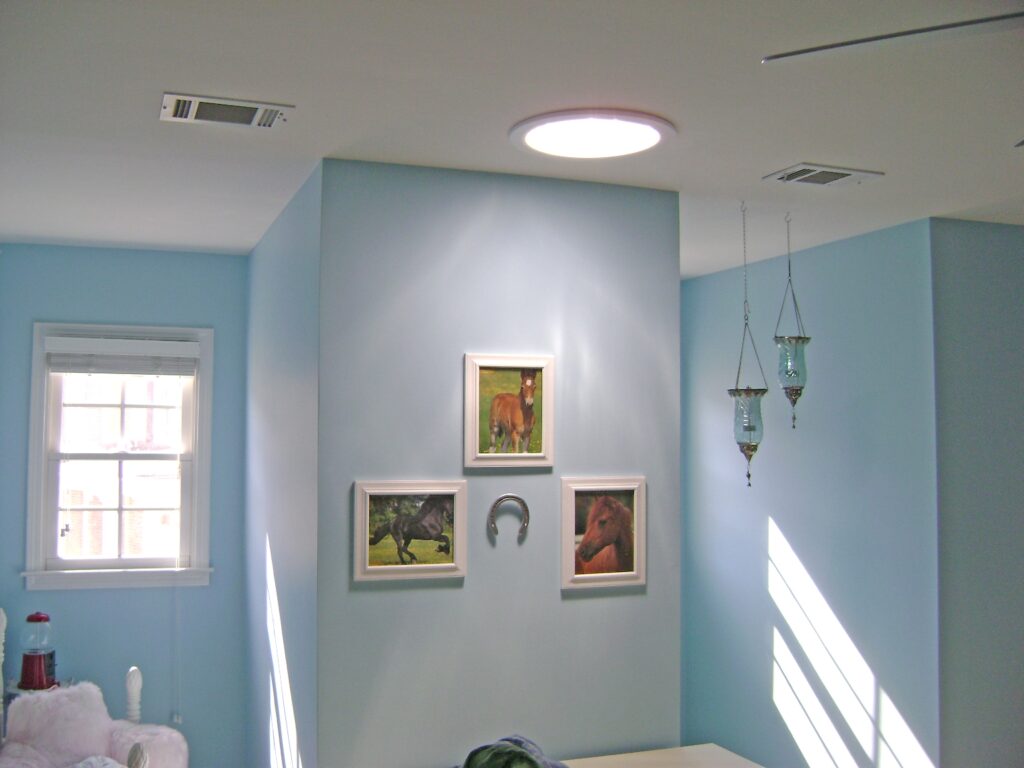
The neat thing is at 4PM the skylight produces strong sunlight because I positioned the dome reflector to face southwest to capture the afternoon sun at a time when it doesn’t shine in the windows.
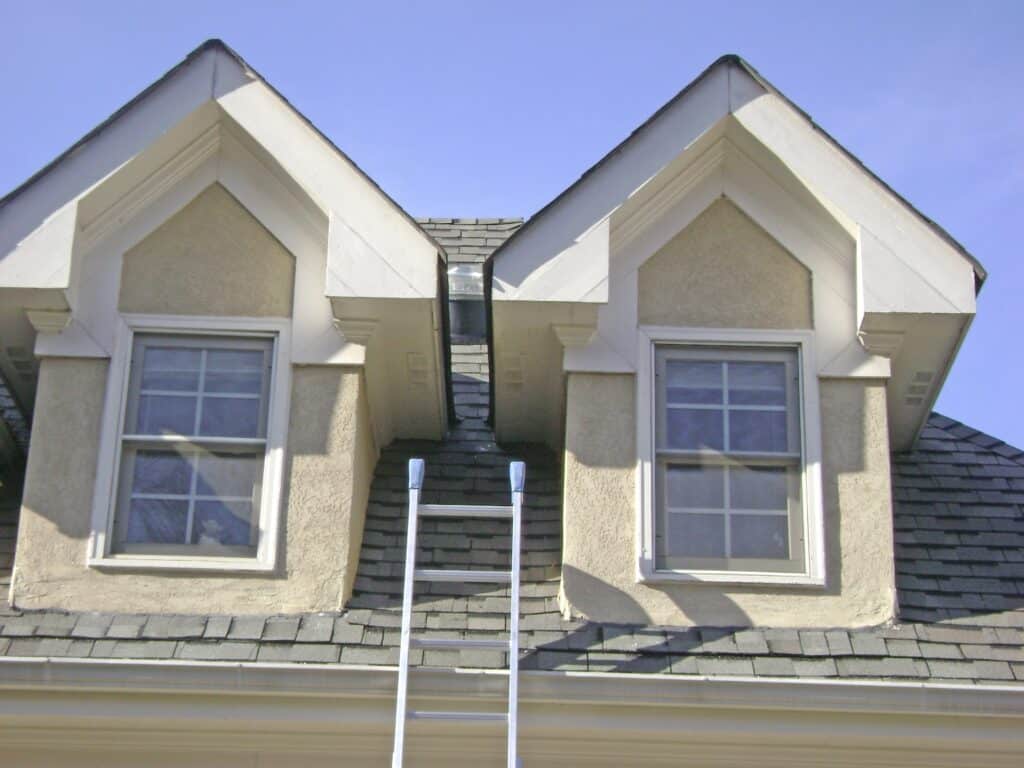
You can just see the Solatube skylight between the dormers in this photo. The ladder isn’t for getting on the roof, rather it’s to retrieve items I’d dropped from the rain gutter! Working with a helper on the ground, I used a rope and 5 gallon plastic bucket to ferry tools and materials from the driveway to the roof.
Solatube Installation Advice
- Solatube Skylight – a high quality and easy to install product.
- A good project for the Do-It-Yourself if working on a low pitch roof.
- If working on a steep and dangerous 10/12 pitch like mine, I’d hire a professional.
- My poor-man’s roofing shoes worked great, but only for casual work. The foam soles were nearly worn out after the job. Without them, I could not have climbed the roof.
Take care,
Bob Jackson