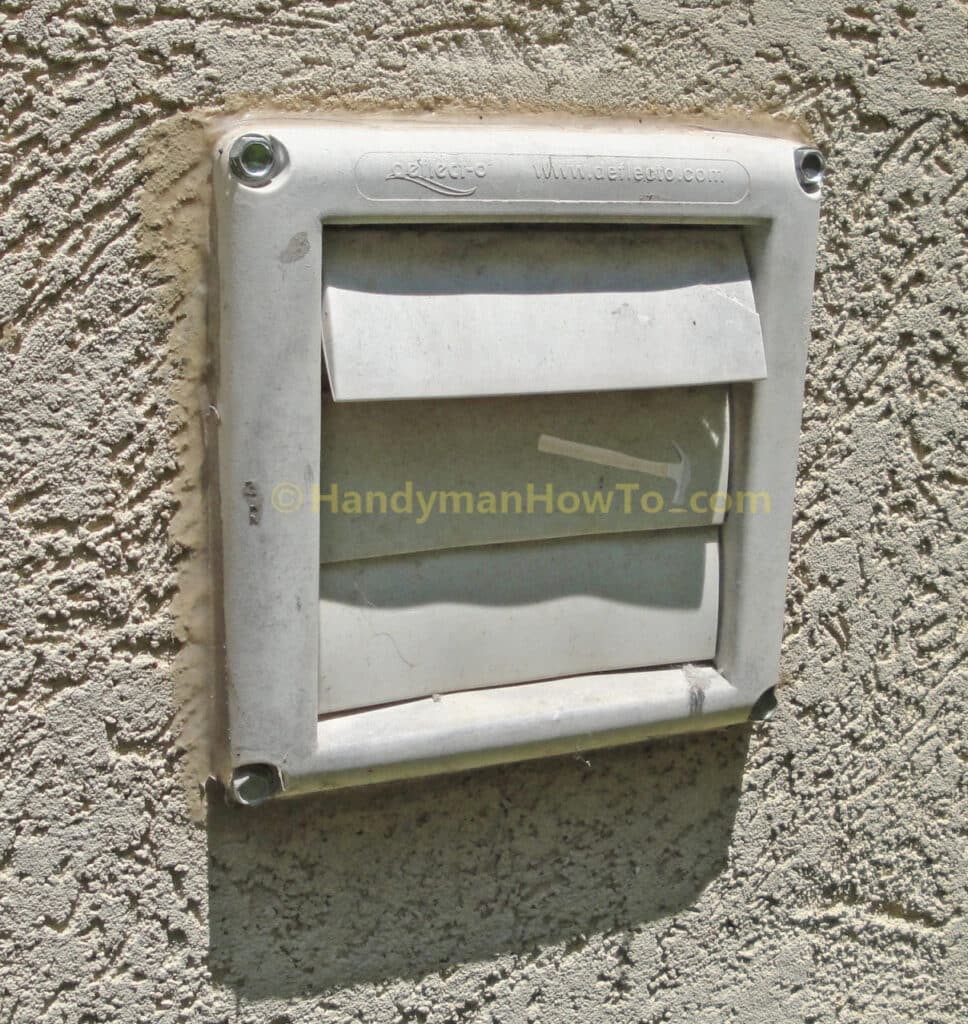
This project explains how to replace a dryer vent in an exterior wall. The dryer vent was 10 years old and the louvers were sticking open. The vent is an older style without a bird guard.
How to Install a Dryer Vent
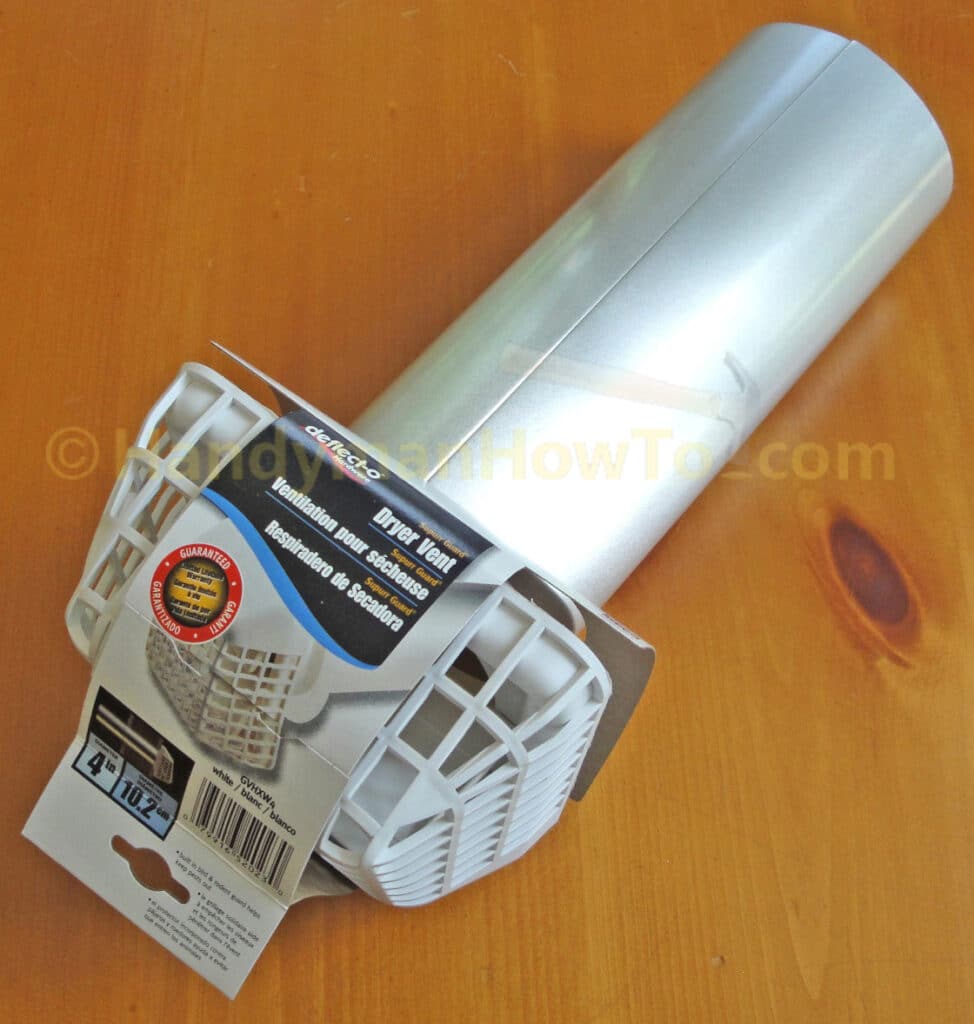
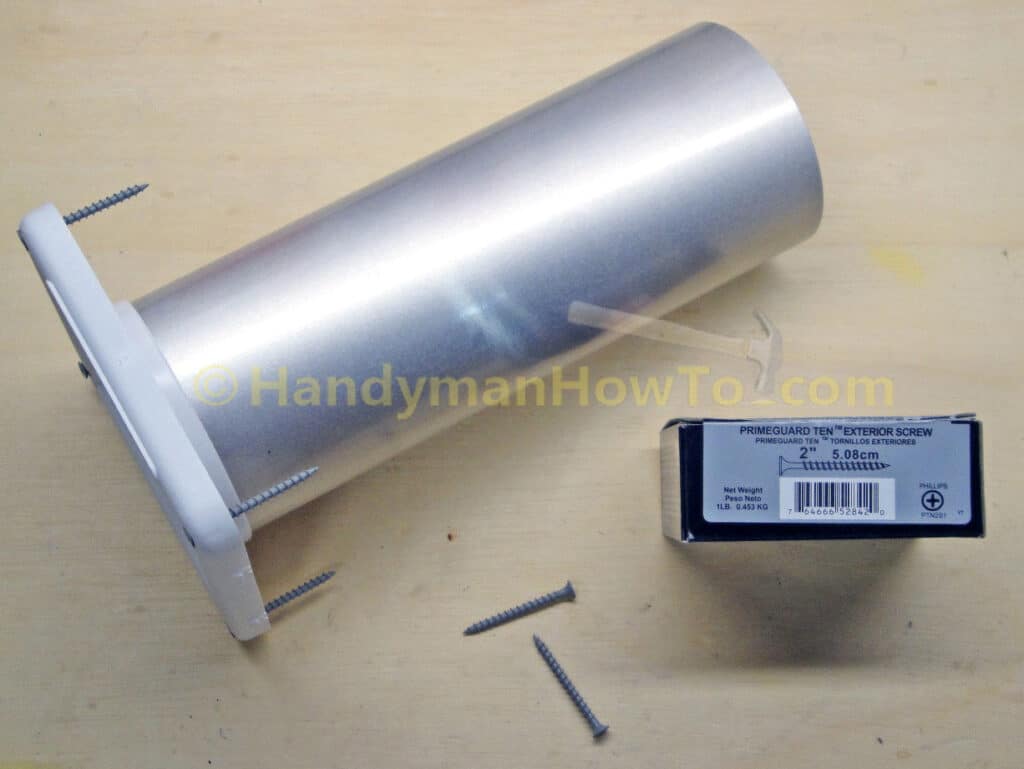
I purchased a new deflect-o® 4″ Supurr Guard® Vent Hood with Pipe & Collar, model #GVHXW4 at Home Depot for $10.97 as shown:
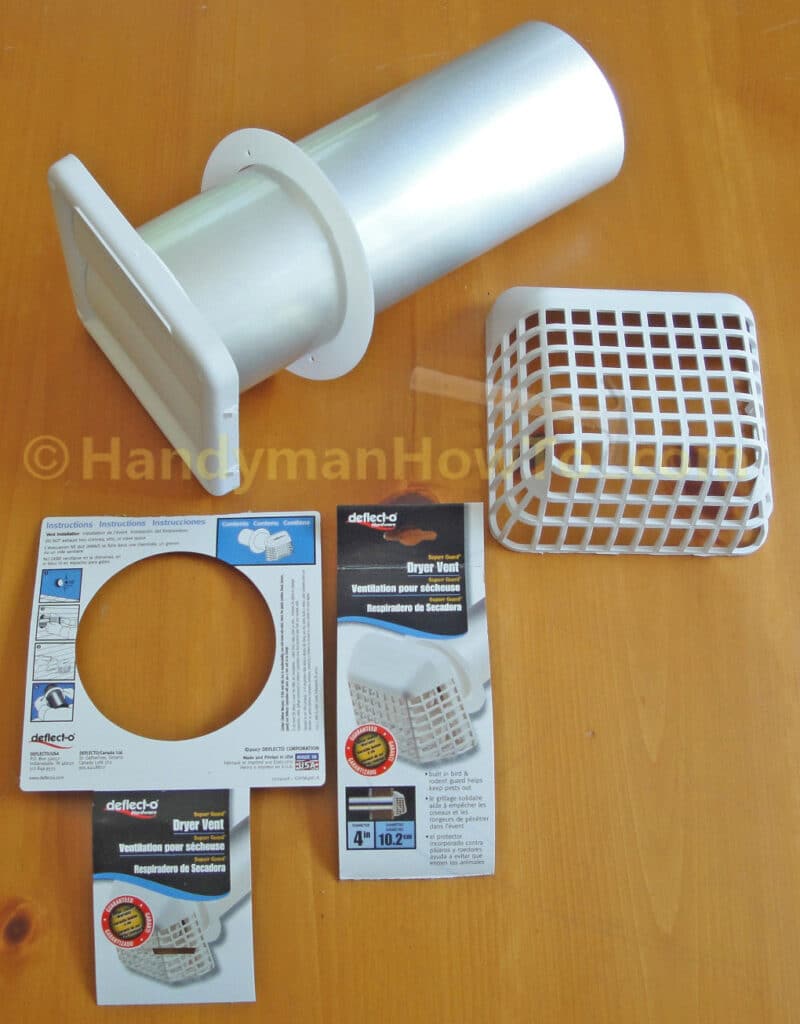
The new dryer vent consists of the preassembled vent and pipe, pipe collar (white plastic ring) and bird guard:
The new unit has two louvers compared to three louvers in the old unit. Two louvers are slightly heavier and less likely to stick open. The louvers only allow air flow one-way and prevent back drafts.
Disconnect the Dryer Vent Flexible Duct
Before removing the outside vent hood, I checked the dryer vent duct in the basement crawlspace to see what I was getting into. The washer and dryer are on the first floor and the flexible aluminum dryer duct runs below the floor joists, suspended every several feet by metal hanger straps.
There are two vents through the outside wall: 1) 3-inch bathroom ventilation fan duct and 2) the 4-inch dryer duct. The house sits on a hillside and the concrete foundation walls step down with the exterior grade.
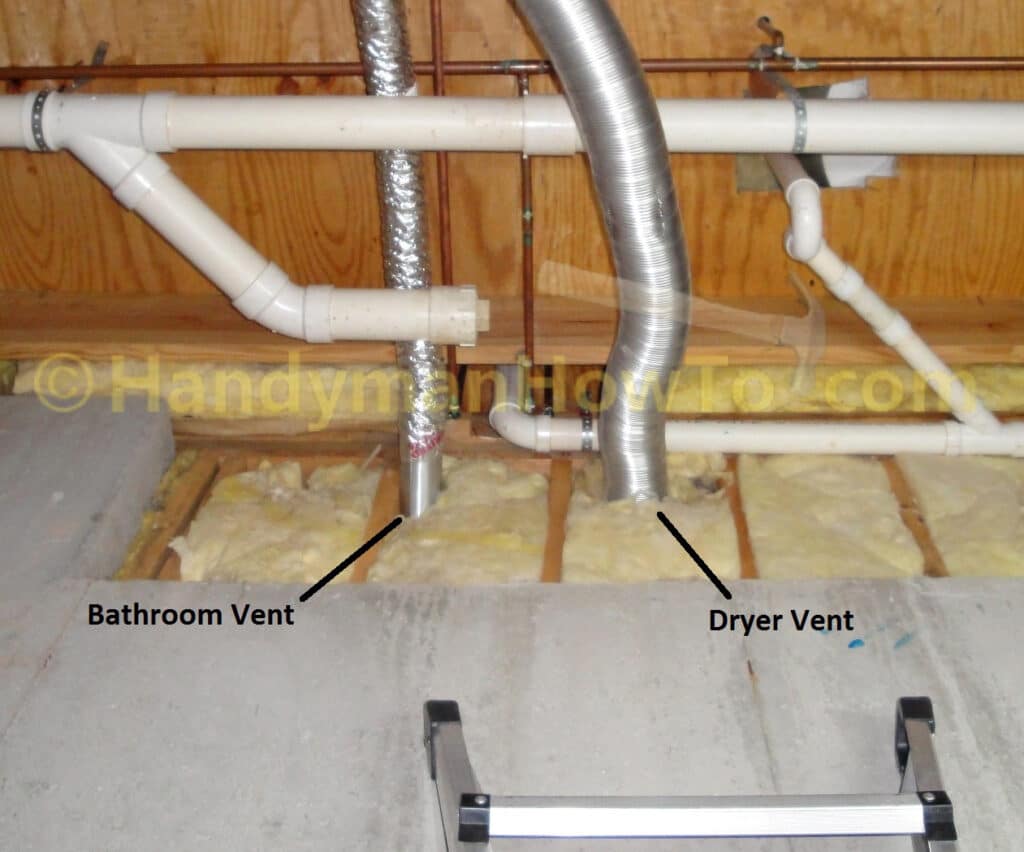
A couple of observations about the dryer vent duct:
- The dryer duct is flexible aluminum.
This is required by the Building Code and extremely important to handle the hot dryer gases and avoid fires. - The duct is properly sized at 4-inches in diameter.
- The duct is not touching the PVC plastic drain pipes, which could melt the pipe.
From the basement floor, things look OK.
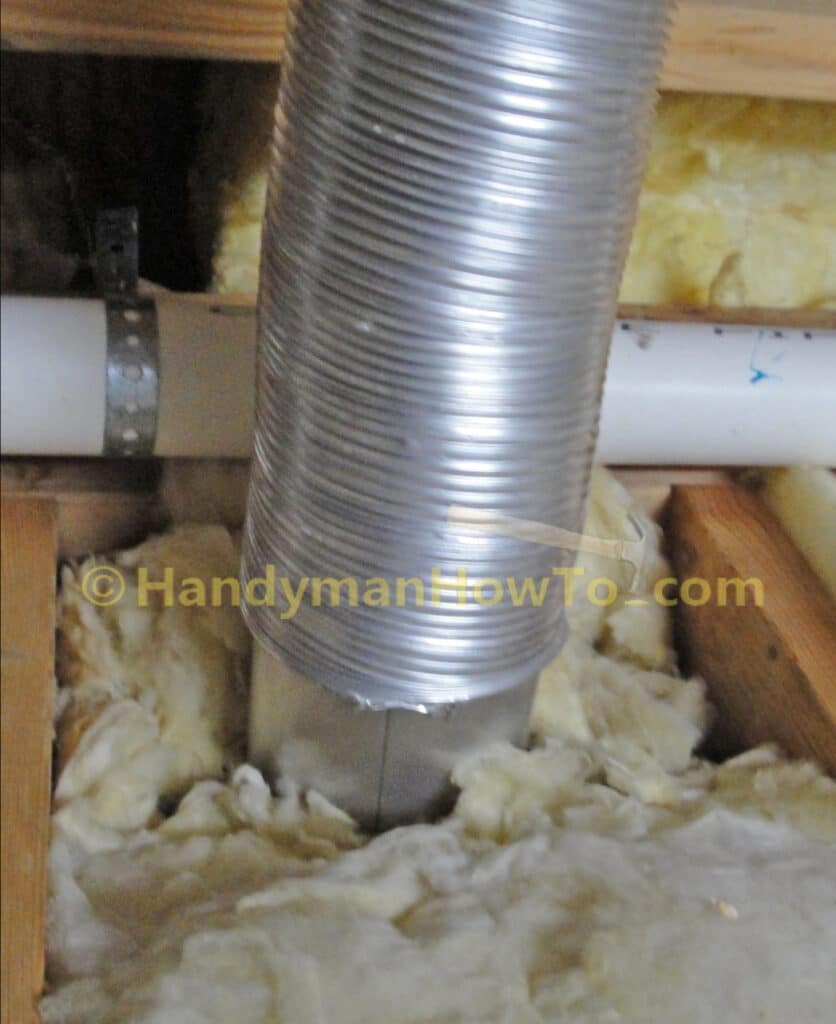
I went up the ladder to unfasten the flexible duct from the dryer vent. However, I saw daylight as I pushed the fiberglass insulation aside to expose the end of the duct! The insulation is a bit darkened from lint as the insulation filtered dryer gases leaking at the loose joint.
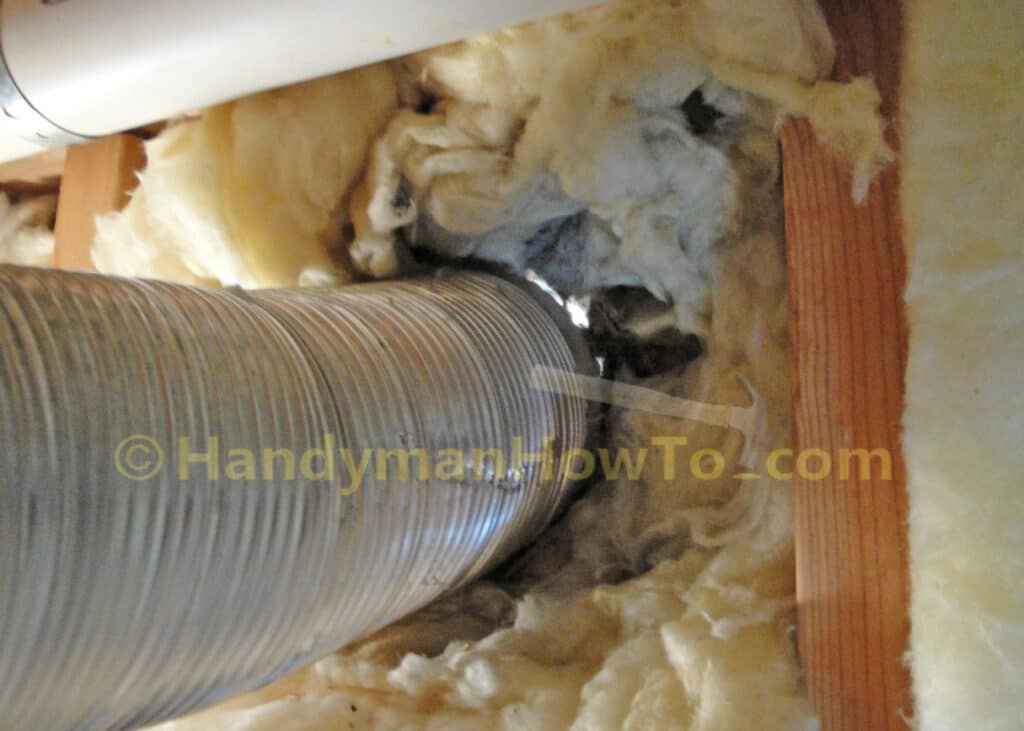
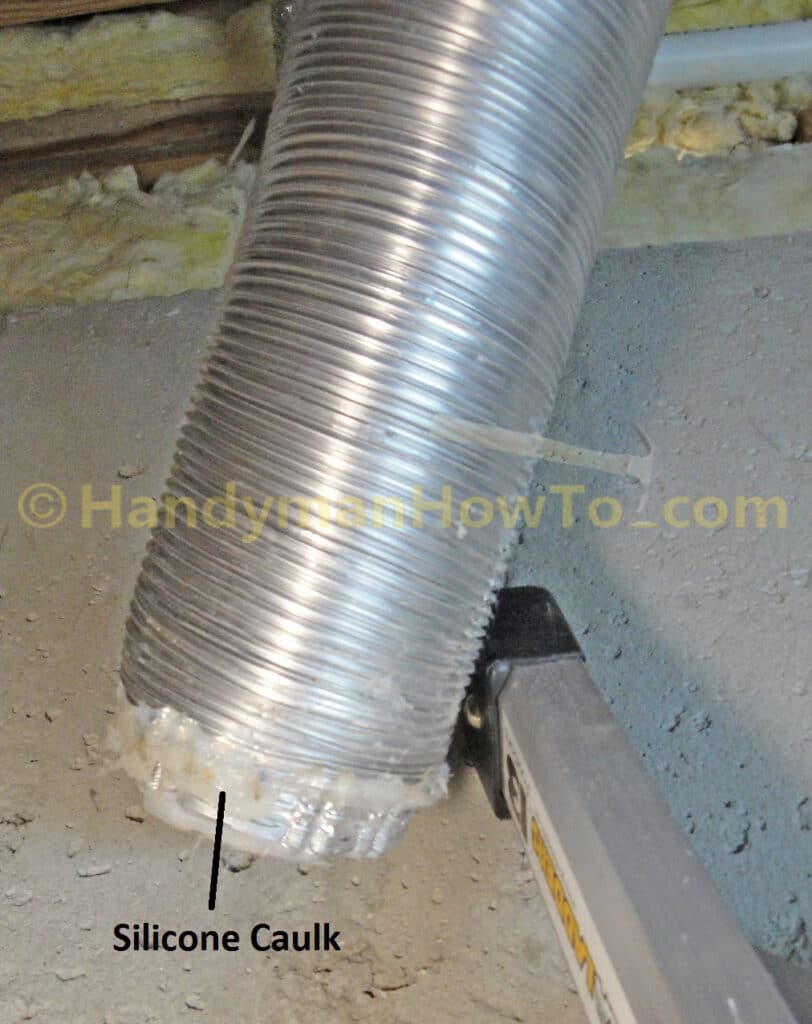
Wow! The goober who installed the dryer vent tried to caulk the metal duct to the vent! Silicone caulk has just about no bonding strength and the duct was held in place against the vent only by it’s own rigidity. This is a bad installation! I was fortunate there was no signs of rot on the oriented strand board (OSB) wall sheathing or 2×4 studs from condensation from the leaking dryer exhaust gases. Aside: I have an electric dryer; had this been a natural gas dryer then carbon monoxide poisoning from natural gas combustion products would have been a worry.
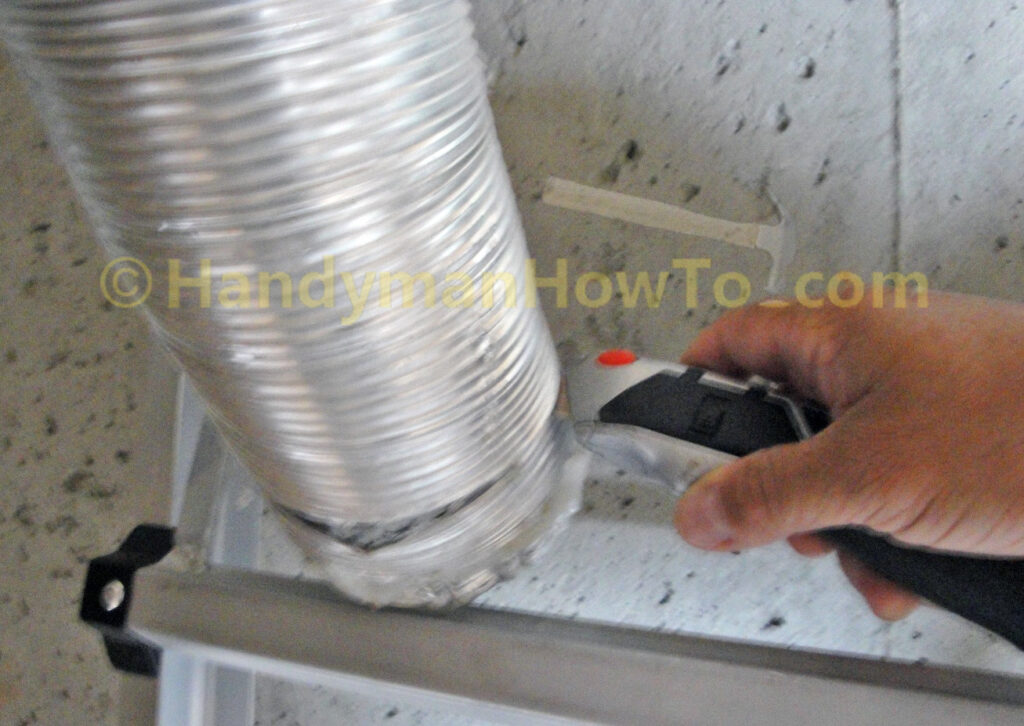
To get a clean end free of the gummed up caulk, I cut off about 3 inches of the flexible duct with a utility knife, slicing between the spiral metal ribs. When I’d made a complete circle with the knife, the metal rib was cut with pair of wire snips.
I inspected the flexible dryer duct with a flashlight and found only a light layer of lint inside the pipe. This is well as it appears the clothes dryer lint filter is doing a good job keeping lint out of the ductwork. I vacuumed the lint from the inside of the duct as a far as the vacuum cleaner hose would reach.
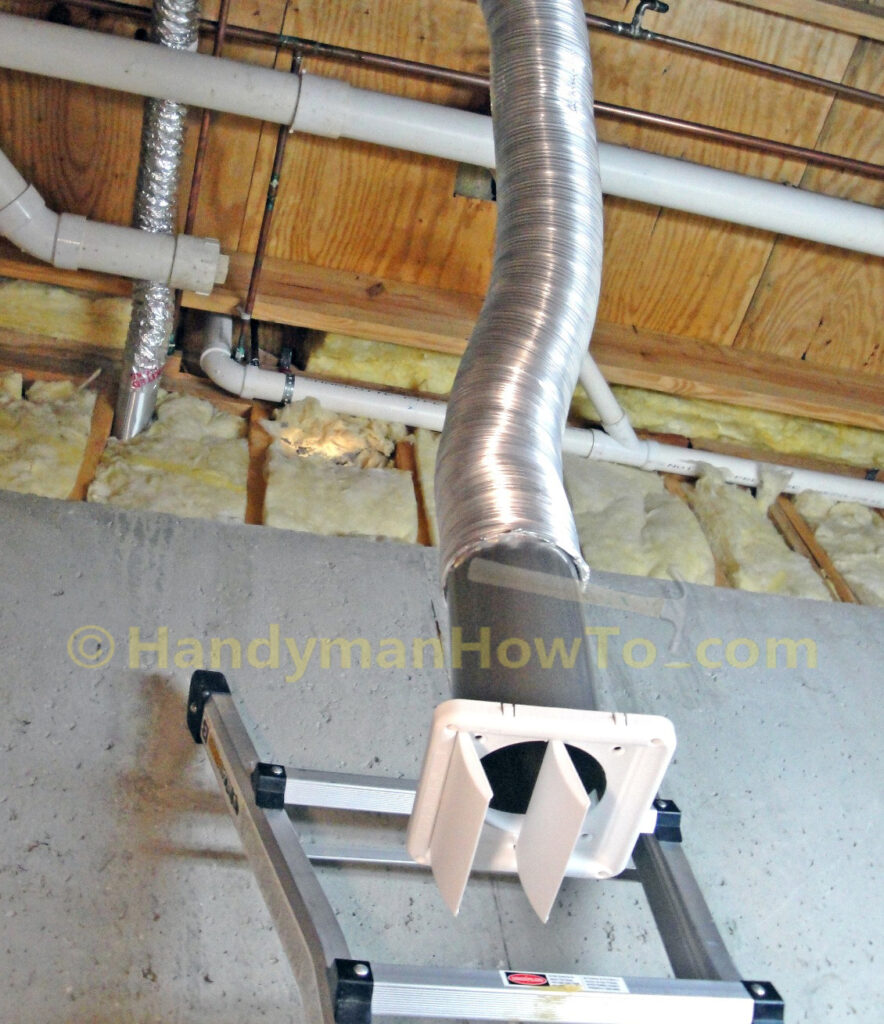
The new deflect-o dryer vent was test fitted to work out the kinks in the flexible duct. Ultimately, the 11-inch rigid vent pipe will slide several inches into the flexible duct.
Before going outside to remove the old dryer vent from the wall, I needed to find the appropriate mounting screws. I decided that Grip-Rite® 2″ PRIMEGUARD TEN exterior would screws would be best based on what I had on hand in my workshop. The bugle head wood screw fit the recesses in the vent face well and 2-inches is sufficient to reach through the stucco to the OSB sheathing.
Remove the Old Dryer Vent
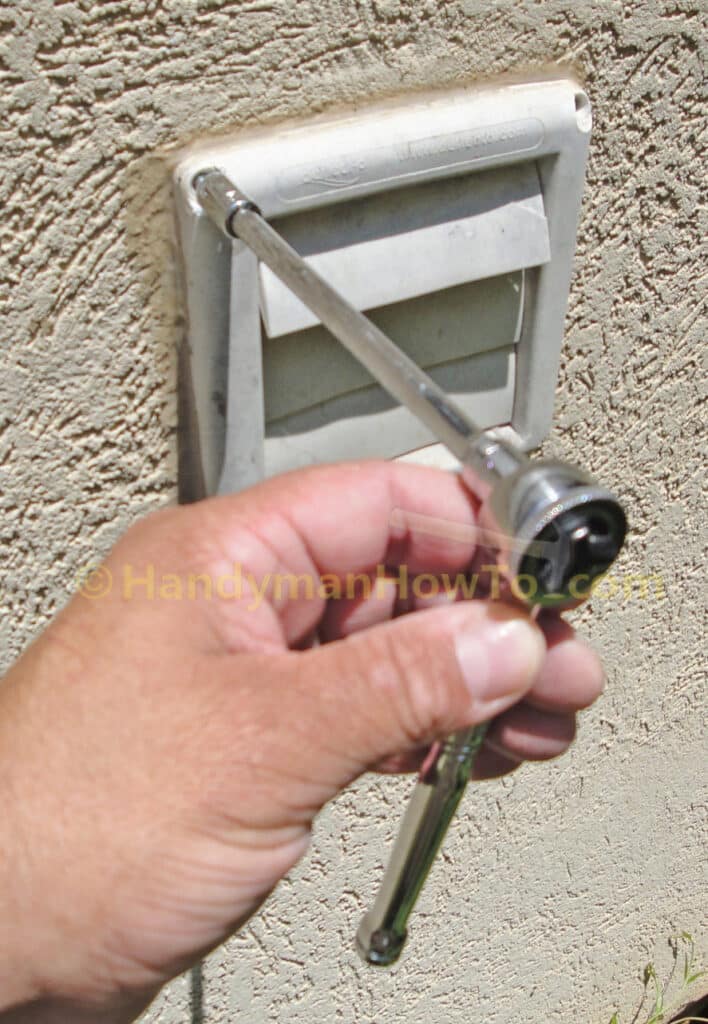
The hex-head wood screws are removed from the old dryer vent with a socket wrench.
The caulk lines are cut with a utility knife to release the vent plate:
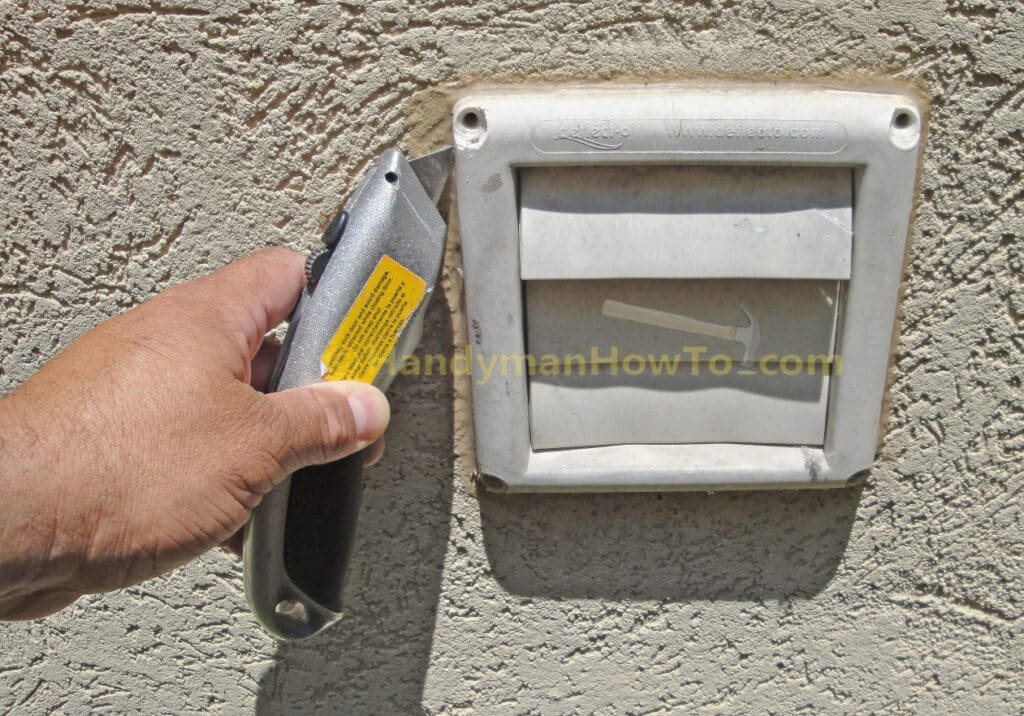
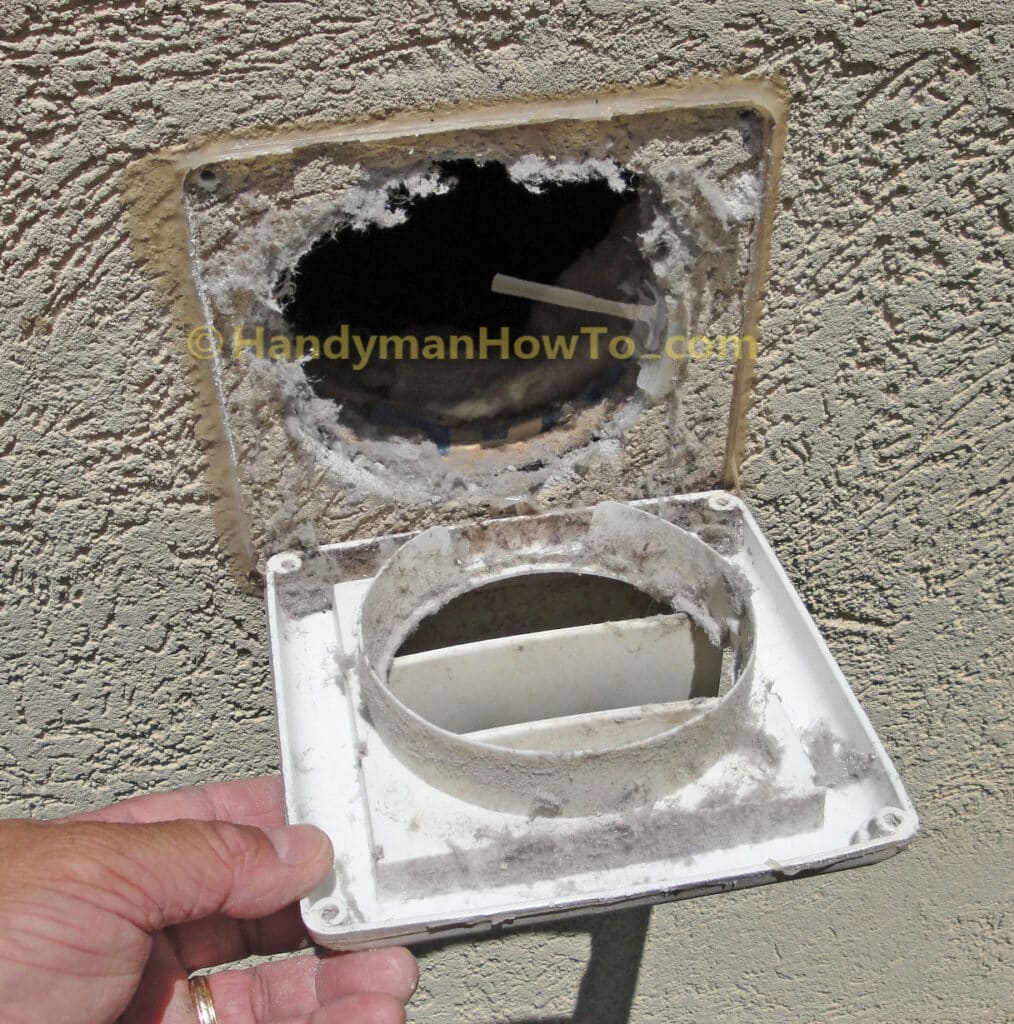
And pull off the old vent:
The back side of the blade on the Husky 3-in-1 Caulk Tool was ideal for scraping the old caulk off the stucco wall and getting into the crevasses.
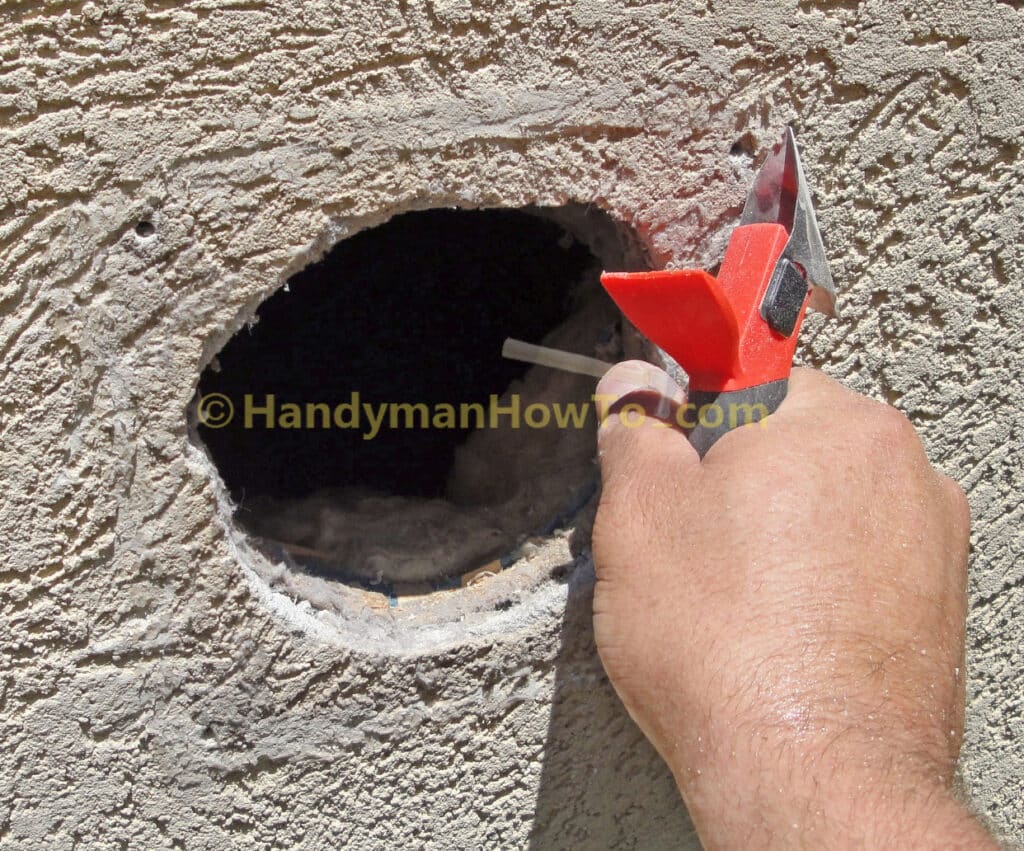
It’s important to remove all the old caulk so the new caulk will make a watertight bond to the wall. The 10 minutes of scraping is well worth extra effort.
Install the New Dryer Vent
The hole in the basement wall is plenty large enough for the deflect-o® 4″ Supurr Guard® Dryer Vent #GVHXW4:
The wood screws won’t punch through the cement stucco, so pilot holes are drilled to get the screws started. To mark the screw locations:
- Hold the new dryer vent against the wall.
- Center and level the dryer vent.
The new vent face is slightly smaller than the old one, so I centered it taking care to avoid the old screw holes. - Mark each screw hole against the wall.
A felt tip marker or No. 2 pencil is too fat to fit through the holes in the vent plate, so I shaved down a No. 2 pencil with my pocket knife so it was skinny enough to reach through the screw holes to the wall.
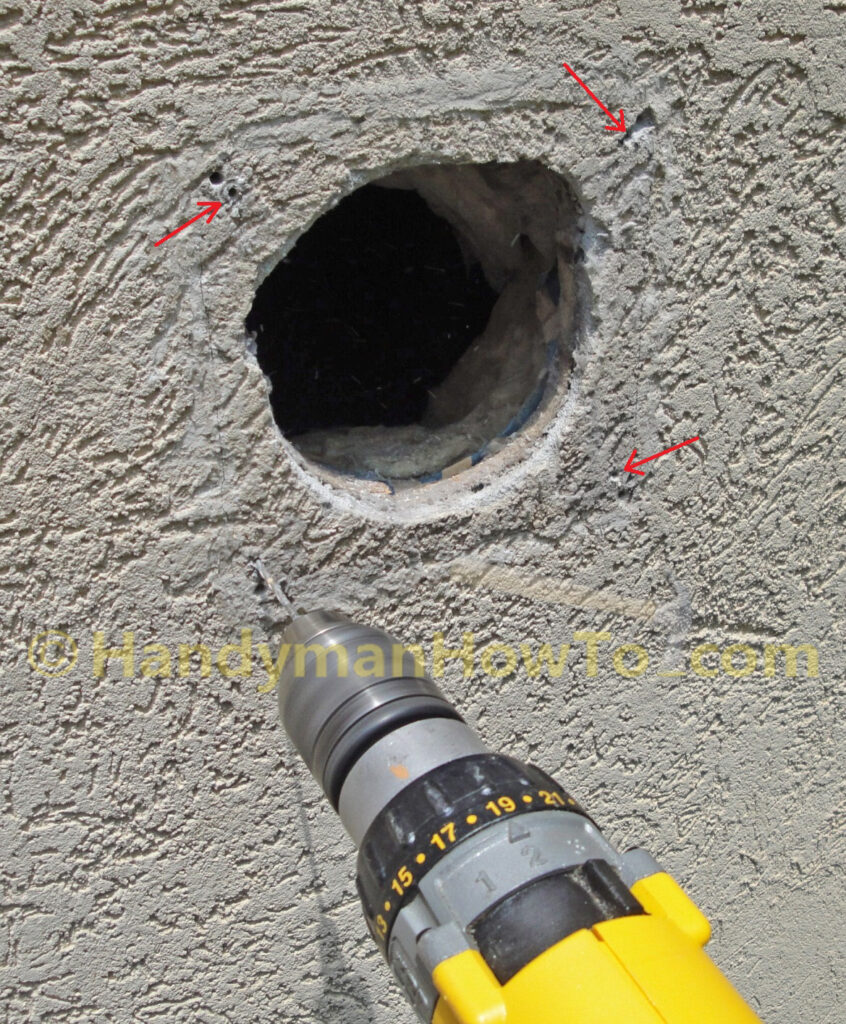
Four pilot holes are drilled at each mark (red arrows) using a drill bit that is slightly smaller than shank of the wood screw. A masonry drill bit should be used, but since I didn’t have a small masonry bit on hand so I “sacrificed” a normal drill bit, which did OK. It’s only necessary to drill through the stucco and stop at the oriented strand board (OSB) wall sheathing.
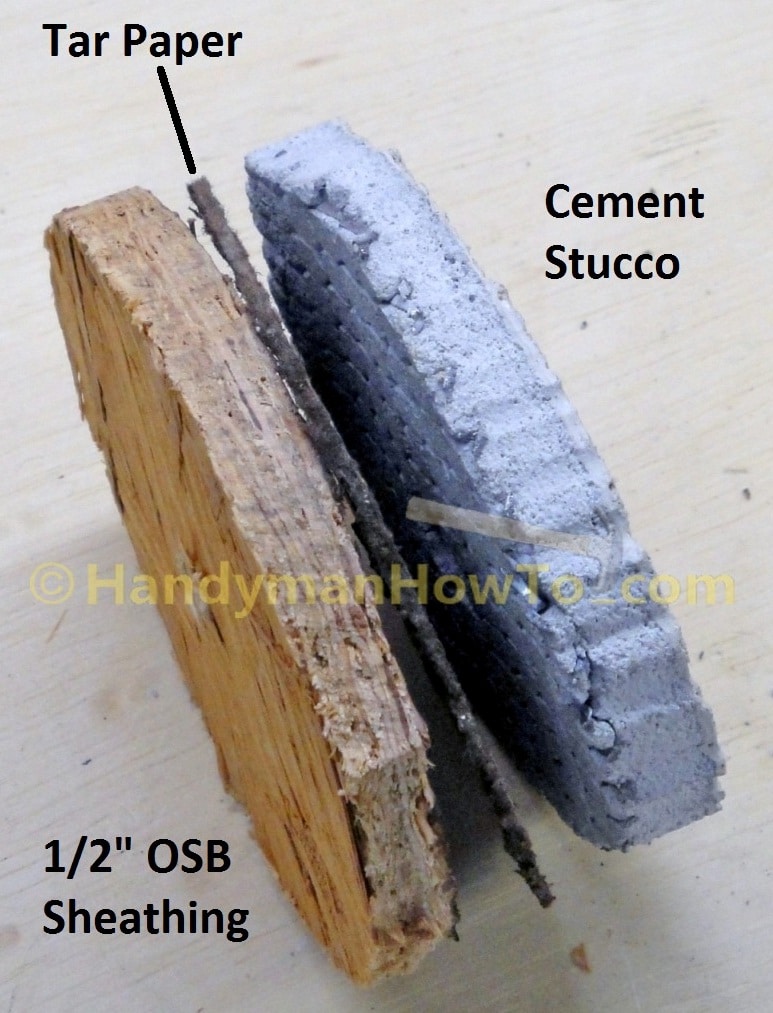
Aside: I saved the plug from the hole I cut in the wall for the basement bathroom exhaust vent that’s also located on this exterior wall. The plug illustrates the stucco wall construction:
- 1/2 inch oriented strand board (OSB) against the 2×4 studs (interior side)
- tar paper weather proof barrier
- metal lath to hold the stucco (notice the grid pattern on back of the stucco)
- 1/2 inch layer of cement stucco
- top coat of paint over the stucco
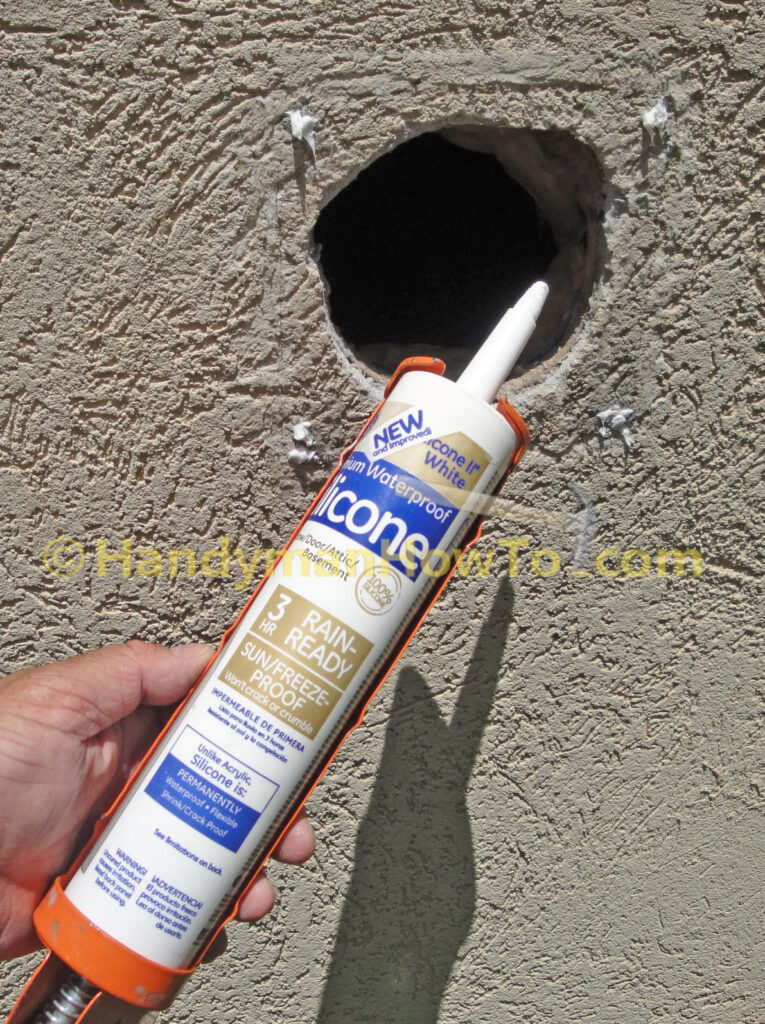
The old and new screw holes are filled with GE Silicone II waterproof exterior silicone caulk to seal out rain water. There are two types of silicone caulk: paintable and non-paintable. I used the non-paintable white silicone caulk because the vent is white and I don’t plan to paint the vent. Non-paintable caulk dries to a tack free surface that won’t collect dust/dirt. Paintable caulk has a slightly tacky surface to bond with paint and will collect dust/dirt over time if left unpainted. Take care and read the label when buying caulk at the hardware store so you get the right type for your job.
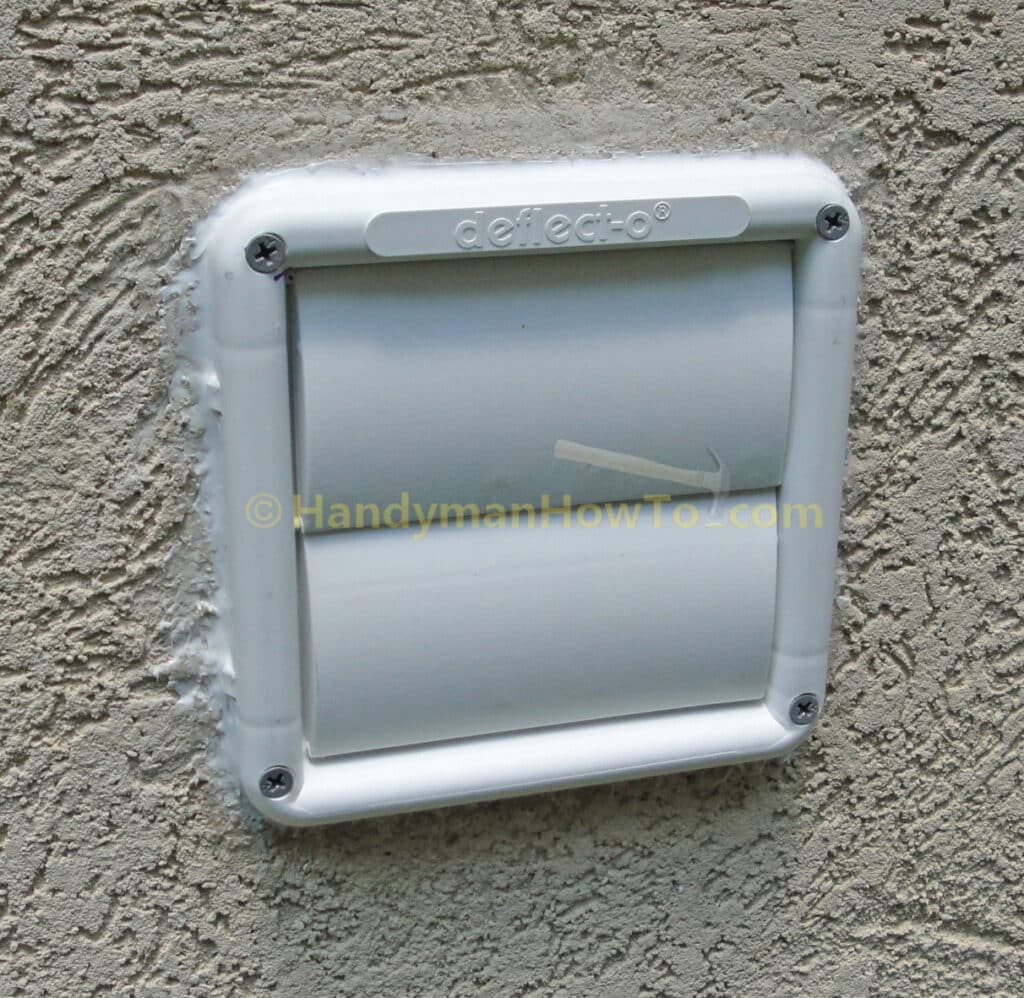
The new dryer vent is fastened to the wall with Grip-Rite® PRIMEGUARD TEN 2 inch exterior wood screws. The wood screws pass through the cement stucco to the oriented strand board (OSB) wall sheathing. It’s the OSB sheathing that gives the screws holding power.

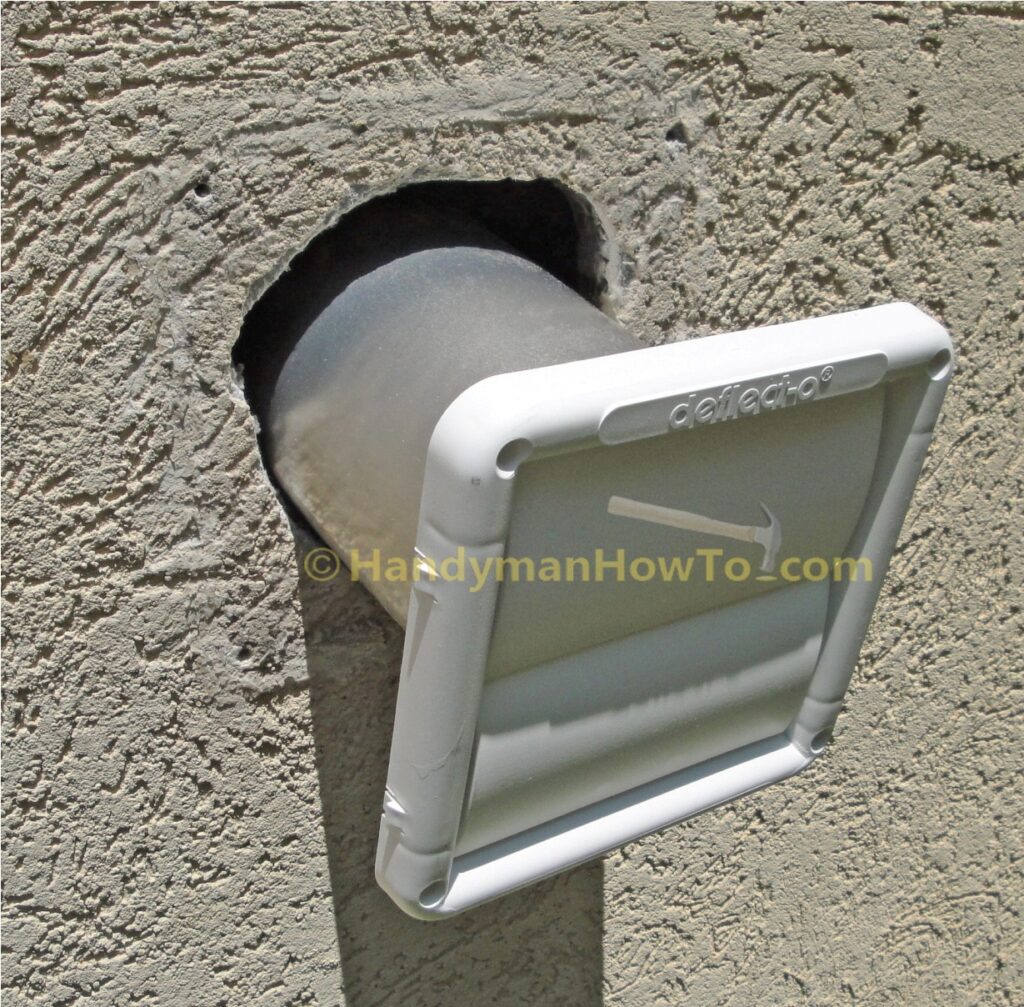
A bead of white silicone caulk is applied to the perimeter of the dryer vent to seal it to the wall.
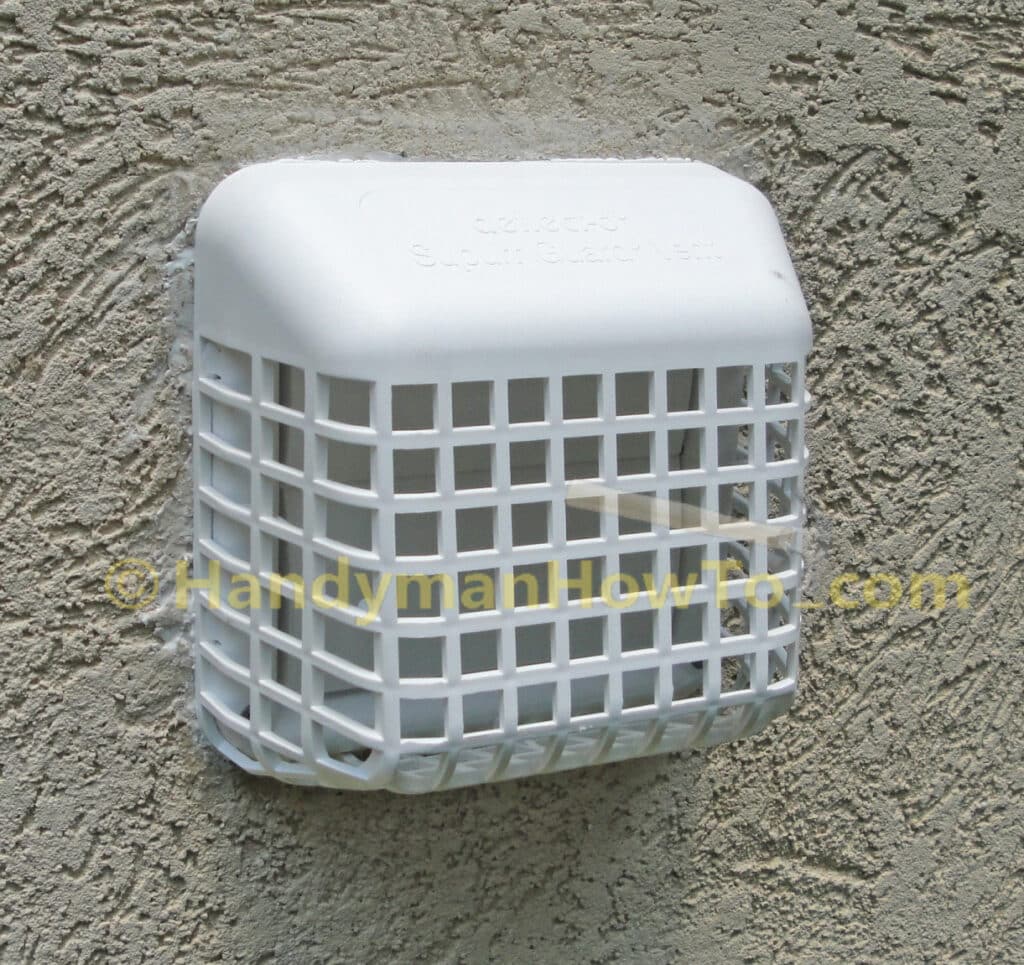
The bird guard snaps on the vent hood to keep out birds and small pests. I’m a big fan of bird guards because a bird will build a nest inside an open vent if a given chance.
Dryer Vent: Flexible Duct Connection
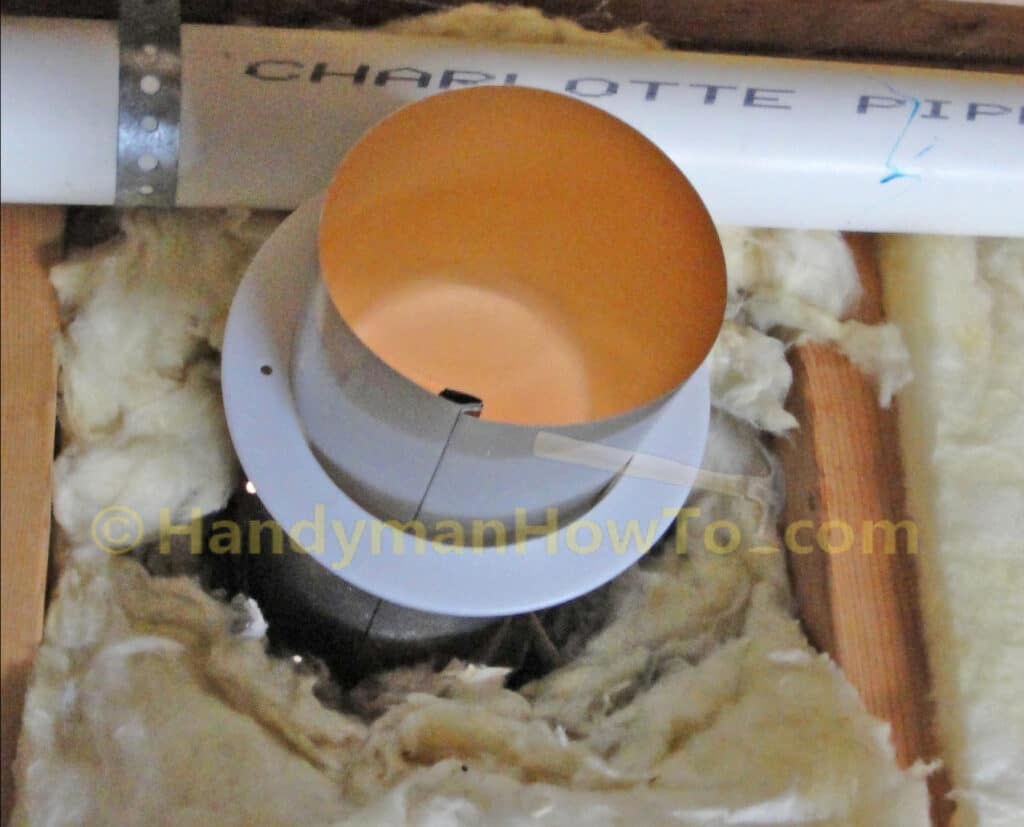
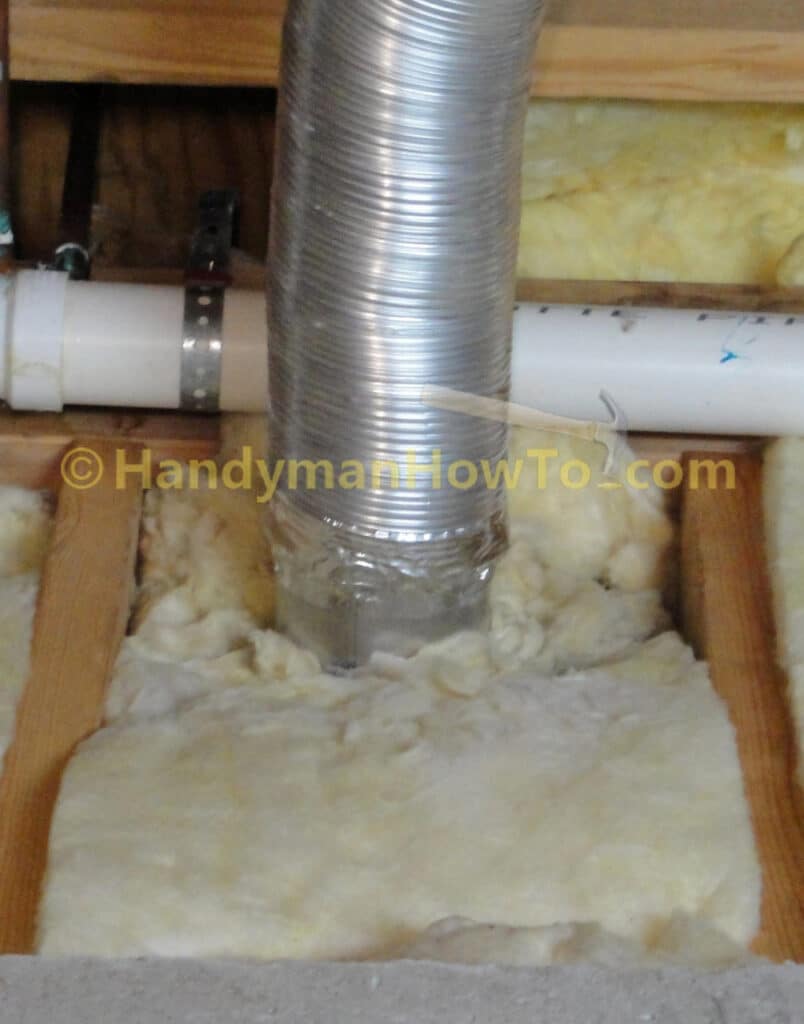
Back inside the basement, the white pipe collar is slipped over the dryer vent pipe and set against the wall behind the fiberglass insulation. The collar is a cosmetic trim piece to cover the hole in the wall. The fiberglass insulation held the collar against the OSB wall sheathing so I skipped the extra step of securing it with two small screws.
Notice the warm glow of sunlight diffusing inside the vent pipe.
The insulation is pressed back around the dryer vent pipe, then the flexible alumimun dryer duct is slipped about 6 inches over the vent pipe. This takes a little bit of wiggling to work the flexible duct over the vent pipe because it has to be exactly smooth and straight. I stopped at the face of the fiberglass insulation to leave room for sealing the joint with aluminum foil HVAC tape.
The flexible dryer duct is fastened and sealed to the vent pipe with two loops of aluminum foil HVAC tape. Smooth down the edges of the tape for an air tight seal. It is critical that HVAC metal foil tape is used here to withstand the temperature and maintain a solid bond. Do not use common duct tape because it will come loose and fail.
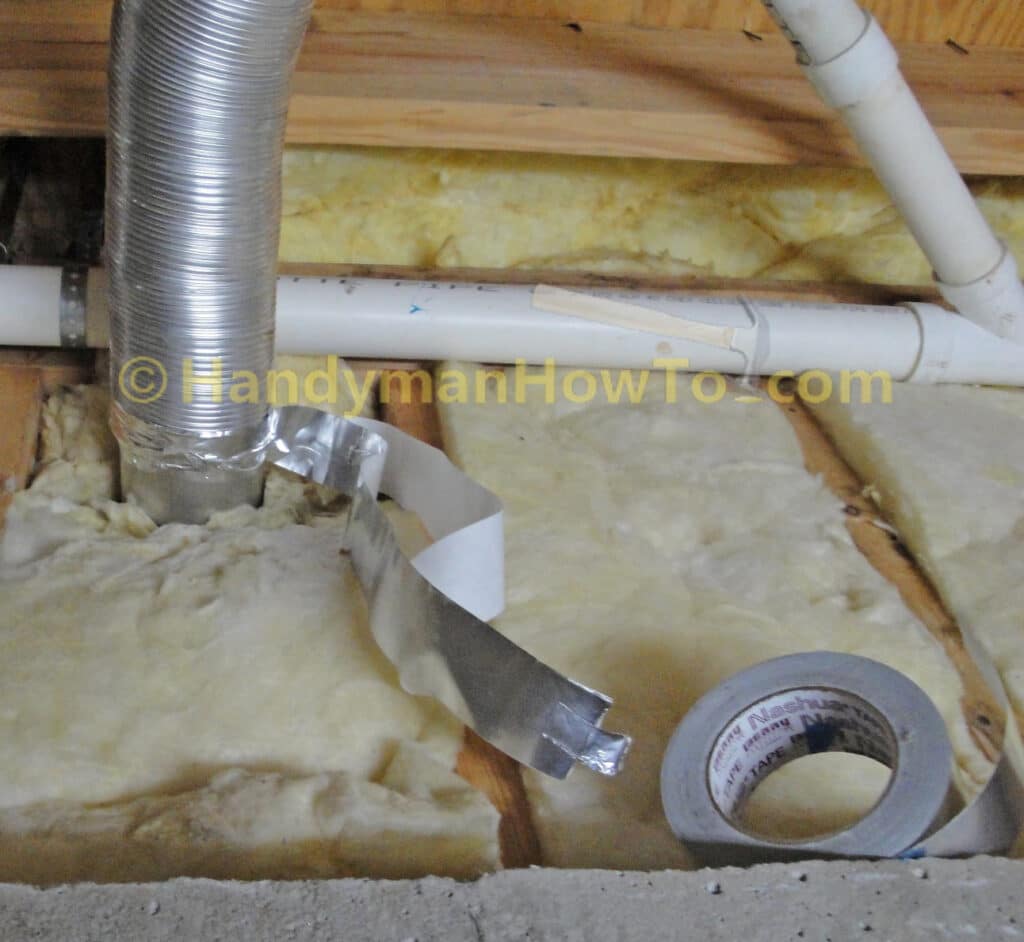
Flexible metal dryer duct sealed to the new deflect-o dryer vent pipe with HVAC foil tape:
Dryer Vent Testing
Toss a load wet clothes in the dryer with an anti-static dryer sheet and turn it on. Check the ducting and new vent for leaks by:
- Feel around the duct inside the basement to ensure there’s no air leaks.
- Walk outside and verify the louvers on the dryer vent are open with a strong flow of warm air.
If the airflow is weak or your clothes are taking an unusually long time to dry, the dryer duct may need cleaning.
Cool Product: Dryerbox®
I plan to do some laundry room remodeling work and stumbled across the Dryerbox by In-O-Vate Technologies, Inc. I haven’t used this product yet, but it looks perfect to solve the kinked dryer hose problem. It’s simple to install and I’ll use the opportunity to clean out the dryer duct starting at the laundry room.
Thanks for reading,
Bob Jackson