This project explains how to take apart the drain P-trap to recover an item accidentally dropped down the sink drain. Lost jewelry is a common occurrence.
How to Retrieve an Item Dropped Down the Sink Drain
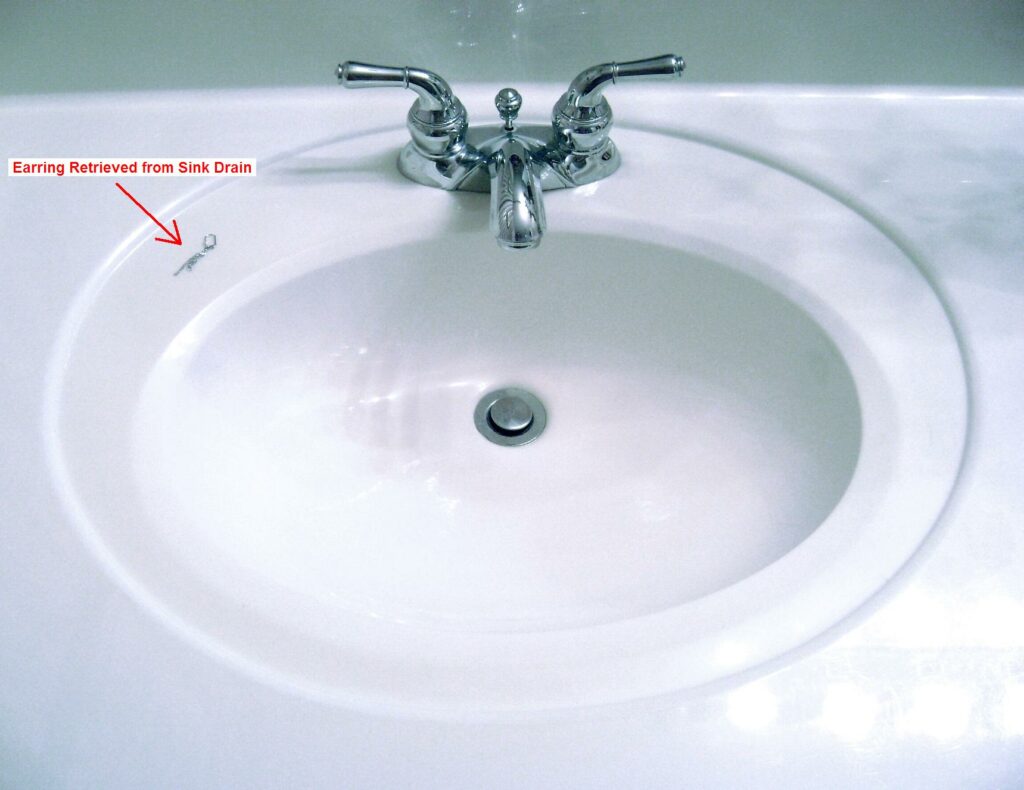
Small and sometimes expensive items are easily washed down the sink drain. Metallic items like jewelry will sink and can usually be retrieved from the plumbing drain trap under the sink. Be sure to turn off the water immediately to minimize any chance of the item getting flushed into the main sewer line. Taking apart the P-trap to recover a lost item is simple and can often be done without tools. This job took less than 15 minutes when my daughter lost an earring in the bathroom sink.
The steps shown here also apply to unclogging a sink.
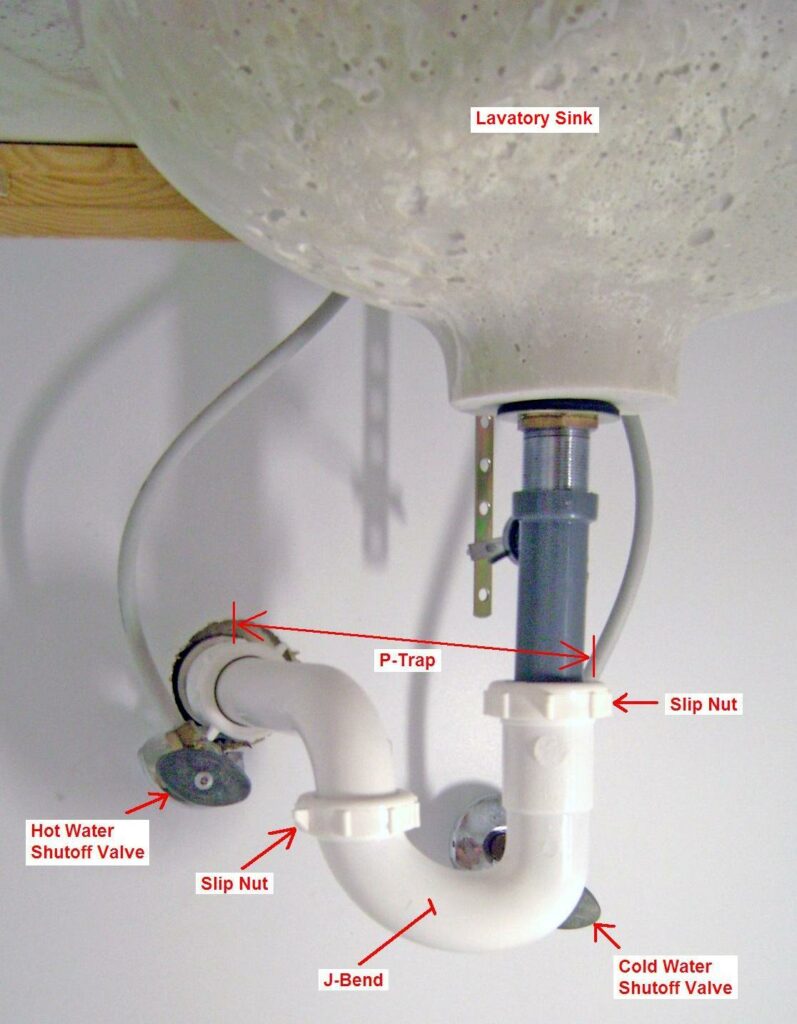
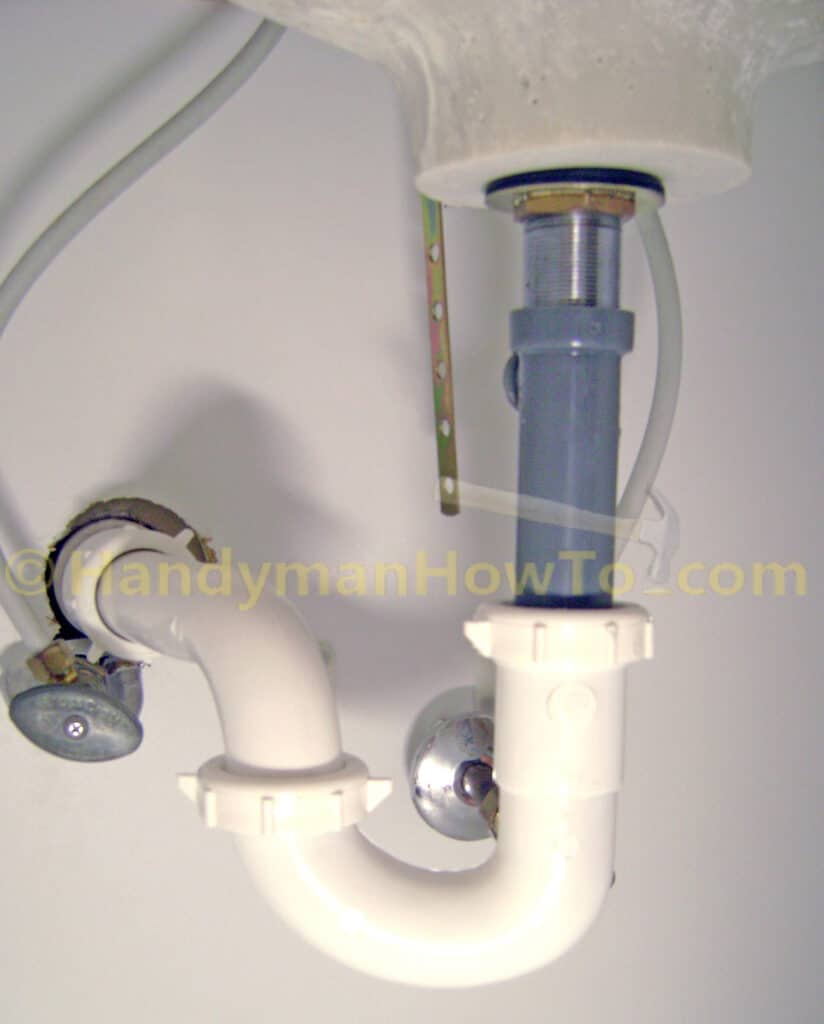
Bathroom Sink Plumbing: P-Trap and J-Bend
A lost item will normally sink to the bottom of the J-bend in the P-trap. The purpose of the the P-trap is to maintain a water seal to prevent sewer gases from wafting out of the sink drain. It’s called a P-trap because it looks like the letter P.
Take Apart the J-Bend
Place a bucket under the J-Bend to catch the water.
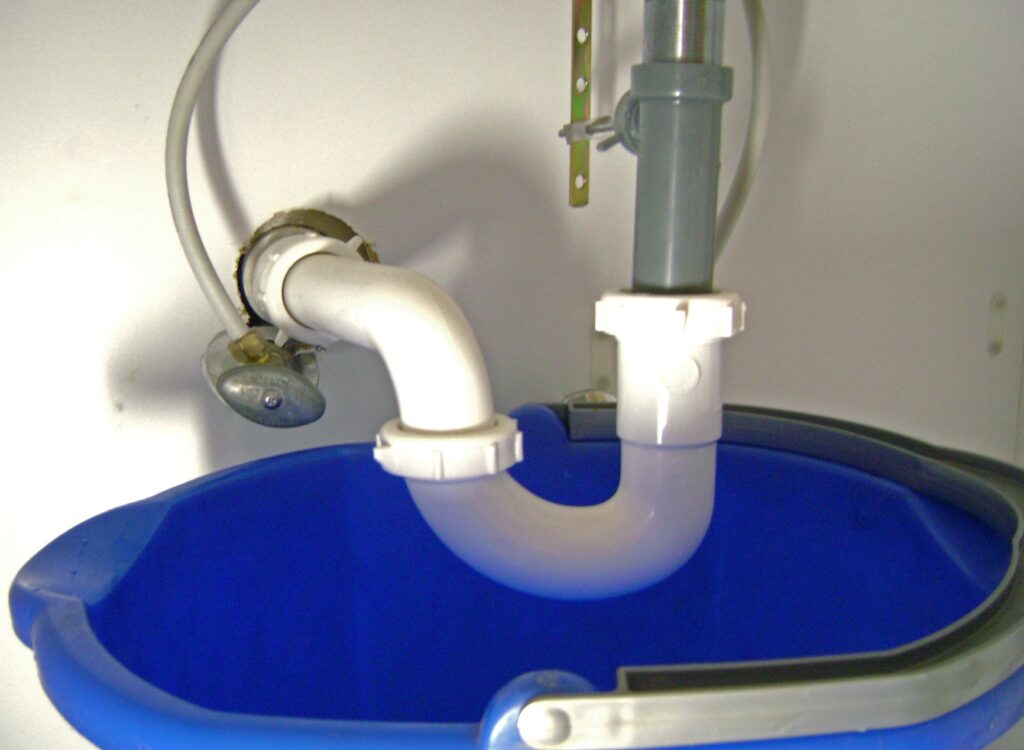
Unscrew the slip nut at the J-Bend. Remember, lefty-loosey righty-tighty. No tools are required.
A nylon washer is under the slip nut. Let the slip nut rest loosely when fully unscrewed.

Unscrew the slip nut at the other side of the J-Bend.
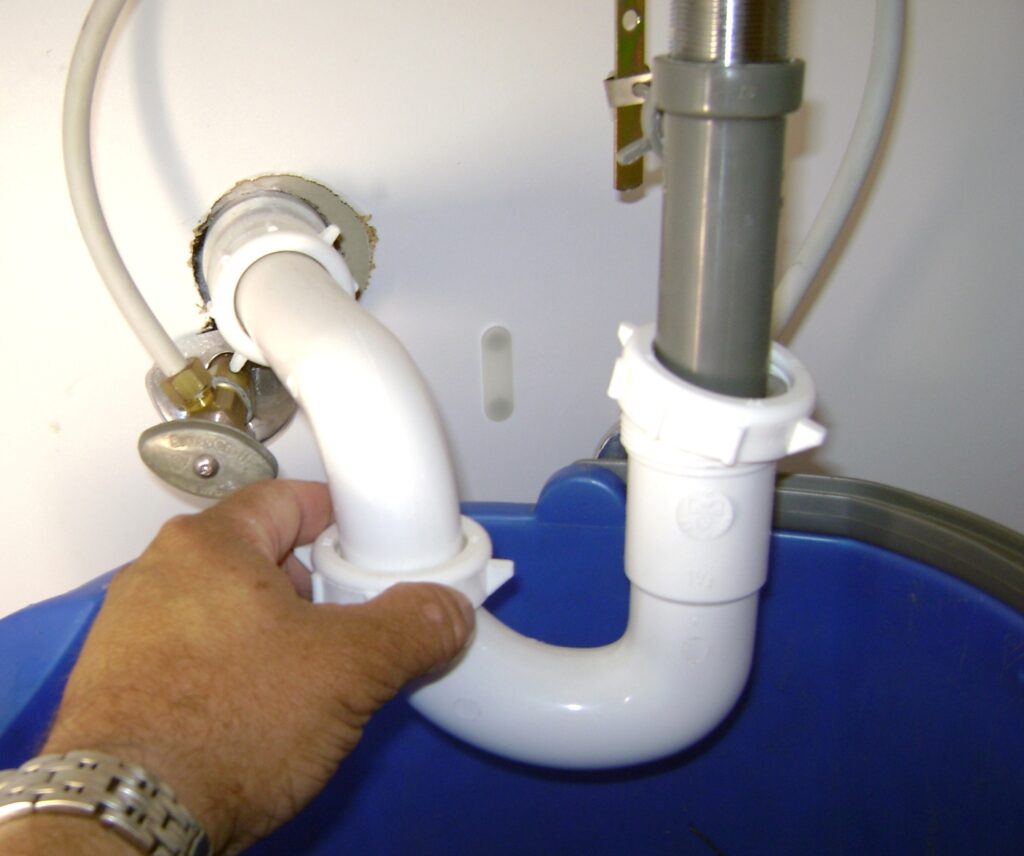
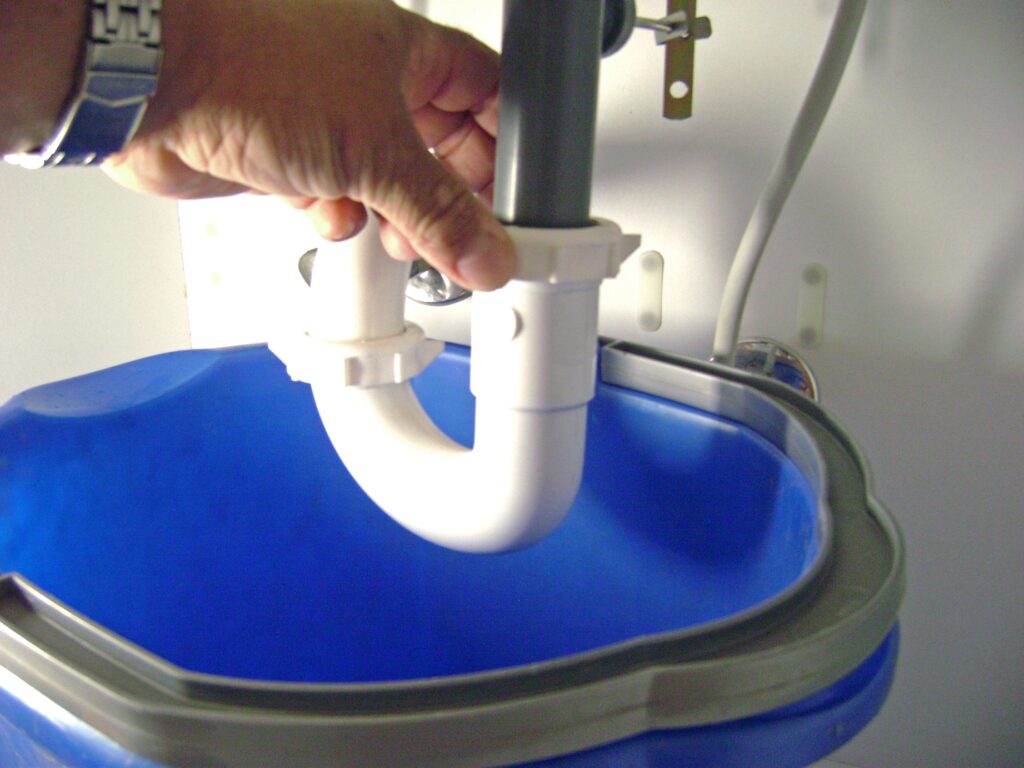
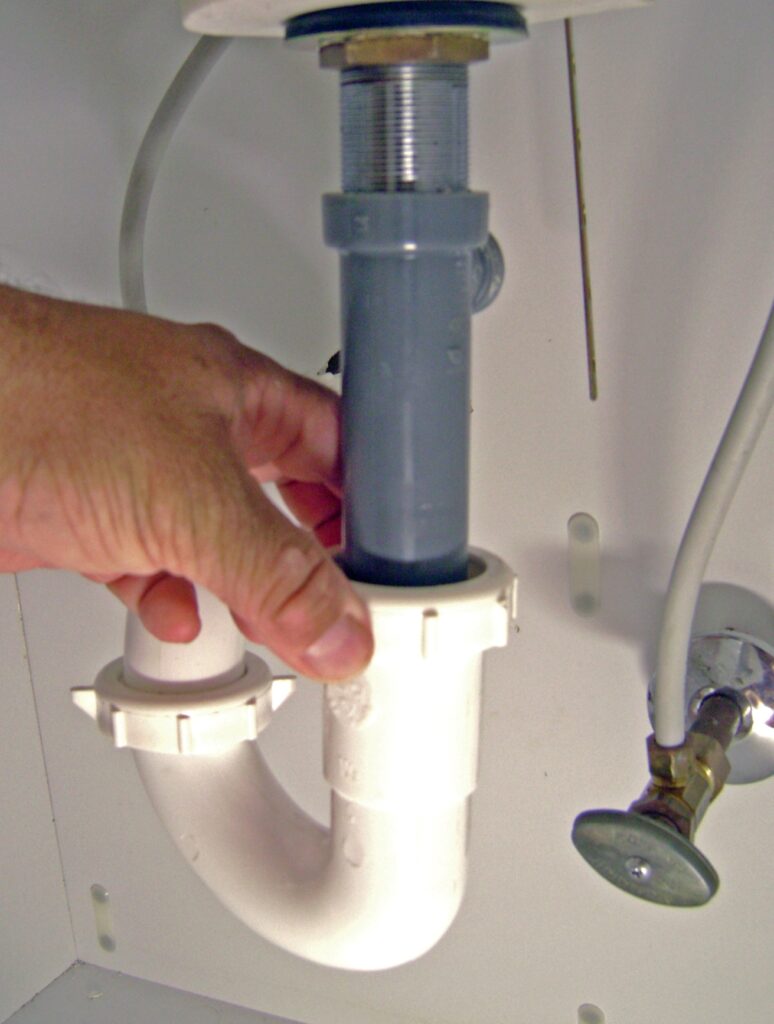
Slide the slip nut up and out of the way on to the horizontal section of the P-trap as shown. I’m supporting the J-Bend with my hand here as it’s ready to drop down.

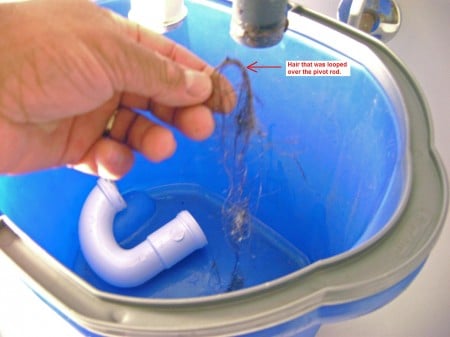
Well – what do you know? The earring didn’t sink to the bottom of the sink trap because it got tangled in a bunch of hair first (yuck!).
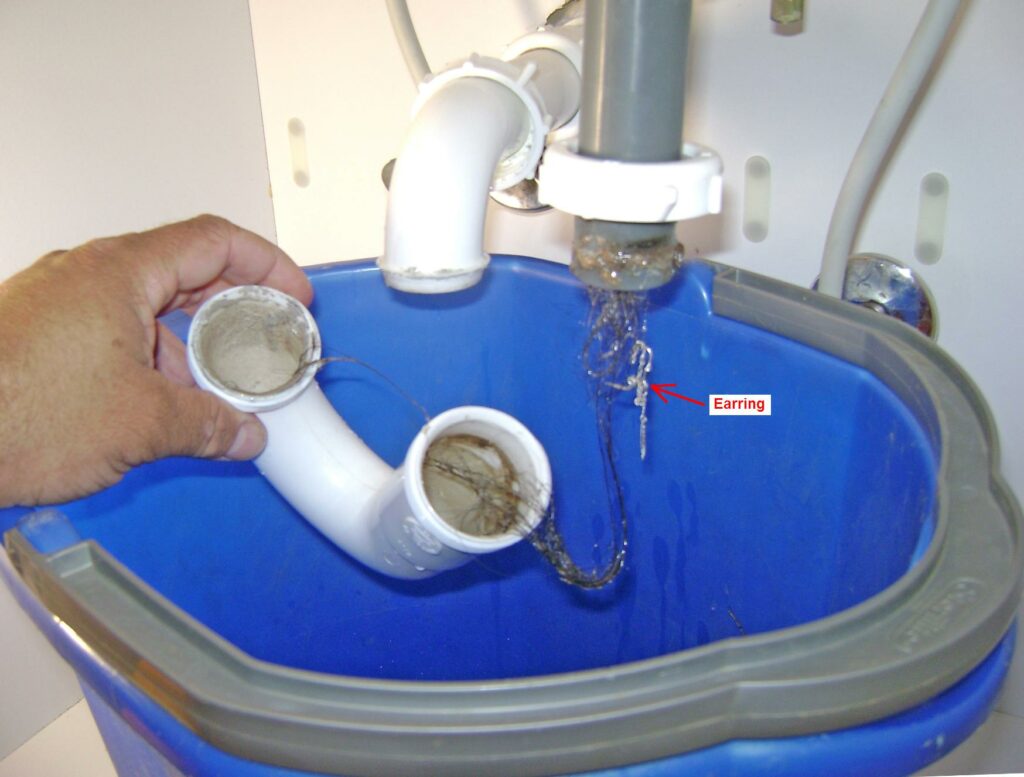
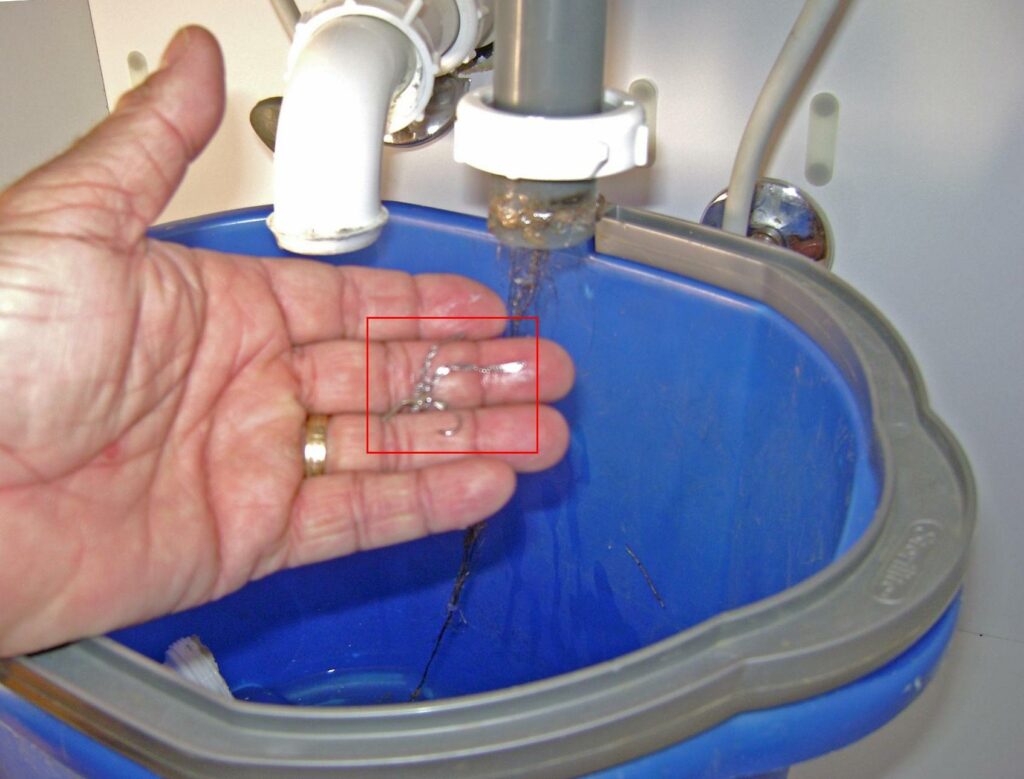
Lost earring retrieved from the sink drain.
Remove the Pop-Up Drain Pivot Rod
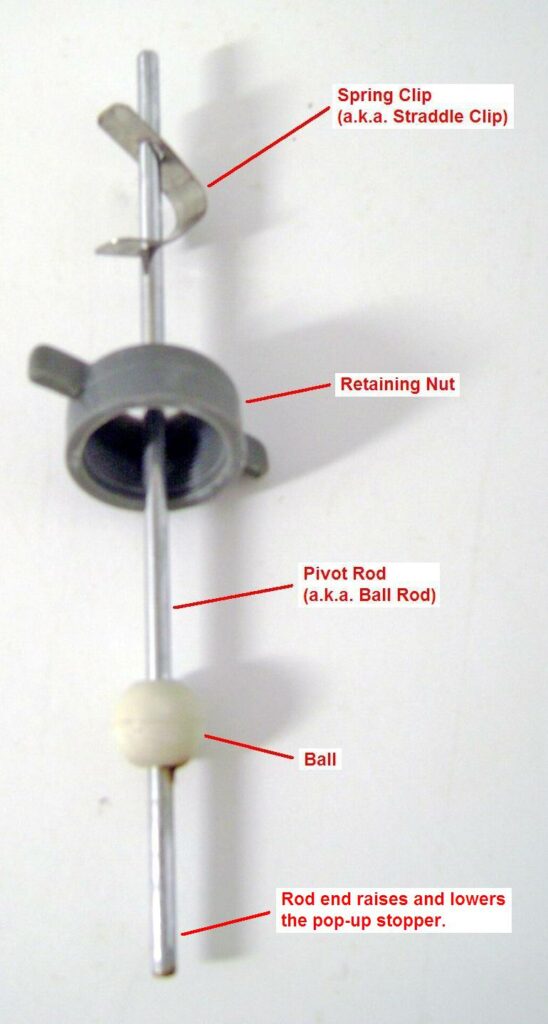
The hair clog I found in Part 1 must be removed it would continue to build up over time and clog the drain. It was obvious the hair was caught on the pivot rod (also called a ball rod) that attaches to the stopper of the pop-up drain. To do a proper job of cleaning the drain, it is necessary to remove the pivot rod.
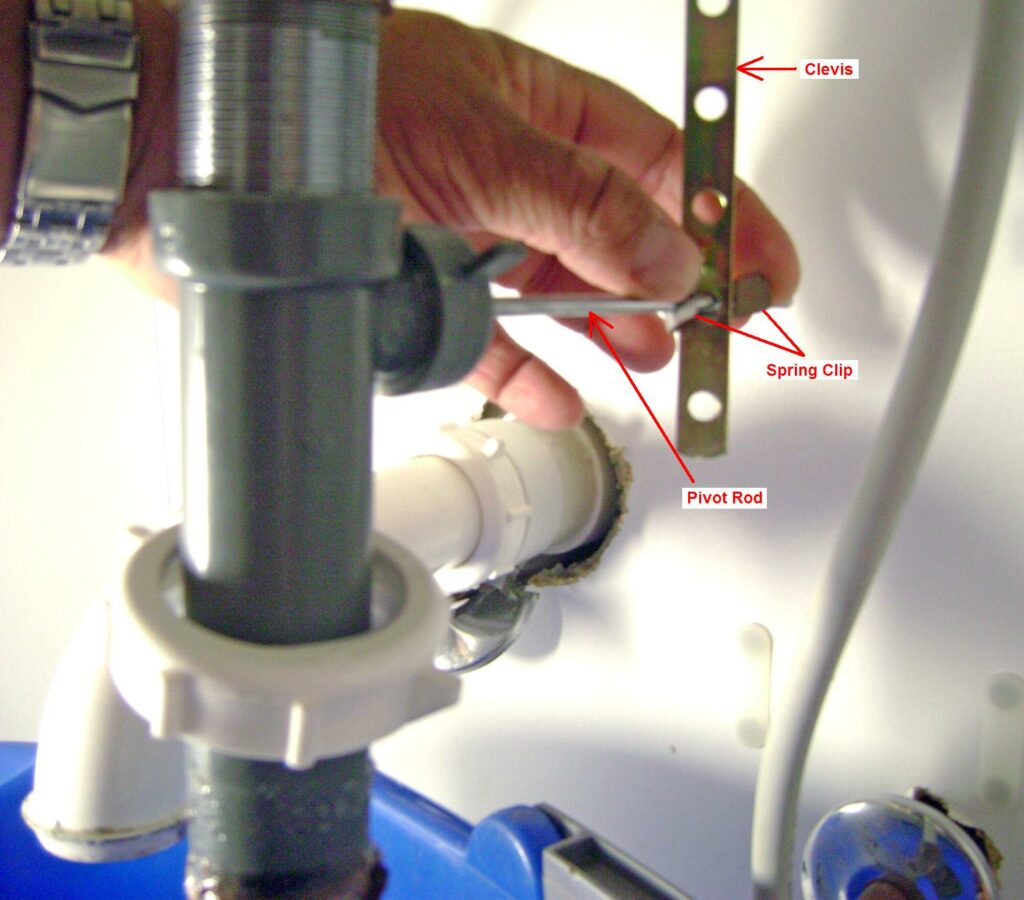
Here are the parts of the pop-up drain pivot rod (click on the image for a full size view):
Step 1: Remove the Spring Clip
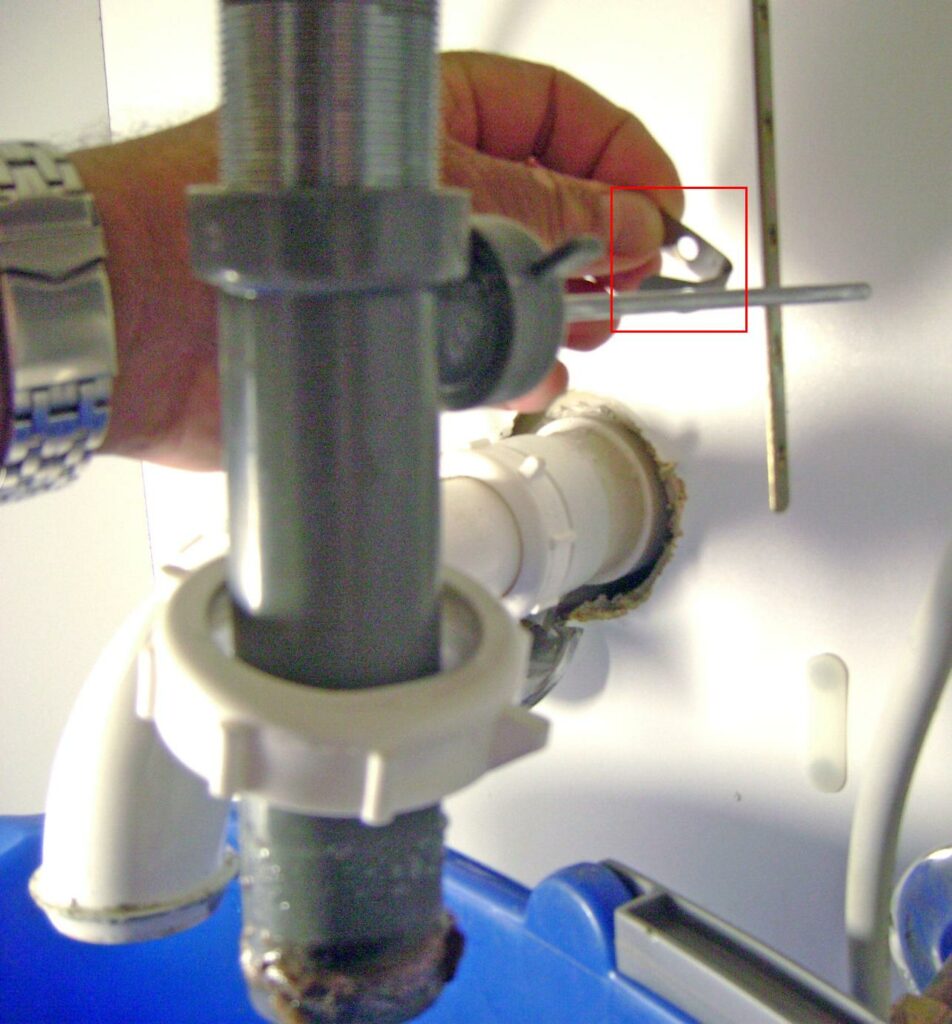
Note which clevis hole pivot rod is in, which is the 2nd hole from the bottom here. Squeeze the ends of the spring clip together slightly and slide the clip and clevis off the end of the rod.
Spring clip released from the pivot rod (a.k.a. ball rod) and clevis.
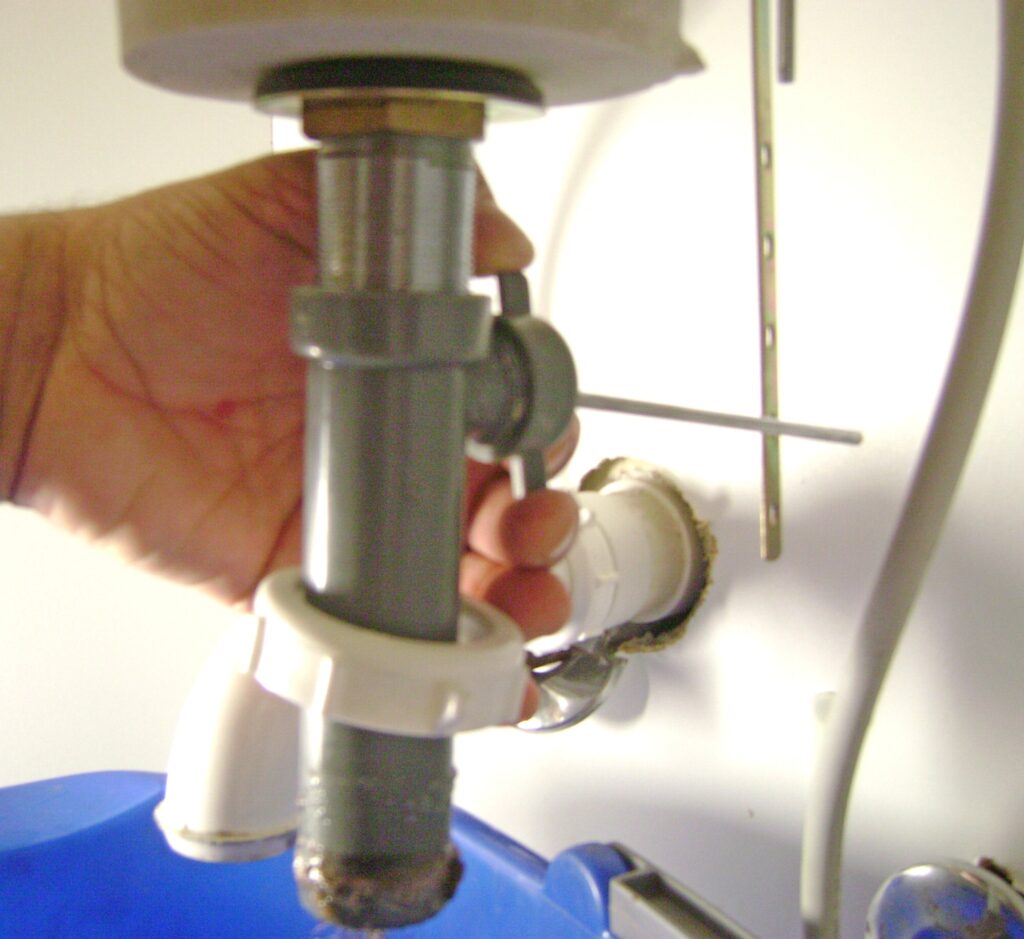
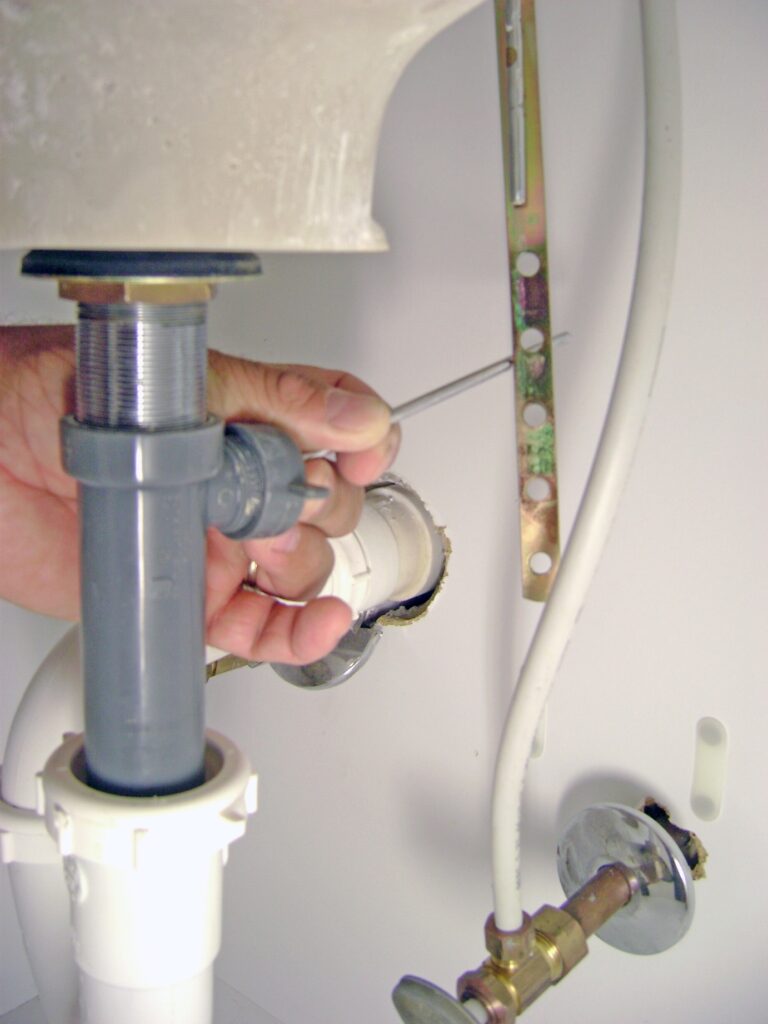
Step 2: Unscrew the Retaining Nut
Unscrew the pivot rod retaining nut to release the pivot rod from the drain T.
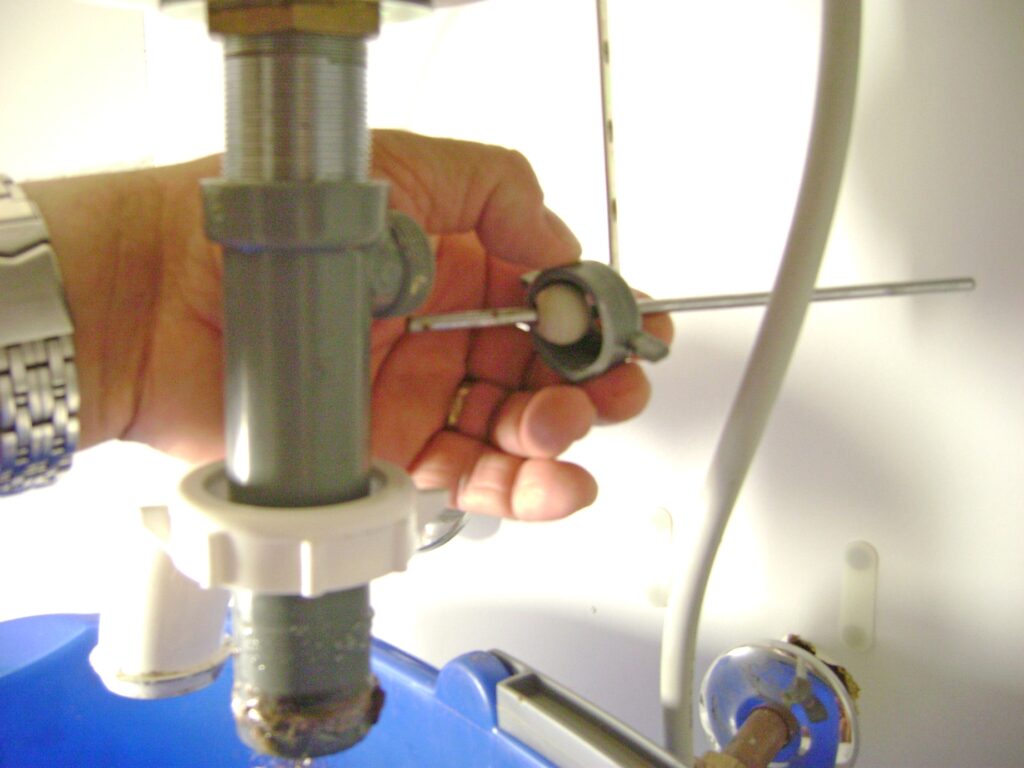
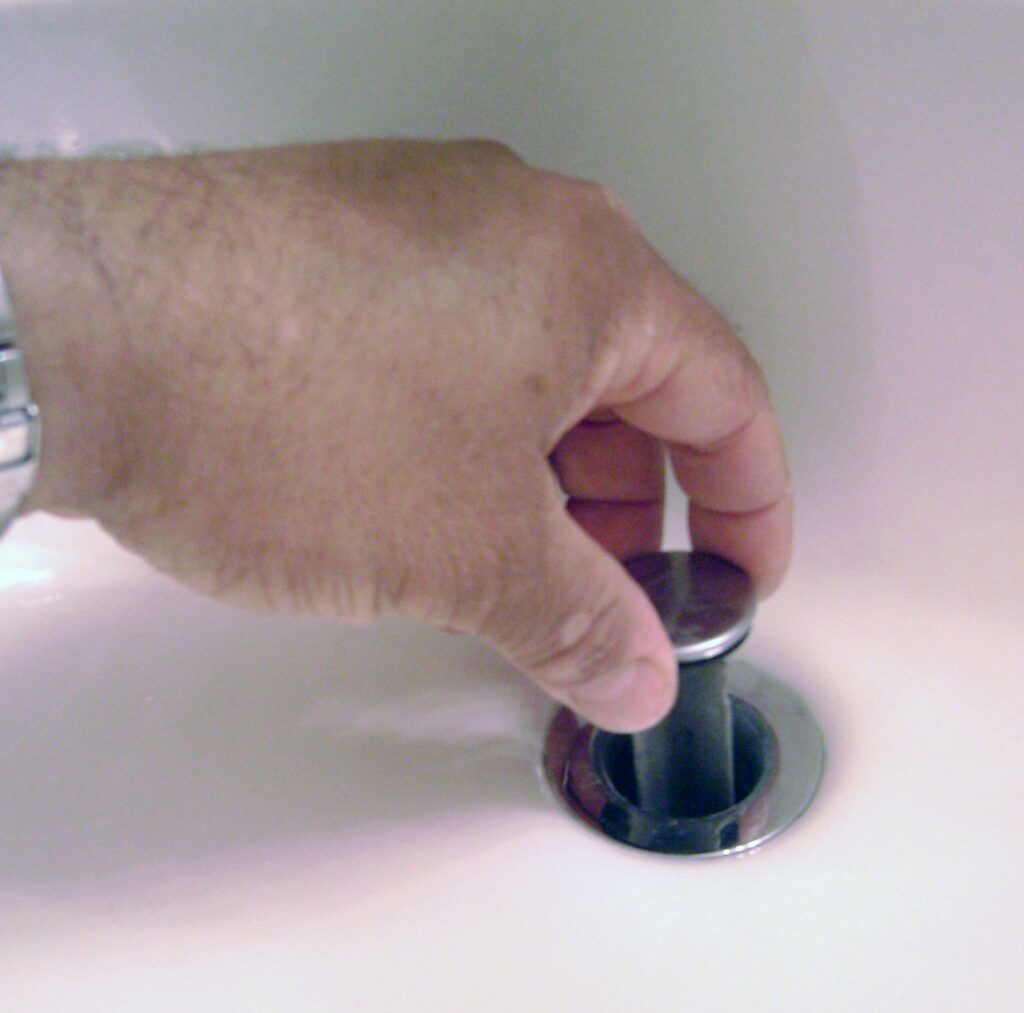
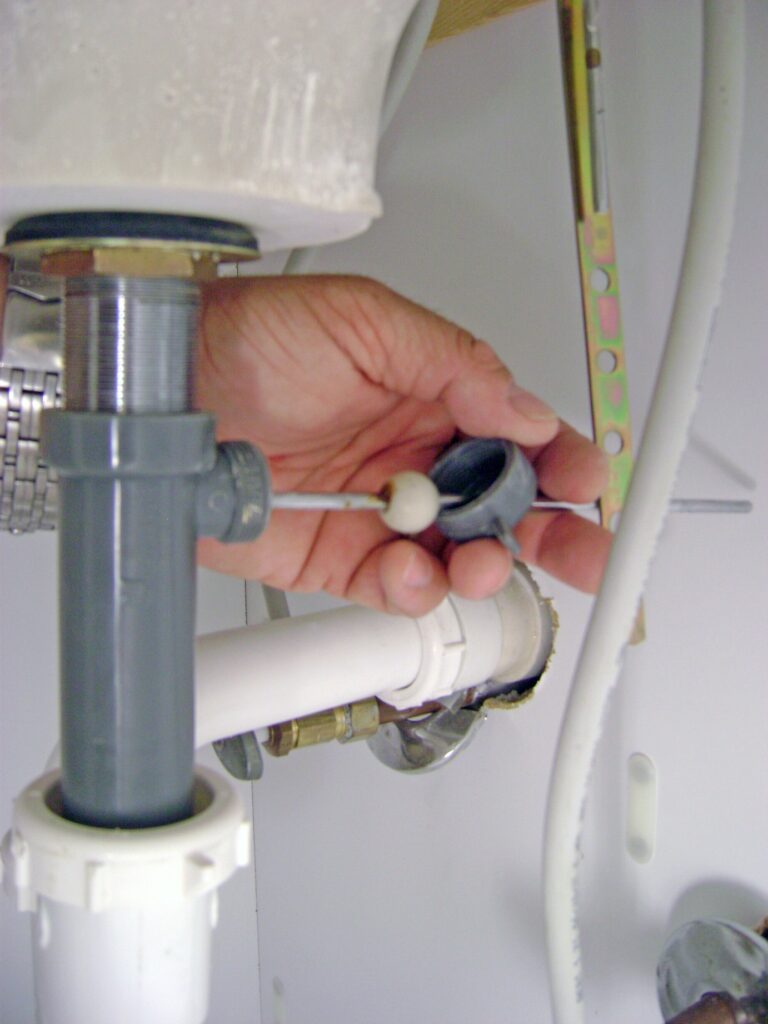
Step 3: Grasp the Sink Stopper
Before removing the pivot rod from the drain T, press down lightly on the rod to lift the sink stopper. Grasp the stopper, pull out the pivot rod, and lift the stopper from the sink drain. The trick is to get a grip on the stopper before removing the pivot rod, otherwise the stopper is seated flush with the drain and you can’t get your fingers under the rim of the stopper to lift it out.

Step 4: Pull out the Pivot Rod
Pull the pivot rod out of the drain T.
Step 5: Clear the Debris from the Drain Pipe
The clump of hair that was looped over the pivot rod now drops easily from the drain pipe.
After removing the obvious clog of hair from the drain pipe, I used a flashlight inspect the drain pipe to see if it was clear. Everything was fine, no other obstructions. The J-bend trap was clear of sediment and debris with a only a light coating of scum inside the PVC pipe. If there were a really a bad clog, it would be simple enough to push it would of the vertical drain pipe with a wooden dowel rod and flush water down the drain into the bucket.
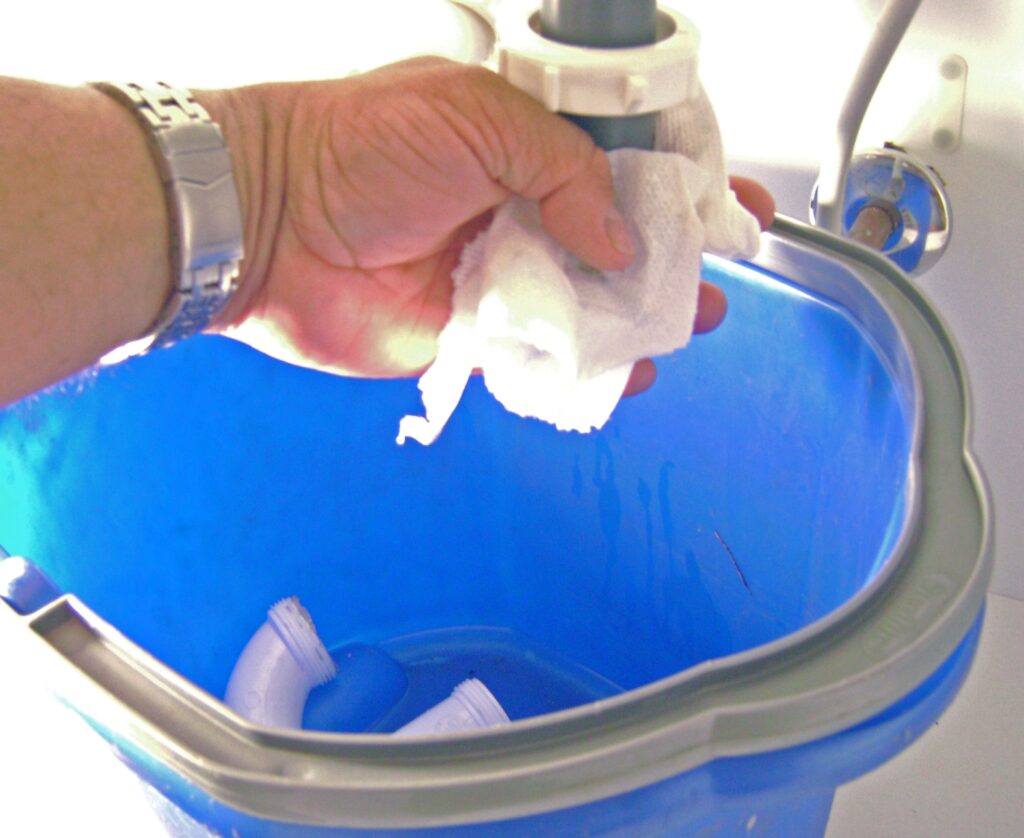
Step 6: Clean the Pipe Joints
Wipe the scum off the end of the drain pipes and P-trap with paper towels.
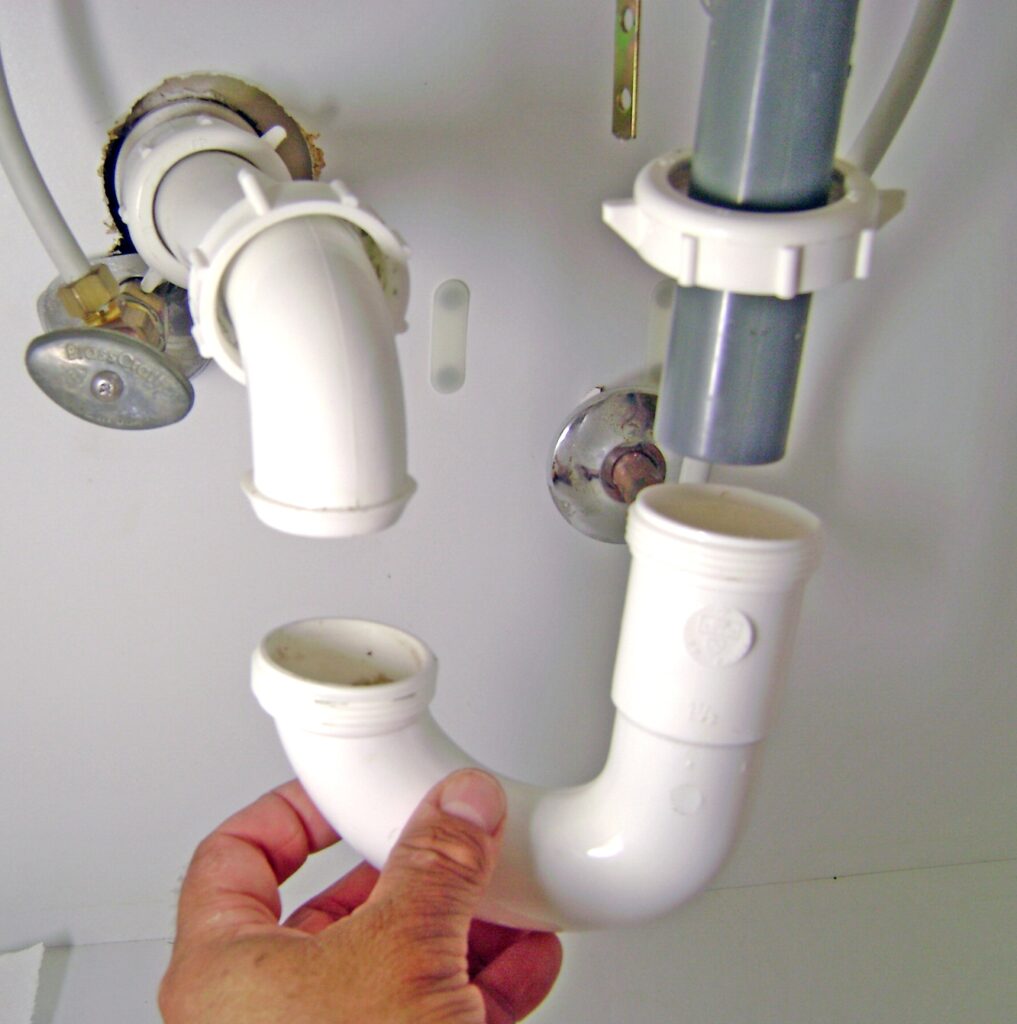
Reassemble the Sink Drain P-Trap
I begin by aligning the sink drain J-bend to the pipes and screwing on the left slip nut. Do not over tighten the slip nut, when snug give it a 1/4 extra turn or so. Note the self-seating gasket formed into the end of the PVC elbow (left side).
The nylon gasket must be slipped down the drain pipe to meet the J-Bend before the slip nut is screwed on.

The nylon gasket is seated in the J-bend:
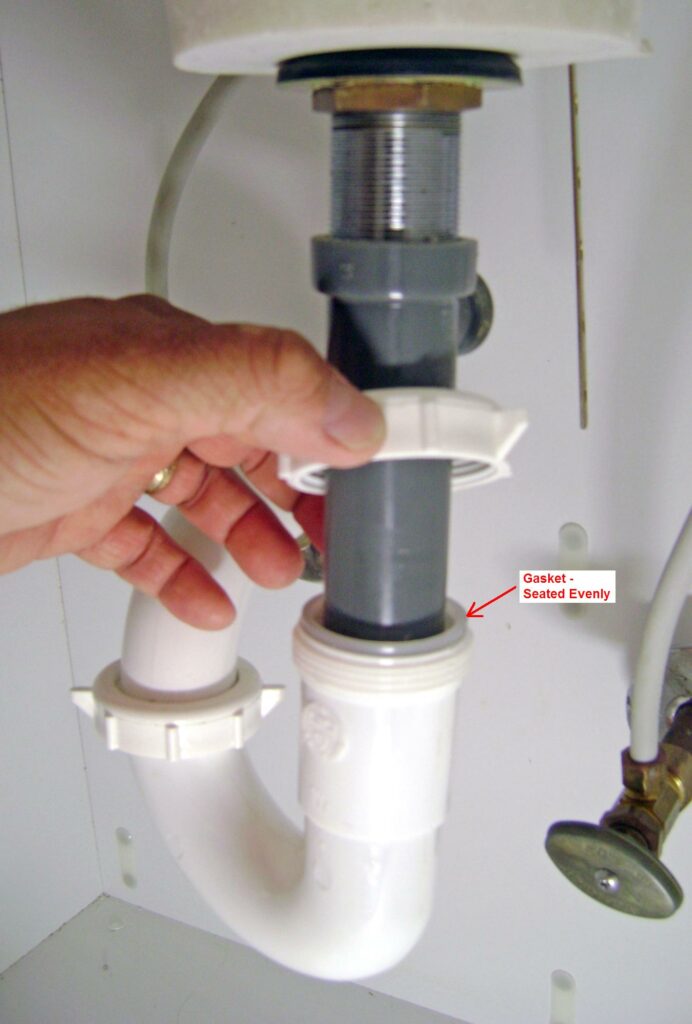
Turn the slip nut until snug, then give it a 1/4 extra turn or so. Do not over tighten or you could crush the nylon gasket.
Here’s the reassembled P-trap and J-bend.
Install the Pop-Up Drain
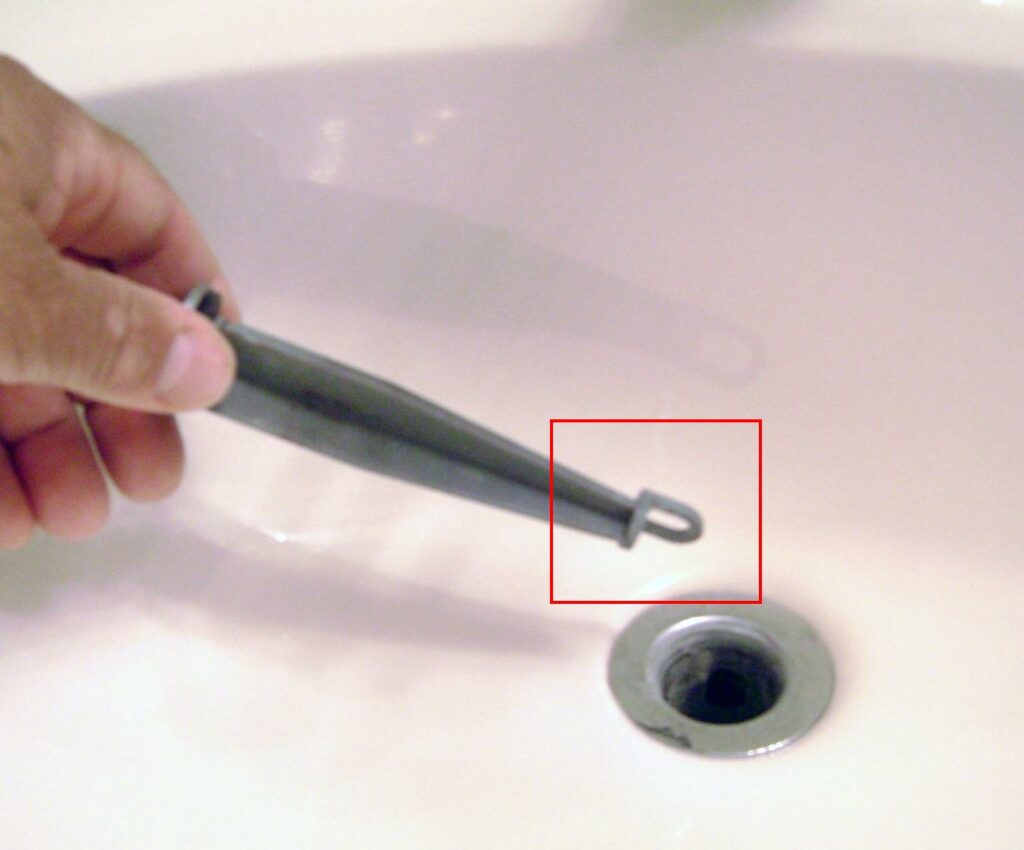
To reassemble the pop-up drain, orient the stopper such that the bottom loop faces the back of sink to catch the end of the pivot rod:
Insert the stopper and hold almost all the way in while you insert the pivot rod into the drain T.
Insert the pivot rod into the drain T while holding the sink stopper. Working by feel, a bit of trial and error is needed to insert the rod into the end of sink stopper. You’ll have it in a couple seconds.
Next steps:
- Screw on the pivot rod retaining nut.
- Place the spring clip on the rod.
- Put rod end in the 2nd hole of the clevis (or whichever hole it was in before).
- Secure the rod and clevis with the spring clip.
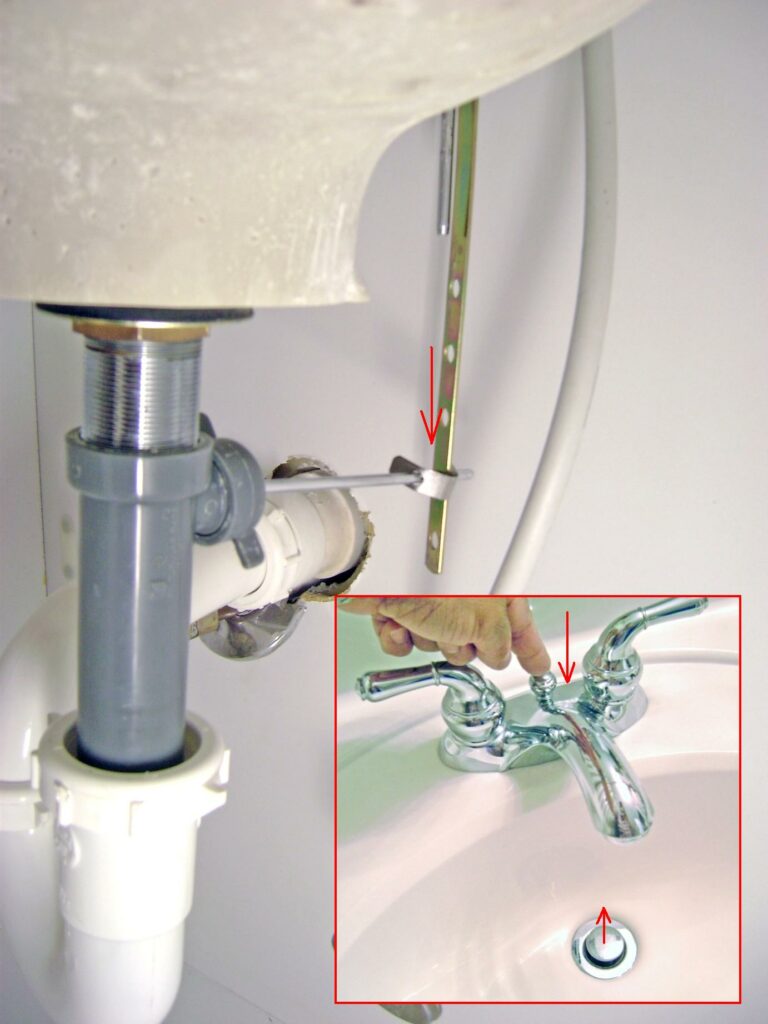
Adjust the Pop-Up Drain Travel
The vertical travel or up/down movement of the pop-up drain is adjusted by sliding the spring clip along the pivot rod.
Begin by pushing the drain handle all the way down (see inset photo below) and slide the spring clip along the pivot rod until the height of the sink stopper is approximately 1/4 inch above the drain as shown. If you later find the water isn’t draining quickly enough, increase the stopper clearance until you are satisfied.
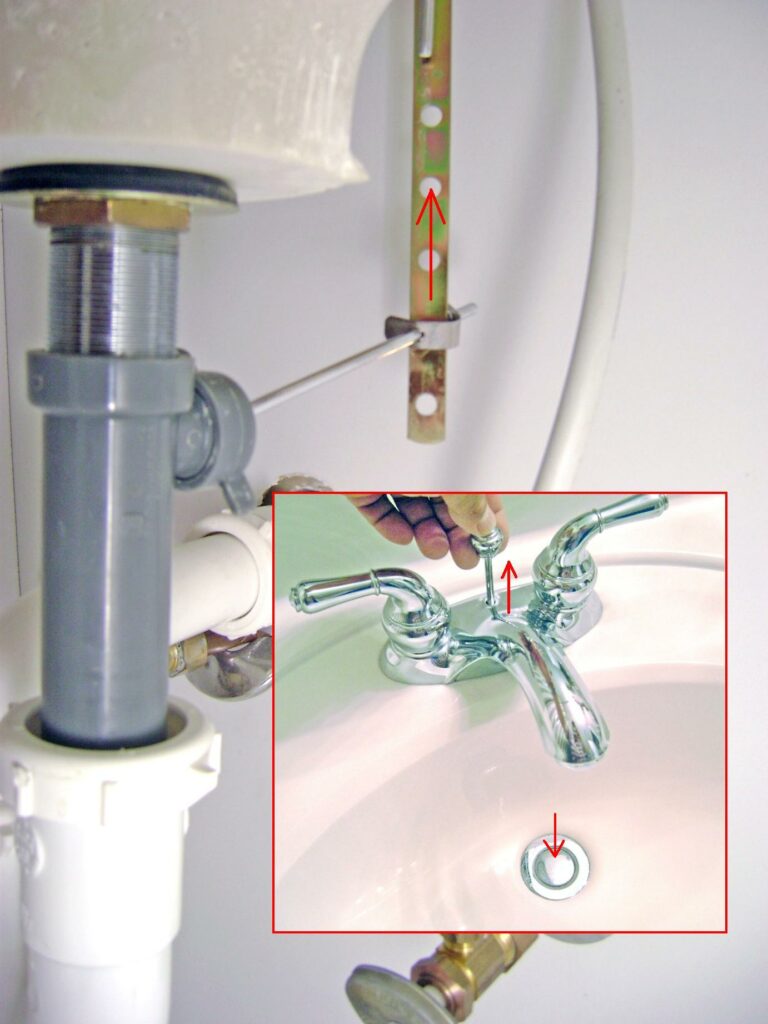
Pull the drain handle up to confirm the stopper is fully seated with a good seal.
Test the Sink Drain for Leaks
Test for leaks by closing the drain and filling the sink with some water. Watch the water level while listening for leaks.
Open the drain and inspect the P-trap and drain plumbing for leaks. If you’re worried about a slow drip that might not be readily evident, place a section of toilet paper on the bottom of the sink cabinet under the trap. Any slow drips will be readily seen. Tighten the slip nuts a bit if necessary.
Take care,
Bob Jackson
Thank you. I am an 80 year old lady, and my gold religious medal was gone from the side of the sink, looking all over found your article, and follow the steps with the photos and my beautiful medal given to me in my First Comunion was the drain.
God bless
Good luck, Carla, I hope you retrieve the medal. Thank you for reading and all the best.