A grassy drainage swale can solve standing water, flooding and yard drainage problems. The advantages of a grassy swale are:
- Nice appearance
- Inexpensive to install
- Easy maintenance
- Can run the lawn mower across the swale
- Effectively drains the water
Drainage Swale Construction Planning
Before installing a drainage swale, consider the following factors:
- Where is the water coming from? Standing rain water? Or is the water flowing onto the property from elsewhere?
- Where should the water go? Water always flows downhill. Is something preventing the water from draining away? Is a storm drain clogged with debris? Is a drainage ditch overgrown with weeds or full of mud? Is some man-made barrier blocking the waters natural path?
- How much water to be handled? Is a wide drainage channel needed or will a shallow channel suffice?
- How steep is the slope? A gentle slope will have a slow current, while a steep slope will need breaks to slow the water and prevent erosion.
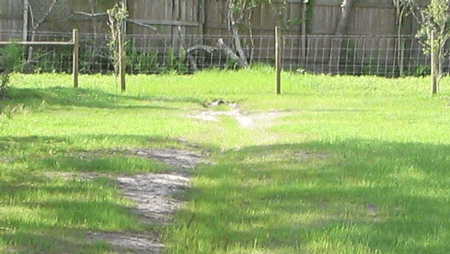
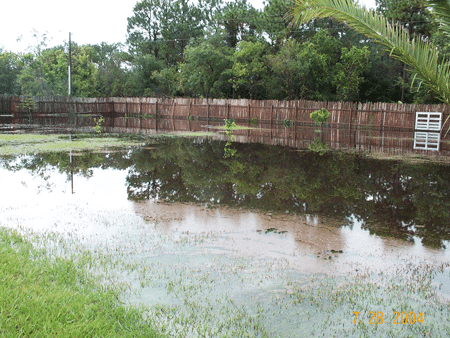
The yard at this house is very flat and flooded during heavy rains:
Why the Yard Flooded
The flooding and standing water problem was caused by an overgrown and clogged drainage ditch that couldn’t handle the rainwater runoff. The drainage ditch is hidden behind the wood fence along the back of the property line in the above photo. Annual maintenance of the ditch had been neglected for so long that it was choked with trees, weeds and mud.
Fixing the Flooding Problem
The flooded yard problem was solved by:
- Called the County Stormwater Management Dept. (this function may be within the County Dept. of Transportation in your area) to clear and dredge the drainage ditch. The Stormwater Dept. promptly performed the clean-up and repair work because the drainage ditch is connected to an upstream ditch along a road that is maintained by the County Government. I said to the County representative “You’re putting the water into the ditch, it’s your responsibility to make sure it handled properly.”
- Built a grassy swale and buried a 6″ PVC drain pipe that empties into the large ditch that is now maintained by the County.
The results were very satisfactory.

How to Build a Grassy Drainage Swale
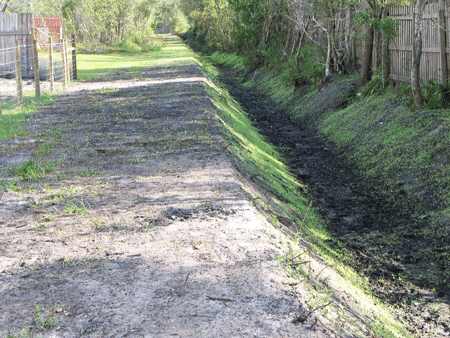
The County Stormwater Dept. cleared the overgrowth and dredged the drainage canal as shown in the photo below. The county used a 40-ton trackhoe to cut down the trees and weeds. A Gradall excavator dredged out the mud and contoured the sides of the ditch. The rotted wood fence (see the first photo above) was removed and replaced with a post and wire farm fence set well back from the ditch to provide access for the county’s heavy equipment to maintain the ditch.
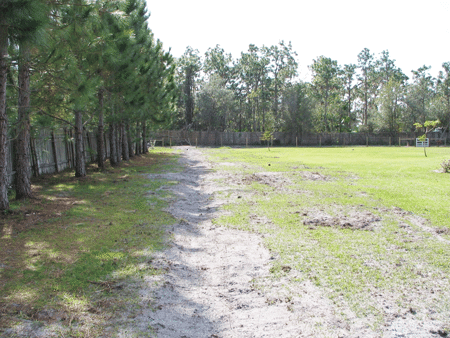
A tractor service was hired for $600 to dig two swales roughly 200 feet in length on the left and right sides of the property line. The main trench was made by a single-furrow v-blade plow. The depth of the swale began at ground level and increased to about 1 foot at the far end. The sides of the swale were then graded and smoothed using a flat scraper blade tractor attachment.The slope of the swale is very gentle and no lining material for the bottom was necessary, other than grass seed and grass to hold the soil in place.
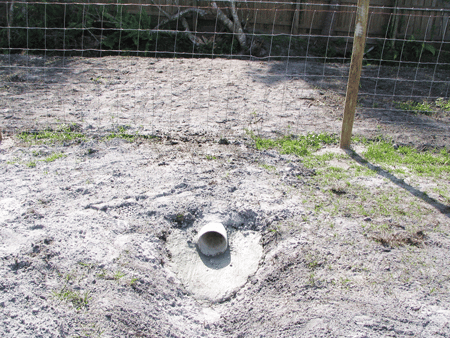
A 6-inch PVC drain pipe was buried on a 1/2 bubble slope (set using a carpenter’s level) that emptied into the drainage ditch. The mouth of the drain pipe is lined with cement to prevent erosion and keep away the grass.
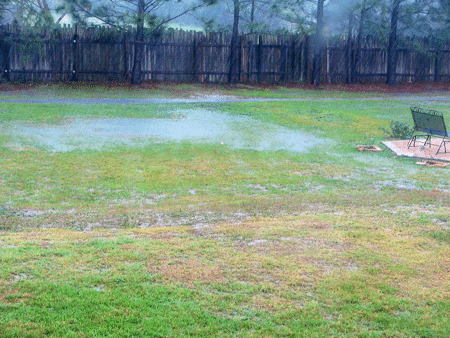
Grassy Drainage Swale in Heavy Rain
The swale worked great during a heavy rain and thunderstorms. Notice the swale full of water from left-to-right in the photo below. The water would pond temporarily only during the heaviest downpours and the yard is high and dry soon after the rain had stopped.
Hope this helps,
Bob Jackson