This project shows remove the front cover plate and clean inside AC evaporator coils where dust, dirt and debris accumulate on the upwind side.
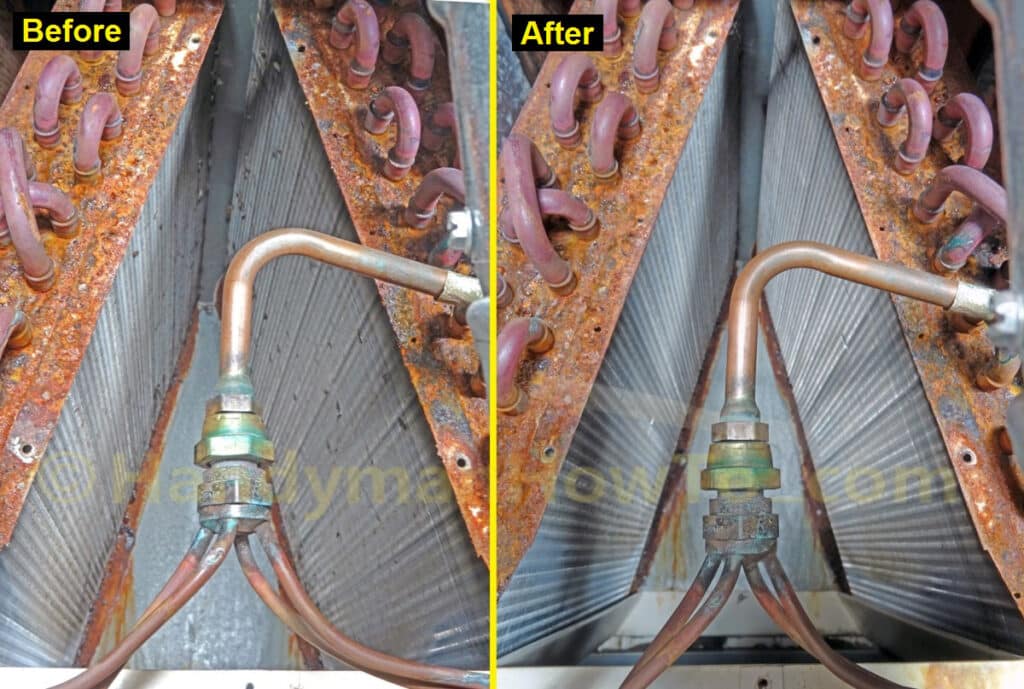
This is my 12 year old coil before and after cleaning the inside:
Evaporator Coil Cleaning Methods
I’ve written several tutorials about cleaning AC evaporator coils:
- How to Clean AC Evaporator Coils with an aerosol spray foaming cleaner and overview of the various parts of the air handler.
- Heavy Duty AC Evaporator Coil Cleaning using a professional coil cleaning solution and pump sprayer. It also shows how to inspect the interior side of the coils with a high intensity flashlight check to know if they are blocked with dirt or mold.
The above methods do work well to clean and disinfect the coils if the AC system is well maintained with regular air filter changes using quality filters. Remember – anything that makes it past the air filter may get caught on the coils. However air conditioners are often neglected and homeowners don’t realized there’s problem until the system stops cooling, usually because the coils are frozen over with ice due to insufficient airflow through the coils. Dirt and dust accumulation on the coils also promotes mold growth by providing a food source and moist media to grow on that can cause a “gym sock” odor.
When the evaporator coil case front panel is removed the outside (or downwind) of the coils may look shiny and clean but the interior (upwind) side can be dirty. If your evaporator coils are very dirty you’ll need to clean both the outside and inside faces of the coils. Your cleaning options are:
- Depending on the construction of your coils, it may be possible to remove the front cover plate as explained in this tutorial. This is the easiest and lowest cost solution.
- If the front cover plate cannot be removed due to refrigerant line obstructions, it may be possible to carefully slide the evaporator coil and condensate drain pan forward enough to access the coils through the bottom of the drain pan.
This can be done only if the copper refrigerant lines to the air handler are long enough to be flexed without kinking or stressing the coil connections. It’s a two person job because the front of the coils and pan must be supported and you risk damaging the refrigerant lines. The condensate drain line and possibly the furnace vent pipe must also be disconnected. I don not recommend the homeowner attempting this cleaning method due to the level of difficulty and cost of hiring a professional to fix an error. However it is less expensive compared to cutting the refrigerant lines and removing the coils for cleaning if performed by a HVAC technician (next bullet). - The most expensive option is to hire an HVAC service and repair company to remove and clean the coils.
The refrigerant must be drained and captured, the copper lines cut and the coils taken out of the system for cleaning. After cleaning and re-installation, the refrigerant lines are reconnected, evacuate the air and recharge the system. This is a major repair and I’d prefer to have a new evaporator coil installed rather than mess with the old coils.
How to Clean Inside of AC Evaporator Coils
My home has two identical Heil central AC systems – one in the attic for the 2nd floor and this unit in the basement for the main floor. It’s now July and hot in the attic so I’ll be working on my basement air handler.
The manufacturer label on the coil case panel states:
International Comfort Products Corp.
Lewisburg, TN USA 37091
Cased Evaporator Coil
Model No. EED36B15B1
Mfg. No. NEED36B15B1
Design Pressure 300 PSIG
Refrigerant 22
Remove the Evaporator Coil Front Cover Plate
I began by turning off the thermostat (my Honeywell touchscreen thermostat has Heat/Cool/Off modes) and shutoff the electricity to the air handler to prevent the blower fan from accidentally turning on.
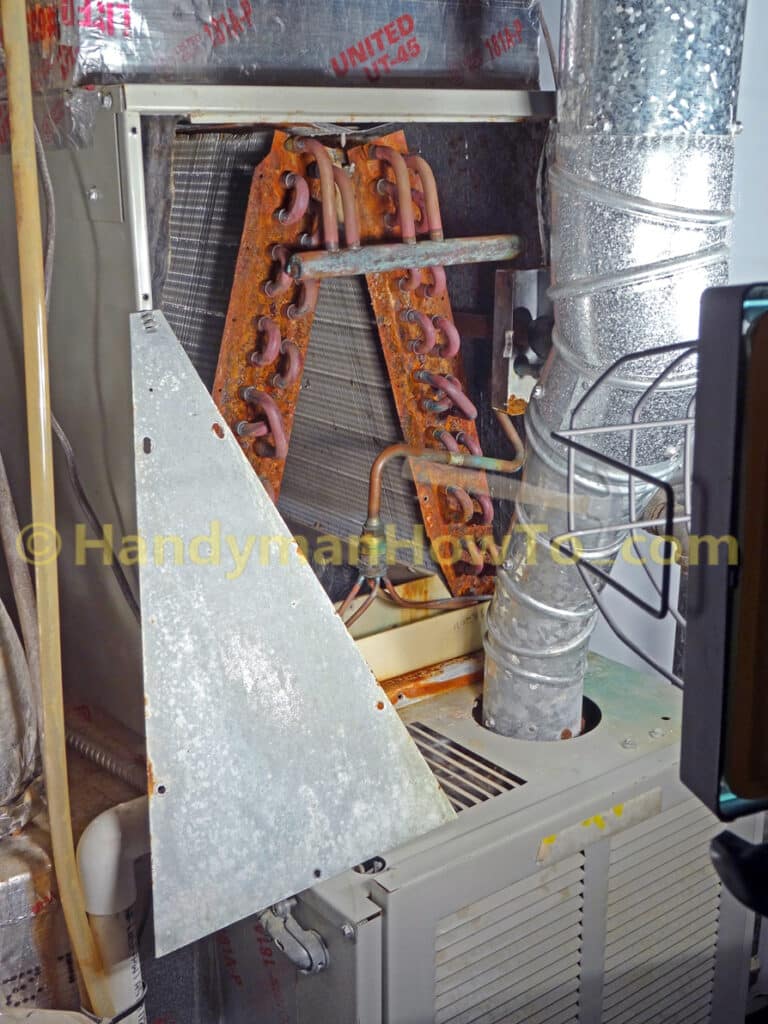
I next removed the coil case panel to expose the evaporator coils. The front cover plate on my coils is fastened with 5 hex head 1/4 inch screws (red arrows); two screws are obscured by the suction manifold in this photo:
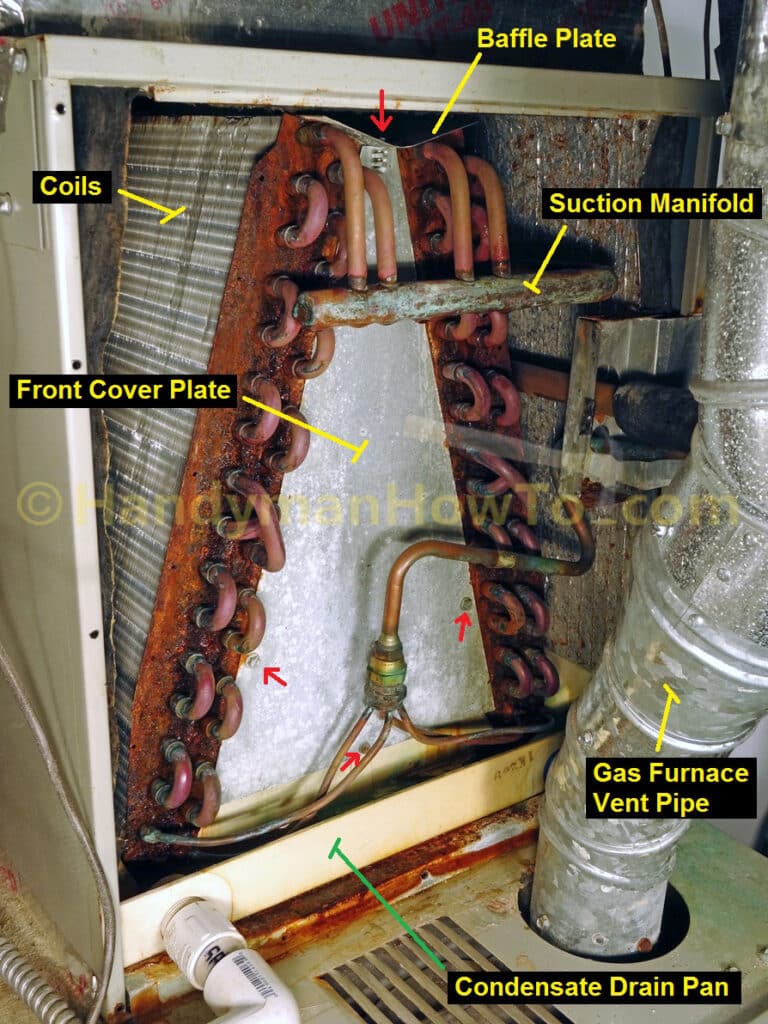
Notice the rust on the metal frame along the front of the condensate drain pan in the above photo. The rust is caused by condensation on the bottom of the plastic pan from the small amount of chilled water standing in the pan. Because there isn’t a gasket between the plastic pan and metal frame, air blows through the crack pushing the condensation to the front. The coils and drain pan simply sit inside the coil case. I lifted the drain pan up about 1/2 inch to check the plastic pan for cracks. This system is nearing the end of it’s useful life at 12+ years old. I’m getting quotes to replace the gas furnace and AC in the Fall because if something fails I’m not going to spend money for a major repair on such an old and less efficient system.
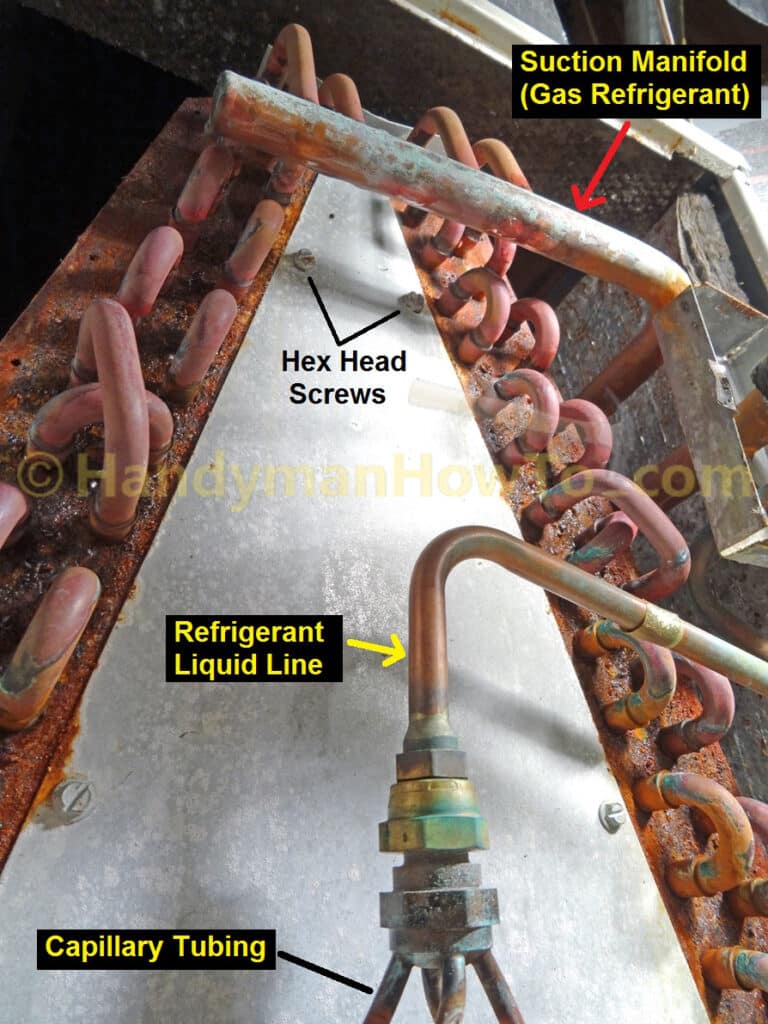
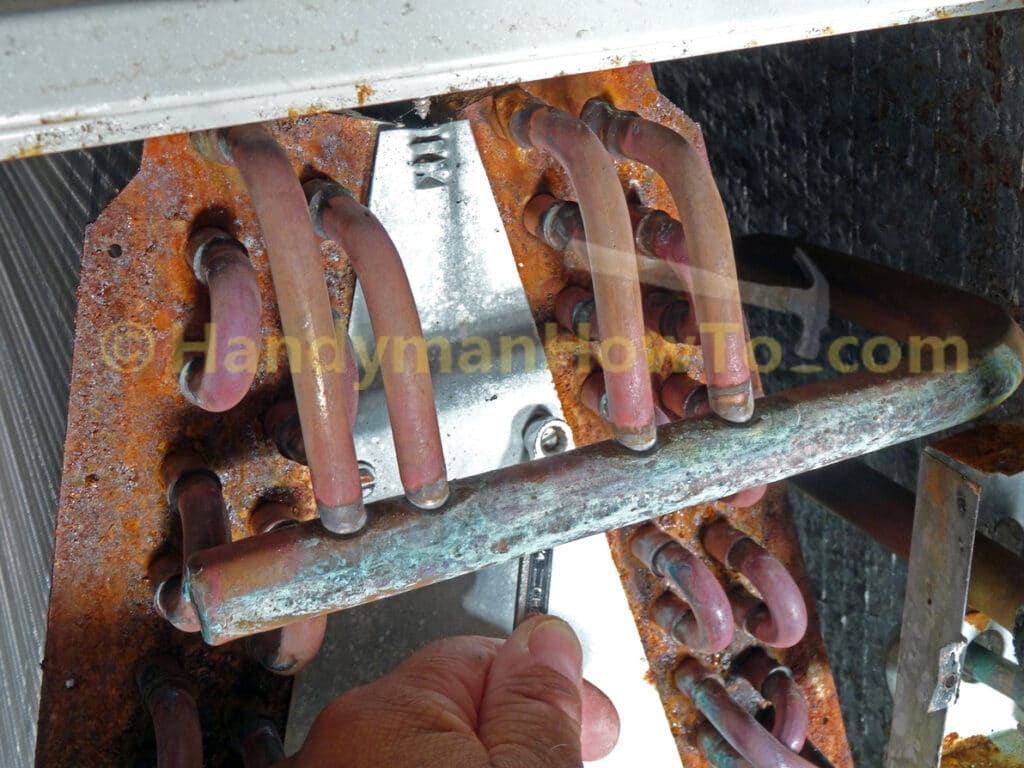
The two other 1/4 inch sheet metal screws are behind the suction manifold in the follow photo.
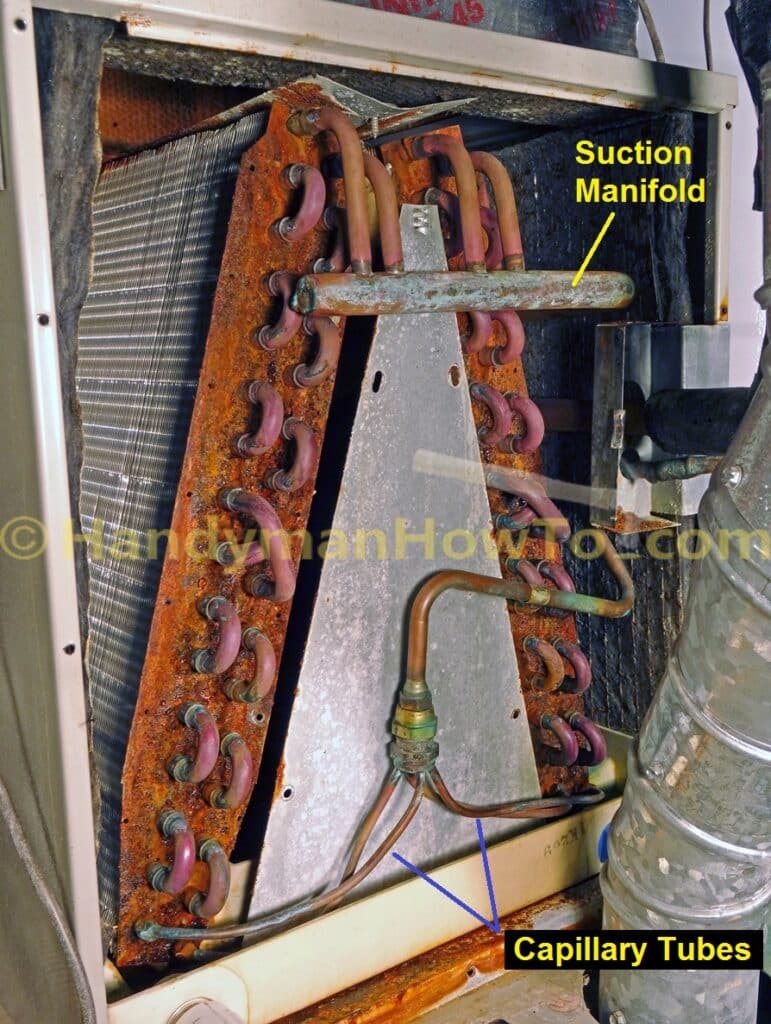
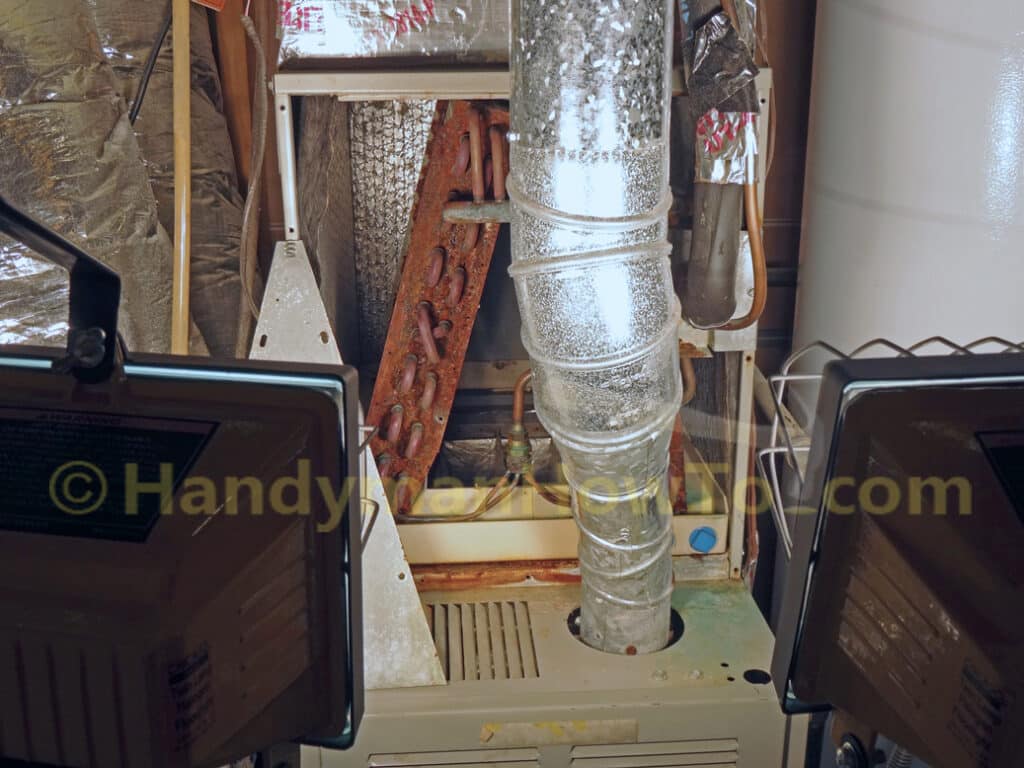
Referring to the following photo: High pressure / high temperature liquid refrigerant from the outdoor compressor/condenser unit flows into the coils through the liquid line where it’s flashed to a low pressure / cold gas by the restriction in the capillary tubes. The gas leaves the evaporator coils through the suction manifold and flows back to the compressor/condenser unit.
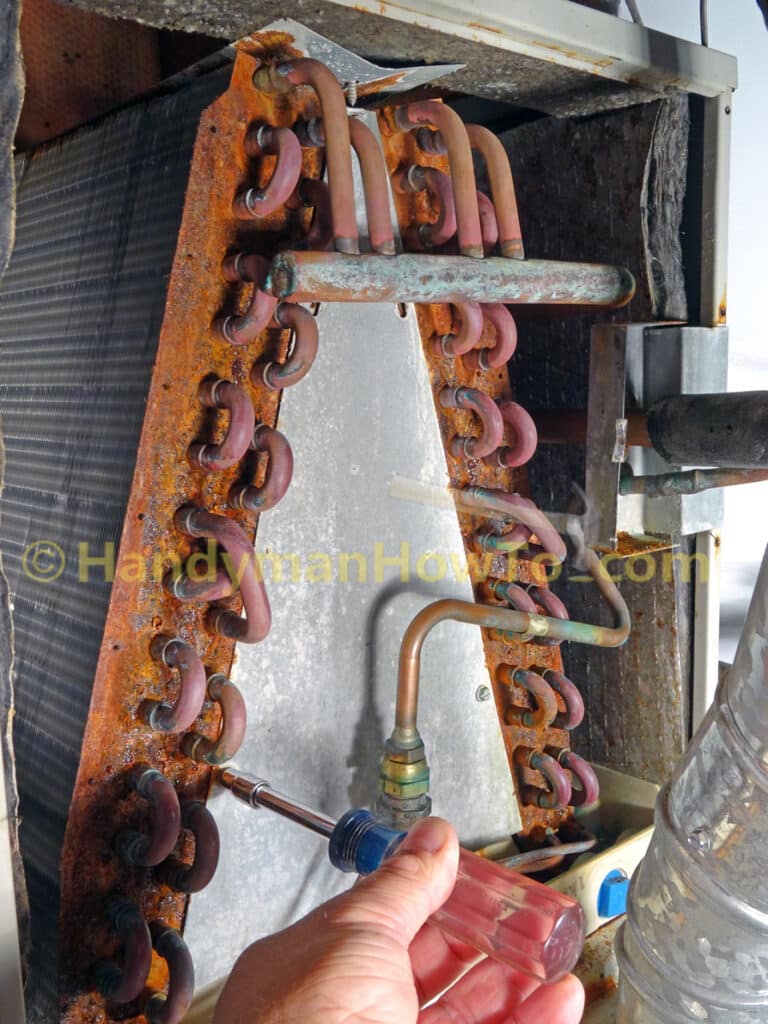
The coil baffle plate screw attaches to the coil cover plate. The screw is somewhat tedious to remove because of the narrow gap between it and the coil case frame. I used a 1/4 inch combination wrench to (slowly) remove the screw:
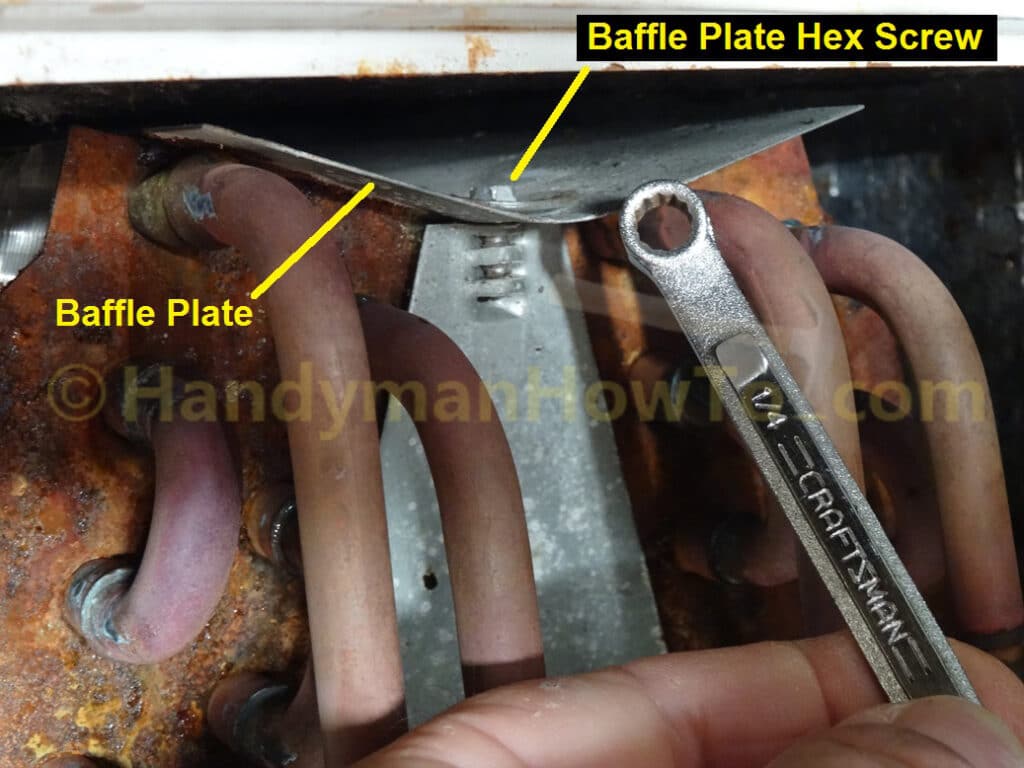
I could only turn the wrench a little at a time but was able to remove the baffle plate screw. Take care not to drop the screw. I found that my screw remained captive in the baffle plate which flexed upward as the screw is loosened:

The two screws behind the suction manifold are removed with the small wrench where my socket wrench and nut driver couldn’t reach:
I used a 1/4 inch socket on my nut driver to quickly remove the bottom three cover plate screws. Note the size and type of each screw because the screw for the plastic drain pan was different than the others:
The evaporator coil front cover plate dropped free after removing the 5 screws:
The cover plate was tricky to wiggle (“maneuver” is probably a better word) out from behind the suction manifold and capillary tubes. Work slowly and carefully to prevent damage to the refrigerant lines. Do not force the plate. I got it out by trial and error, moving it a little at a time. Basically I tilted the plate to the right and up, then slipped it out to the left as shown:
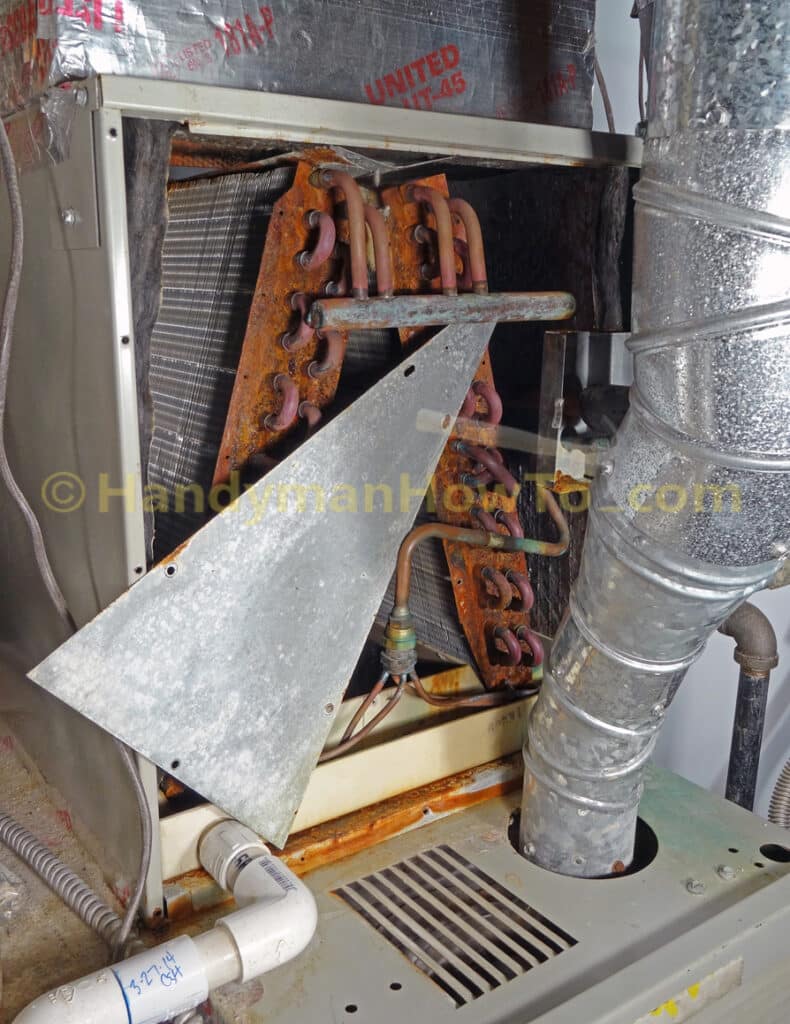
The coil cover plate is removed:
Good lighting is a tremendous help and I’m using a 1000 Watt twin halogen work light. The downside is the lights get extremely hot but I can see in every nook and cranny.
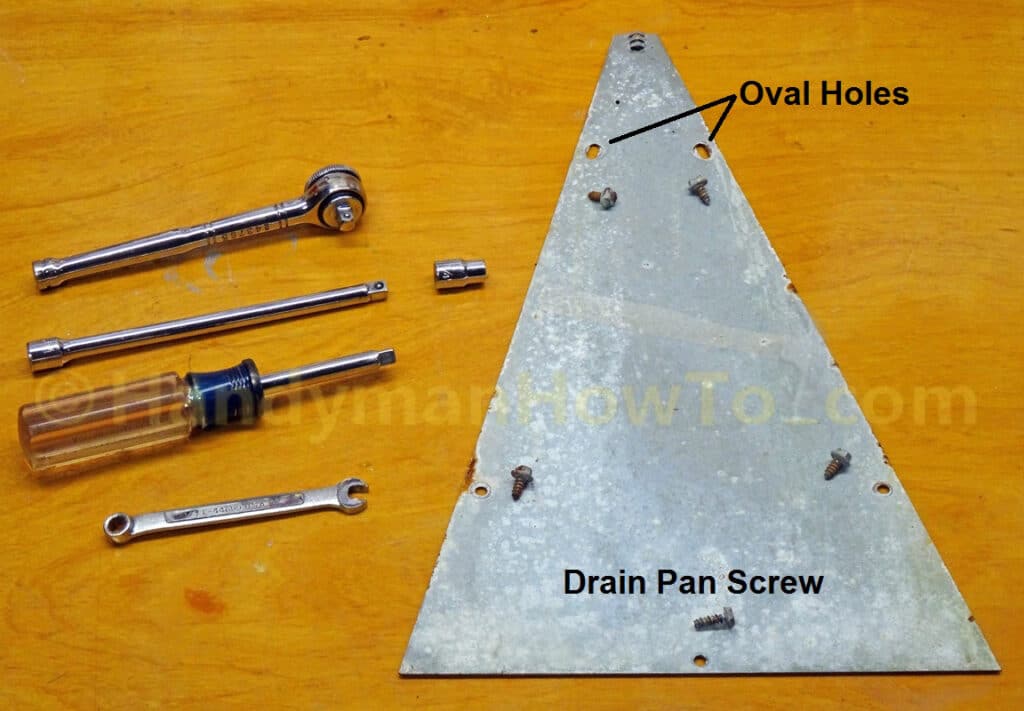
Here’s the evaporator coil front cover plate on my workbench with the socket wrench, extension bar, 1/4 inch socket, nut driver and 1/4 inch combination wrench I used to remove the coil case panel and cover plate. Notice two oval holes and longer drain pan screw. When reinstalling the cover plate, install the two upper screws in the oval holes last.
This project is continued in AC Evaporator Coil Cleaning with Pump Sprayer and Brush.
All the Best,
Bob Jackson