This project explains how to replace a ceiling fan that won’t turn by replacing a blown motor capacitor. Total cost of the repair was $12 for a new motor capacitor ($8 for the capacitor plus $4 shipping).
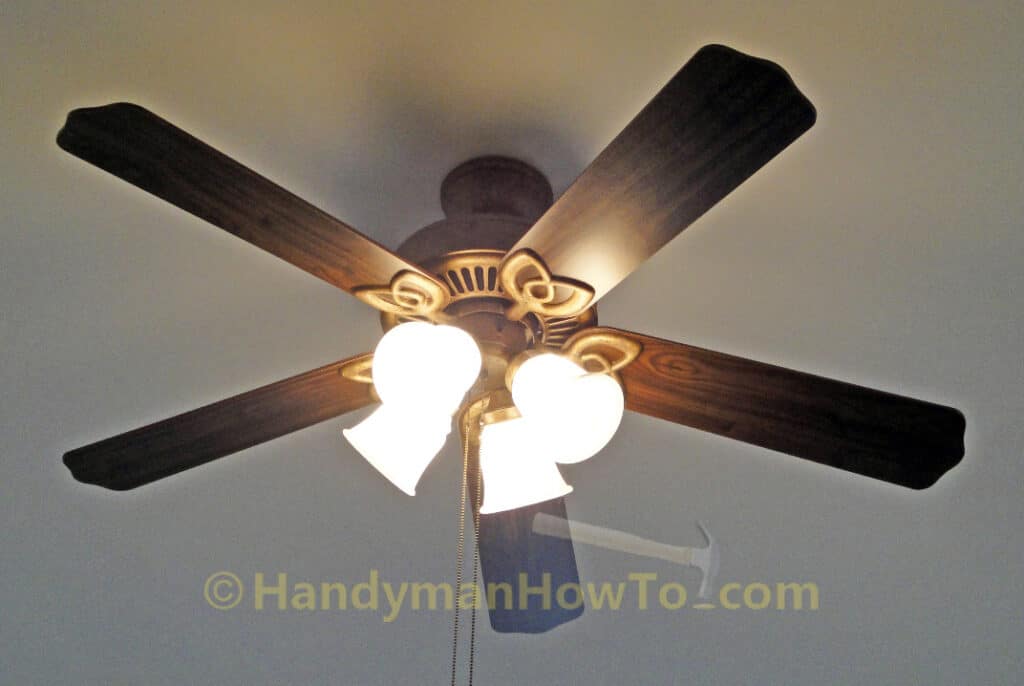
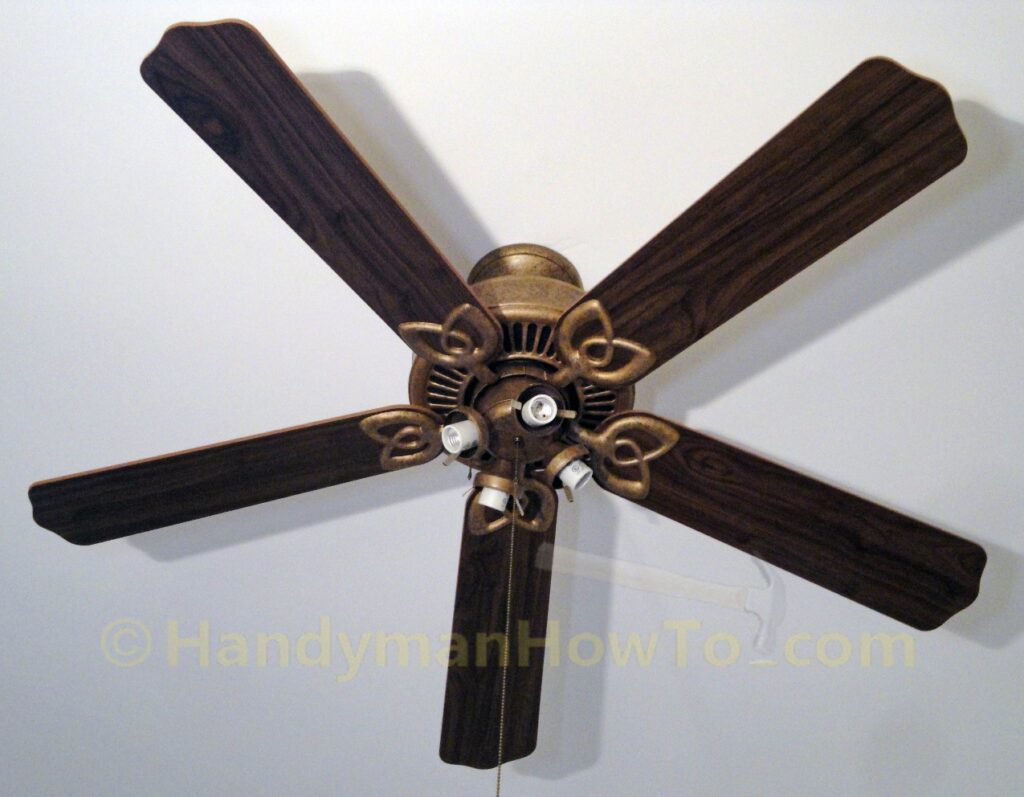
The problem was the Hampton Bay ceiling fan stopped running. The ceiling fan lights worked fine, but the blades wouldn’t turn. The lights and fan are controlled by a single wall switch. I pulled the fan chain several times to cycle through the Off-Low-Medium-High fan speeds but the blades would not turn. However, the blades turned easily when I pushed them by hand so the motor bearings weren’t frozen.
I suspected the fan switch might be bad, so I got a step ladder to get a closer look. The room was quiet and I noticed a very faint humming noise when fan switch was set to the Low, Medium or High fan speed. This indicated the fan switch was working, but something was wrong with the ceiling fan motor.
Electrical Safety
Turn off the power to the ceiling fan at the circuit breaker panel before proceeding to avoid electrical shock, injury and/or death. Verify the electricity is off by operating the light switch and verifying with a voltage tester. A non-contact voltage tester is very convenient.
Blown Ceiling Fan Motor Capacitor
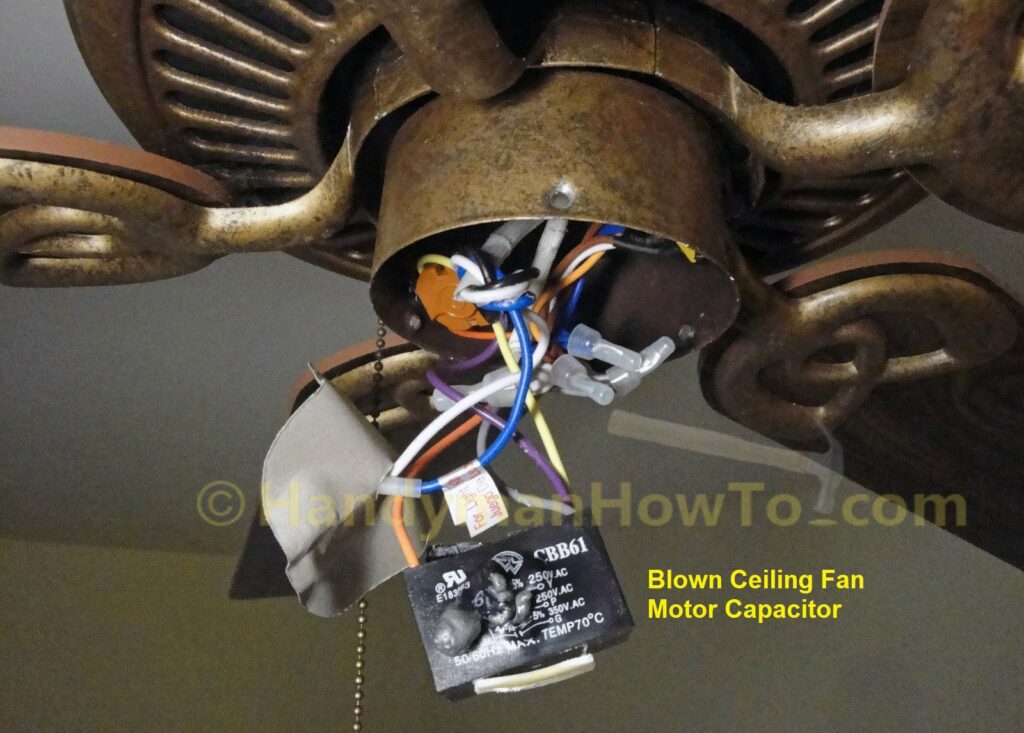
I disassembled the light kit by removing the bulbs, glass shades and three small screws that attach the light fixture to the fan housing. Please refer to the Owner’s Manual for your fan for the dis-assembly procedure.
After removing the light kit, the problem was obvious: The ceiling fan motor capacitor was blown. The capacitor case was ruptured with gobs of hard gray plastic swelled out. What caused the motor capacitor to fail? It probably wore out with age because I’ve not had problems with other ceiling fans and appliances on the same electrical circuit.
My ceiling fan was manufactured July 2005 and only has the single start/run motor capacitor. Ceiling fans manufactured after January 1, 2007 may have two black boxes that resemble a capacitor: 1) start/run motor capacitor and 2) light kit power limiter to restrict the total light bulb wattage to not more than 190 watts.
Aside: The Energy Policy Act of 2005 requires that all ceiling fan lamps have not more than 190 total watts. To comply with the law, fan manufacturers install a current limiting device such as a power limiter or fuse to limit the total light wattage. Now you know why new ceiling fans have candelabra sockets packaged with dim incandescent bulbs and warning label not to exceed the maximum wattage or the lights won’t work. If you exceed 190 watts total for all light bulbs, the lamp power limiter cuts off the electricity to the lights. This basically forces you to replace the dim incandescent bulbs with lower wattage, but overall brighter, compact fluorescent (CFL) bulbs.
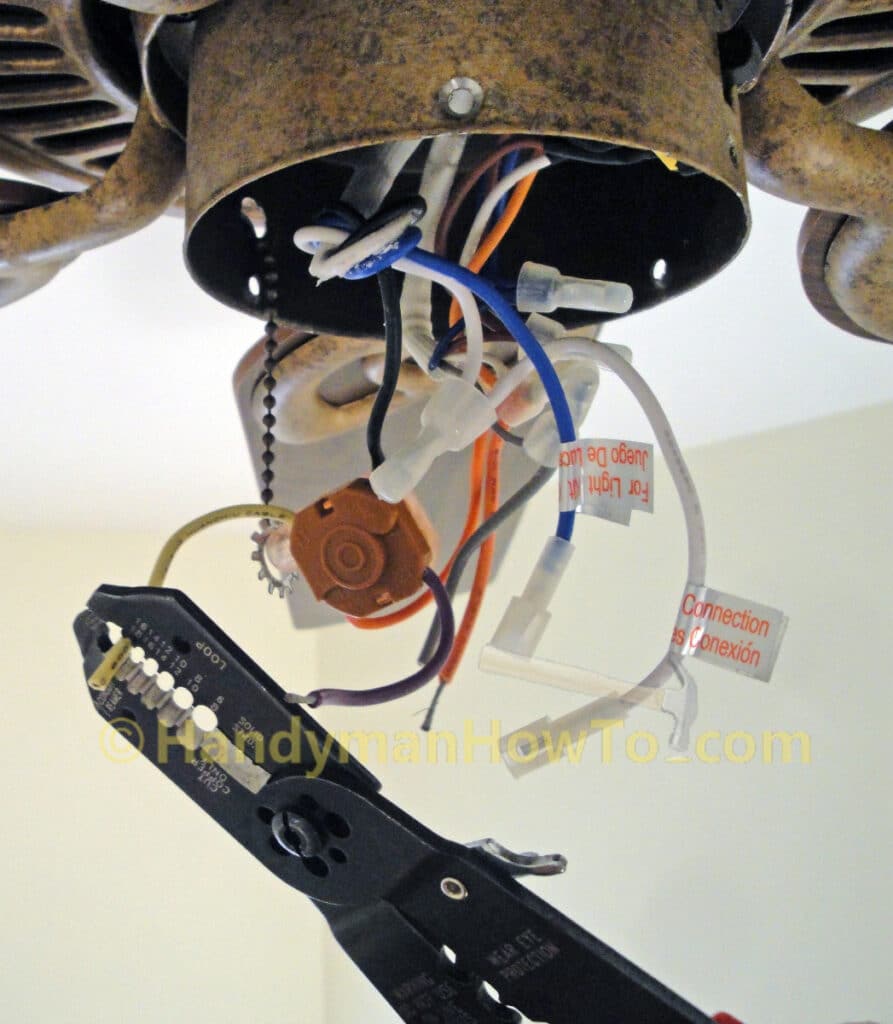
If you fan has a power limiter, both the lamp power limiter and motor capacitor look like small black boxes with several wires attached. The motor capacitor will be connected to the pull chain fan switch and the lamp power limiter is attached to the light switch.
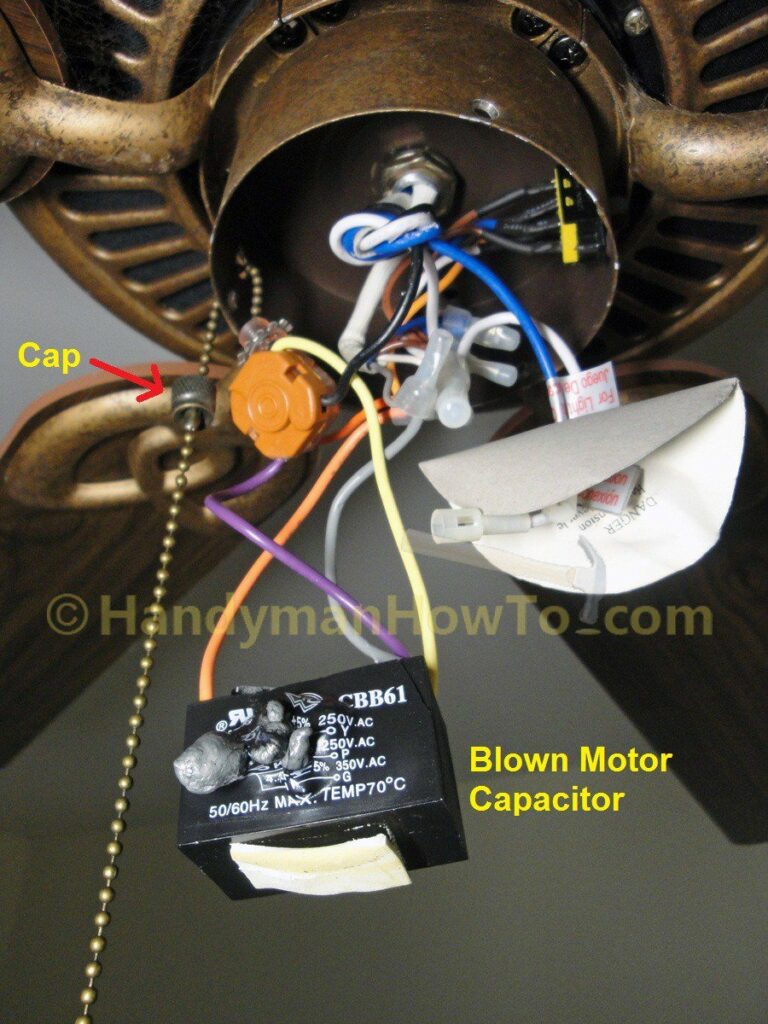
In this next photo, I’ve unscrewed the metal cap that attaches the orange fan switch to the fan housing to better expose the capacitor wires. Notice that the motor capacitor is wired directly to the fan switch and other capacitor wires are permanently crimped inside the clear plastic caps.
Given the permanent wiring situation, the only way to replace the ceiling fan motor capacitor is to cut the capacitor wires. Use a pair of wire cutters to cut the capacitor wires off close to the capacitor such that you have sufficiently long wire leads to wire in the new motor capacitor.
Order a Replacement Ceiling Fan Motor Capacitor
You will need the ceiling fan Model Number or UPC # to order replacement parts from Home Depot / Hampton Bay Customer Support as listed on the label affixed to the top of the fan motor:

I called the Hampton Bay Customer Support toll free line at 855-434-2678 which is staffed Monday to Friday from 8am – 7pm EST, as well as Saturday 9am – 6pm EST. I explained the blown capacitor problem and provided the UPC # to the pleasant customer service representative (CSR). The CSR looked up the part, quoted the price ($12 which includes shipping), took my credit card payment information, and gave me her name and extension to contact her if I had any questions or issues. I really like it when a customer service rep. takes personal responsibility for customer satisfaction!
In a couple of days the replacement capacitor arrived via 1st class mail from King of Fans in Fort Lauderdale, Florida. King of Fans is the USA distributor for Chien Luen Industries, the Chinese manufacturer of Hampton Bay ceiling fans for Home Depot. Who would know the replacement parts better than the original equipment manufacturer?
How to Replace a Ceiling Fan Motor Capacitor
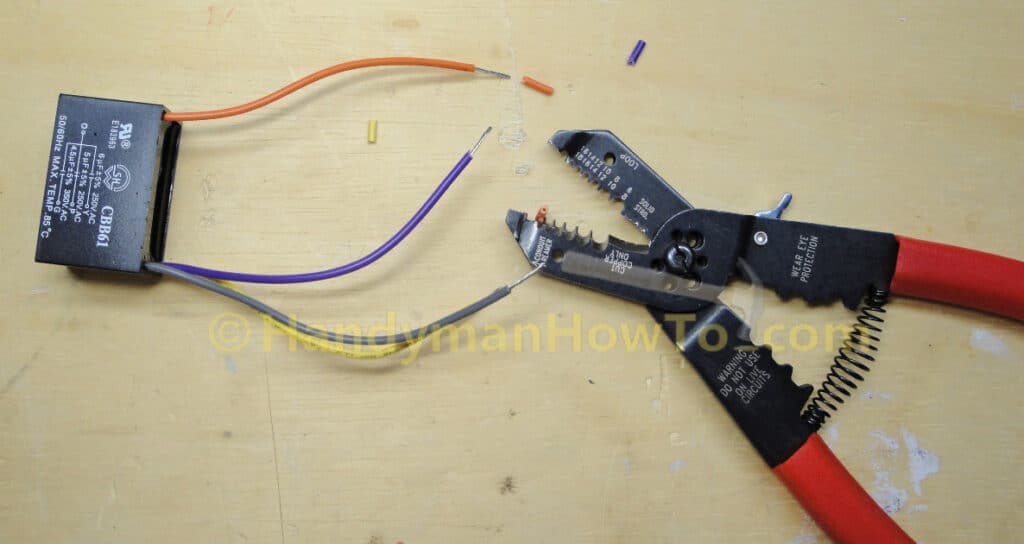
The replacement start/run motor capacitor type CBB61 was identical to the blown capacitor in every way (except the case wasn’t ruptured) with the same color wires in identical positions and electrical specifications printed on face:
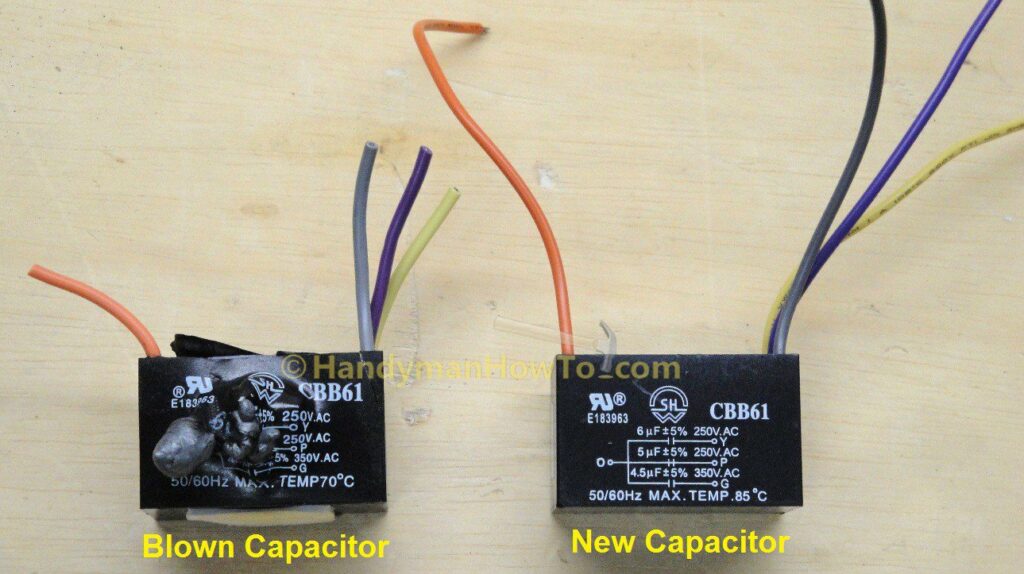
Ceiling fan motor capacitors can have two (2) to five (5) wires in different arrangements, so don’t worry if your ceiling fan capacitor looks different than mine. The procedure for wiring in a new fan motor capacitor is the same as shown in the following steps; just match identical wire colors and fasten the wires together.
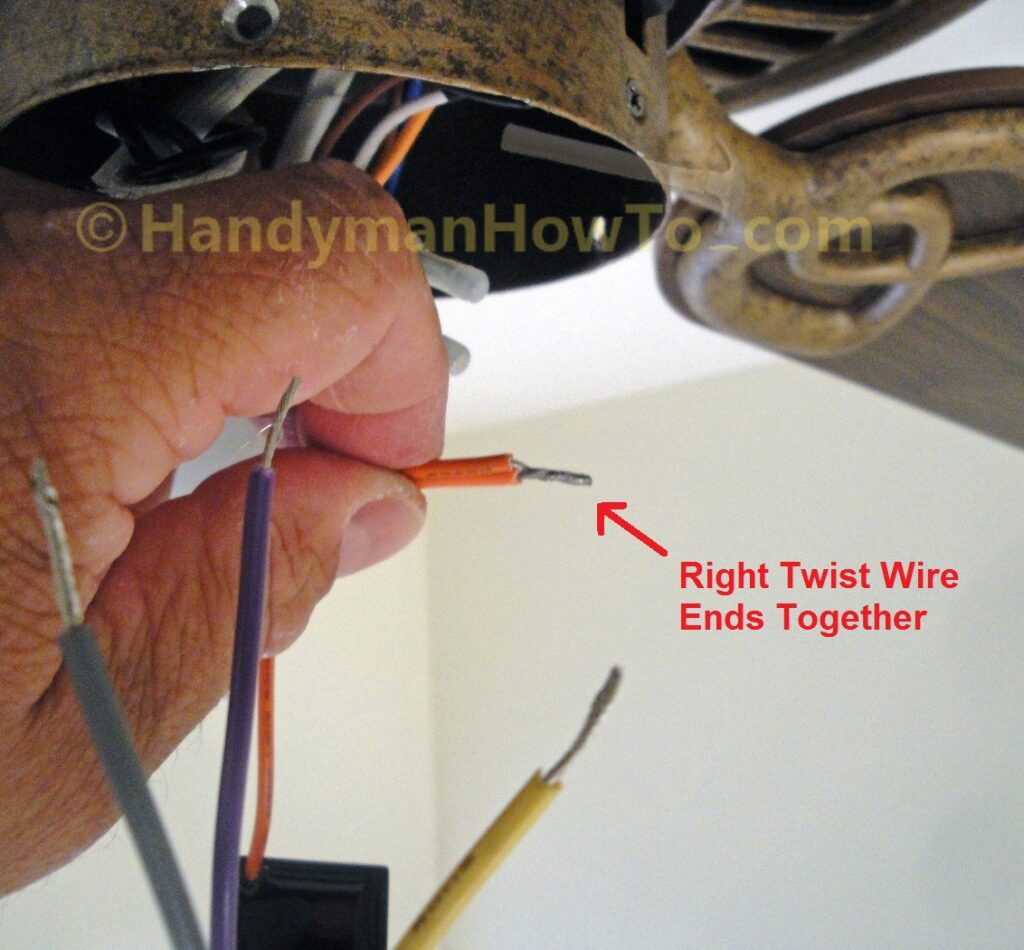
I stripped about 5/8 inch of insulation from the new capacitor wires, then right-hand (clockwise) twisted the stranded wire ends to form a tight lead (“righty tighty, lefty loosey”). A right-hand twist is essential because wire nuts tighten with a right-hand twist. It’s much more convenient to strip the wires now before getting on the ladder.
Next, I stripped the insulation from the corresponding wires on the ceiling fan that were previously cut to remove the blown capacitor:
The new ceiling fan motor capacitor is wired to the fan by:
- Twist the matching color fan and motor capacitor wires together.
- Secure the wires with a small wire nut.
The first pair of wires are secured with a small wire nut as shown in the following photo. It’s important to use the correct size wire nut for light gauge wires so the wires don’t come loose. I used small orange wire nuts left over from prior ceiling fan installations. If you need to buy wire nuts, get the Ideal 72B Blue wire nuts or equivalent size.
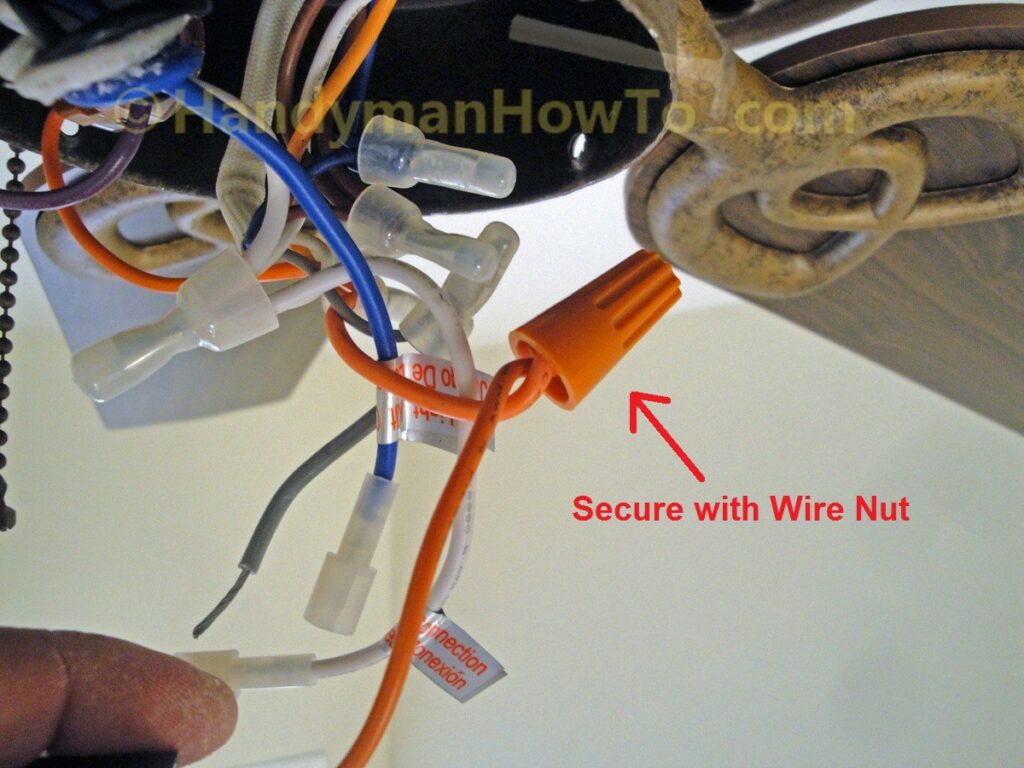
Wire in the remaining capacitor wires using the same method:
- match the wires by color
- twist the wire leads together
- secure the wires by twisting on a wire nut
Ceiling Fan Motor Capacitor Testing
Before closing up the ceiling fan wiring, I let the new motor capacitor dangle from the wires, turned on the electricity at the circuit breaker panel and flipped on the wall switch to verify the wiring was correct and the fan motor worked.
I shut off the electricity at the circuit breaker panel before closing up the wiring and reinstalling the light kit.
Reinstall the Ceiling Fan Light Kit
Having wired-in the new ceiling fan capacitor, the switch cap is screwed onto the fan switch, then the motor capacitor and wires are tucked into the bottom of the fan – it was a tight fit! The new capacitor can just be seen as the black box on the right inside the fan. The blue and white light power wires are hanging out for plugging into the light kit.

The light kit is reattached to the ceiling fan with the three small screws that were previously removed. Then the glass shades and light bulbs are installed last. Remember to turn on the power at the circuit breaker.
$12 dollars for a new motor capacitor and 45 minutes of work was much less effort and expense compared to buying and installing a new ceiling fan!
Thanks for reading,
Bob Jackson