This project explains how to install a Delta single handle kitchen faucet. This project is continued from How to Replace a Kitchen Faucet where I removed the old faucet.
I chose the Delta Leland Kitchen Faucet model # 9178-DST because I liked the look, features and warranty:
- High-arc neck that doesn’t obstruct sink access.
- MagnaTite docking holds the sprayer head firmly in place.
- DIAMOND™ Seal Technology – microscopic diamonds embedded in a ceramic valve that won’t leak or wear out.
- Push button stream and spray pattern.
- Faucet swivels 360 degrees.
- Lifetime warranty to the original purchaser.
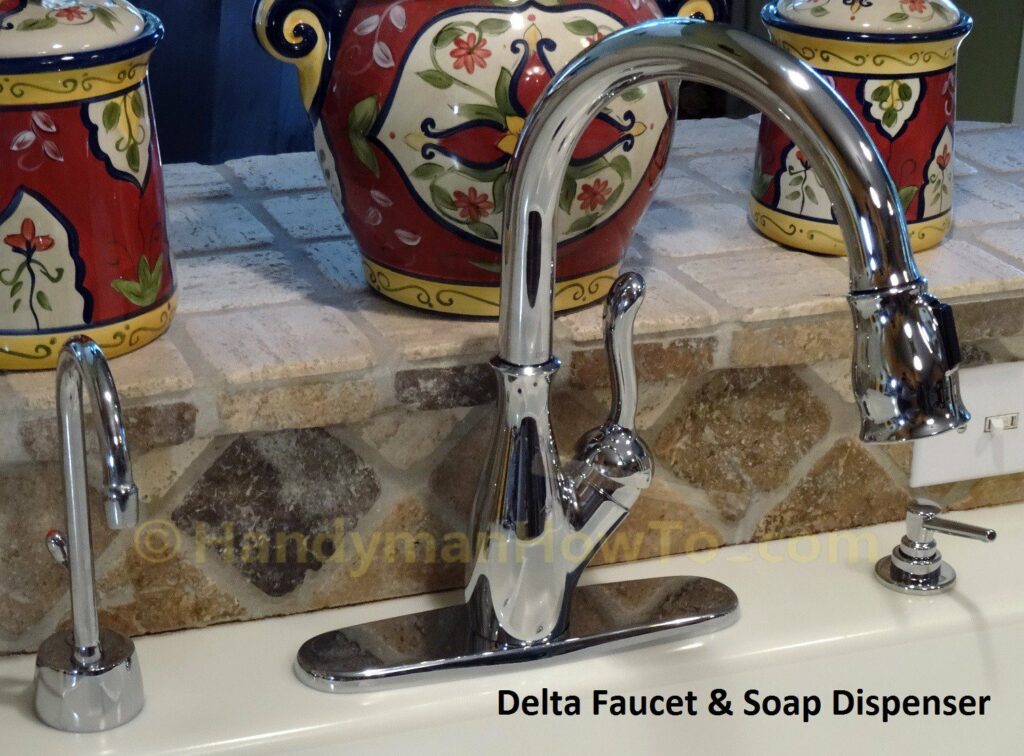
The boss (my wife) is pleased with the new Delta faucet.
How to Install a Delta Single Handle Kitchen Faucet
The Delta single handle faucet box contents includes instructions, special wrenches and trim plates for single- and three hole sinks:
The out-of-the-box Delta faucet is basically fully assembled – it’s a matter of mounting the faucet on the sink and hooking up the water supply tubes:

Referring to the above photo, the water flow is as follows:
- Hot and cold water flows to the faucet from the house plumbing.
- Water is mixed and regulated by the faucet valve using the handle.
- Regulated water flows from the faucet valve to the outlet tube.
- The outlet tube connects to the sprayer hose and flows to the sprayer.
Delta Kitchen Faucet Installation Instructions
The instruction sheet covers several Delta single handle faucet models due the nearly identical installations, including:
- Delta Savile 19949-DST
- Delta Ashton 19992-DST
- Delta Addison 9992-DST and 9192-DST
- Delta Leland 9978-DST and 9678-DST
The above variants may include a soap dispenser or feature electronic touch control or water efficiency.
I highly recommend reading the instructions thoroughly and identify the parts and accessories before you begin.
Required Installation Tools
A small adjustable wrench and maybe a utility knife or PEX plastic tube cutter only if the tubes are too long for your water supply connections. I used a utility knife on the small tubes.
Kitchen Faucet – Single and Three Hole Sink Mount
The Delta kit includes trims for single- and three hole sinks. I have an older sink with three holes originally designed for a faucet with separate hot and cold handles but I’ll explain the single hole option first. The single hole trim kit consists of the trim ring, base ring and gasket:
The white gasket fits in the bottom of the base ring:
Which is set over the center hole followed by the trim ring. Note the two tabs are aligned front and back as shown to mate with the faucet:
Aside: The silicone and grime from the old faucet cleaned up really well!
My sink requires the three hole sink mount as included with the Delta faucet. The white gasket is molded in the under cover plate and doesn’t require silicone sealer:
The under cover plate is set in the sink holes:
Working under the counter the two lock nuts are tightened by hand. You’ll need a helper to check the alignment of the cover plate with the sink center hole while tightening the nuts:
Mount the Kitchen Faucet
The metal escutcheon is set on the under cover plate then faucet tubes are fed through the center hole. The faucet base will mate with the front and rear tabs of the cover plate:
The faucet is clamped to the bottom of the counter by a mounting bracket and hex nut. A plastic wrench is included with the Delta kit to tighten the nut:
While laying on my back under the sink the sprayer hose is fed through the mounting bracket and nut, then the nut is spun on the faucet shank by hand until the bracket rests against the counter:
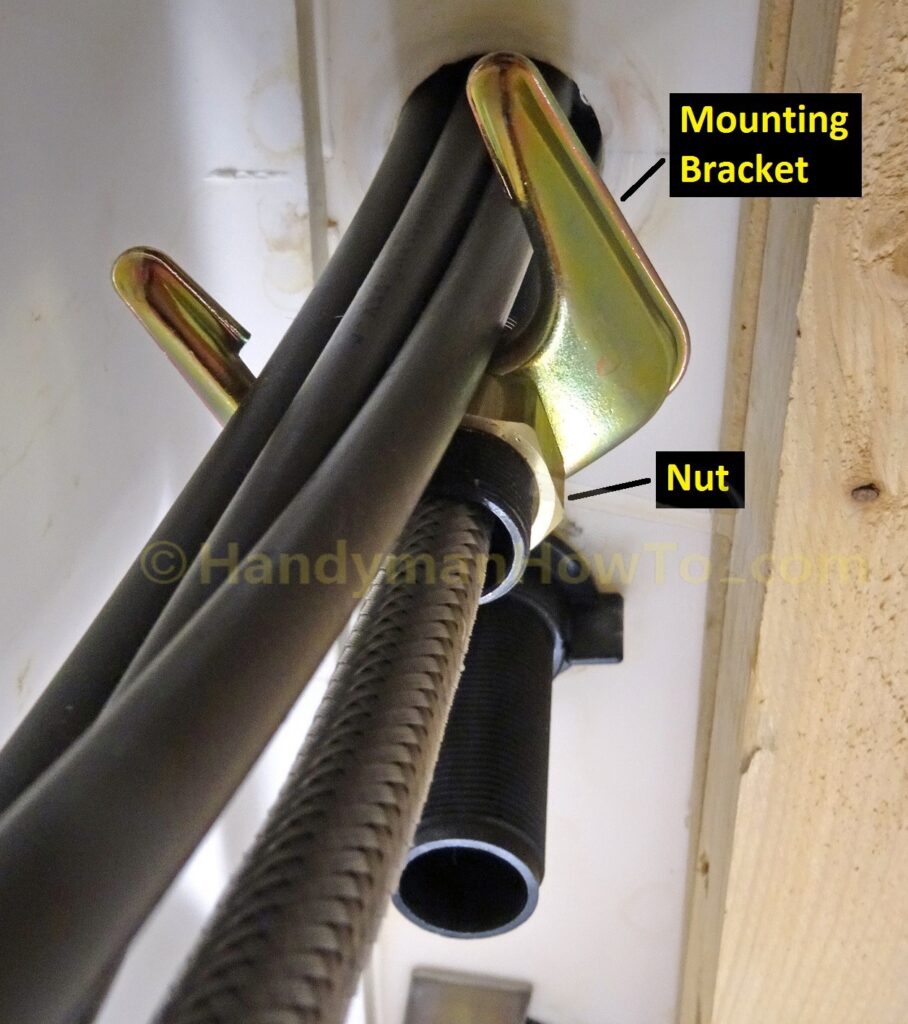
The sprayer hose is fed through the wrench to tighten the nut. The PEX tubes are fairly stiff and have to be held out of the way to turn the wrench:
Remove the wrench after tightening the nut:
Next up – connecting the water supply in Delta Kitchen Faucet Water Line Connections.
Thanks for reading,
Bob Jackson