This project series shows how to replace a kitchen faucet and install a Delta Leland single handle pull-down faucet.
The job will require 1 to 2 hours labor which includes:
- clean out sink cabinet
- disconnect the PVC drain plumbing for easier access
- disconnect and remove the old kitchen faucet
- install the new faucet
- clean the PVC drain p-trap, waste arm and slip joint washers
- reassemble the drain plumbing
How to Replace a Kitchen Faucet
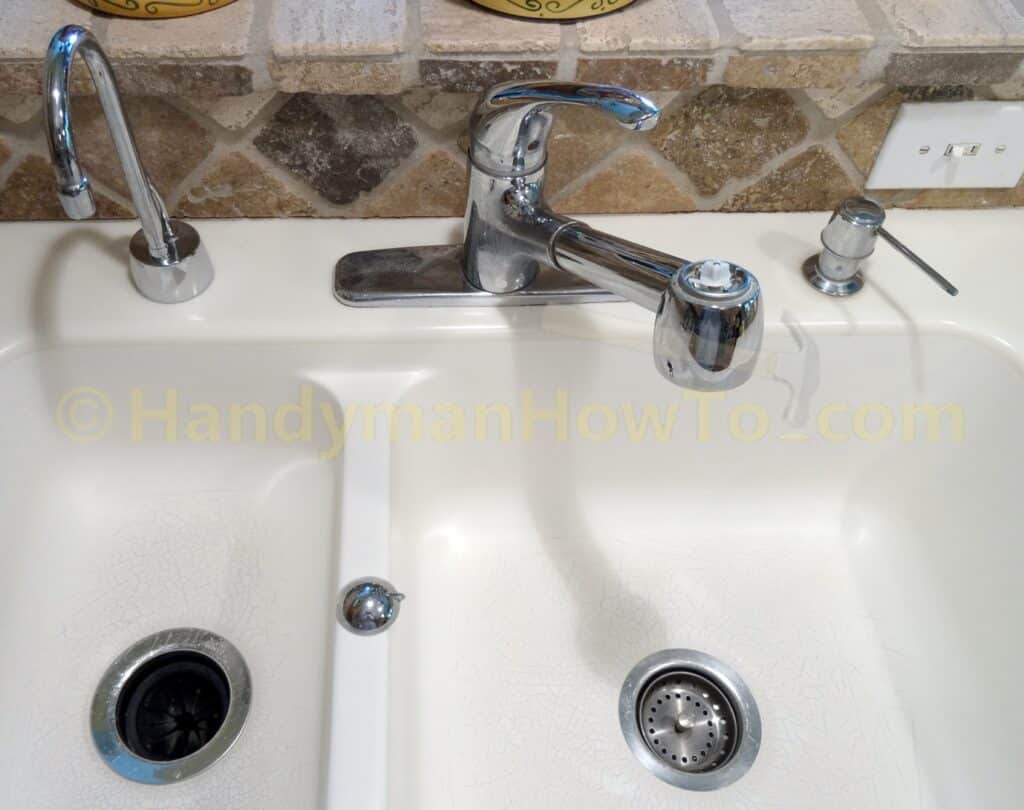
The old faucet squeaked loudly when the turned then the sprayer control cap broke. Styles have changed and this faucet lack a modern look and features:
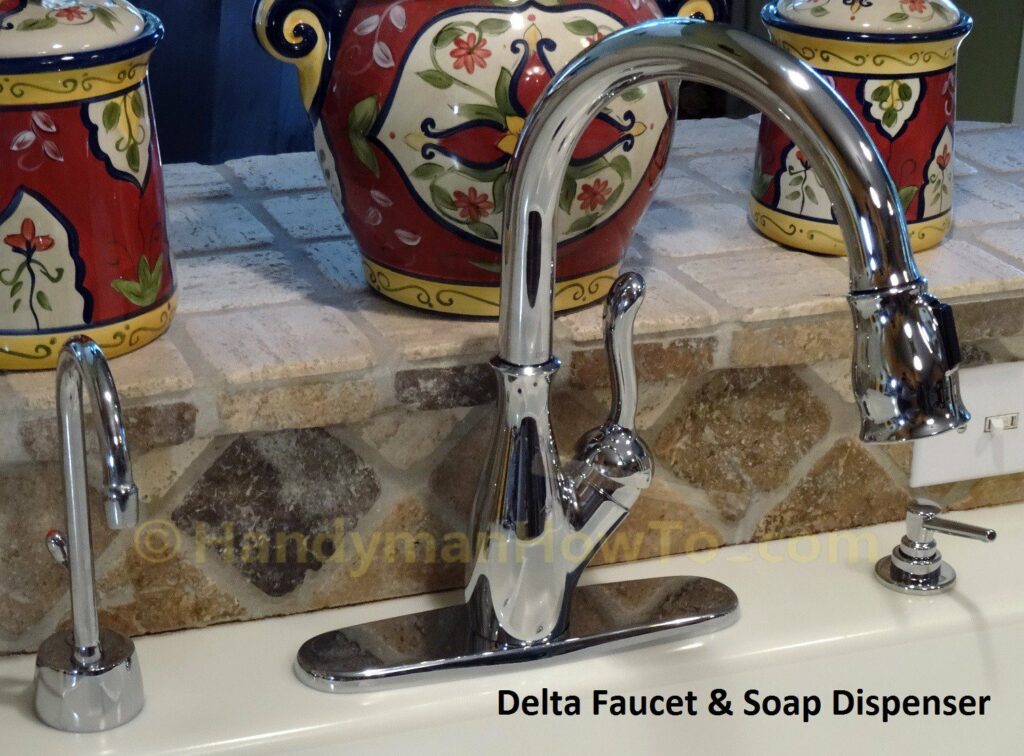
After researching kitchen faucet styles, features and warranties I installed a Delta Leland 9178-DST Kitchen Faucet and matching Delta soap dispenser RP1001:
Remove the Old Kitchen Faucet
The challenge with this job is difficult access to the sink plumbing. My kitchen sink cabinet is deep and too far to comfortably reach inside. I’ll have to lay on my back inside the cabinet to reach the faucet mount behind the sink.
After clearing out the items stored under the sink, I can see the kitchen faucet plumbing connections:
- Hot water connection
- Cold water connection
- Sprayer hose
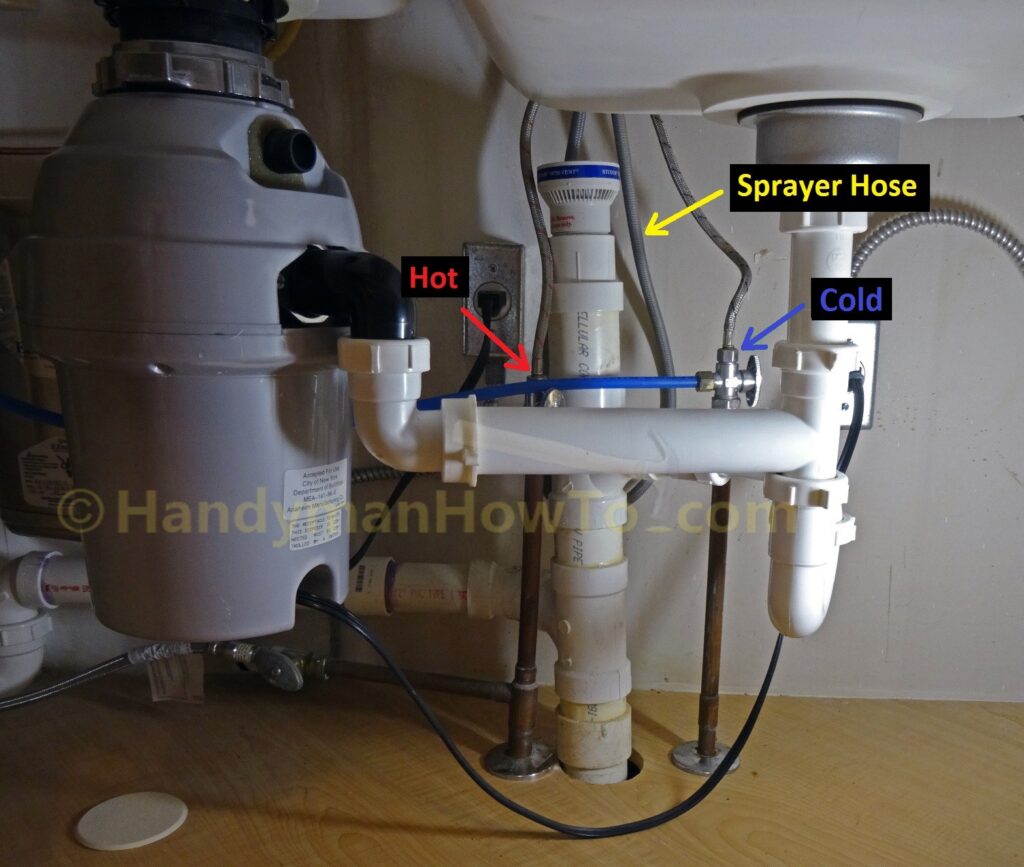
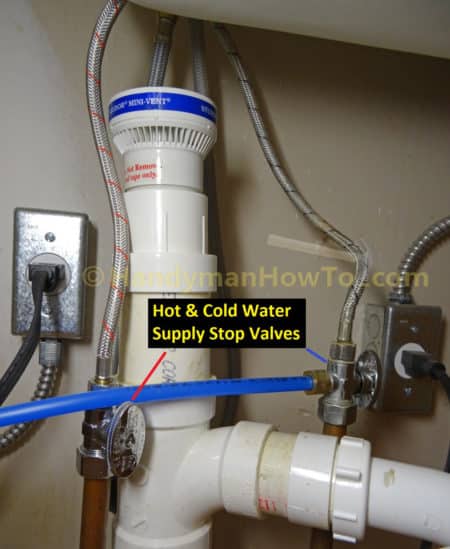
A closer look reveals the hot water faucet hose (red stripe), cold water supply hose (blue stripe) and the stop valves (water shutoff valves):
The bright blue plastic water line is for the instant hot water dispenser.
Disconnect the Kitchen Sink Drain Plumbing
The drain P-trap is blocking me from laying on my back inside the sink cabinet. I placed a bucket under the P-trap and disconnected the PVC slip joints:
The garbage disposal waste arm is loosened and moved to the side to reach the hot & cold water stop valves:
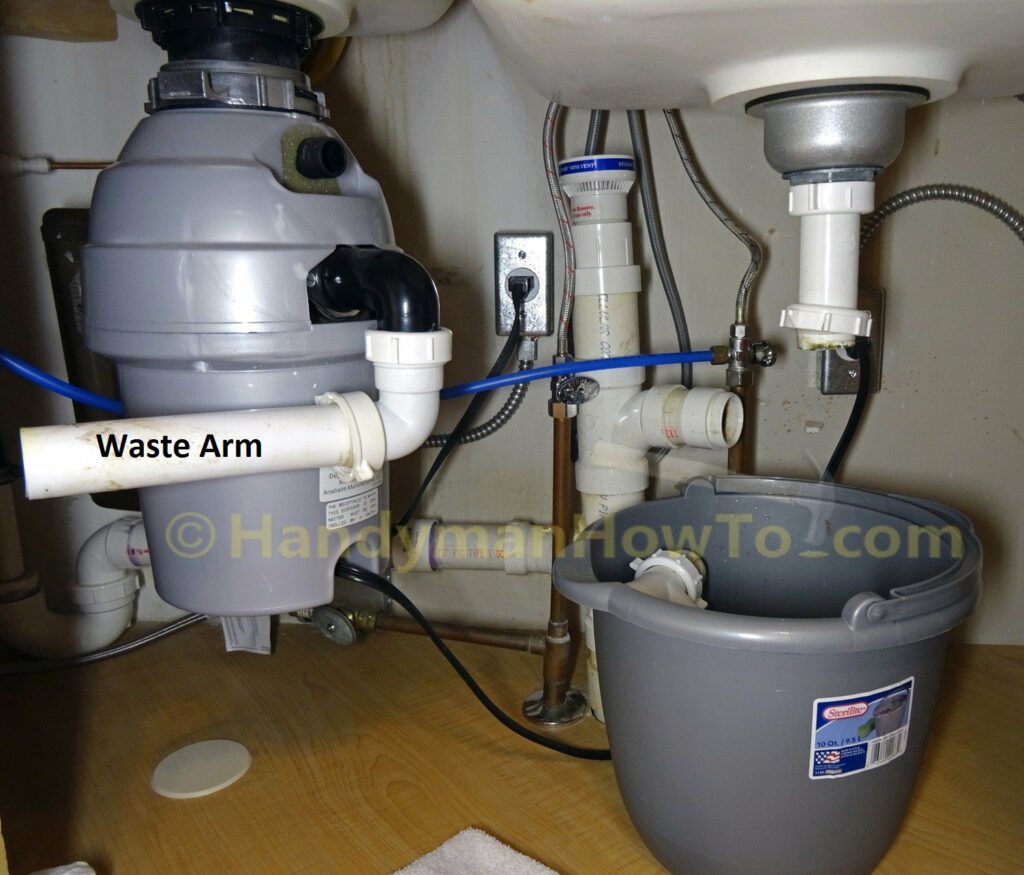
I’ll bleach and clean the waste arm, P-trap and slip joint washers in the laundry room utility sink before reinstalling.
Disconnect the Kitchen Faucet Water Supply Lines
The steps to disconnect the kitchen faucet water supply are:
-
Close the hot & cold water stop valves then open the faucet to relieve the water pressure in the lines.
I have quarter-turn stop valves but yours may be multi-turn valves.
You’ll know the water is shutoff when nothing comes out of the faucet. - Move the faucet handle to the hot and cold positions to depressurize both lines.
- Close the faucet because this will stop water from running out the supply lines when disconnected.
- Have a cup ready and place a towel on the bottom of the sink cabinet to catch any drips.
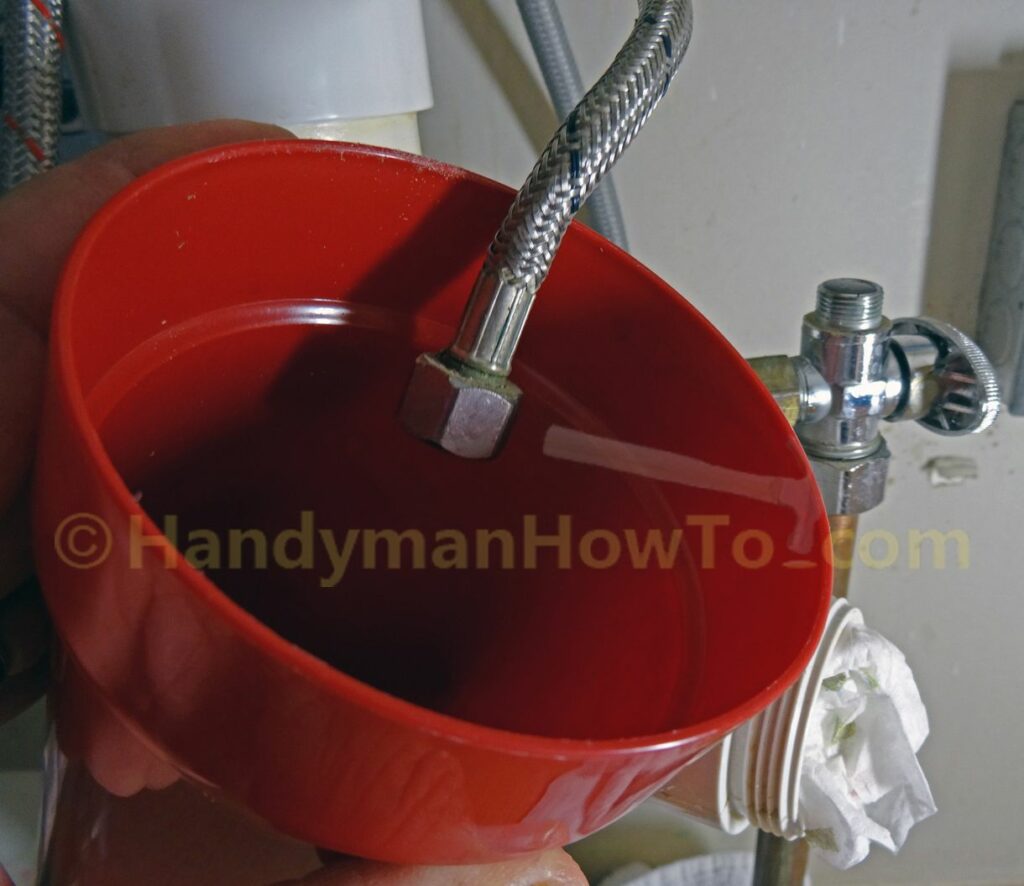
- Hold the stop valve body with one hand and remove the nut on the hot and cold water faucet lines with an adjustable wrench:
After disconnecting each line, hold a cup under it and open the faucet to break the vacuum and drain the line. Each 3/8 inch supply line has several ounces of water:
The 3/8 inch faucet supply lines are now disconnected from the stop valves as indicated by the arrows:
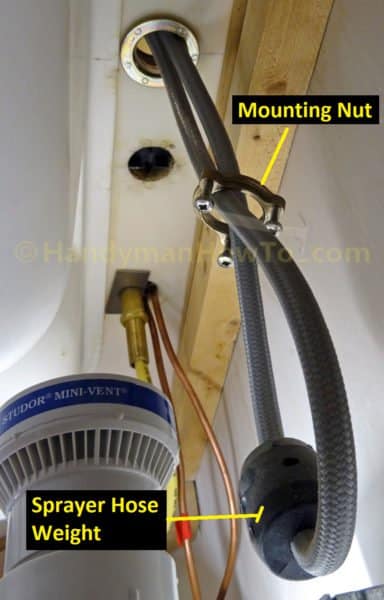
Remove the Kitchen Faucet Mounting Nut
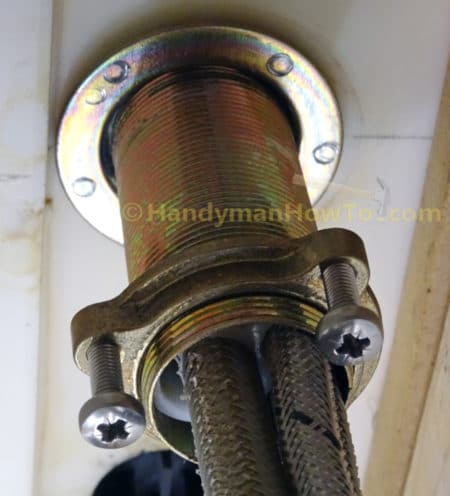
Lying on my back inside the cabinet under the kitchen sink I can now reach the faucet mounting nut. My mount nut is held in place with three lock screws. The old dish soap dispenser bottle is to the left:
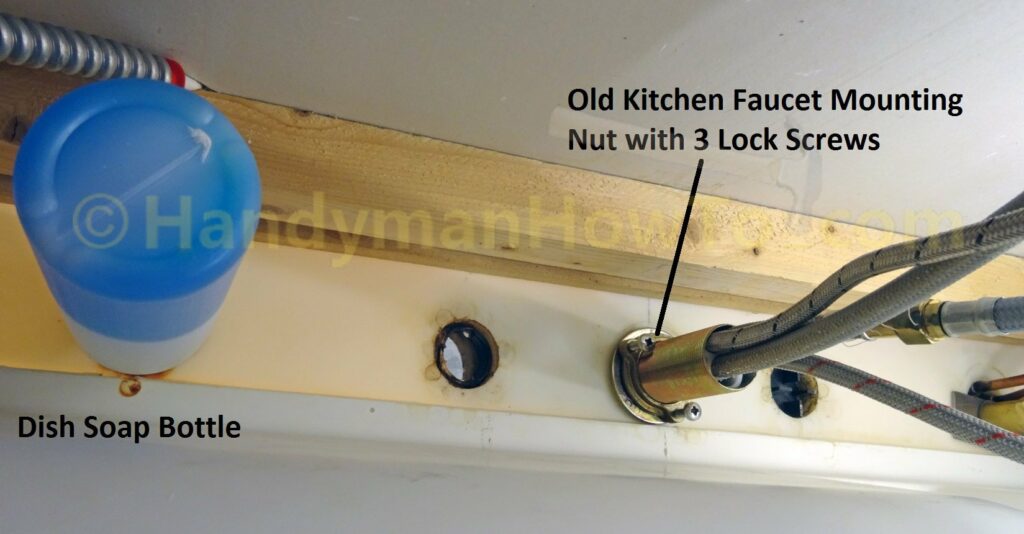
This style of mount nut won’t accept a wrench therefore it uses three lock screws. If your faucet has a hex nut remove it with an adjustable wrench. After loosening the lock screws the nut is spun off the faucet shank:
Disconnect the Faucet Sprayer Hose
The faucet is pulled out of the sink to expose the sprayer hose connection:
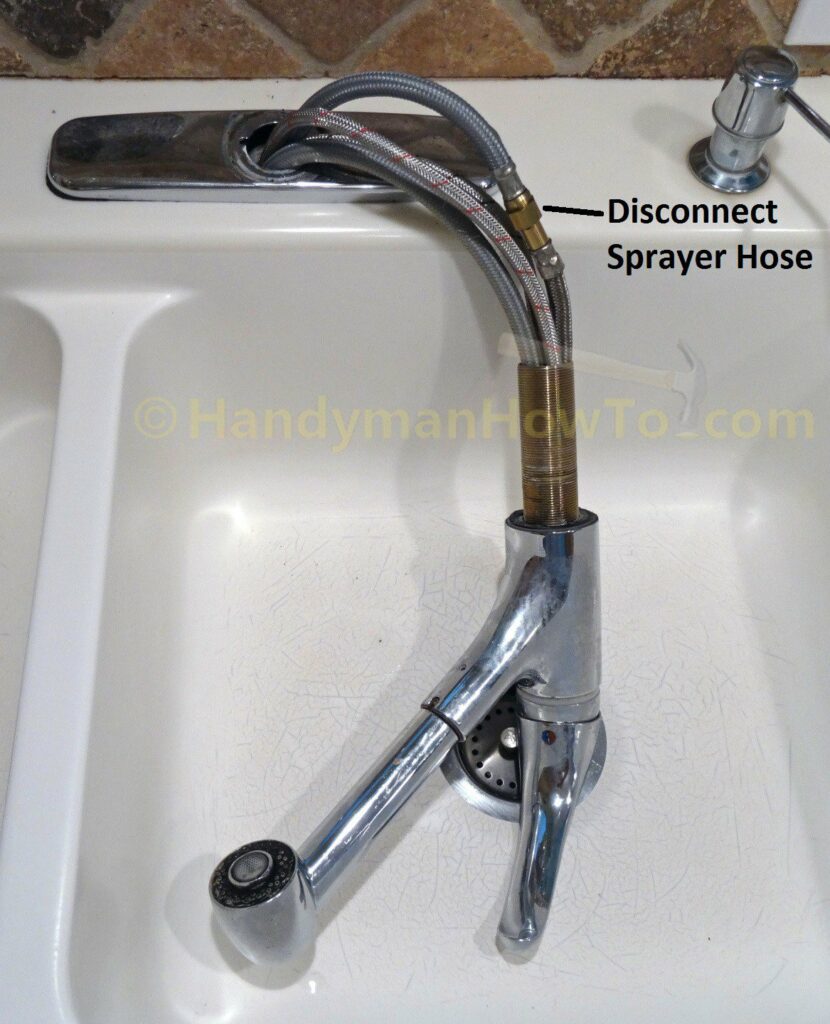
The sprayer hose must be disconnected to remove the mount nut and hose weight because it’s looped through the two items:
I could have disconnected the sprayer hose under the sink but easier to do it from above. I used channel locks to hold the sprayer hose while loosening the outlet hose nut with an adjustable wrench:
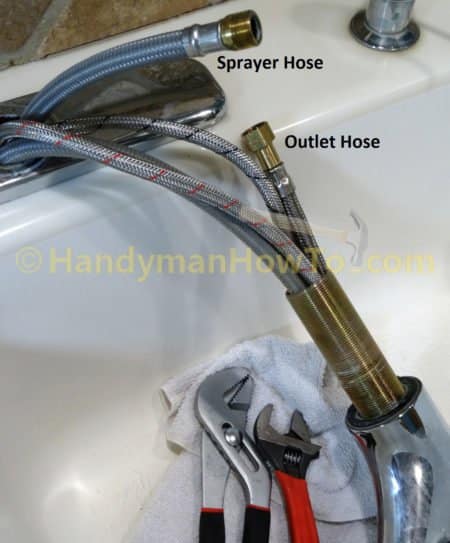
The sprayer hose is pushed into the sink cabinet then the hose weight and mount nut are removed. My hose weight has two halves held together with two screws:
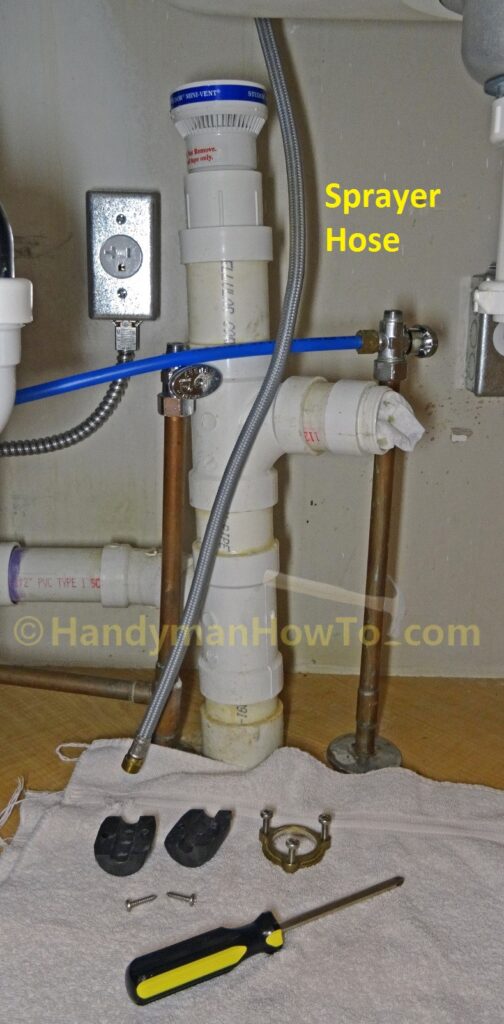
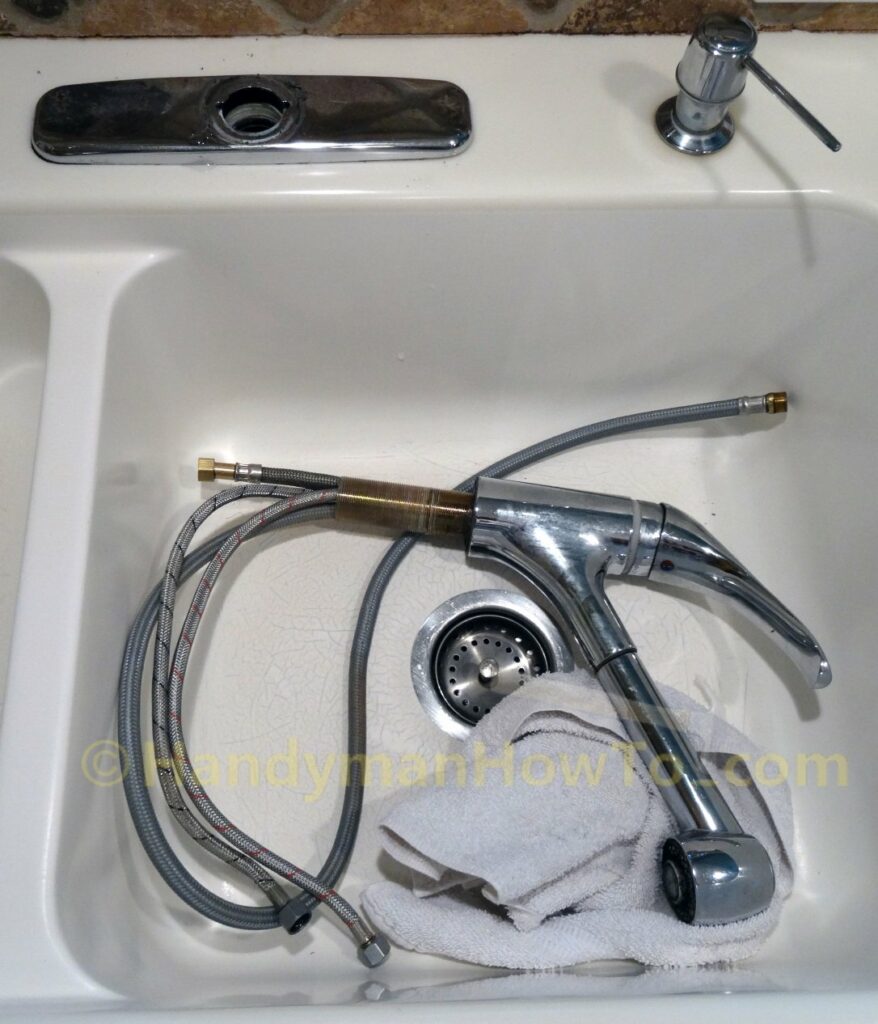
Remove the Old Faucet
The old faucet and hoses are lifted out of the sink:
Kitchen Faucet Escutcheon and Under Cover Plate Removal
The escutcheon simply lifts off the under cover plate. My under cover plate didn’t have mounting nuts and was sealed with silicone to the counter top. It’s dirty with years of crud as water splashes seeped under the cover plate:
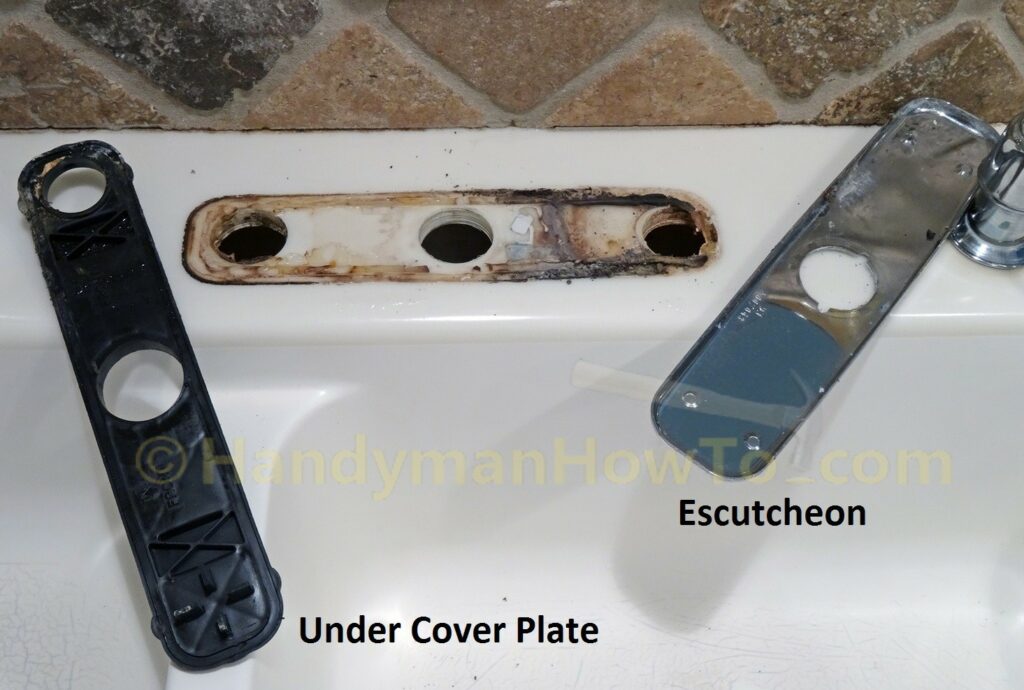
I used a small putty to scrape off the silicone and crud taking care not to scratch the counter top. Then I scrubbed it with Ajax® cleaner to disinfect and polish the counter.

Now I’m ready to install the new faucet! This project is continued in How to Install a Delta Single Handle Kitchen Faucet.
Thanks for reading,
Bob Jackson