The new Bryant Evolution condenser (outdoor compressor unit) and sheet metal duct upgrades are installed to replace the old central air conditioning system.
Series index:
- Old Central Air Conditioning Replacement with New Bryant Evolution High Efficiency System
- New Bryant Evolution Central AC Installation
- Bryant Evolution AC Condenser and Ductwork Installation (you are here)
- Bryant Evolution Connex WiFi Thermostat & MyEvolution Smartphone App Review
Bryant Evolution AC Condenser Installation
Heavy rain was forecast so the HVAC crew put a pop-up canopy over the work area. The old condenser is removed and the new 3 ton Bryant 189BNV air conditioner condenser is moved by hand truck to the side of the house. As mentioned in the previous article, I double checked the copper refrigerant lines by shining a flashlight in the tubes. The outdoor tubes were bright and shiny with no corrosion or debris:
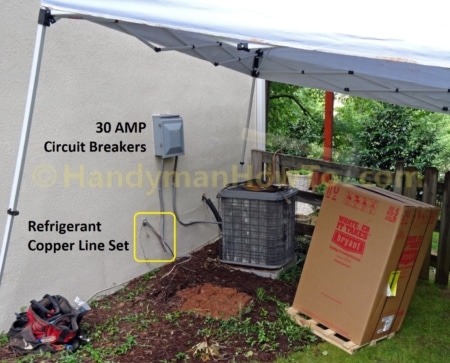
The new unit is set on a large plastic mounting pad with a least 24 inches of space between it and the other old AC condenser that I’m keeping for now. The refrigerant lines were flushed with cleaner before brazing new splices between the old line set and the condenser:
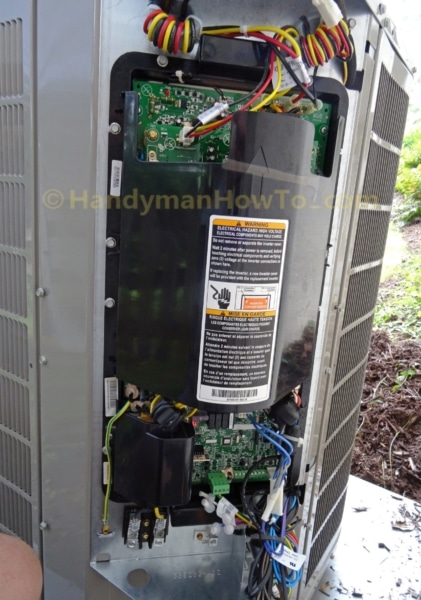
A look at the control panel circuit boards (.pdf) to manage the 5 stage (running speeds) compressor and diagnostics:
A new air conditioner electrical whip was installed because the old whip was too short to reach the new condenser.
With the new evaporator coils and condenser installed and refrigerant lines sealed, the AC techs:
- Pressure tested the refrigerant lines to about 300 psi with dry nitrogen gas to check for leaks.
They waited about 30 mins to see if the pressure gauge held steady. - Ran a vacuum pump to pull a deep vacuum to remove air and dehydrate the refrigerant lines, condenser and evaporator coil.
The techs ran the vacuum pump for at least 30 mins to boil off any water in the lines and checked the gauge to verify the vacuum is holding steady.
While waiting for the vacuum pump to do it’s thing the techs turned their attention to the ductwork upgrades.
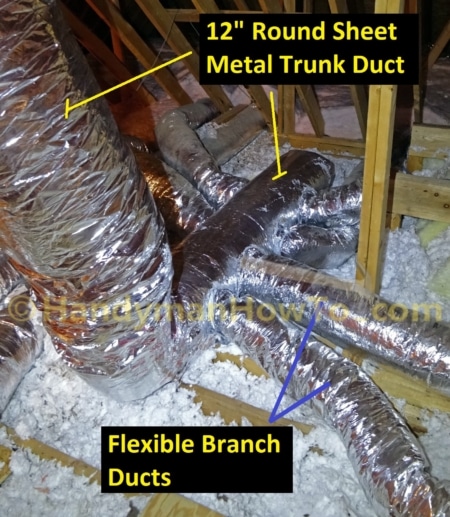
Sheet Metal Supply Duct – Mixing Box Fabrication
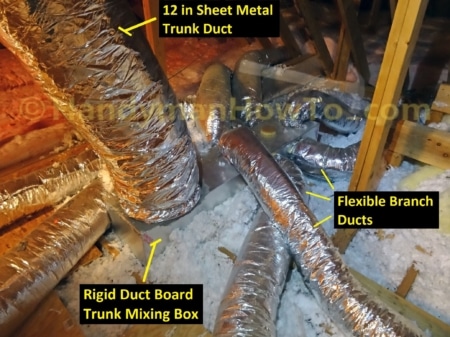
An optional but recommended improvement is replacing the too small duct board mixing boxes with sheet metal for better air flow and to clean up branch duct connections. I liked this because I had previously replaced the 12 inch flex trunk ducts with sheet metal. This is one of the old duct board mixing boxes:
The new mixing boxes are fabricated from 12 inch round snap lock sheet metal duct. I invited the crew to work in the garage to stay out of the rain. To make the mixing boxes a prefabricated metal end cap is fastened to one end of the duct pipe with screws and sealed mastic and HVAC metal foil tape. A fiberglass insulation wrap is cut to length, the long side taped to the duct pipe then the pipe is rolled up in the wrap. The insulation seam is then sealed with HVAC tape and mastic:

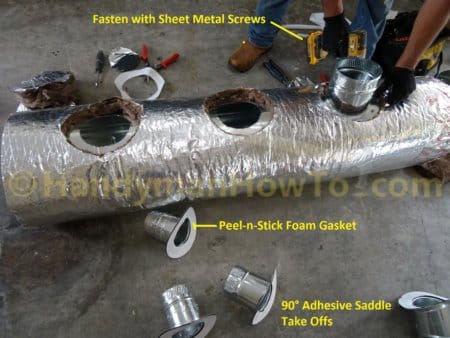
Holes for the flex duct collars are located and cut in the insulation wrap and sheet metal duct. Air Tite® saddles (a.k.a. “collars”) with a peel & stick adhesive gasket are pressed on the pipe, secured with sheet metal screws then sealed with mastic. It was a very efficient process seeing a pro at work:
The new 12″ inch round mixing box is connected to the main supply trunk with an adjustable elbow, the flex ducts connected, sealed with mastic, HVAC tape and large zip ties. The new ductwork looks so much better:
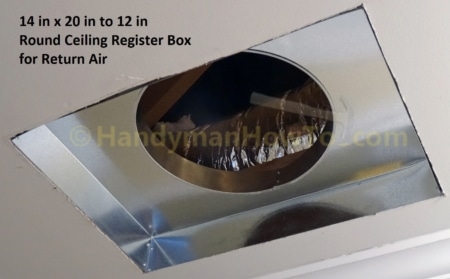
Return Air Plenum Trunk Duct
The old return air ducts were undersized for the ~1200 CFM air flow needed by the 3 ton central air system. The solution is to:
- Replace the 14 in x 14 in to 10 inch round ceiling register box in the hallway with a 14 in x 20 in to 12 in round box.
The old ceiling box, 2×4 cross framing and 10 inch flex duct was removed, the drywall opening cut to 20 inches long, new 2×4 cross members installed and a 12 inch round flex duct installed from the ceiling box to the return air plenum. - Replace an 6 inch ceiling return with 8 inch duct and vent in another room.
I chose my upstairs office above the network equipment wall rack because it generates a lot of heat. The heat is a bother in the summer but nice in the winter.
The new hallway ceiling box being fitted in the rough opening. The box will be fastened with screws to the joists and 2×4 cross members set in the flat interior sides:
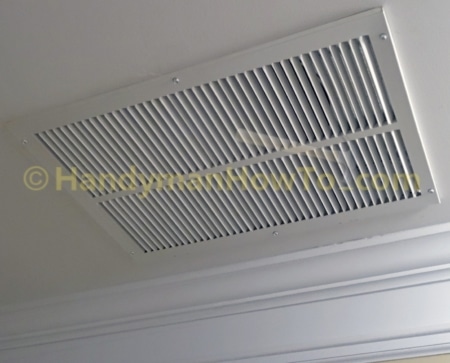
New 12 inch ceiling return after installing the grill:
Completed Bryant Evolution Installation
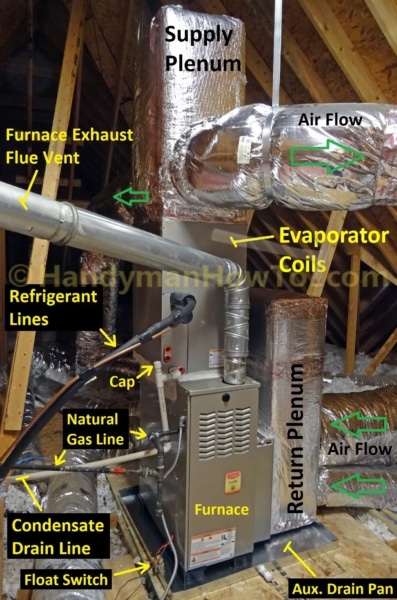
View of the new Bryant Evolution air handler in the attic:
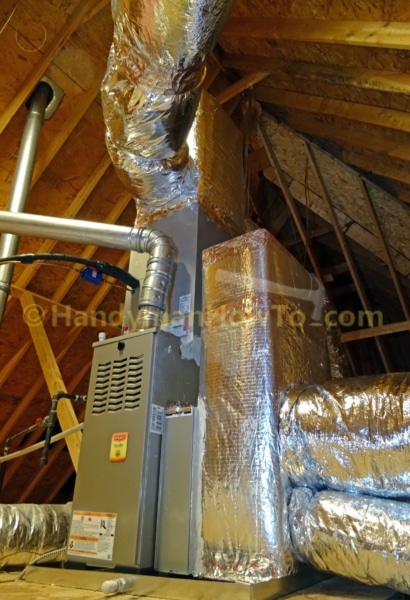
Annotated air handler system components:
EZ Flex Cabinet Air Filter
Instead of a standard air filter I chose the Carrier / Bryant EZ Flex Cabinet Air Filter EZXCAB high flow air filter. The filter has a much greater surface area for better air flow. It typically only needs to be changed once or twice a year.
The panel unscrews without tools for easy access:
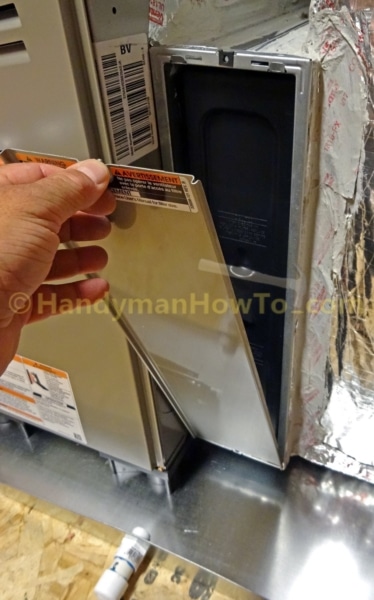
The filter panel has finger grabs and pulls out easily for changing the filter cartridge:

New Central Air System Commissioning
Commissioning the new central air system takes about an hour and consists of:
- Charging the system with Puron (R-410A) refrigerant.
- Install and configure the Evolution Connex WiFi thermostat.
The gas furnace and AC condenser model and serials numbers are input so the thermostat knows exactly how to operate the equipment. - Test the heating and air conditioning operation.
- Customer education – how to operate the thermostat, owner’s manuals, register the warranty with Bryant, answer questions, paperwork sign-off, etc.
The crew worked from 7am to 8pm (13 hours) including cleanup and loading up the old AC system to be hauled away. They could have finished in about 1/2 the time except for the ductwork which was time consuming.
Post Installation Central AC Maintenance
I forgot to ask the installers to put AC condensate pan tablets to prevent slime clogging the drain line. The next day I removed the evaporator coil access panel revealing split delta plate and plastic drain pan:
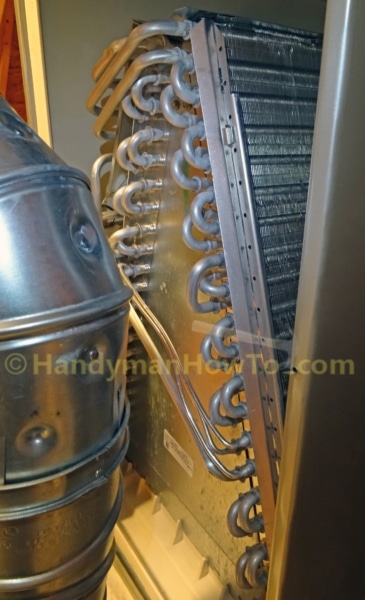
Closeup of the evaporator coil drain pan and drain line outlet at the far end:

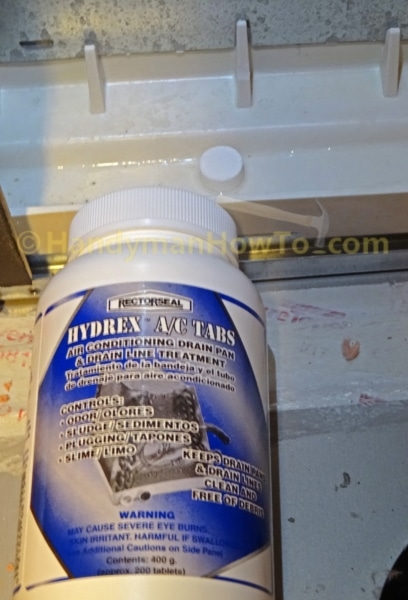
I bought a bottle of RectorSeal Hydrex AC Drain Pan tablets and placed 6 tablets in the pan 2 tablets per ton for this 3 ton system per the instructions. Two tablets on the left & right sides of the coil and two in the front of the drain pan:
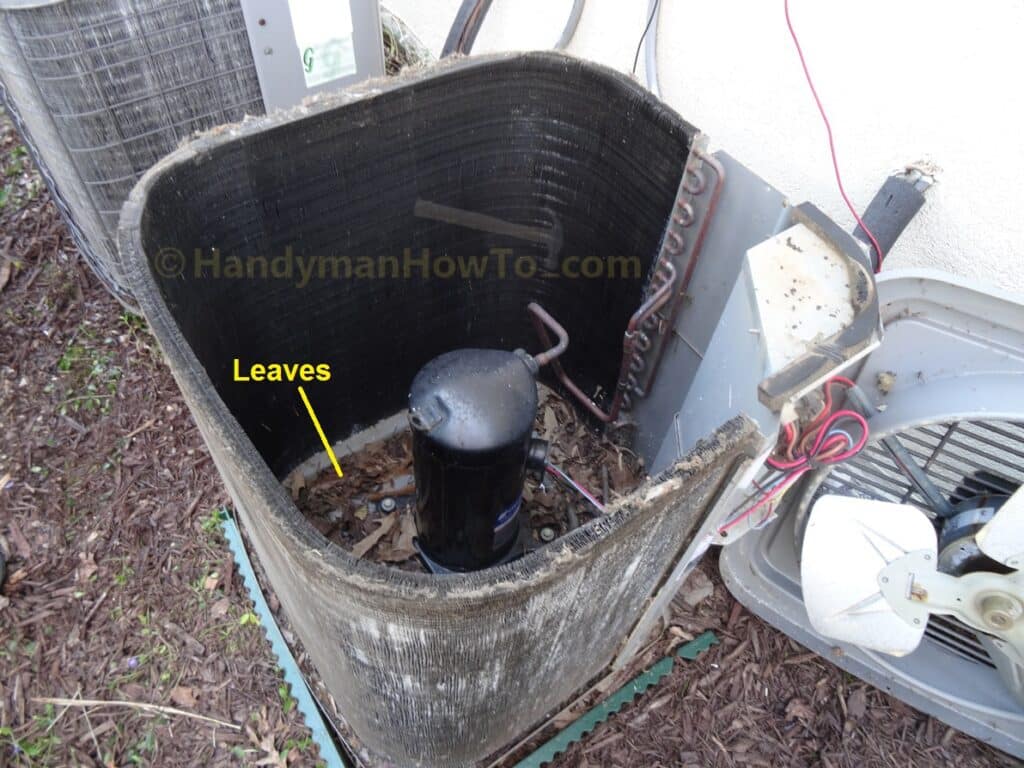
Leaf Guard Air Conditioner Cover Kit
My home is surrounded by tall trees and I wanted to prevent leaves, seeds and twigs from falling through the AC condenser grate like it did with my old unit:
I bought a 32in x 32in leaf guard AC cover that fits the 3 ton Bryant Evolution. The kit consists of a mesh cover and bungee cords with hooks:
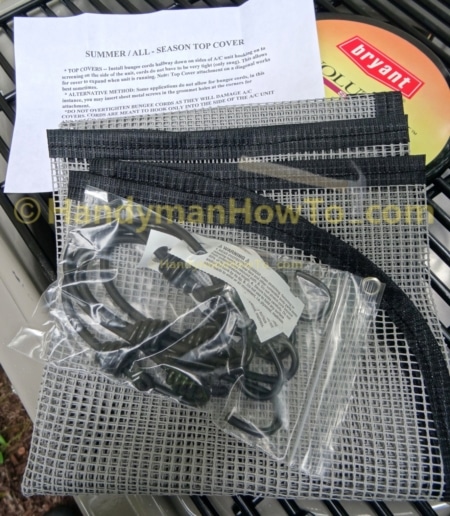
Installation was simple by hooking the bungee cords to the side panel. The instructions recommend the bungee cords be snug but not tight:

Continue reading the Bryant Evolution Connex WiFi Thermostat & MyEvolution Smartphone App Review.
Thanks,
Bob