The Fluke Networks LinkSprinter 200 Network Tester (Editor’s note: the 200 is no longer available and the model you want now is the LinkSprinter 300) is a pocket size, affordable, easy to use and feature-packed automated network test tool. Simply plug an Ethernet cable into the LinkSprinter and it automatically tests PoE, Link, DHCP, DNS, Gateway and Internet connectivity. Test results are delivered to your mobile device via the LinkSprinter internal Wi-Fi hotspot and web server. Results are sent to your free LinkSprinter Cloud Service account and can be automatically e-mailed.
Fluke LinkSprinter 200 Network Tester Review
The affordable Fluke LinkSprinter 200 features many of the capabilities that were only available in expensive test tools like the Fluke LinkRunner AT Network Tester. Instead of a built-in display screen, the LinkSprinter 200 unit has an internal Wi-Fi hotspot for viewing test reports in a web browser on your smart phone, tablet or laptop. No App required!
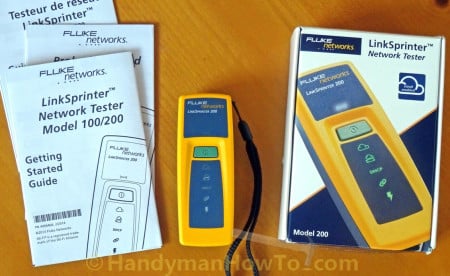
The LinkSprinter box contains:
- LinkSprinter 200 Network Tester
- Lanyard
- Two AA batteries – which will last for 500 to 600 tests
- Getting Started Guide in English, Spanish and French
Also see the LinkSprinter Support site for training videos and common questions.
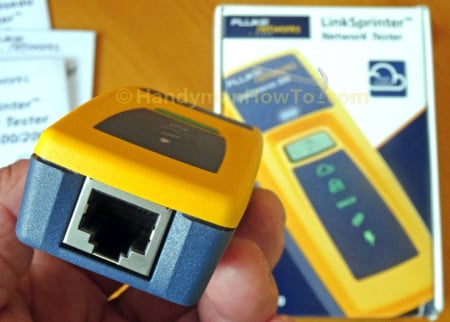
The LinkSprinter has a single RJ-45 copper Ethernet port located at the bottom of the unit for plugging in a Cat5e or Cat6 Ethernet cable:
Fluke LinkSprinter Operation
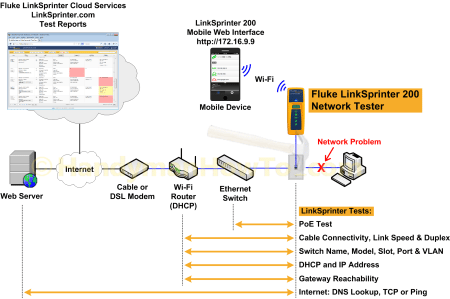
The following network diagram illustrates how the LinkSprinter operates. Suppose there’s a network problem with a computer or other device such as an IP camera on the LAN network. Troubleshooting network problems from a personal computer is often difficult due to software configuration and operating system issues. Simply plug the Ethernet cable into LinkSprinter and network testing starts automatically:
- Power over Ethernet (PoE) if present and voltage
- Ethernet connectivity, Link Speed 10/100/1000 BASE-T, Full/Half Duplex, Receive wiring pair and Polarity.
- Ethernet Switch Name, Protocol Type (LLDP or CDP), Switch Model #, IP/MAC address, Switch Physical Port #, Virtual LAN (VLAN) number(s) and labels (e.g. “voice” or “data”).
If an Ethernet switch is not present these entries will be blank; for example if the LinkSprinter is connected directly to the WiFi router or cable/DSL modem. You can test anywhere with the LinkSprinter. - DHCP – client IP address, subnet mask, DHCP server IP address and DNS server IPs.
You can optionally configure a static IP address – either private or public to the LinkSprinter 200 to verify connectivity from a client static IP address. I wish the LinkSprinter was available when I was setting up a Comcast Business Class static IP network. - Gateway IP address and Ping response time in milliseconds (ms).
In the network diagram below, the Wi-Fi router is the gateway and DHCP server. - Internet Connectivity and Response: Website URL, Protocol TCP or Ping, IP address, Port # and response time (ms).
The LinkSprinter defaults to www.Google.com on Port 80. You can change this to any web site address and port #, e.g. 8080, 443, etc. Instead of a URL an IP address can be input, for example to bypass the DNS lookup or test an internal server on a corporate network.
To view the test results:
- Press the LinkSprinter power button twice to turn on the internal Wi-Fi hotspot.
Aside: The LinkSprinter Wi-Fi signal range was excellent showing 2 out of 3 signal bars on my iPhone through the walls in my home. - Connect your mobile device to the LinkSprinter Wi-Fi hotspot.
The SSID is “LinkSprinter” + the last 6 digits of the LinkSprinter MAC address. - Enter the URL http://172.16.9.9 in the mobile device web browser to view the LinkSprinter test report.
You can press the Retest button on the mobile web interface to test again or press the gear icon (bottom right) to configure the LinkSprinter settings:
I bookmarked the LinkSprinter web page on my Apple iPhone for easy access:
Fluke LinkSprinter Cloud Service
The Fluke LinkSprinter Cloud Service is an optional but free and highly useful service for logging test reports, managing LinkSprinter devices and users. If you’re in the network installation and support business the LinkSprinter Cloud Service can be used for saving network install “birth certificates” and verifying field personnel are following quality control standards by running tests to show the network is in good working order.
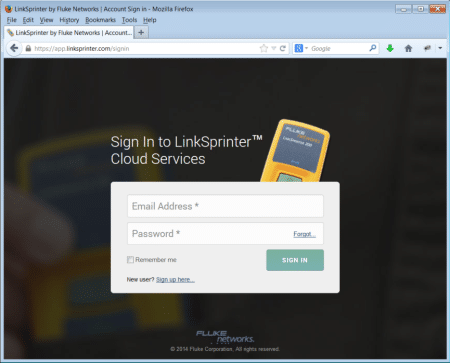
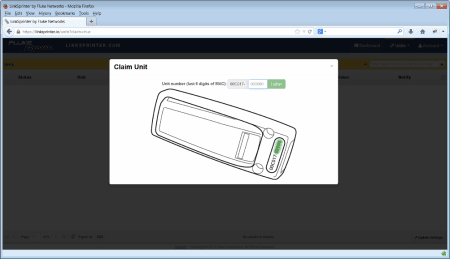
Once you’ve registered for a Cloud account, a LinkSprinter unit is linked to the account by “claiming”:
- Click on Units → Claim at the top right menu.
- Enter the last 6 digits of the LinkSprinter MAC address from the label on the back of the unit.
- Then click the Listen button.
Hold the power button for 5 seconds until the Cloud icon illuminates:

Then plug in an Ethernet cable with known good Internet connection:
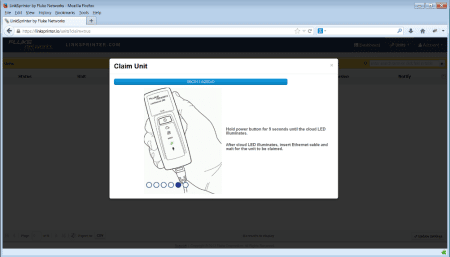
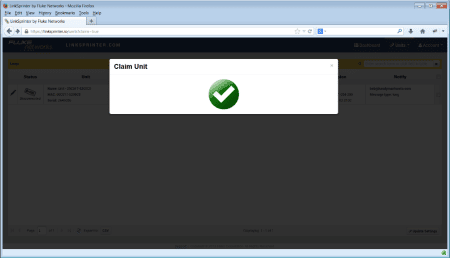
After a short wait the LinkSprinter will talk to the Cloud Service and be claimed:
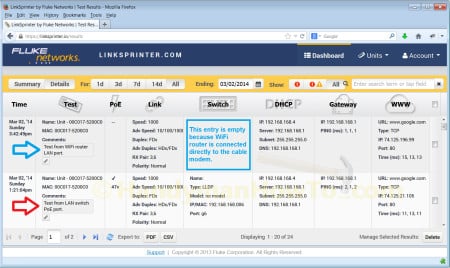
Fluke LinkSprinter Cloud Service Reports
The LinkSprinter will push the network test reports to the Cloud Service immediately when it has an Internet connection. If an Internet connection is unavailable due to a network problem, the LinkSprinter will upload the reports the next time it’s connected to the Internet.
Notes can be entered in the LinkSprinter Cloud Service test reports (see the blue and red arrows in the following screen grab) to identify the nature or purpose of the test. In this example I tested from a LAN port on my WiFi router (top row) which bypassed my Ethernet switch. Compare this to the second row which tested from an Ethernet switch port:
This article is continued in Fluke LinkSprinter Network Trouble Testing.
Thanks for reading,
Bob Jackson