This project explains how to repair a cracked concrete patio with QUIKRETE® Concrete Repair (No. 8620) caulk.
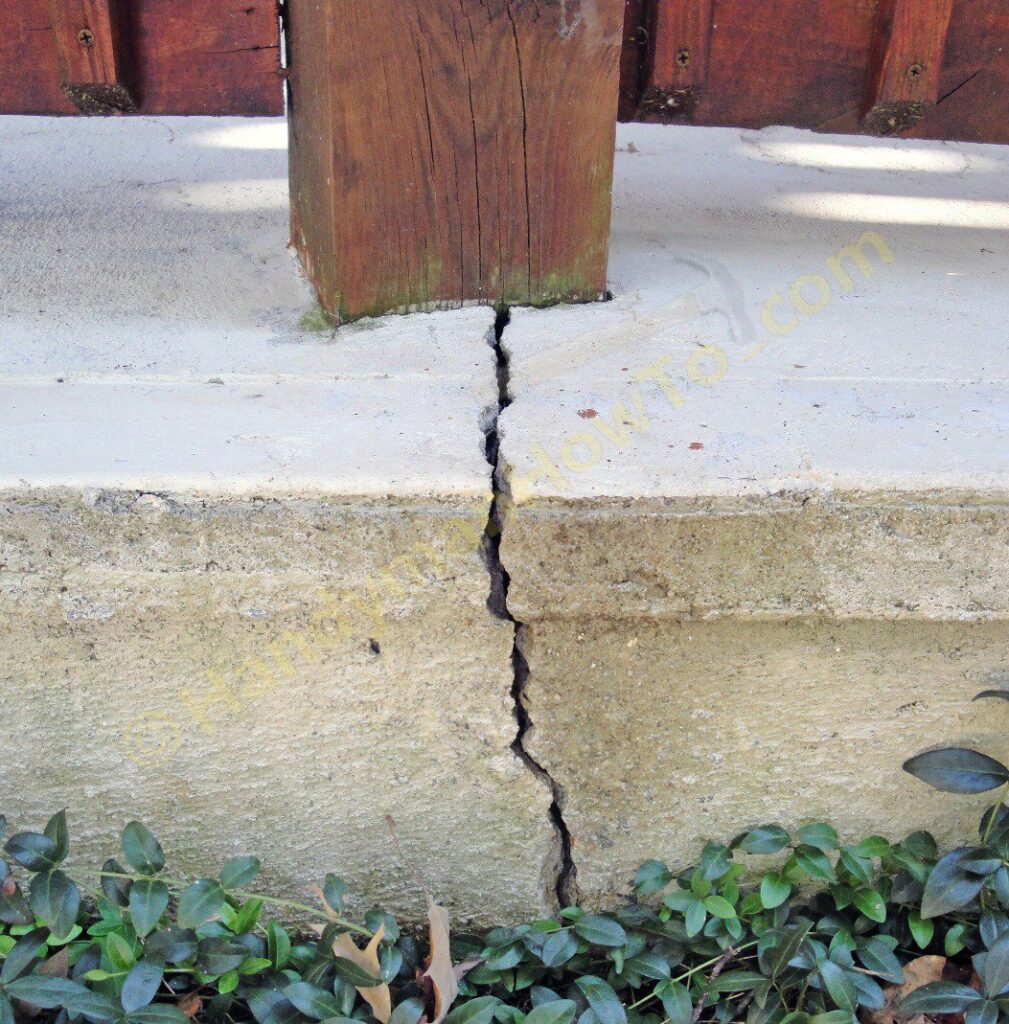
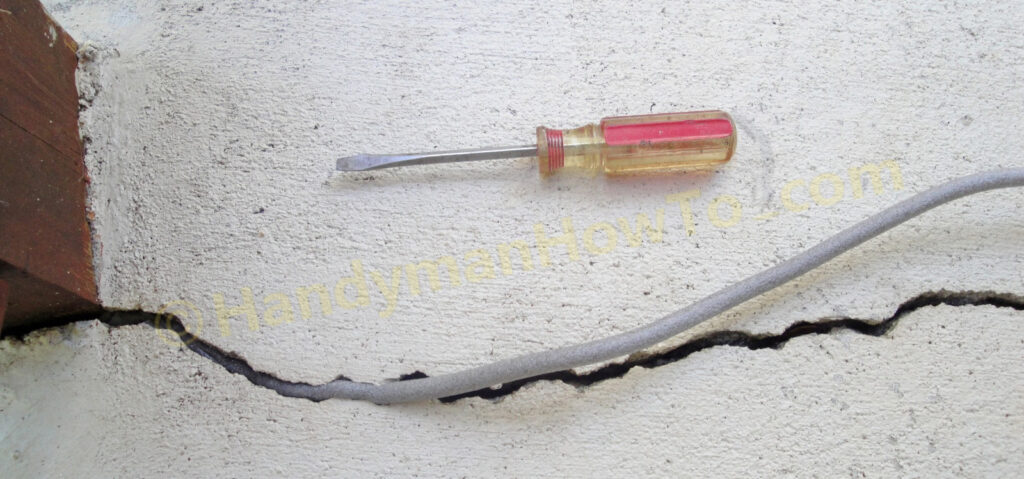
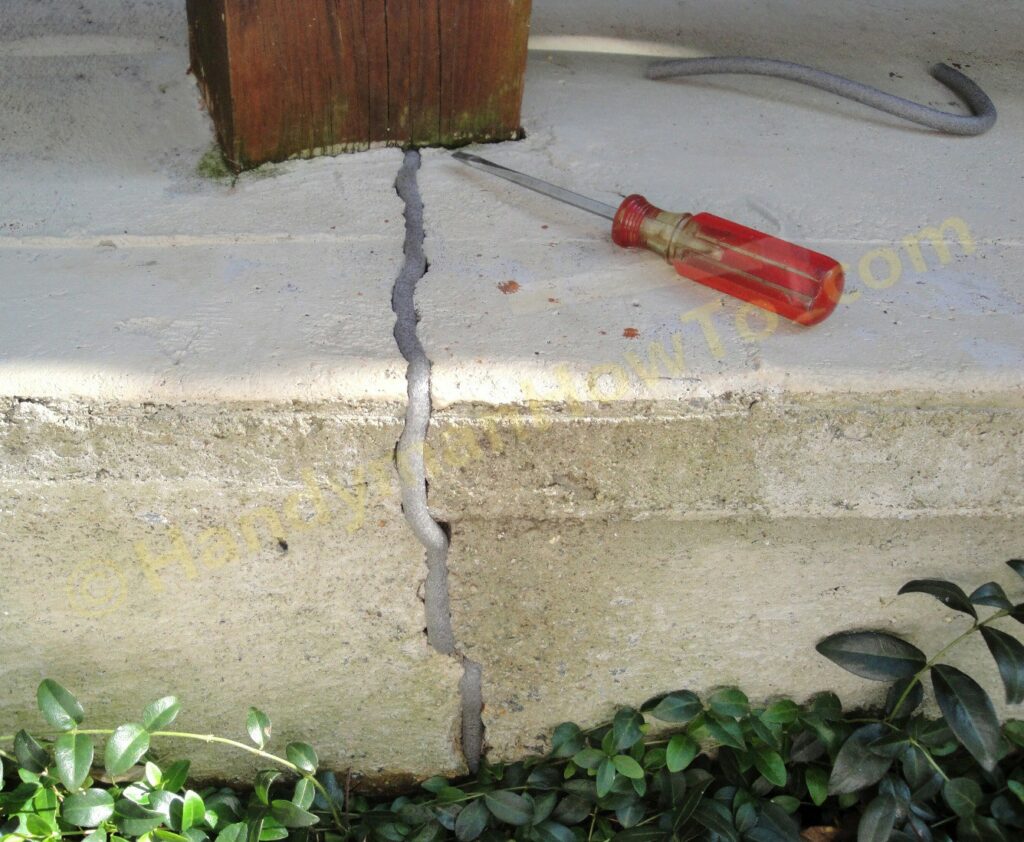
My concrete patio slab developed a 13 foot long crack that varied from a hairline next to the house, widening to 3/8 inch at the edge of the patio. I wanted to repair the crack before winter prevent water from freezing in the crack, causing it to get worse.
Freezing water expands with tremendous force that will widen a crack by shifting the concrete slab and/or creating new cracks to relieve the stress. Repeated freeze/thaw cycles can do a lot of damage to concrete.
Why the Concrete Patio Slab Cracked
I later understood why the patio slab cracked during my sagging wood deck repair project; the concrete slab lacked a proper footer set at least 12 inches below grade (ground level) and had no rebar or reinforcing wire. The prior homeowner’s didn’t like building permits because they thought it would increase their property taxes – which it may by a very minor amount. A building permit would have required a footer inspection by the building inspector to ensure the footer is below the frost line (12 inches below grade in my area per local building code) and didn’t know to ask the contractor to set rebar and remesh in the slab to resist tension (pulling apart) forces. Rebar and remesh is inexpensive and an inexcusable oversight.
The result was a low-bid contractor who simply set a wood form and poured the slab directly on the ground. This resulted in frost heaving and allowed chipmunks to burrow under the slab undermining the ground support. The crack developed as the unsupported slab sagged and started to slide downhill. Rebar and remesh would have provided tension strength to limit the crack widening, however nothing can make up for a non-existent footer. My solution when replacing the 6×6 wood deck post was to dig and pour a 38 inch deep by 2 foot square concrete pier with a rebar cage to pin the slab in place.
Concrete Patio Crack Repair Options
There are many products and methods to go about patching or repairing a cracked concrete patio slab. The main options are:
- Caulks & Sealers – inexpensive, easy, non-structural (i.e. has no strength), surface patch of uncertain long-term durability. Only for cracks less than 1/2″ wide.
- Concrete – inexpensive, semi-structural, repair to full depth of the crack. Best for cracks 1/2″ or wider due to difficulty of forcing concrete into a narrow crack all the way down in a 6 inch thick concrete slab. For best results, the crack should be undercut with a chisel to form an inverted V notch for maximum holding power at the “cold” joint between new and old concrete. Concrete is relatively weak in tension and can’t prevent slab movement if the foundation is less than 100% stable.
- Polymer Resins – expensive, deep penetrating, structural repair which forms a permanent chemical bond with the concrete slab, gluing the slabs together. Compressive- and tension (i.e. “pull apart”) strength of 4,000+ psi exceeds that of concrete to prevent the slab from moving. Slightly less rigid than concrete for stress relief. Epoxy and Polyurea adhesives are example materials.
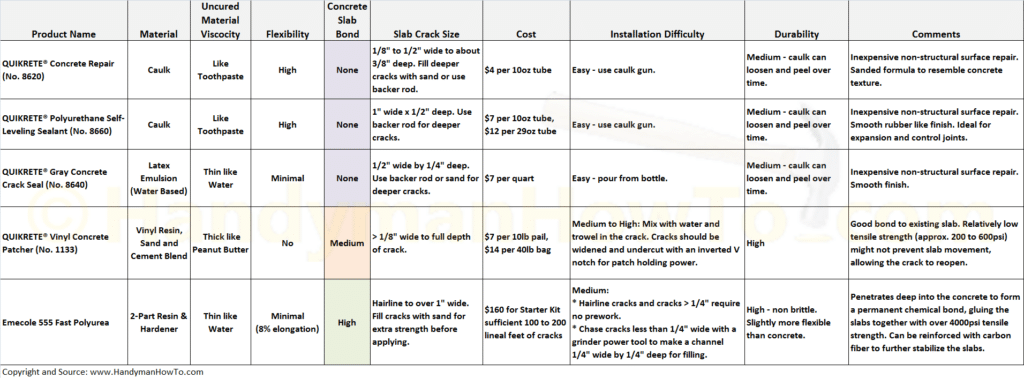
This table summarizes several QUIKRETE® concrete slab crack repair products that are readily available at home improvement stores. Click on the table for a full size view.
For this repair, I chose the QUIKRETE® Concrete Repair (No. 8620-10) sanded acrylic latex caulk for the following reasons:
- It is designed for concrete crack repair
- Sanded formula to resemble concrete
- The slab crack was less than 1/2″ wide
I decided against the following products for this application because:
- QUIKRETE® Polyurethane Self-Leveling Sealant (No. 8660) has a smooth texture and the self-leveling properties wouldn’t do well on the edge of the patio
- QUIKRETE® Gray Concrete Crack Seal (No. 8640) also has a smooth texture, cures/dries relatively slowly and I was concerned about run-out at the edge of the patio. It’s recommended the concrete should be chemically cleaned for a good bond
- QUIKRETE® Vinyl Concrete Patcher (No. 1133) looked to be an excellent choice for this job, but I thought the crack was too narrow in areas for concrete to work well
QUIKRETE® Concrete Patio Crack Repair Filler
I purchased a QUIKRETE® Concrete Repair (No. 8620-10) 10oz caulk tube and a bag of 3/8″ x 20′ closed cell polyethylene backer rod. The backer rod is a filler for cracks 1/4″ or wider.
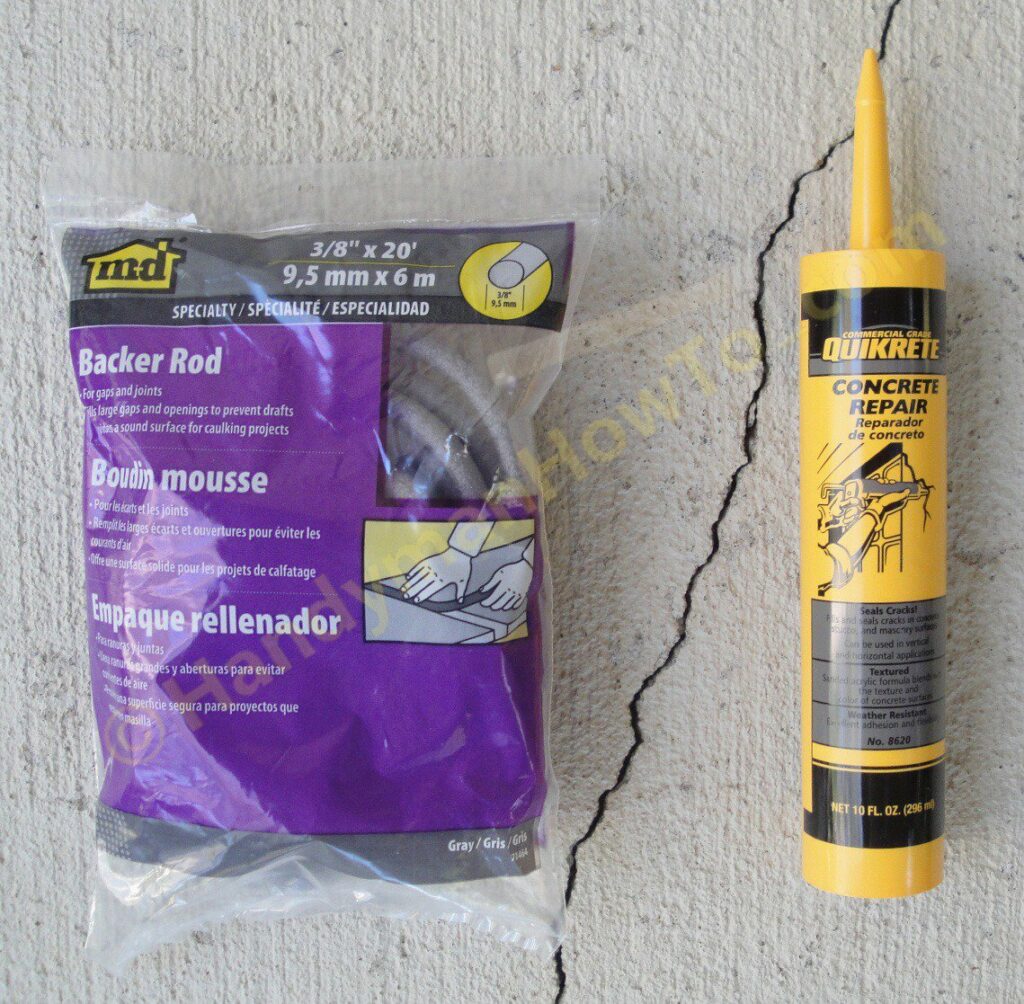
The QUIKRETE 8620 caulk is suitable for cracks 1/8″ to 1/2″ wide. The caulk should be applied no more than about 3/8″ thick, using backer rod or sand to fill deep cracks.
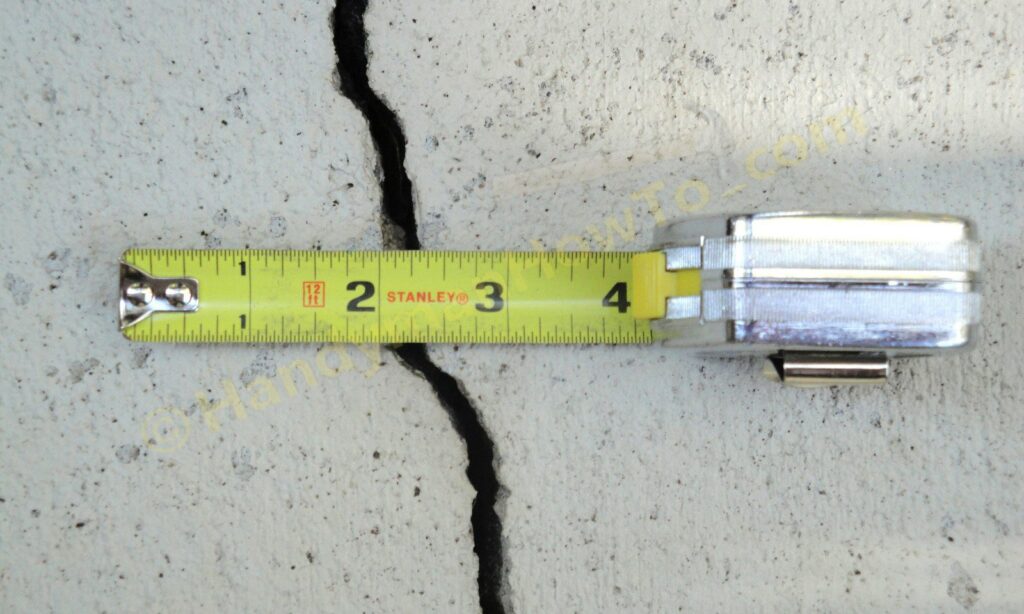
The maximum crack width on my patio was about 3/8″ wide to the full 6″ or 8″ depth of the slab.
I hope the builder installed wire reinforcing mesh when the concrete slab was poured, but I couldn’t see well enough into the crack to confirm. If wire mesh is in there, it has broken as the slab cracked in two.
Backer Rod Installation and Caulking
The foam backer rod is pressed into the wide sections of the crack to serve as a filler before caulking. Press the backer rod into the crack with your fingers.
Then seat the backer rod about 3/8″ deep with a screw driver.

Fill the crack with the QUIKRETE 8620 caulk. Note the gray color of the concrete in contrast to the white concrete stain on my patio. The QUIKRETE 8620 caulk is paintable and will be covered when I stain the deck.
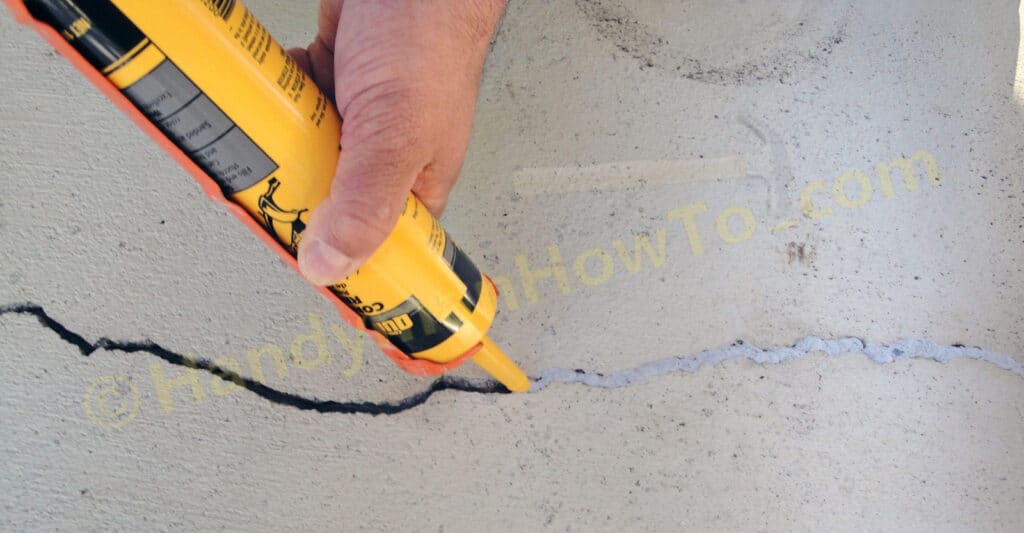
After applying a bead of the QUIKRETE® Concrete Repair (No. 8620-10) sanded caulk, work it into the crack with a fingertip to seal it against the concrete.
Finish the Concrete Caulk Line
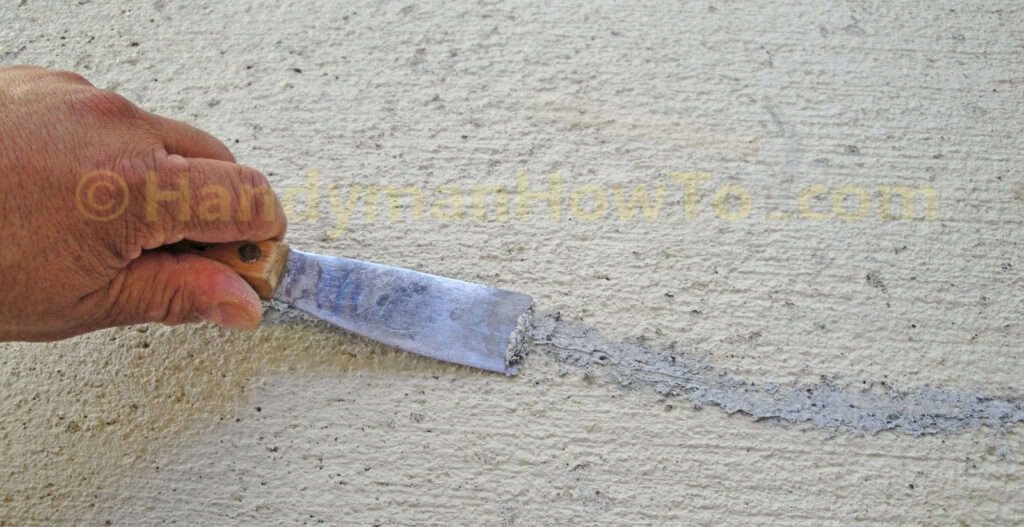
The caulk line now has a U-shaped depression from your fingertip that must be filled to prevent water from pooling in the crack and to present a even surface for a nice looking appearance.
- Apply a 2nd thin layer of caulk along the crack.
- Pull a putty knife along the crack to smooth the caulk.
- Push the putty knife over crack to scrape away the excess caulk.
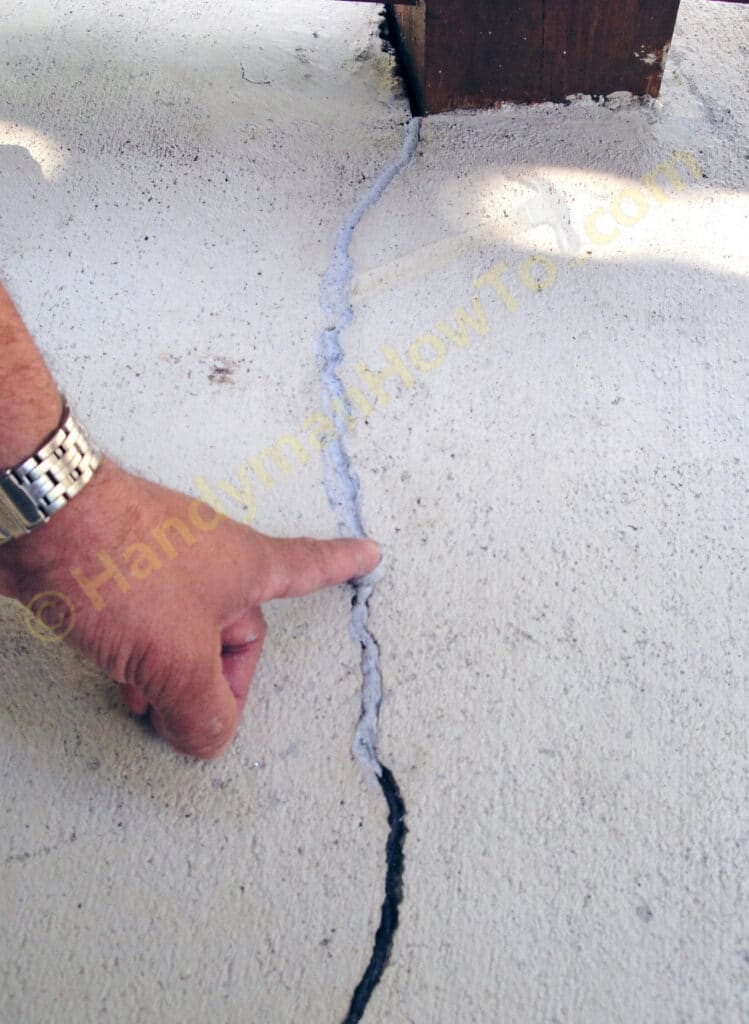
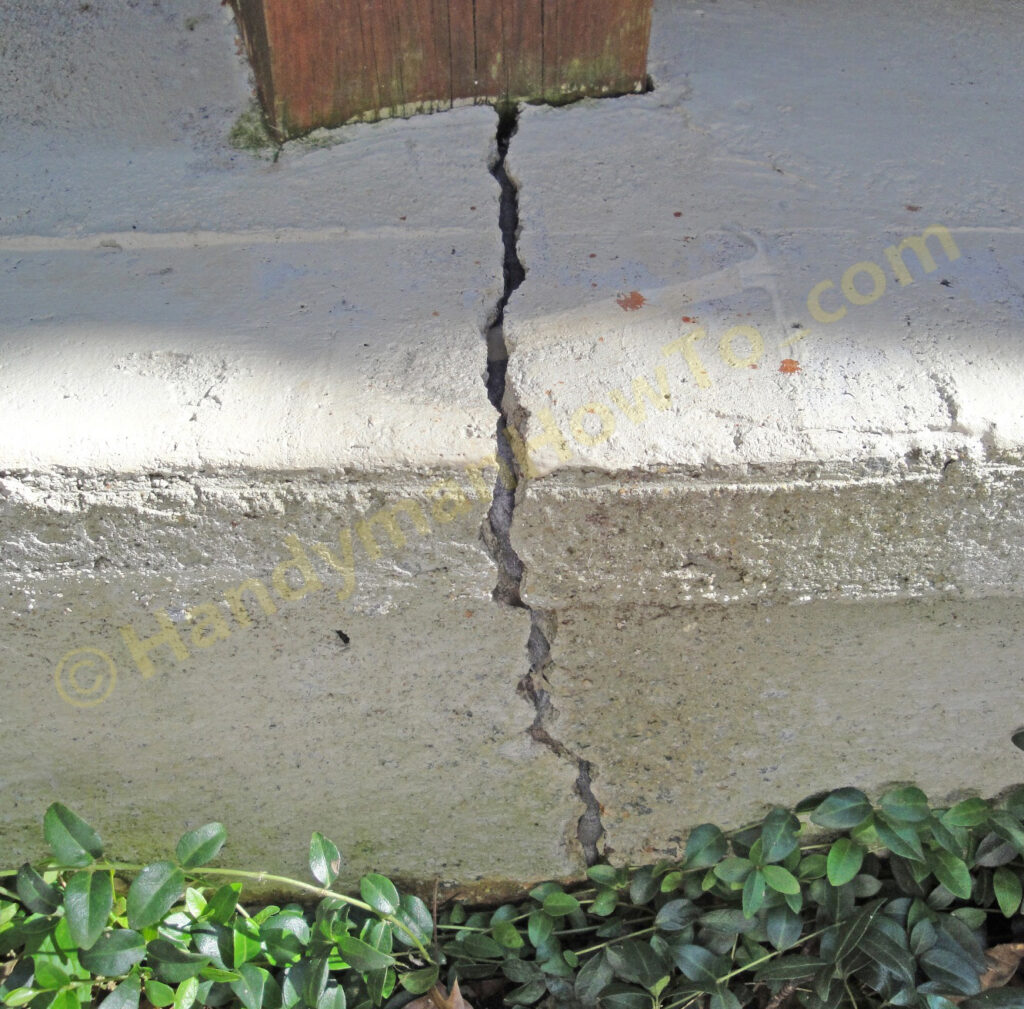
The crack narrowed as it approached the house. No backer rod is needed when the crack narrowed to less than 1/4″. The crack is fully caulked and finished in this photo.

The crack will be stained to blend with the rest of the patio concrete after it cures.
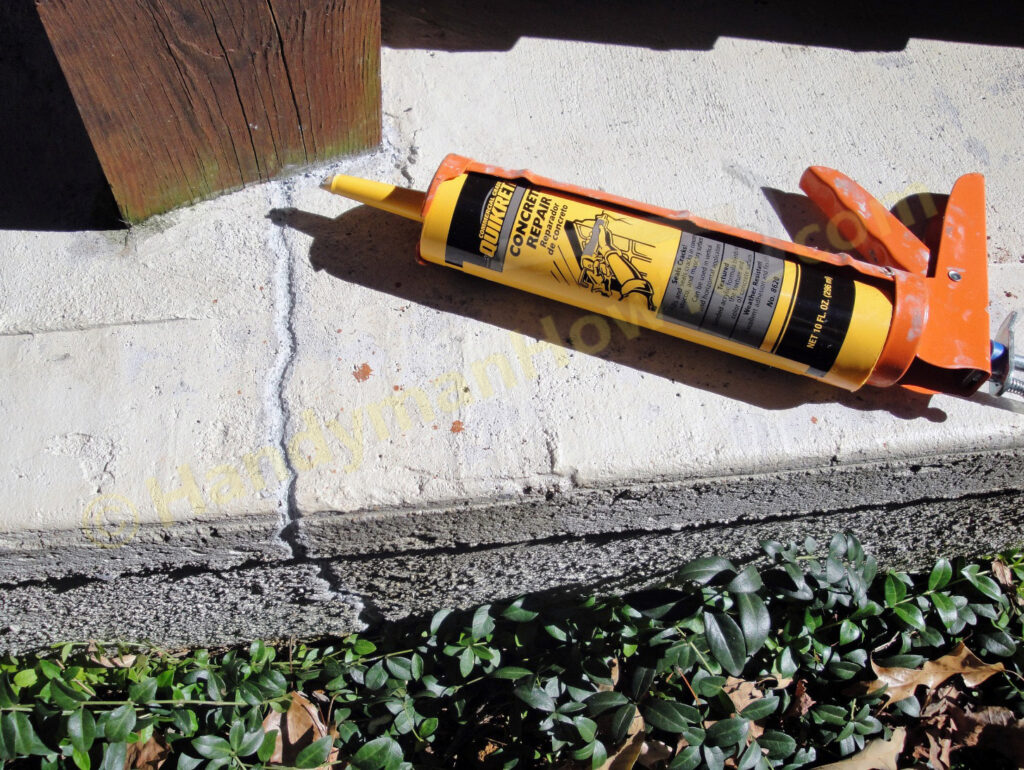
Patio Slab Edge Repair
The crack in the outside edge of the patio slab is patched using the same method with backer rod to fill the crack and QUIKRETE 8620 caulk.
The foam backer rod is pressed into the surface of the crack:
The backer rod is seated with a screw driver:
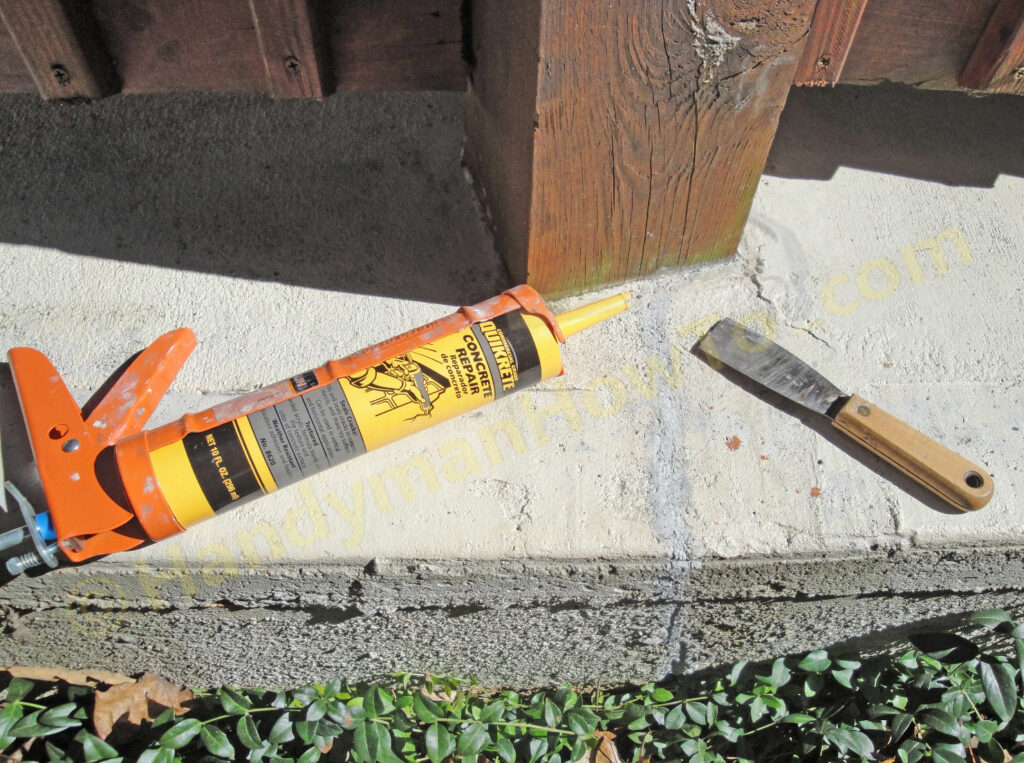
The crack is caulked and smoothed with a fingertip:
A second thin bead of caulk is applied, then smoothed and scraped with a putty knife.
QUIKRETE Concrete Repair Results
The QUIKRETE Concrete Repair No. 8620 caulk did a good job at an unbeatable price. Easy to apply with simple tools and has the sanded texture of concrete. I needed only one 10oz tube to patch the 13 foot long crack. The patch will not be noticeable when I apply a new coat of concrete stain.
My patio slab cracked because the soil foundation settled. I believe the soil and slab movement has stopped as the house is 10 years old. Caulk is best suited for stable slabs and cracks where a weather-seal will suffice. I’m curious to see how well the caulk will hold up over time and if peeling will be an issue.
Emecole 555 – Concrete Patio Large Crack Repair
The other end of my concrete patio slab has a large 1/2″ crack where the poured concrete steps have pulled away. Caulk and concrete would be insufficient because a high strength structural bond is needed glue the slab back together to prevent further movement. I used the Emecole 555 polyurea DIY Slab Repair Kit to mend the slab:
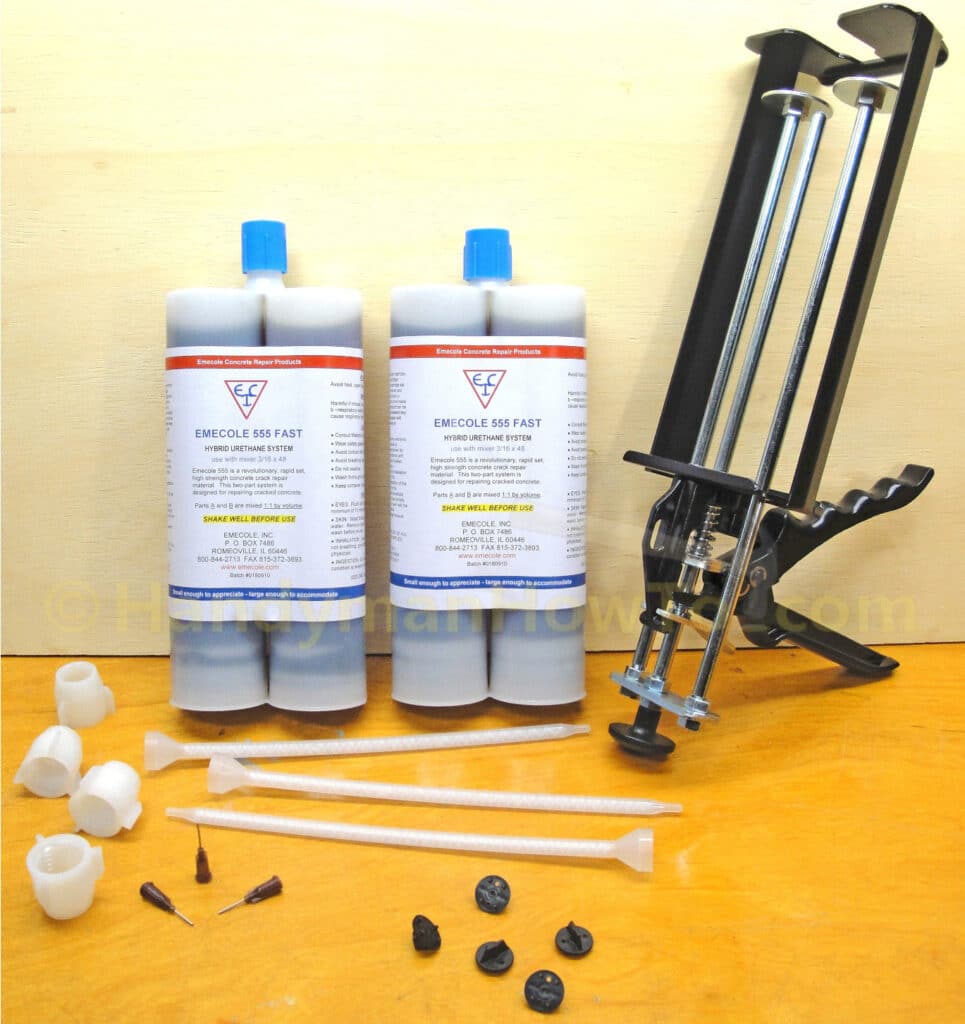
See the Concrete Slab Crack Repair project for more about Emecole 555.
Take care,
Bob Jackson
Hi Bob Thank you for your advice. After I patch the cracks I planned on painting the concrete patio. You said the cracks would not be noticeable after staining. Does that also apply to painting. Do you recommend a primer?
Regards
Kirk James
Hi Kirk, same with painting, the cracks should be hardly noticeable. Of course, it will depend on the size, width, and shape of the crack ultimately. There are different painting products out there, some as an overall solution that may not need priming. Review what you have locally or are willing to order and see what may be best for your needs.
I use the proper minimum footing of 42″ to 48″. No problems so far.
Excellent, Jerry!