Mark and saw the mounting hole in the drywall ceiling for the new bathroom ventilation fan and remove the old duct.
This project is continued from How to Replace a Bathroom Exhaust Fan and Ductwork – Part 2.
Bathroom Ventilation Fan Ceiling Measurements
Having removed the old economy bathroom ceiling vent fan, I need to figure out an “old work” installation strategy for the new Panasonic WhisperCeiling ventilation fan. Panasonic assumes the vent fan will be installed in one of two ways:
- During the home construction to be mounted between the ceiling joists BEFORE the ceiling drywall is installed.
- After home construction WITH attic access to mount the fan between the ceiling joists.
My challenge is the fan will be installed as an old work replacement in the space between the first floor drywall ceiling and second floor joists. Because I only have access from mounting hole in the master bathroom ceiling there’s no way to install the mounting brackets provided with the fan kit.
The model FV-11VQ5 box contains the following items: Fan unit, ceiling grille, mounting brackets, mount screws and installation instructions. I was impressed with the high quality workmanship and finish of the vent fan. Way better than other products I’ve seen.
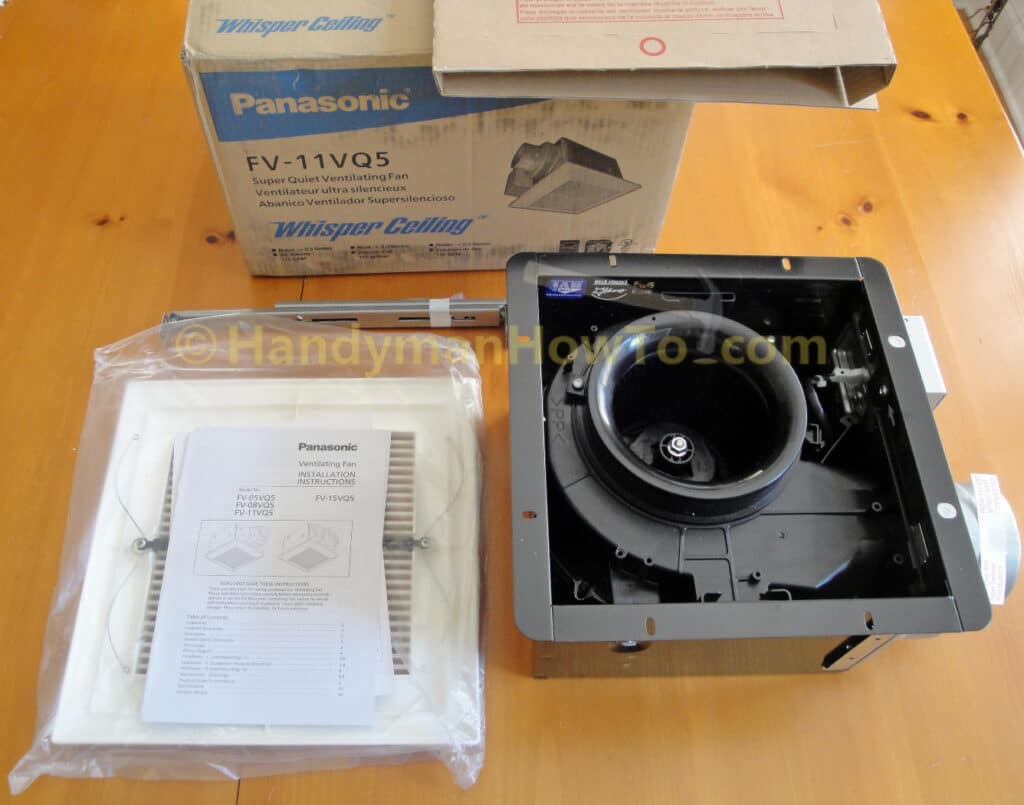
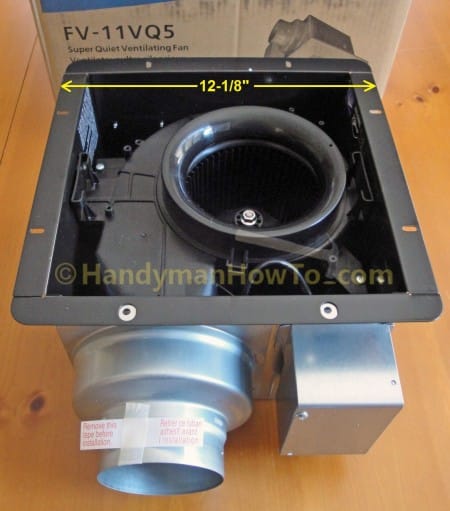
The Panasonic FV-11VQ5 has a convenient mounting flange that is 15/16 inches (or 23.8 mm) wide on all four sides of the fan housing. The total width is 12-1/8 inches.
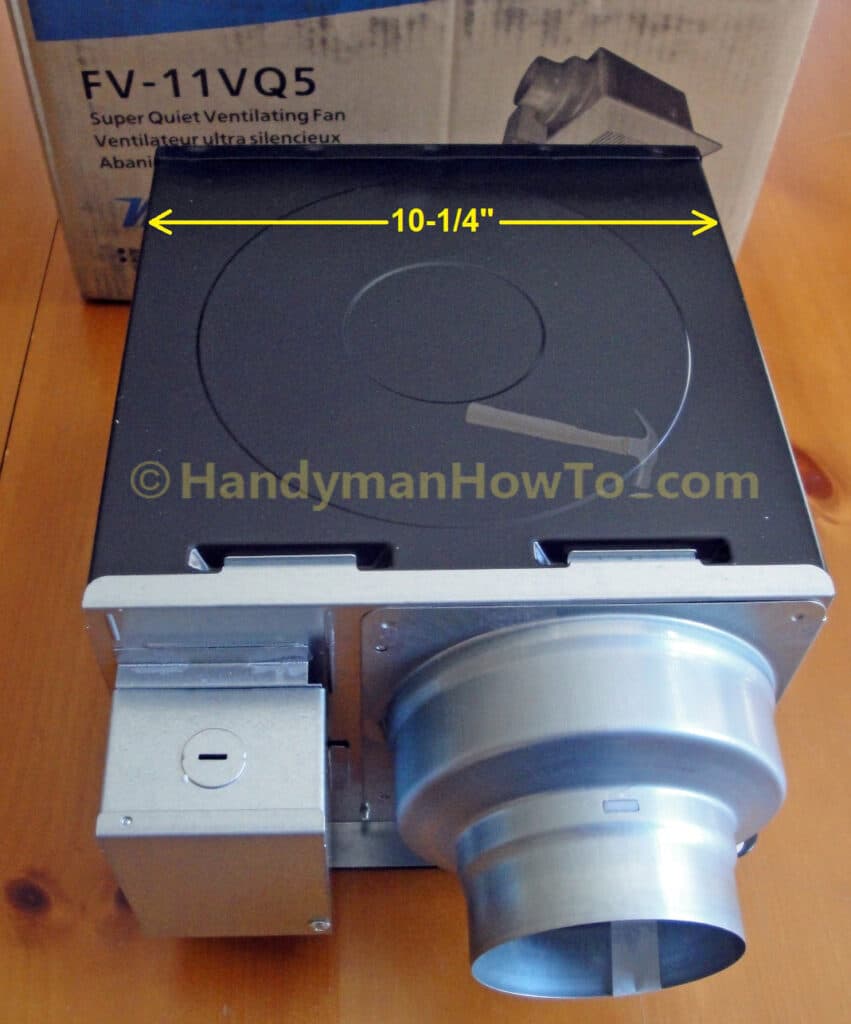
The main fan housing is 10-1/4 inches wide. The electrical junction box and 4 inch duct adapter are fairly large and extend will past the fan housing:
Bathroom Vent Fan Drywall Ceiling Mounting Hole
The Panasonic FV-11VQ5 fan housing is 10-1/4 inches square. I marked a square box with a carpenter’s square on the bathroom drywall ceiling that is 3/16 inches larger for clearances at 10-7/16 inches square. The new hole will enlarge the original 8 inch square hole from the old economy bathroom vent fan.
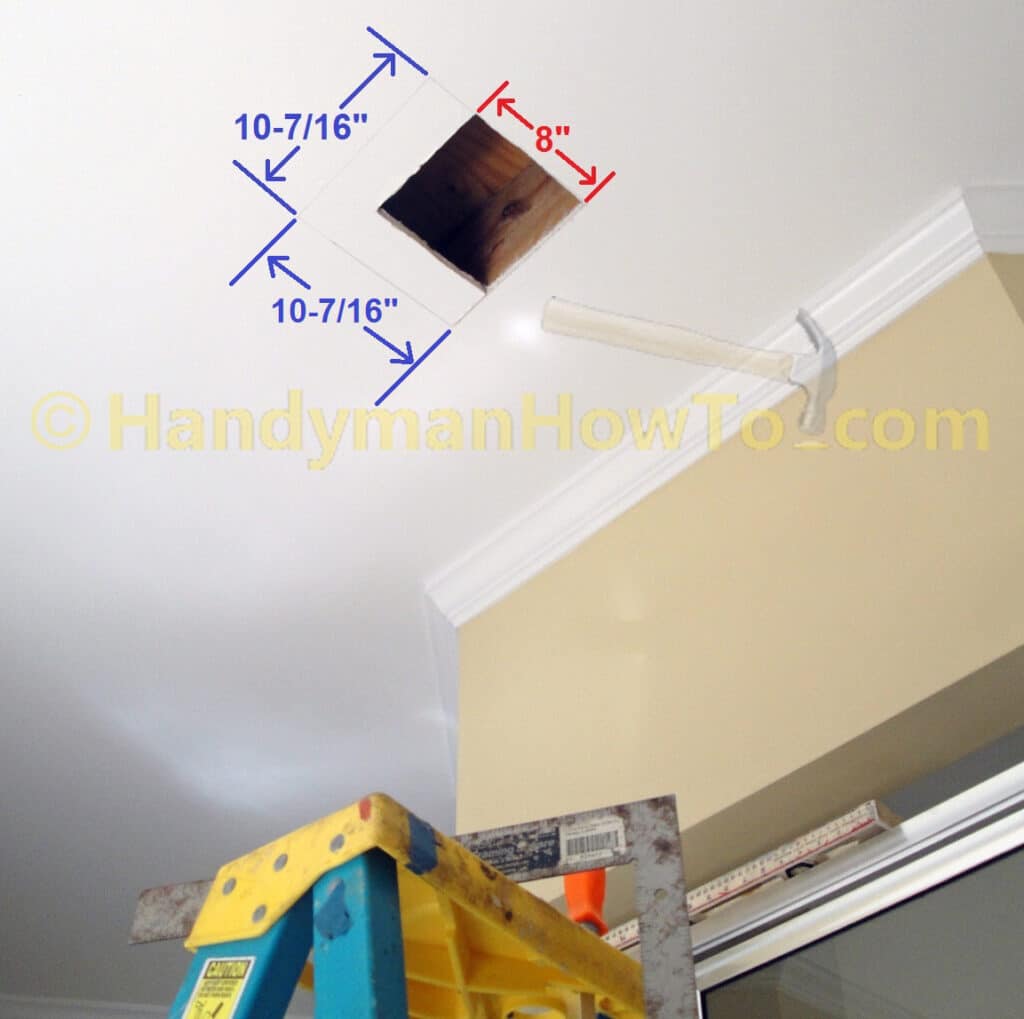
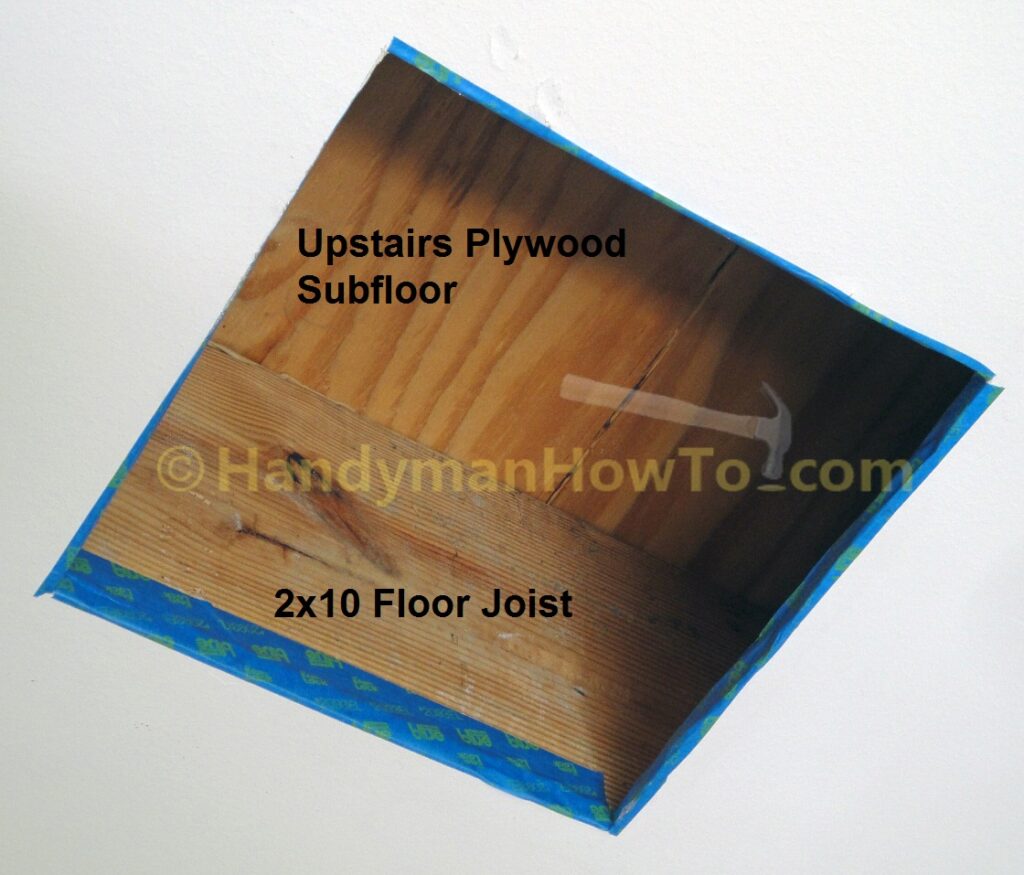
I used a drywall jab saw to make precision cuts for the new bathroom vent mounting hole and to minimize the amount of drywall dust. The 2×10 inch floor joist and plywood subfloor for the 2nd floor is clearly visible here.

The 10-7/16 inch square ceiling mounting hole is lined with painters tape so drywall dust doesn’t rub off on my head and arms. If you don’t do this you’ll soon be covered in dust!
Bathroom Vent Fan: Remove the Old 3 Inch Duct
The Panasonic FV-11VQ5 bathroom ventilation fan requires a 4 inch diameter exhaust duct. While it can be challenge to replace the old 3 inch duct it is necessary for the new fan to work properly with maximum airflow. What is the difference between 3 inch and 4 inch diameter duct? A big difference because the 4 inch duct is ~79% larger than 3 inch duct!
Aside: The area of a circle is Pi times the Radius squared: A = π × r²
The area of a 3 inch dia. duct is approx. 7 sq. inches.
The area of a 4 inch dia. duct is approx. 12.5 sq. inches.
Percent Area Increase = (12.5 – 7) / 7 * 100% = 79% (after rounding digits).
You therefore do not want to use 3 inch duct with a bathroom vent fan designed for a 4 inch duct because it will significantly decrease the fan performance.
I stuffed a small flashlight into the hole where the 3 inch flex duct enters the interior soffit in the garage because I wanted to be certain where the vent duct entered the garage while looking inside the bathroom ceiling:
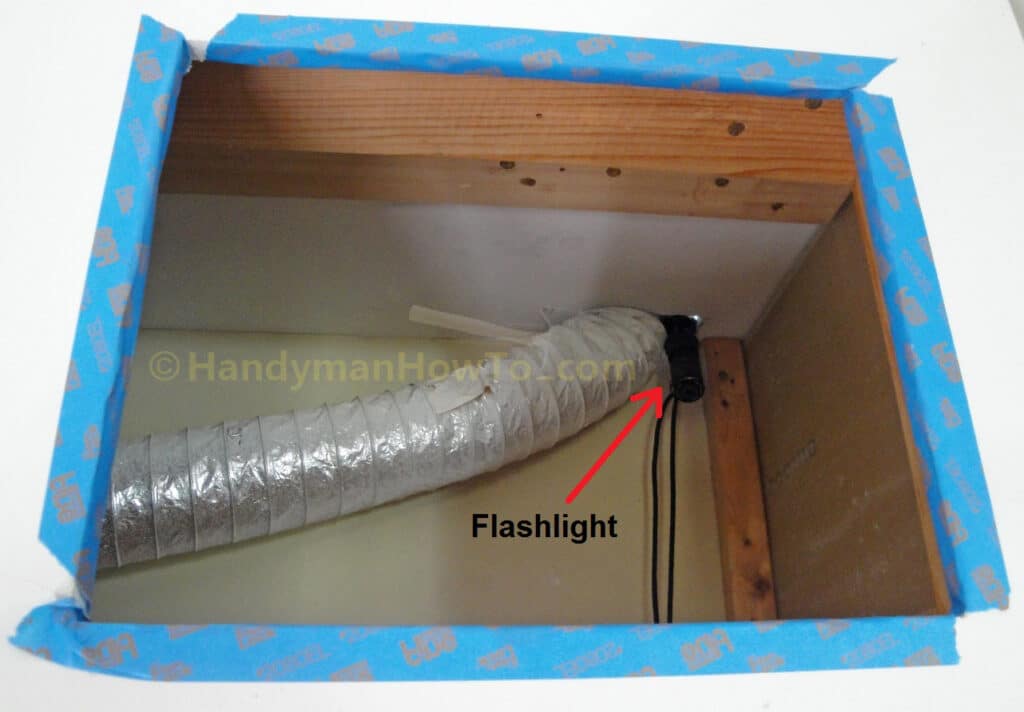
The light at the end of the tunnel: Flashlight shining from the garage confirms there are no hidden twists or turns in the 3 inch ductwork:
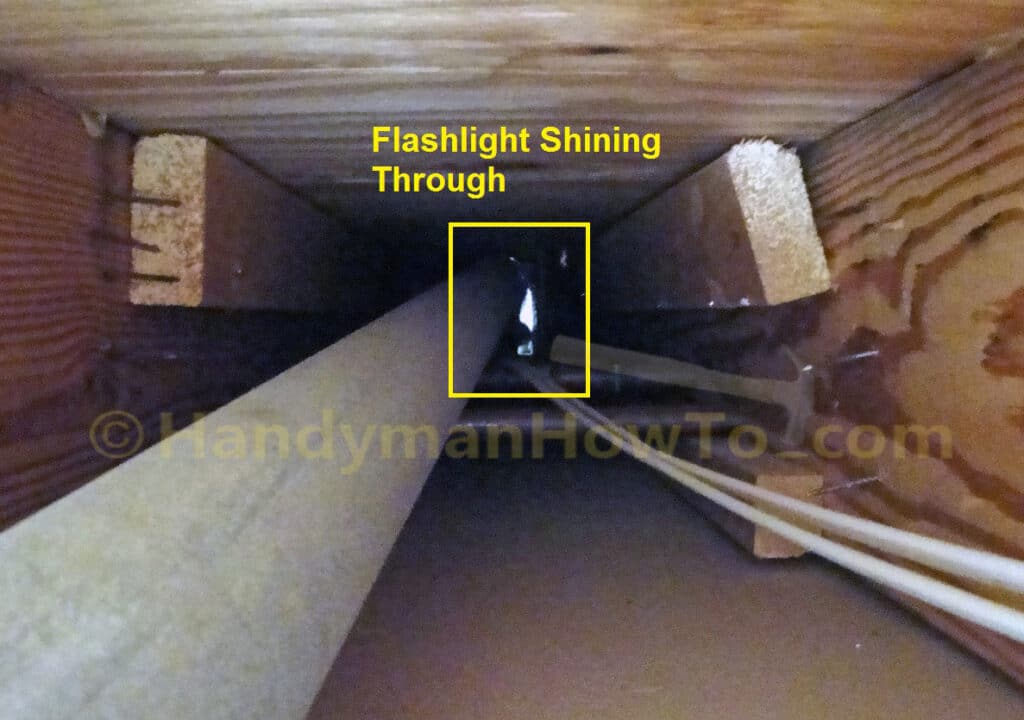
The 3 inch galvanized duct pipe was flattened by crushing it against the plywood subfloor so I could bend it to get it out of the drywall ceiling. I cut off the flex in the garage soffit, however pulling the flexible duct out of the bathroom ceiling was a challenge because it was caught on the two nylon hanger straps at the far end.
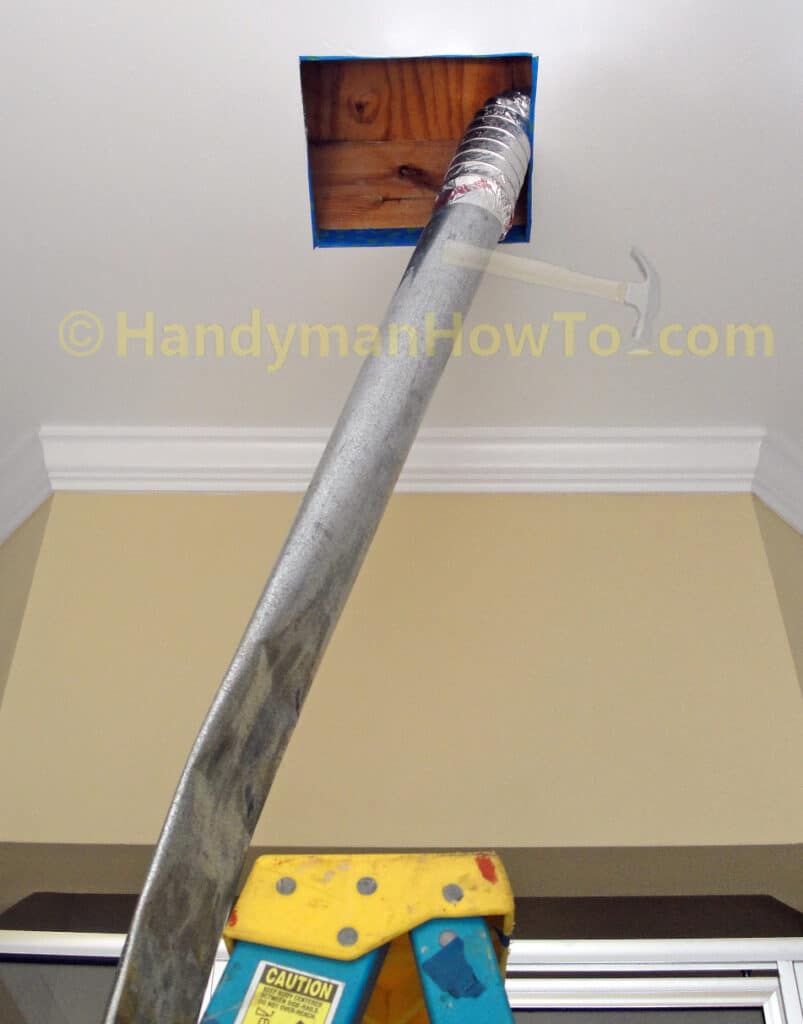
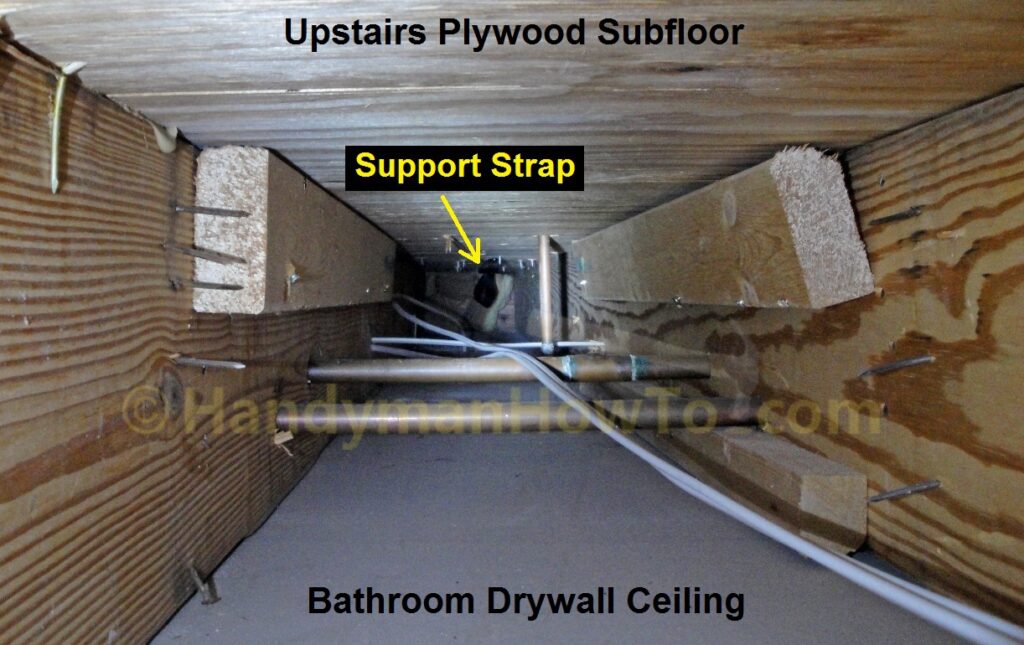
I duct taped a hooked linoleum knife to the end of my telescoping painters stick and cut the nearer of the two nylon hanger straps. The flex duct then pulled through the farthest hanger strap out of the bathroom ceiling. It was a very cramped and awkward operation while taking great care not to damage the NM-B 14/2 electrical cables. Here’s the space above the bathroom ceiling between the floor joists after removing the old 3 inch flexible duct:
This project is continued in How to Replace a Bathroom Exhaust Fan and Ductwork – Part 4.
Thanks for reading,
Bob Jackson