How to Replace a Pop-Up Sink Drain – install the pivot rod, reassemble the P-trap and check for leaks. This project is continued from How to Replace a Pop-Up Sink Drain – Part 2.
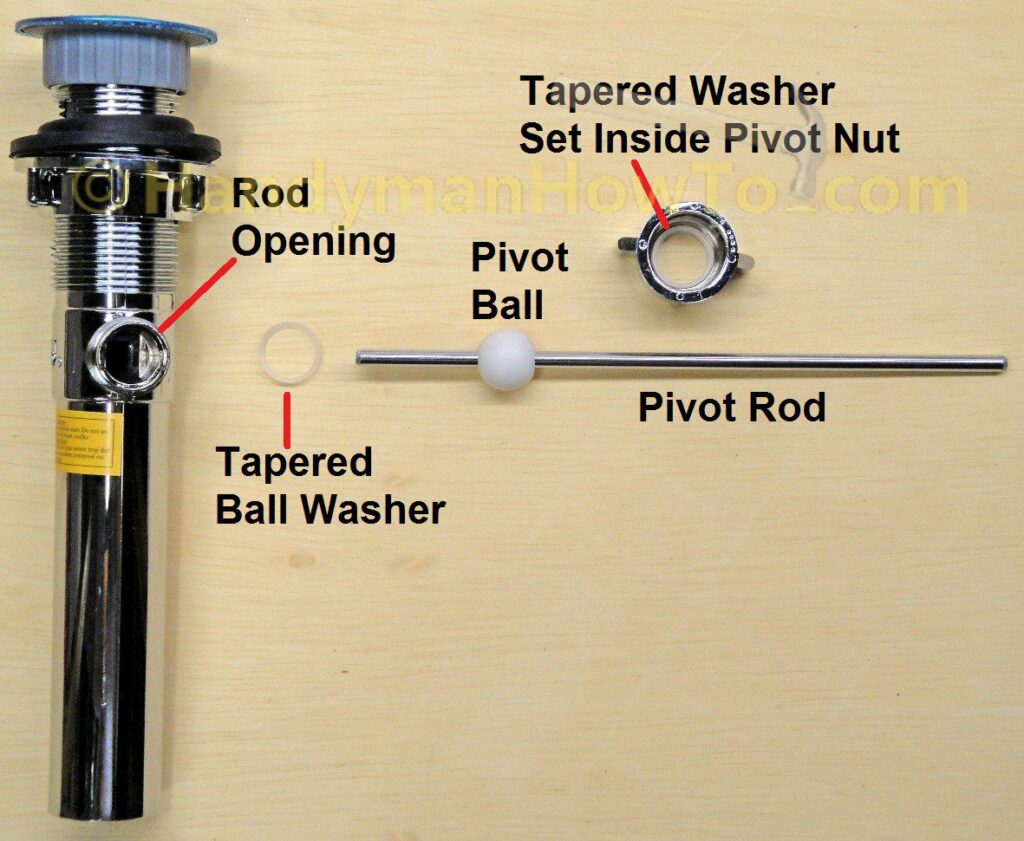
Pop-Up Sink Drain – Pivot Rod Assembly
Before attaching the Pivot Rod (a.k.a. Ball Rod) to the pop-up sink drain let’s look at the how it fits together.
The pivot rod consists of the following parts:
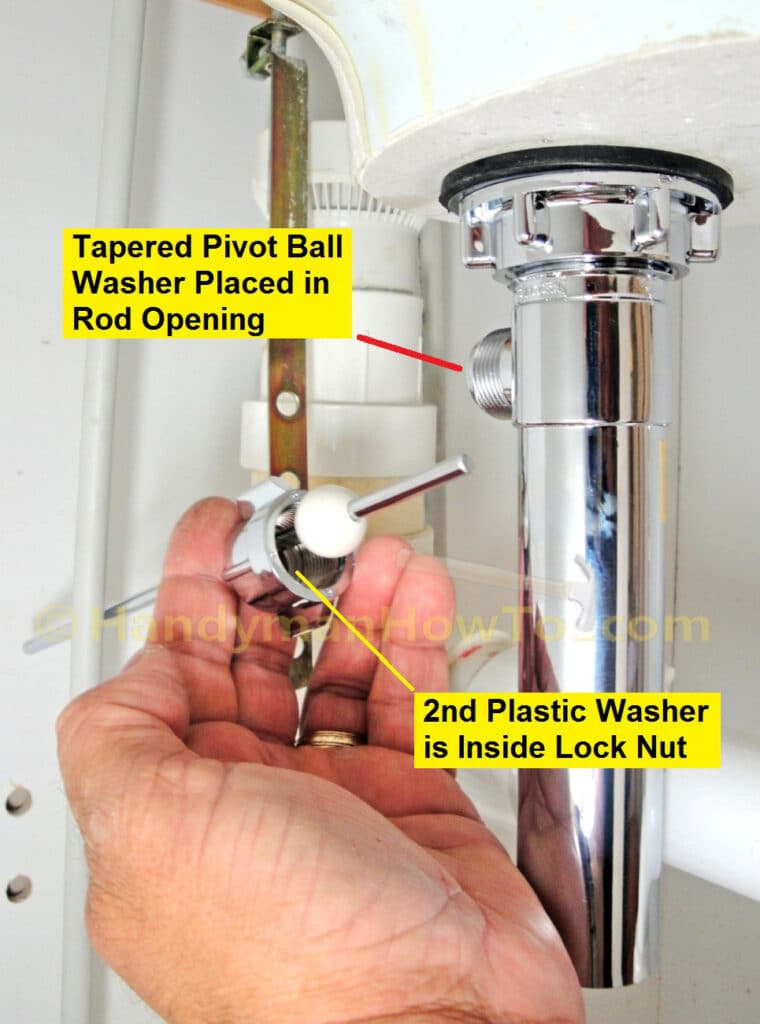
- A tapered plastic ball washer that acts as a bearing inside the rod opening.
- The pivot ball to enable the rotation of the pivot rod as it actuates the pop-up stopper.
- A pivot nut with a captive washer inside.
The two tapered washers are necessary for a water tight seal and smooth movement of the pivot rod.
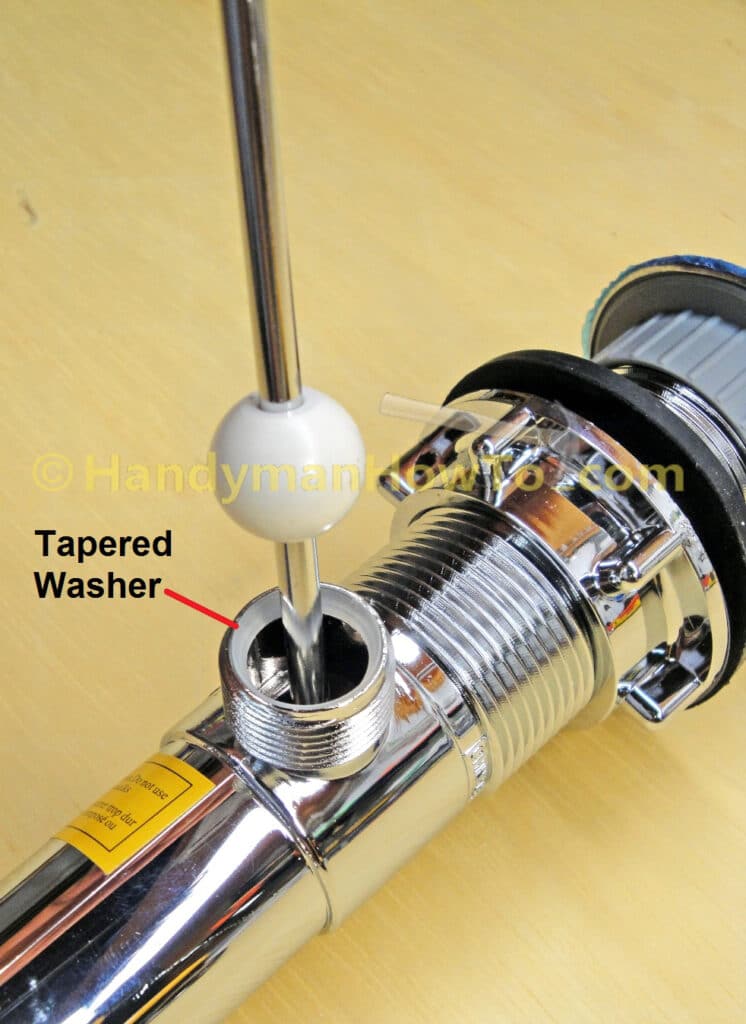
An important installation detail is the plastic ball washer fits inside the rod opening with the tapered side facing outward to match the curve of the pivot ball. If the washer is missing or installed backwards the joint will leak:
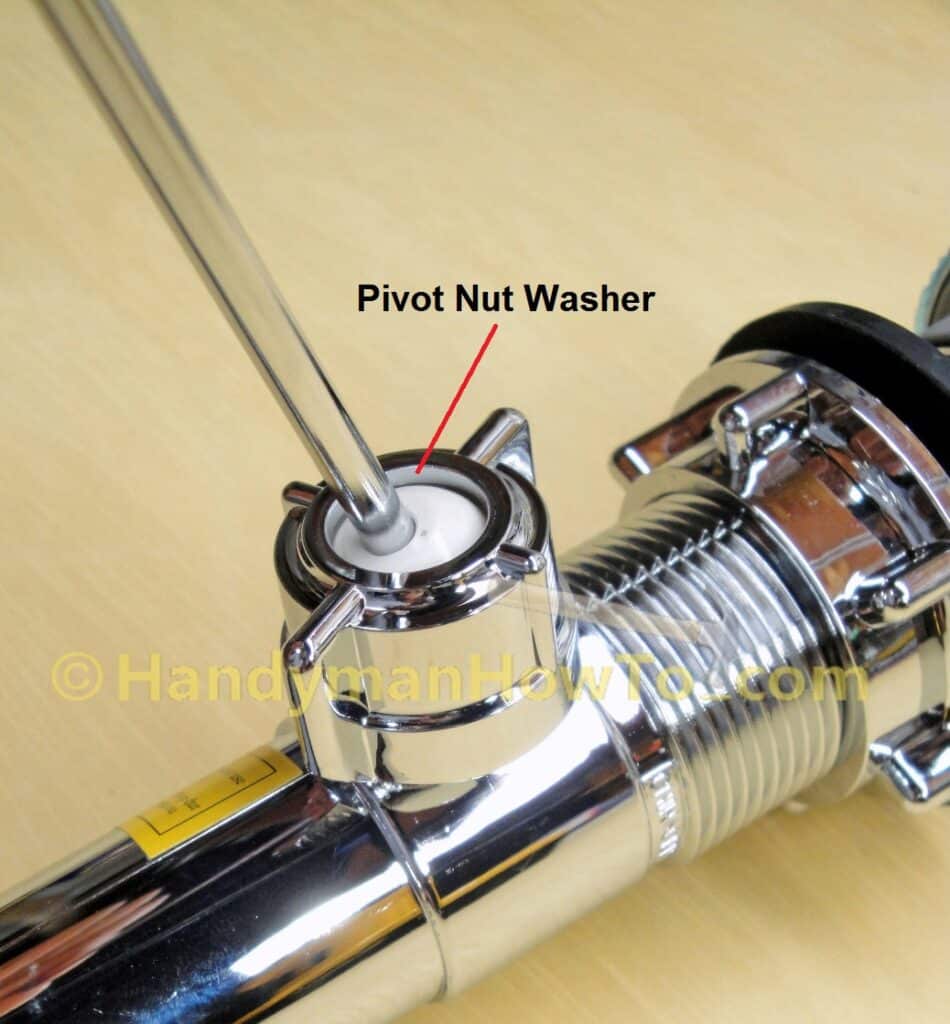
The pivot nut has captive washer holds the pivot rod in place. Tighten the nut so it’s snug and leak free but so much the pivot rod is hard to move back and forth:
Install the Drain Pivot Rod
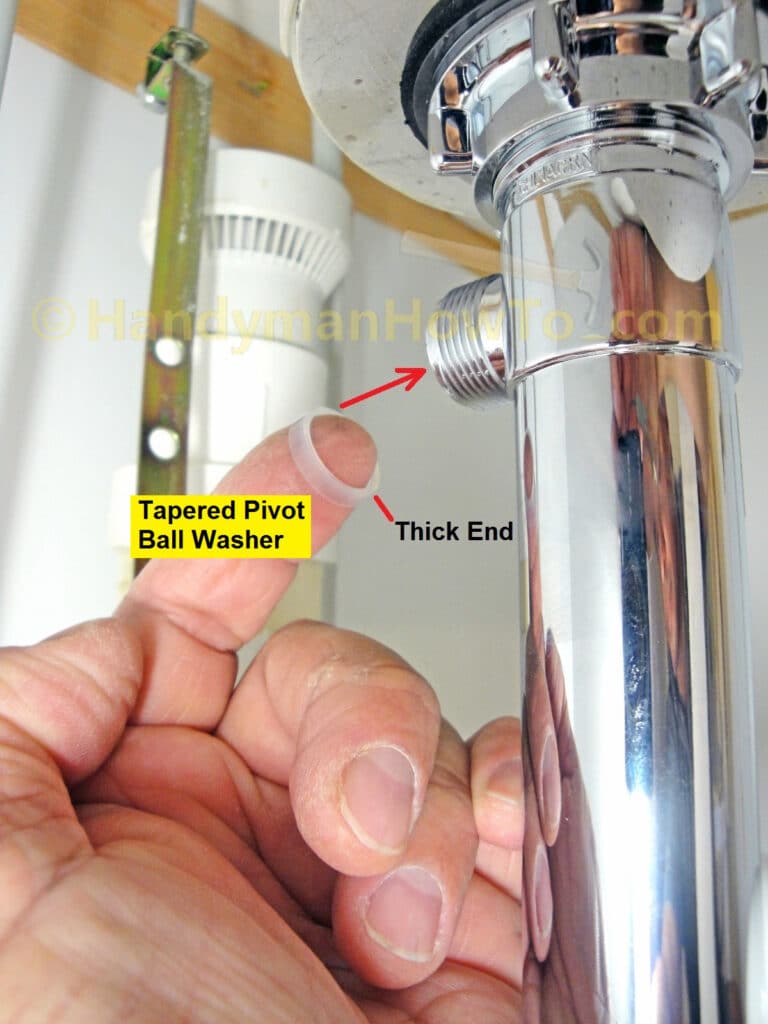
The taper ball washer is inserted into the rod open in the side of the sink drain body:
The pivot rod installation steps are:
- Slide the pivot nut over the rod as shown below.
- Insert the rod at a slight downward angle to catch the pop-up stopper.
When the rod engages the pop-up stopper, you’ll see the stopper bob up and down in the sink bowl. Give the pop-up stopper a tug to verify it has captured the end of the pivot rod. - Screw on the pivot nut until it’s snug.
Do not over tighten or you risk crushing the plastic ball washers. - Check the movement of the pivot rod. The rod should move smoothly but stay in position when released.
Pivot Rod Spring Clip
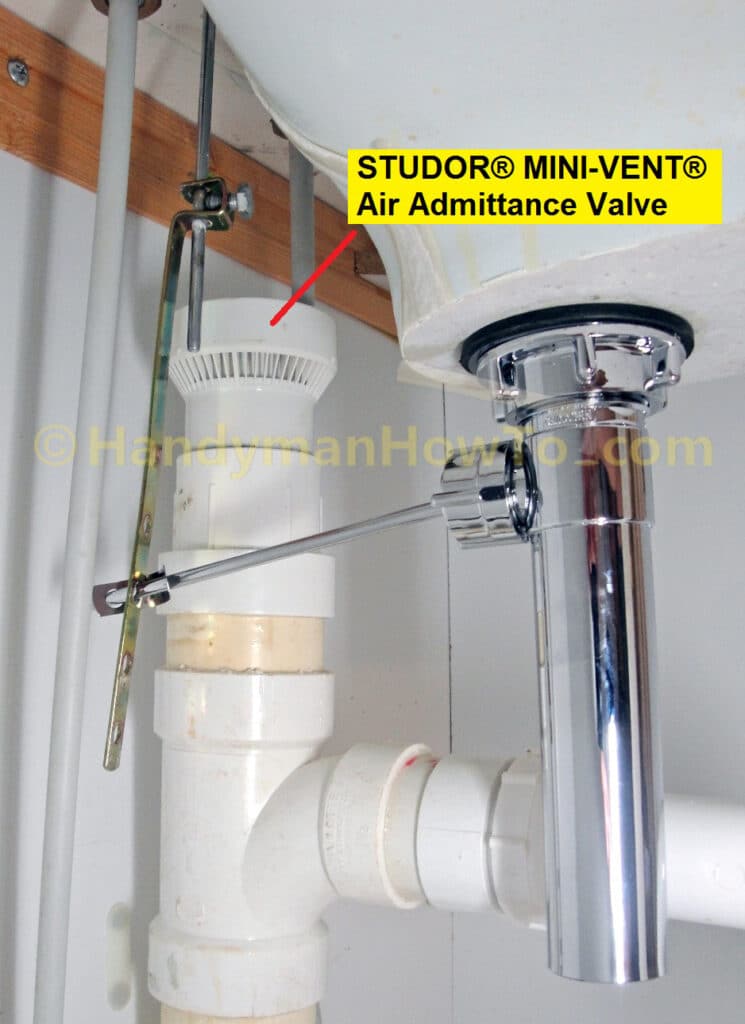
Slip the spring clip on the end of the pivot rod as shown to attached it to the extension rod. The 2nd or 3rd hole in the extension rod is normally the best choice for adjust the height of the pop-up stopper. A nice thing about the pivot rod ball joint is it can be angled to one side in case there’s something the way such as the Studor Mini-Vent® stack in the case of my sink.
Work the faucet lift handle up and down to check the action on the pop-up stopper and verify the action feels right. If the handle falls under its own weight or feels sloppy, tighten the pivot nut washer slightly for a firmer feel.
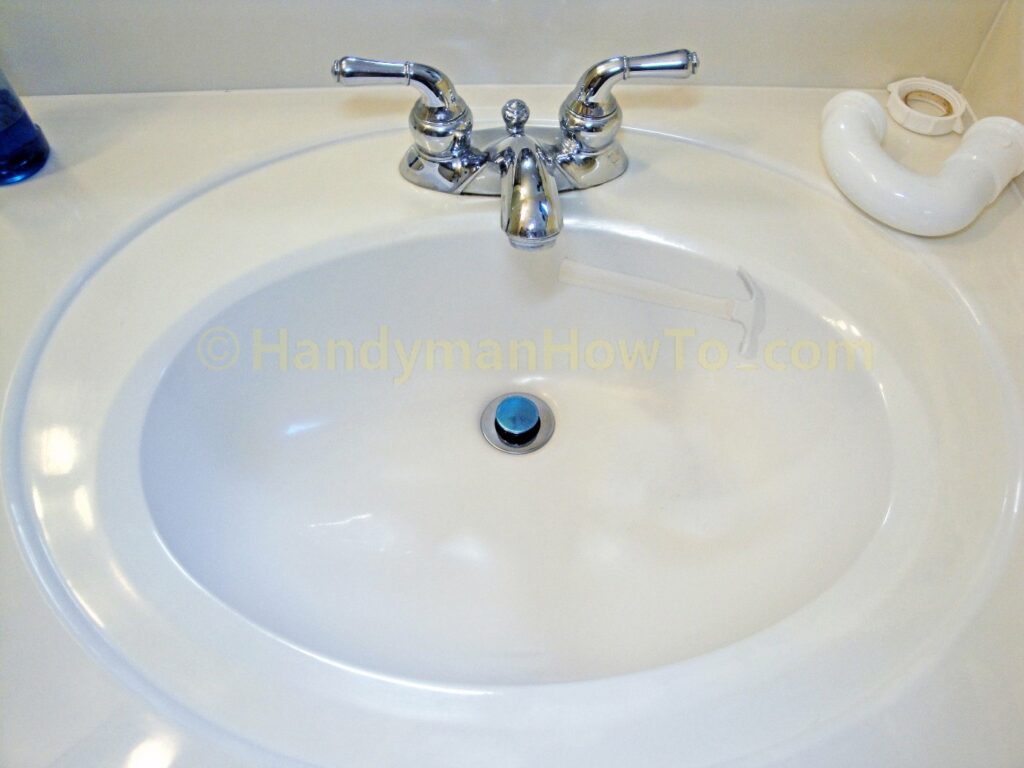
Remember to peel off the blue plastic scratch protector from the pop-up stopper.
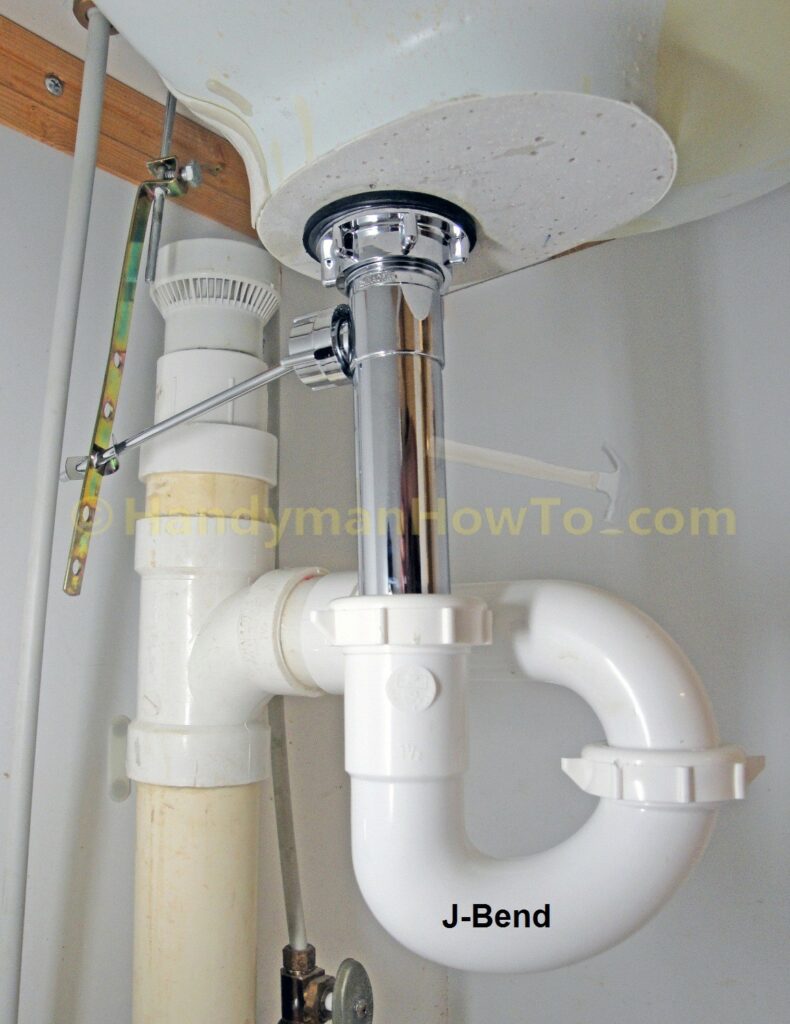
Install the Drain P-Trap
The plastic slip washer can be reused if it’s not damaged and cleaned of all dirt and grime. I was able to clean the slip washer with soap and hot water followed by wiping with paper towels to remove the caked on scum. Also wipe off the beveled end of the PVC wall tube.
Slide the slip nut over the end of the pop-up drain followed by the slip washer with the beveled side facing down:
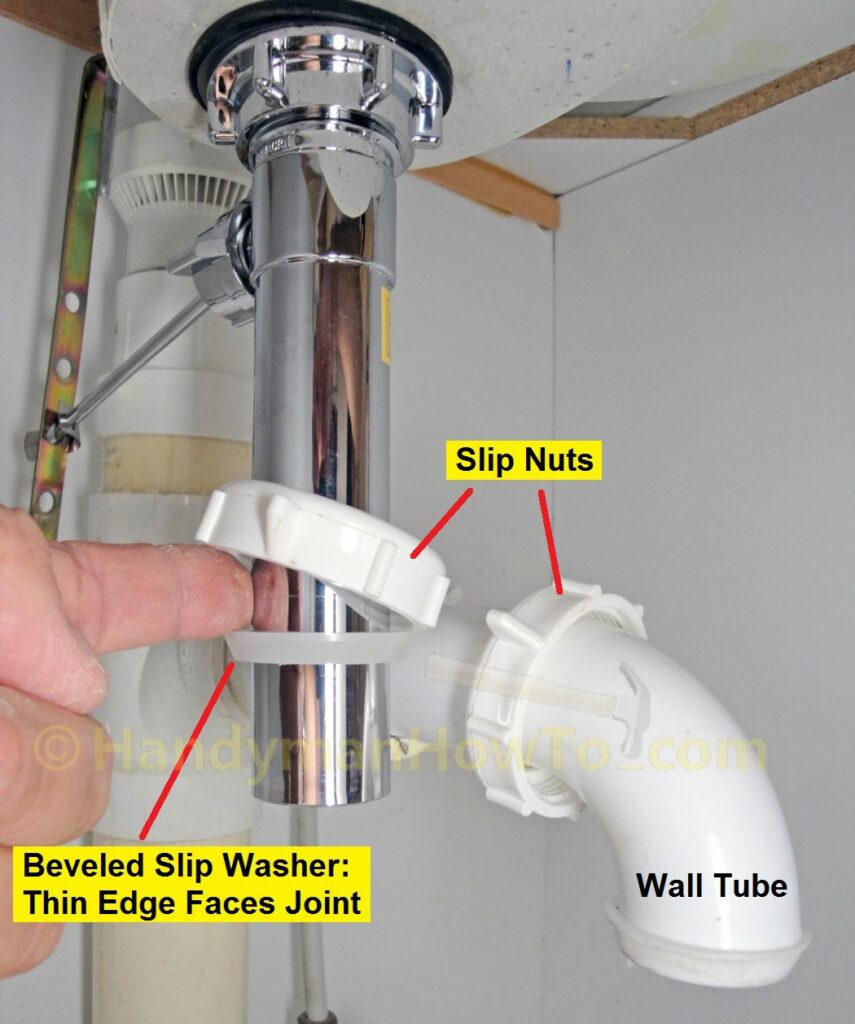
The J-bend installation is simple – just screw on the slip nuts to connect it to the P-trap:
Pop-Up Drain Leak Testing
Turn on the faucet and let the water run for a minute. Check all joints for leaks and tighten the nut(s) as needed to stop any leaks. My favorite leak detector is a piece of toilet paper to locate the smallest of leaks. Toilet tissue is an excellent leak detectors: wipe around the plumbing to find any non-obvious leaks.
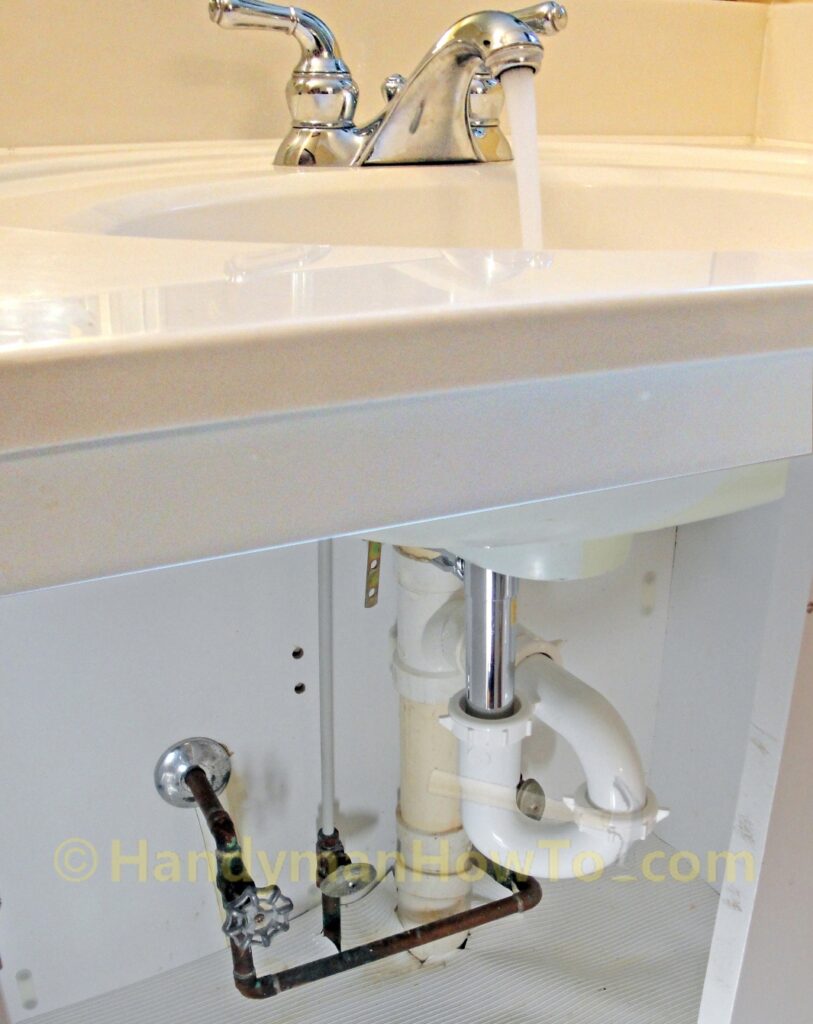
Recheck the joints after 30 minutes to catch any slow leaks.
Hope this saves you some money!
Bob Jackson