The leaky Delta Monitor Series 1300/1400 shower valve cartridge has been removed. Next I’ll clean the shower valve threads and install a new shower cartridge, bonnet nut and sleeve O-ring.
This project is continued from How to Remove a Leaky Shower Valve Cartridge.
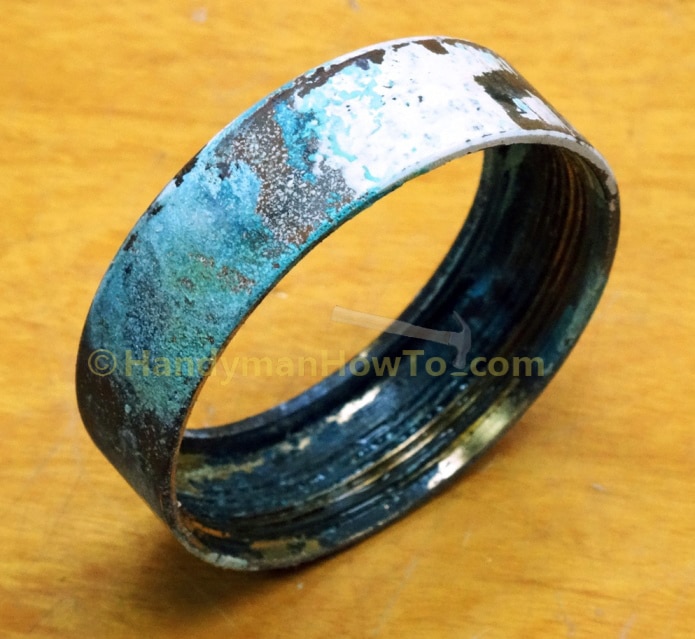
Clean the Shower Valve Bonnet Nut
The bonnet nut holds the cartridge in the shower valve body so the water pressure doesn’t pop out the cartridge. This bonnet nut is 12 years old with mineral deposits and copper oxidation (greenish/blue color). The threads must be cleaned if the nut is to be reused so it doesn’t get frozen to the shower valve body making it difficult to remove for future maintenance.
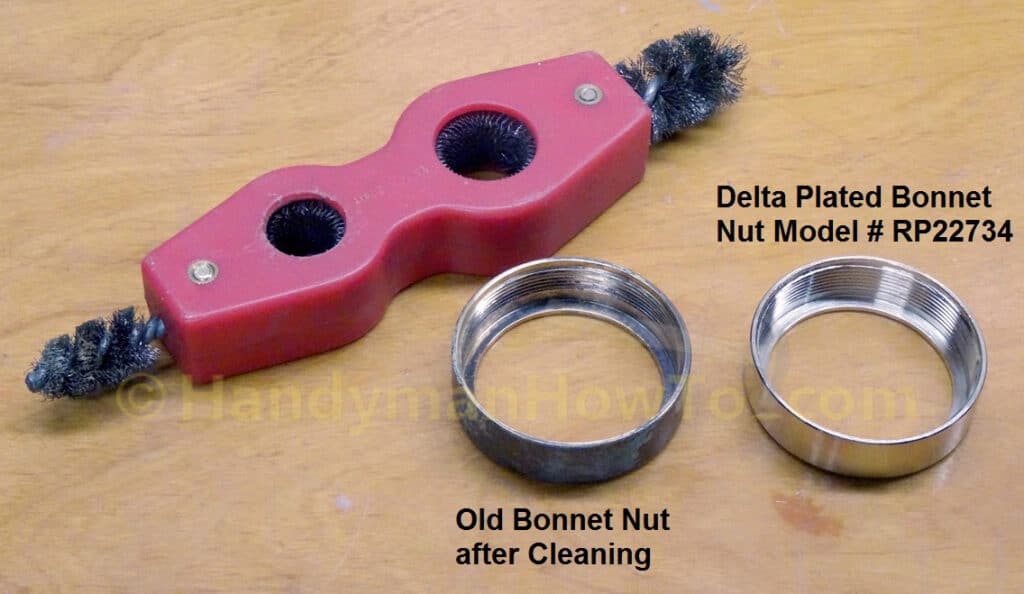
I ordered a new Delta bonnet nut model # RP22734 along with the new Delta cartridge model # RP19804 because the bonnet nut is inexpensive and I’ve occasionally had to saw off a stuck plumbing nut.
The corrosion on the old bonnet was easy to clean and polish with a wire brush and steel wool with 10 minutes of effort. Here’s the rehabilitated old nut with the new bonnet nut:
Clean the Shower Valve Body Threads
The gunk on the shower valve body threads cleaned up well with a wire brush. Also clean inside the end of the shower valve body and wipe off any residue:
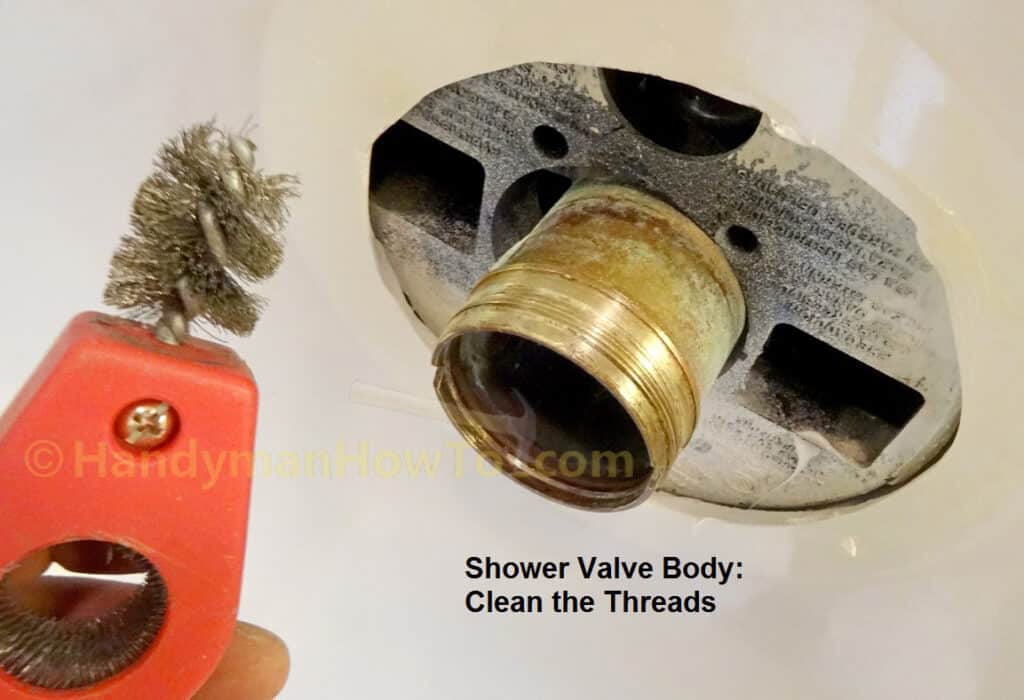
I used a 4-in-1 Plumber’s Copper Pipe Brush but any soft wire brush will do the job.
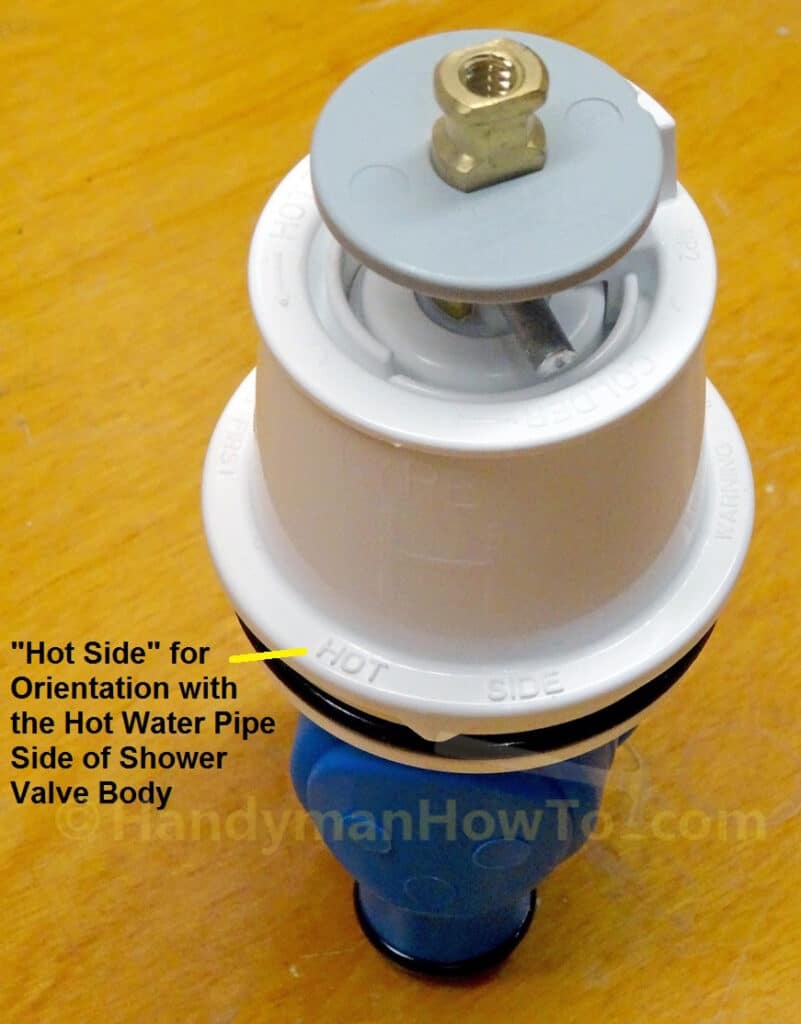
How to Install a Shower Valve Cartridge
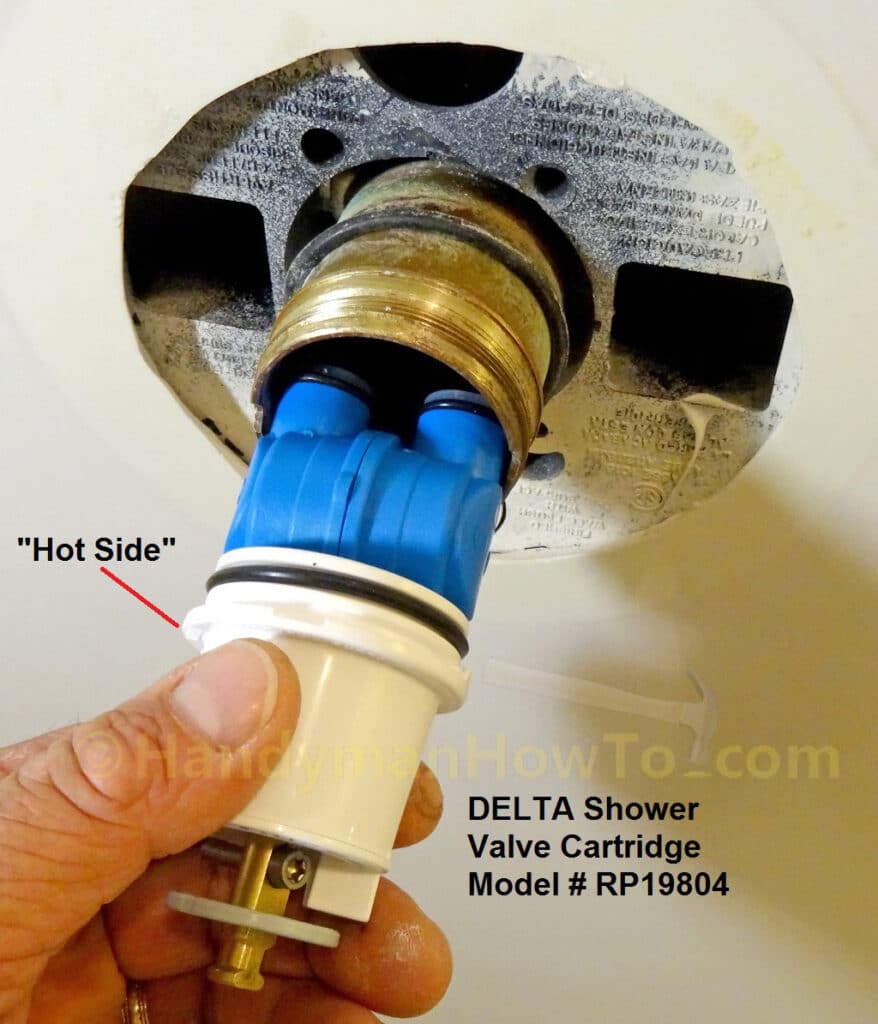
It’s important to install the new shower cartridge in the correct orientation. The Delta P19804 cartridge has “Hot Side” embossed on the side where the hot water pipe enters the shower valve body inside the wall. By convention the hot water pipe is on the left as you face the shower:
Install the new shower valve cartridge by orienting the Hot Side on the left and insert the cartridge straight into the brass shower valve body. Do not twist or turn the cartridge because you could inadvertently separate the blue lower housing from the white cartridge cap when the two legs begin to slide into the water inlet pockets in the shower valve body. If this should happen remove the cartridge and snap it back together with a 1/4 twist.
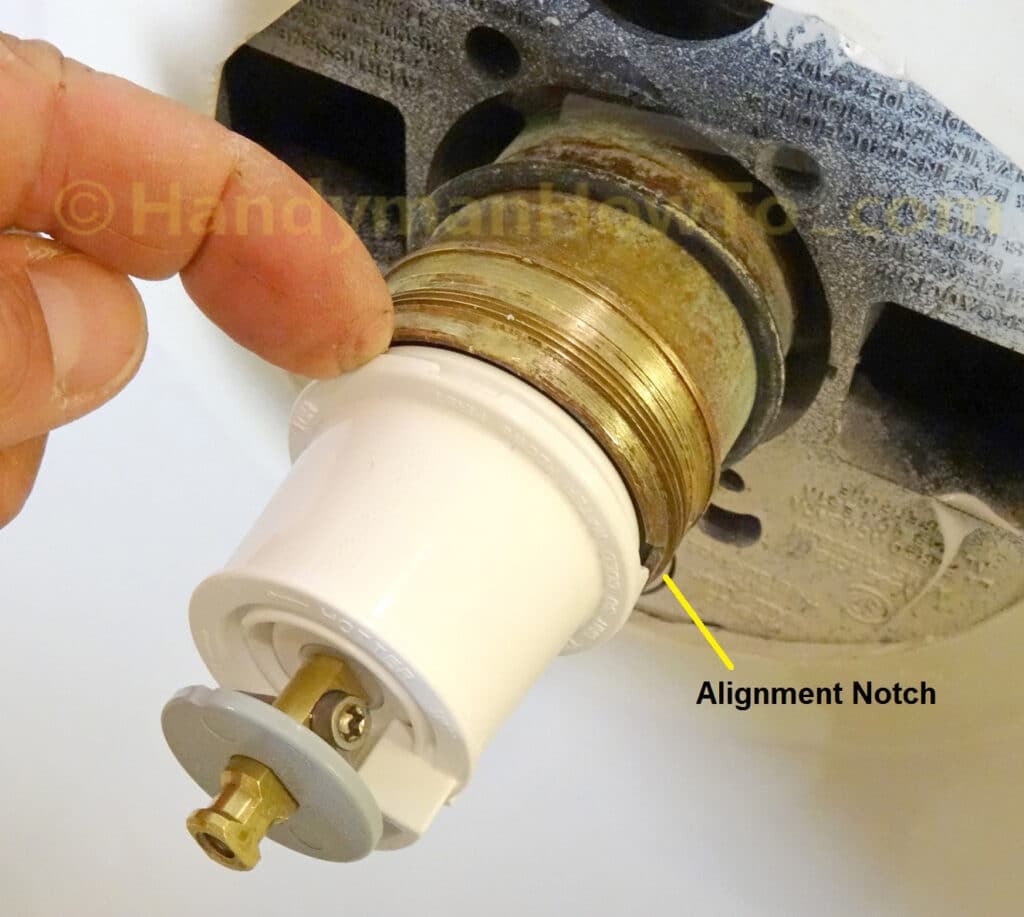
Notice the two V-shaped alignment notches on both sides of the white cartridge cap match that in shower valve body (see the following photo).
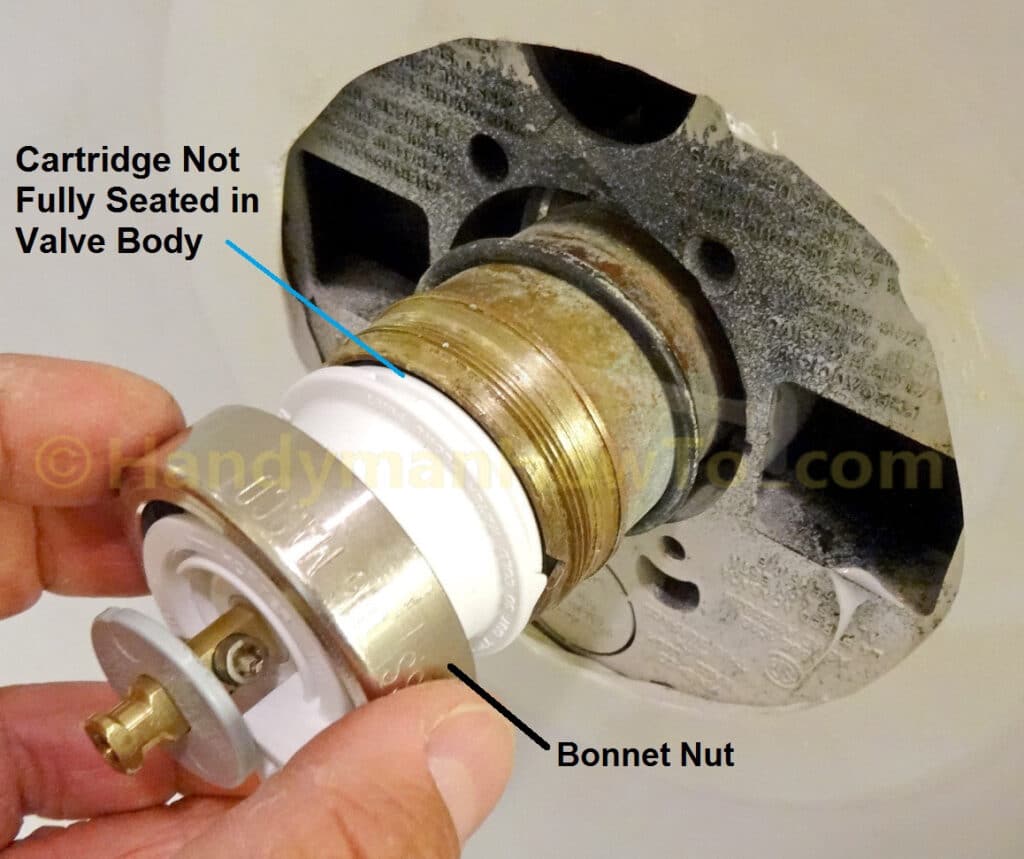
I ran into a minor problem here; the cartridge would not fully seat into the shower valve body because the O-ring at the base of the white cap (the O-ring is just above my thumb in the previous photo) has to be compressed for a water tight seal. It was impossible to push the cartridge in all the way in by hand against the O-ring. The small gap between the cartridge and valve body is noted by finger in this photo:
The bonnet nut has two purposes:
- To compress the shower cartridge cap O-ring.
The bonnet nut compresses the O-ring as it’s tightened and will fully seat the cartridge in the shower valve body.
It’s the O-ring that makes a water tight seal. - To hold the cartridge in the brass shower valve body so the water pressure doesn’t blow out the cartridge.
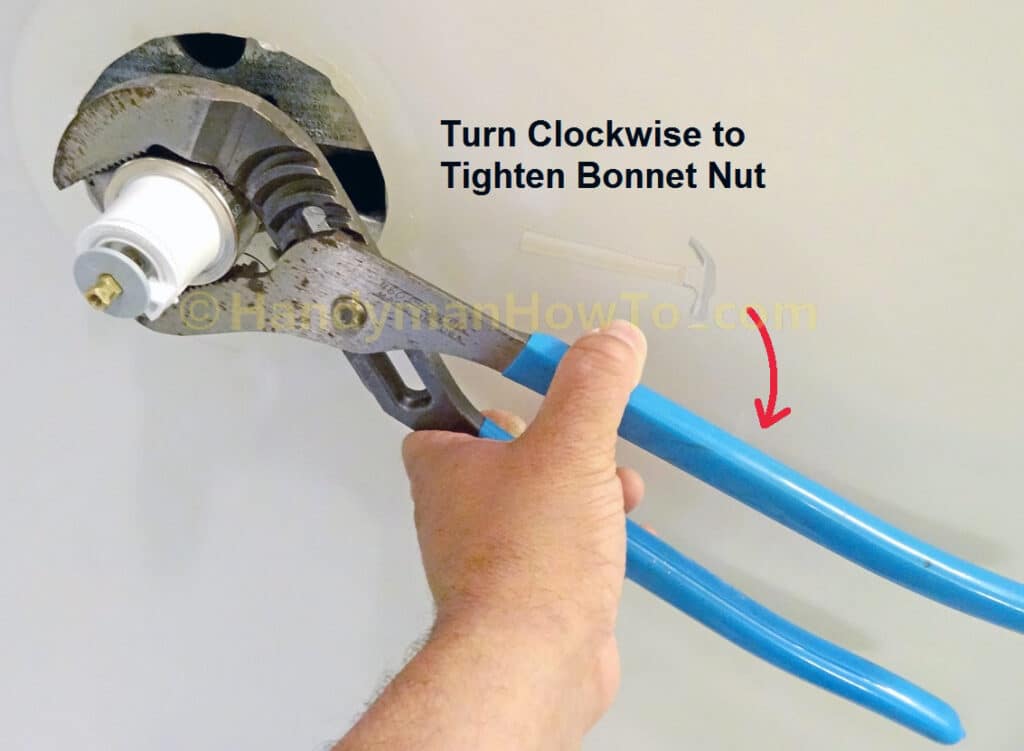
With the V-notches in the cartridge aligned with the brass valve body, I threaded the replacement bonnet nut on by hand…
… and tightened the bonnet nut with the channel locks.
Update: Per Derrick’s note, Delta’s instructions say to “Hand tighten securely“.
This part was very easy and I could feel the shower cartridge O-ring compress. The nut “bottomed out” quickly when the cartridge was fully seated in the shower valve body. Do not over tighten the bonnet nut because it will crush the plastic flange of the cartridge cap:
Turn On the House Water Supply
Point the shower head in a direction where it won’t spray on the shower valve and check that the shower valve is shutoff. You can turn the valve using the the gray disc or temporarily set the shower handle over the brass cartridge stem. If using the shower handle, remove it so it doesn’t fall off.
Turn On the house main water supply and shutoff the faucets after the air in the pipes is flushed.
Feel around the shower valve and cartridge checking for water leaks. A flashlight helps to look inside the shower wall at the shower valve body and pipe connections.
Replace the Shower Valve Sleeve O-Ring
I ordered a replacement Delta shower sleeve O-ring Model # RP23336 as an optional repair item thinking I might as well replace any rubber parts that might degrade with age:
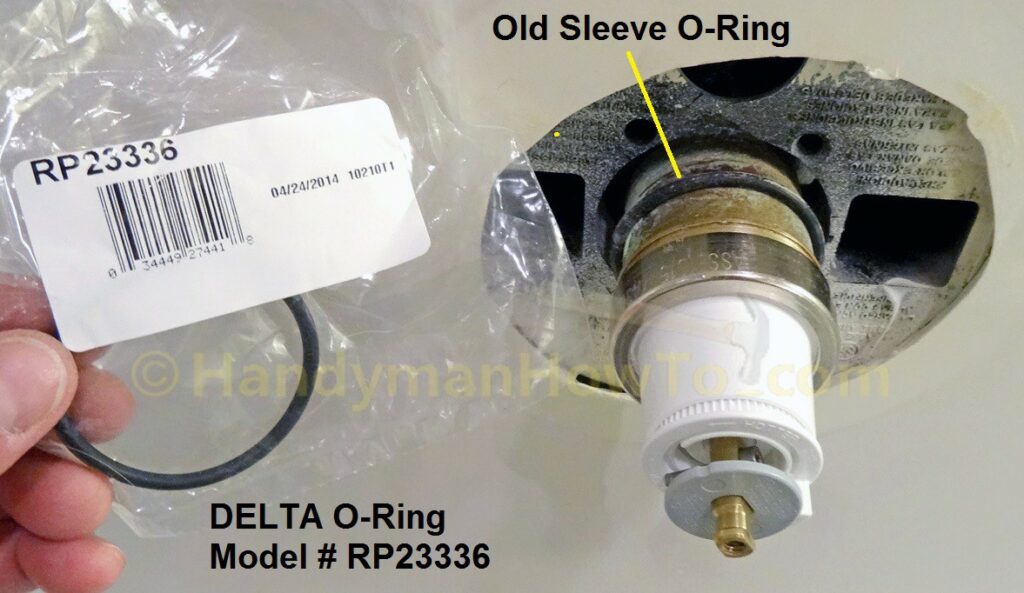
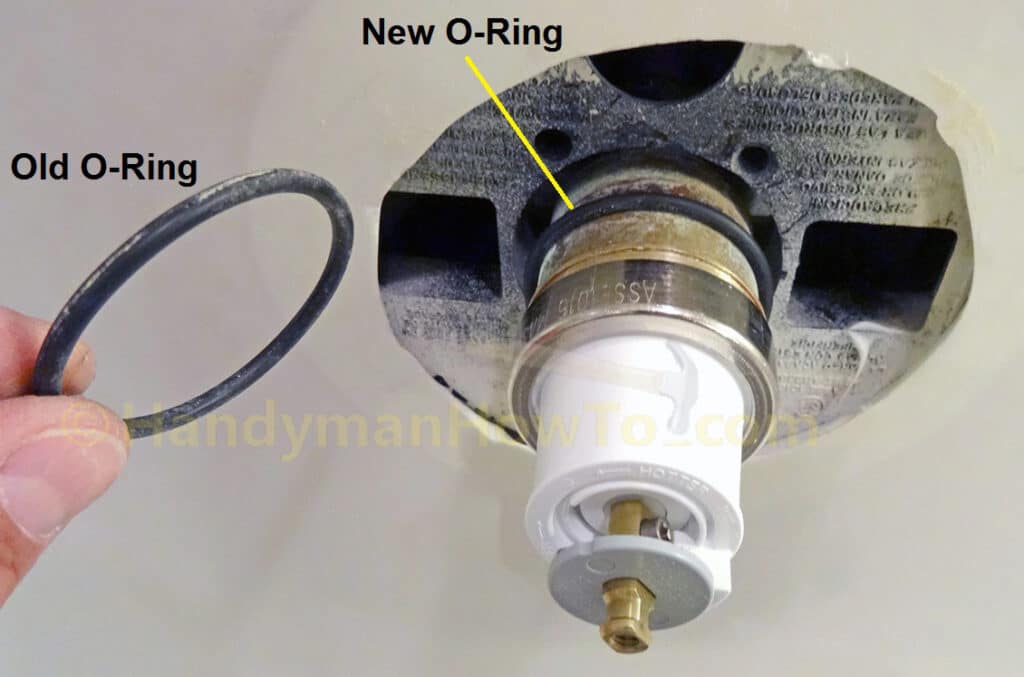
The sleeve O-ring just rolls on and off the brass shower valve body. The O-ring serves as a spacer for the trim sleeve and prevents water from wicking behind the wall:
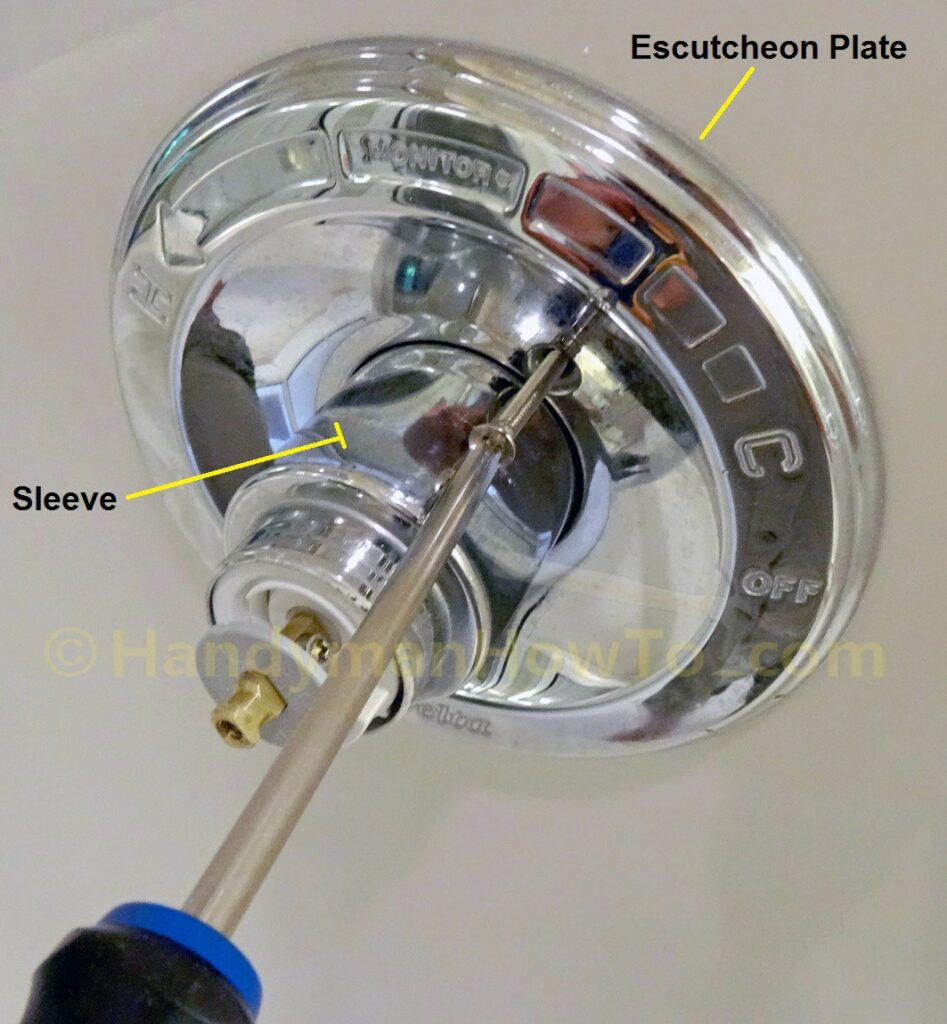
Reinstall the Shower Valve Trim Sleeve and Escutcheon
Slip the trim sleeve over the shower valve and O-ring, then reattach the escutcheon with the two long screws:
The shower valve cartridge water temperature is adjusted in How to Adjust a Shower Valve Water Temperature.
I also take apart the old shower cartridge to see why it leaked.
Thanks,
Bob Jackson