This project is continued from Part 1.
Quick Installation Wizard (continued)
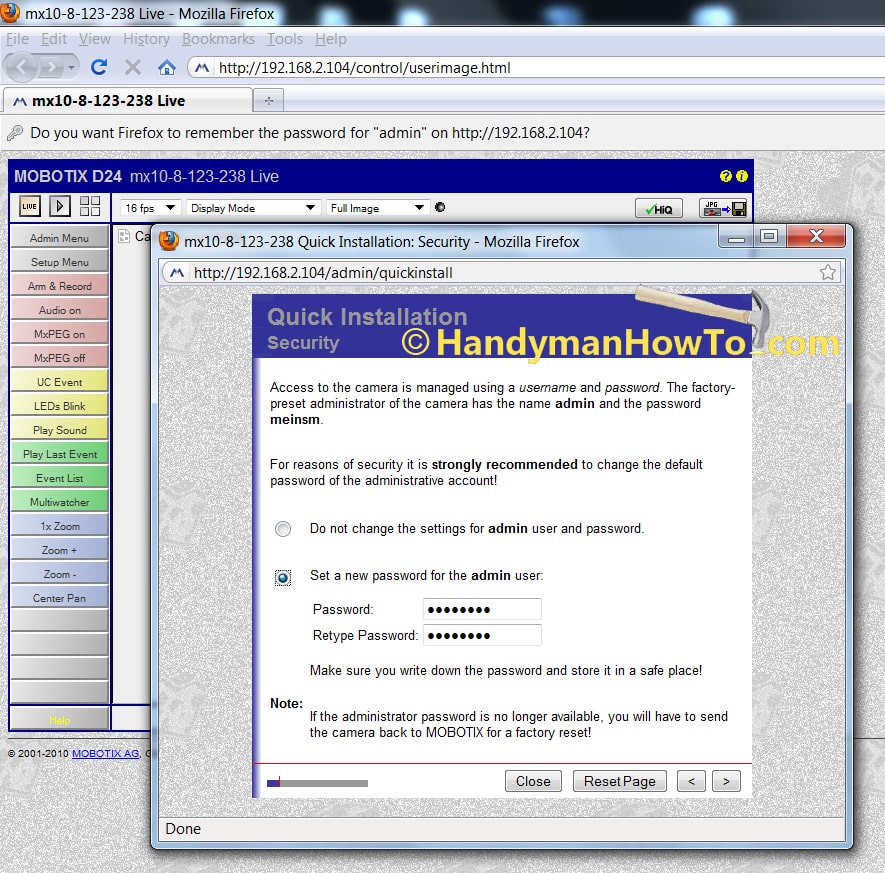
I strongly recommend selecting a new password for the admin user login. Choose a strong password having a mix of upper and lower case characters and digits. Be sure to write the new password down and keep it in a safe place.
Static LAN IP Address Assignment
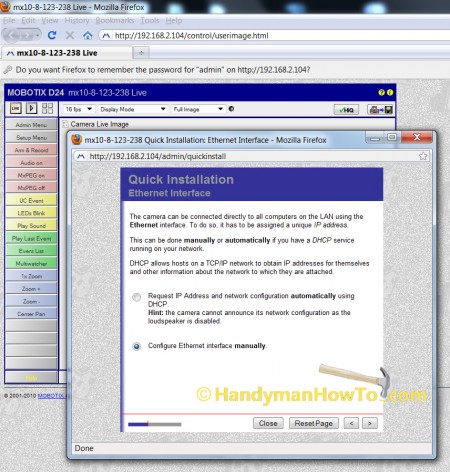
- Select manual Ethernet interface configuration and click next.
Choosing a Static LAN IP Address
A static IP address is required to access the camera from the internet (for port forwarding) or bookmark the camera URL in your web browser. For example, a bookmark named “Mobotix Camera” with the URL http://192.168.2.251.
The Mobotix camera has a DDNS agent, but I already have my Linksys router setup with a DDNS service and will use that, so I only have one DDNS host name to remember to get to my home network, e.g. BobsNetwork.dyndns.org. For more about DDNS services, visit www.DynDNS.org to get a free host account.
The camera’s static IP address will is assigned within the Linksys router subnet range. My Linksys router subnet is 192.168.2.xxx. Just use your subnet range in the following examples.
To select an available static IP address:
- Open a new web browser session! (Do not exit the Mobotix Quick Installation wizard.)
- Log into your Linksys router (http://192.168.1.1)
- Navigate to the Setup → Basic Setup page and scroll down to the Network Setup section:
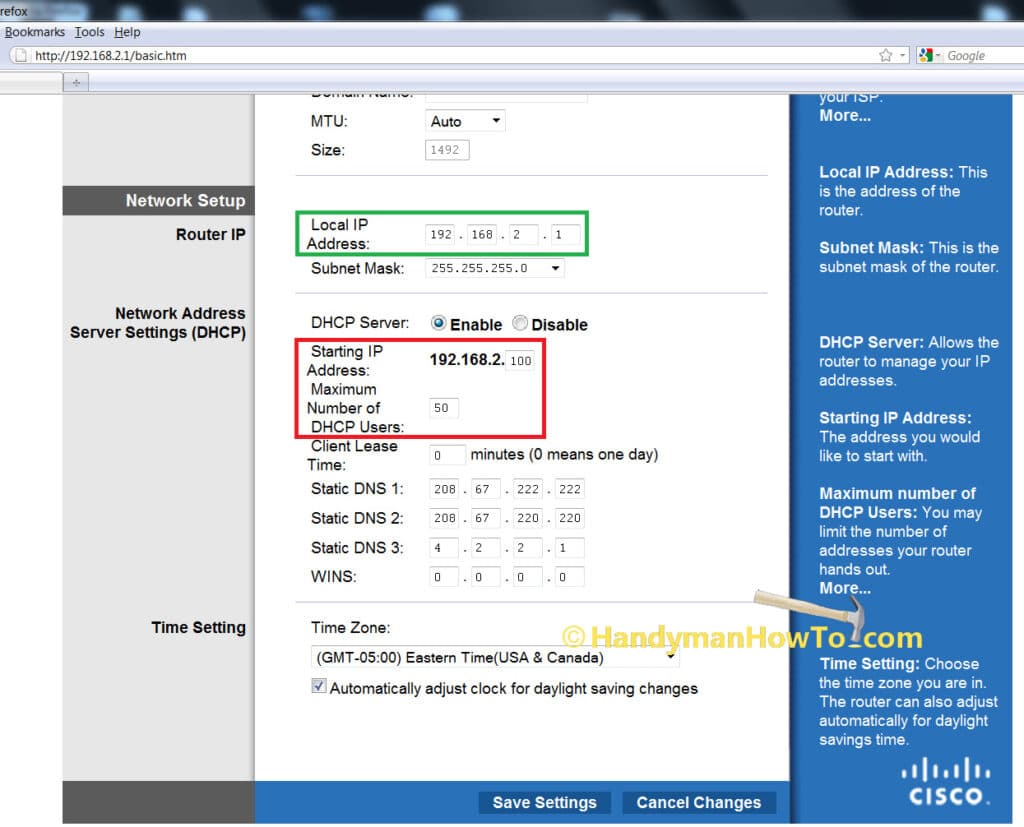
In the green box (above), I’ve changed my Router IP address to 192.168.2.1, where your Router IP is most likely the factory default 192.168.1.1. If so, that’s perfectly fine and leave it the way it is.
The important part is in the red box. Note the
- Starting IP Address = 192.168.2.100 and
- Maximum Number of DHCP Users = 50
Doing the math, this means the last DHCP address the router would assign to a network client (computers, iPhone, etc.) is 192.168.2.149. Therefore, you can select any IP address in the range
- 192.168.2.150 to
- 192.168.2.254
for the Mobotix camera. Remember, your Linksys router is likely using the default 192.168.1.xxx subnet so your available IP range is
- 192.168.1.150 to
- 192.168.1.254
Again, use the 192.168.1.xxx range if that’s the way your Linksys is setup in the following examples.
Now we’ll choose a static IP address for the Mobotix camera.
In the Linksys router menu, navigate to:
- Applications & Gaming → Port Range Forward
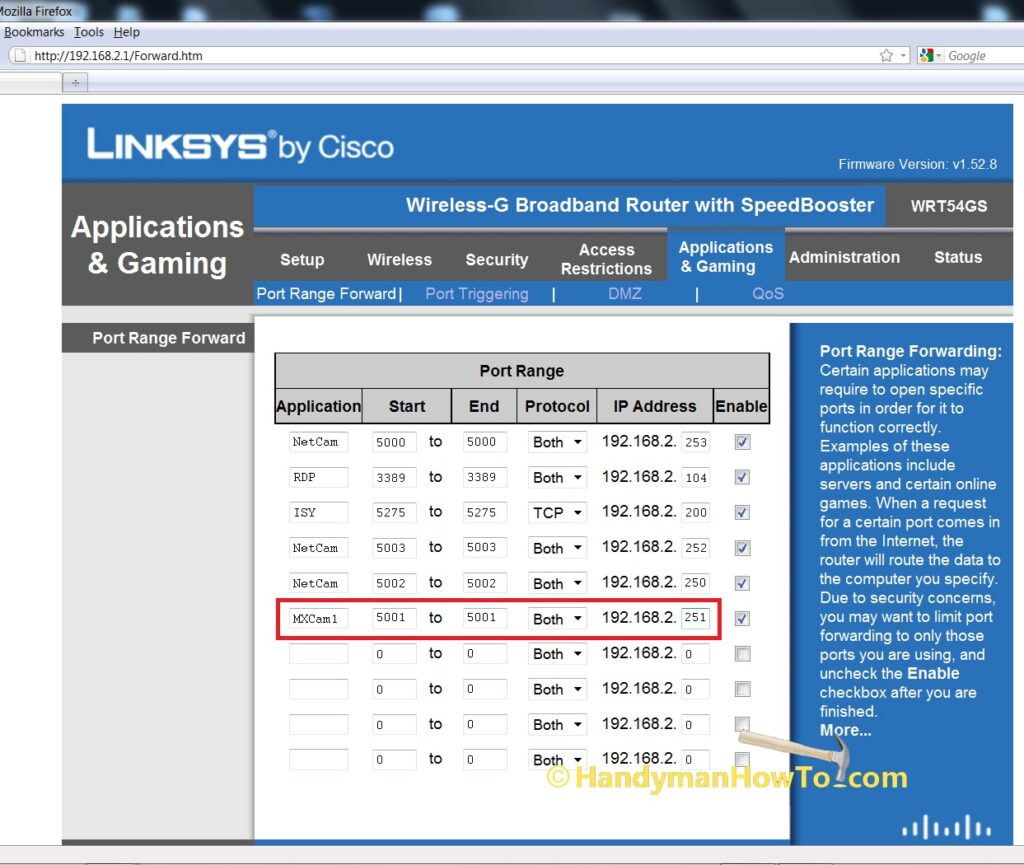
In an empty row, enter the following parameters for the camera:
-
Application: MXCam1
Any name is fine, it’s just to remind you what this is for. -
Start / End Ports: 5001 to 5001.
The requirement is the port number is unique in this table and it’s not being used by any services on your network. See this link for a list of port numbers. For instance, port 5001 is used by Slingbox, but I don’t own a Slingbox so there’s no port conflict. -
IP Address: 192.168.2.251
I prefer to allocate IP addresses from the high end of the available address range. The IP address must be unique in this table and in the range 192.168.2.150 to 192.168.2.254. Remember, your range may be 192.168.1.150 to 192.168.1.254!
The port number is important so you can access the camera from the internet via the DDNS service, for example: http://BobsNetwork.dyndns.org:5001
Be sure to write down the IP address and Port Number for the camera.
Click Save Settings on the Linksys web page and close the browser.
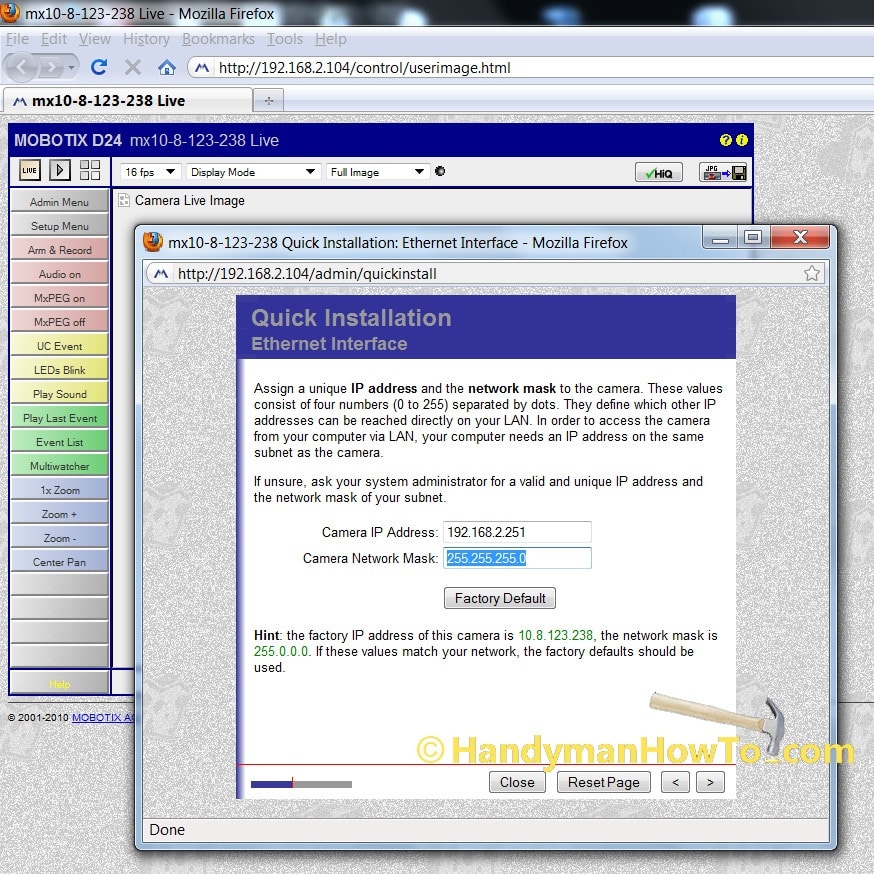
Ethernet Interface IP Address Assignment
Switch back to Quick Installation wizard in the other web browser session.
- Enter the IP address that was chosen above, e.g. 192.168.2.251
- The subnet mask for a Linksys WRT54G is 255.255.255.0
- Click next.
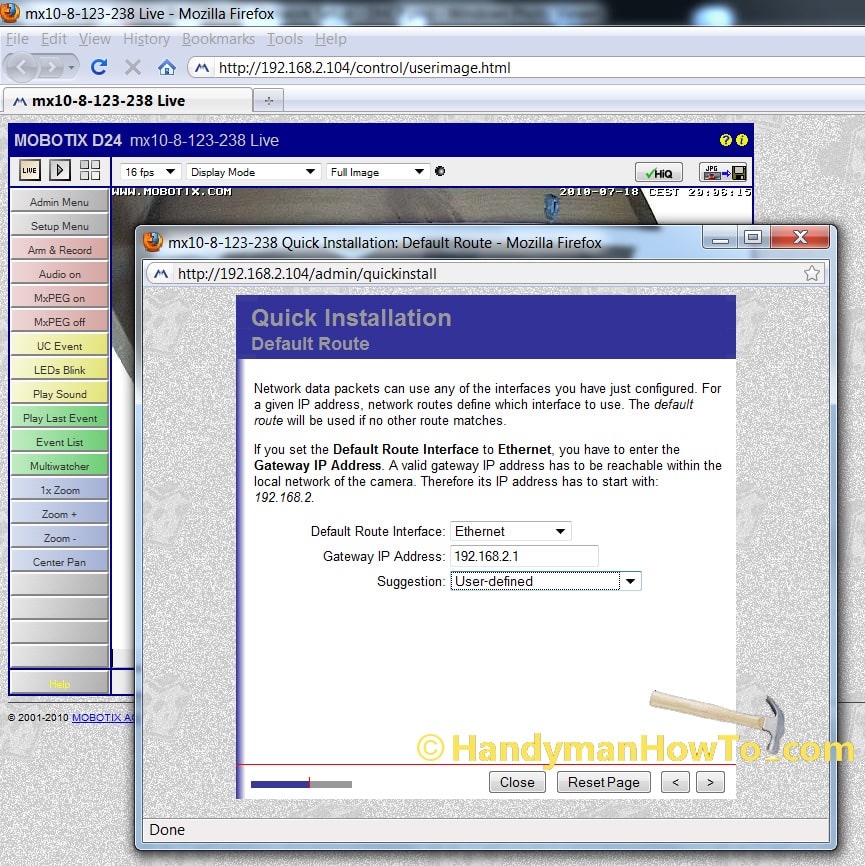
The default gateway is the Linksys Router IP address as highlighted in the green box of the Linksys Network Setup → DHCP screen shown previously.
- Enter 192.168.2.1 (remember your Router IP may be the factory default 192.168.1.1)
- Click next.
This project is continued in Part 3.
Take care,
Bob Jackson