The dreary vinyl wallpaper installed by the prior homeowner in the master bath had to go! Removal was straightforward, but a bit time consuming and requiring attention to detail.
Here’s the “after” and “before” photos of the now bright and cheery bath. The Akita likes the new look, too!

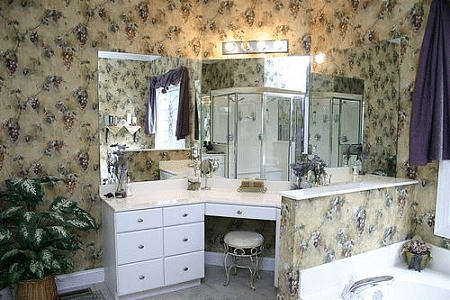
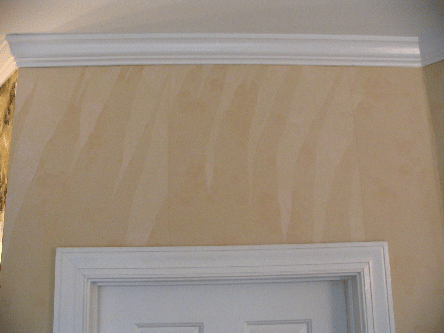
Here’s how the master bathroom looked before with the dreary vinyl wallpaper (gag!):
How to Remove Vinyl Wallpaper
Required Tools
- 1-1/4 inch putty knife
- 4 inch putty knife
- 8 inch putty knife
- Water spray bottle
- Step ladder
- iPod or Radio – for entertainment
Wallpaper Removal Steps
The steps for removing the vinyl wallpaper are:
- Peel off the vinyl top layer.
- Soak the paper backing to soften the glue with a spray bottle of water.
- Gently scrape off the paper backing with a 4 inch putty knife.
I was pleasantly surprised how easily the paper backing came off the wall after soaking with water. It helped the wall had been painted before the wallpaper was installed.
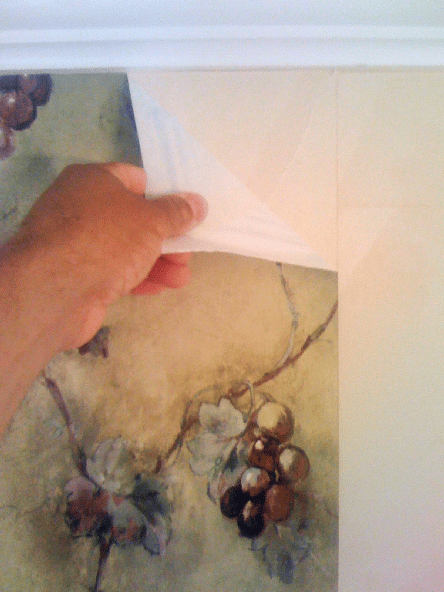
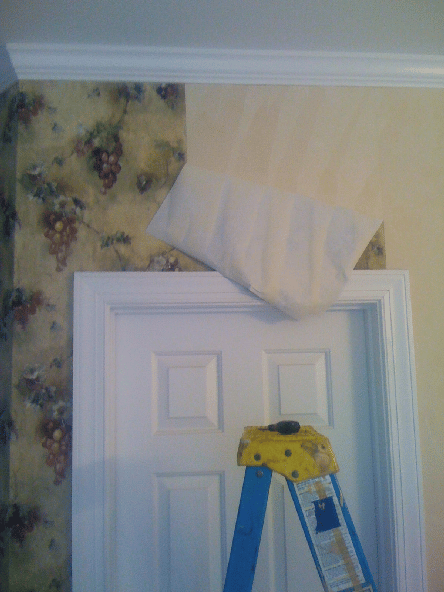
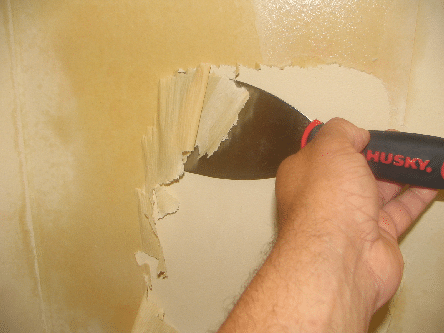
The wallpaper is removed by peeling off the top layer, one course at a time.
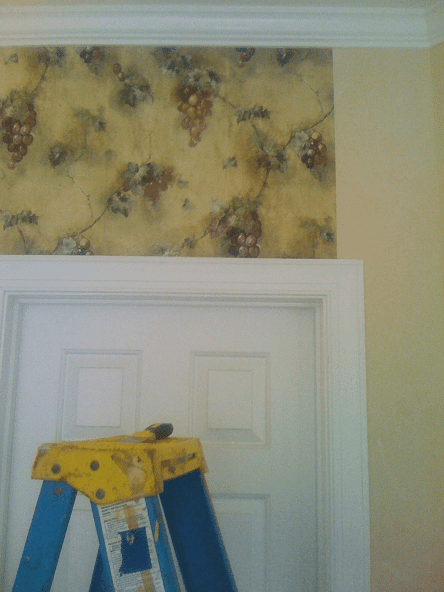
Use a small putty knife to lift a corner of the paper and with a slow steady motion peel off the top layer. The paper backing remains glued to the wall:
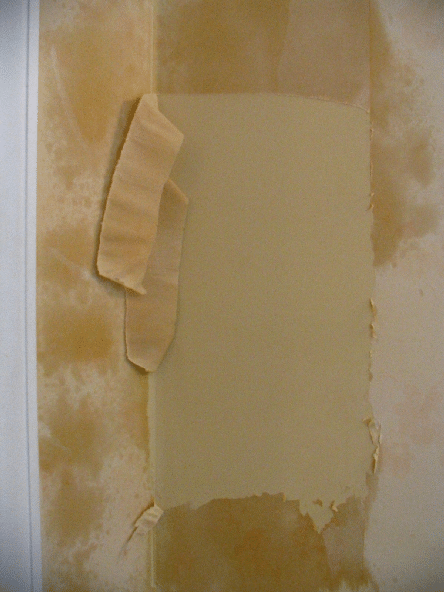
Here’s a partially peeled course of wallpaper in the next photo. The faint “stripes” are delamination of the paper backing. However, there is remains a paper layer and glue attached to the wall that must be dampened with water scraped off.
The paper backing after the top layer is peeled off:
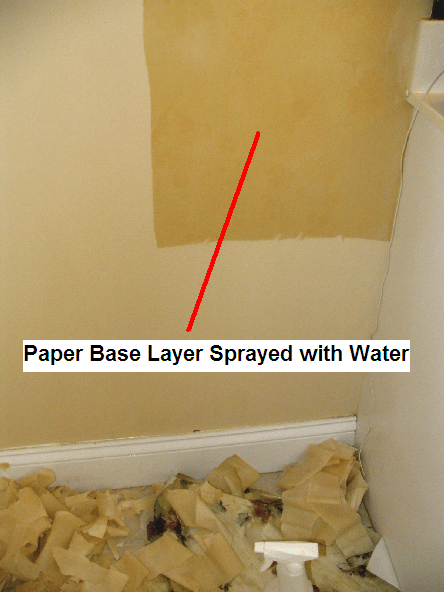
Soak the paper backing with water from pump sprayer and wait about 2 minutes. I found that spraying a 3 foot by 6 foot section at a time worked well as I could scrape the area before the paper dried out again. Here the paper backing is removed with putty knife leaving the painted surface underneath showing. Very little force was needed to scrape the paper backing off the wall:
Ribbons of water-soaked paper backing hang free, exposing the painted wall beneath.
Work in regular rows to scrape off the paper backing. Here an area of is soaked and ready to be scraped off with the putty knife:
The medicine cabinet, light switch and electrical outlet covers must be removed to get at the wallpaper in these areas. Hold a dry rag over the electrical outlets when using the pump sprayer to keep these from getting wet. Water and electricity don’t mix! If you’re uncomfortable around electricity or your skill level, turn off the circuit breakers first.
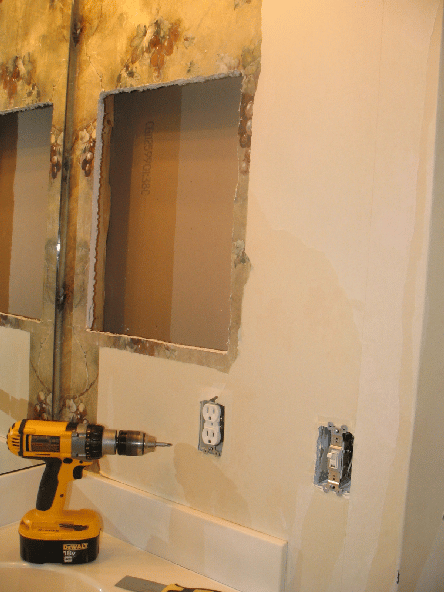
I took nearly 12 hours to peel and scrape off all the wallpaper in the master bath. The most time consuming part were the small spaces around the doors, window, shower, mirrors, tub and the like.
Prepare the Walls for Painting
After the wallpaper is removed, there were several blemishes to be corrected:
- Fill in any pock marks in the sheetrock (wall board) made when scraping off the wallpaper. A few small ones are unavoidable. Use a putty knife and spackling paste.
- Fill in any unused mounting holes for shelves, photos and towel racks with spackle.
- I had a few small rust areas on the exposed metal corner bead around the shower stall. A dab of Naval Jelly Rust Dissolver applied by a Q-tip took care of the problem. Ospho Rust Treatment also works well.
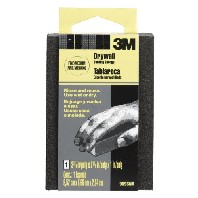
- Lightly sand the wall surfaces with the rough side a drywall sanding sponge to knock down the slight roughness left by the wallpaper glue. It’s important to sand with the sponge dry to avoid dissolving the glue. One or two passes is sufficient.
Naval Jelly and the Drywall Sanding Sponge are available at most home improvement stores.
Painting the Walls
The walls were repainted the original color with a premium kitchen and bath latex paint. Masking off and painting the trim are always time consuming.
The Wagner Paint Mate Plus Roller is a huge time-saver for rolling on paint, easy to use and simple to clean. I’ve painted several rooms with it and wouldn’t go back to the old paint pan and roller method. The Paint Mate Plus is very maneuverable and non-electric so there’s no power cords to get in the way.
My better half is pleased with the master bath facelift. She’s busy accenting the walls with a wrought iron candle holders and a framed painting.
Thanks for reading!
Bob Jackson