This project explains how to fix a shower leak behind the wall by cutting an access panel in the drywall to find and fix the plumbing leak.
I noticed a water dripping from the ceiling of the walk-in closet on the main floor. Based on the floor and room layout, I realized the upstairs shower and bathtub is located directly overhead.
How to Fix a Shower Leak Behind the Wall
My suspicion is the leak was coming from either the shower water supply or drain plumbing. The problem is that I had no access to the shower plumbing because it was concealed behind the drywall – many times there will be a plumbing access panel, but there was none here. I would have to cut a hole in the drywall in order to inspect the shower plumbing and find the leak.
Showers and bathtubs can be creative in the way they leak. It’s a matter of remembering that water runs downhill and tracing the leak to the source.
Aside: Also see How to Fix a Leaky Shower Drain for a related repair.
Cut an Inspection Opening in the Drywall
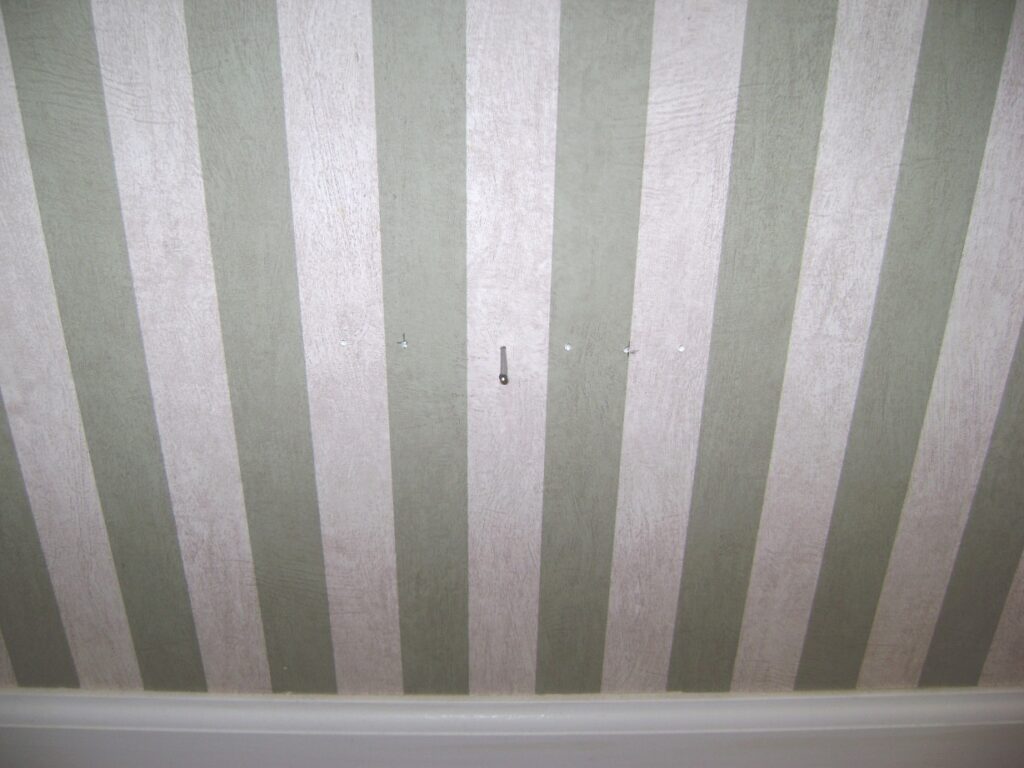
I began by locating the center of the wet wall (i.e. wall with the plumbing). I gently probed (don’t want to puncture a water pipe!) for wall studs by driving a small finishing nail through the drywall to see if it contacted a stud, moving the nail about one inch left and right until I had cleared a 6 inch length. There shouldn’t be framing studs in the center area of the wet wall to allow room for the shower valve and I found my assumption was correct.
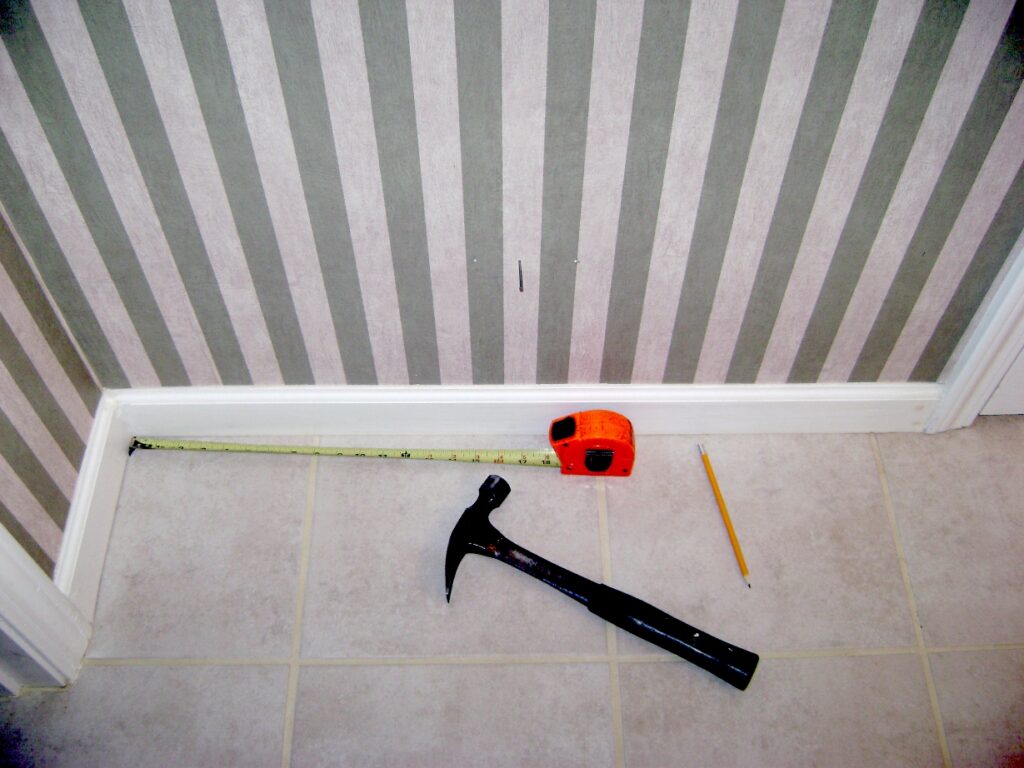
Here’s a closeup of the nail and test holes.
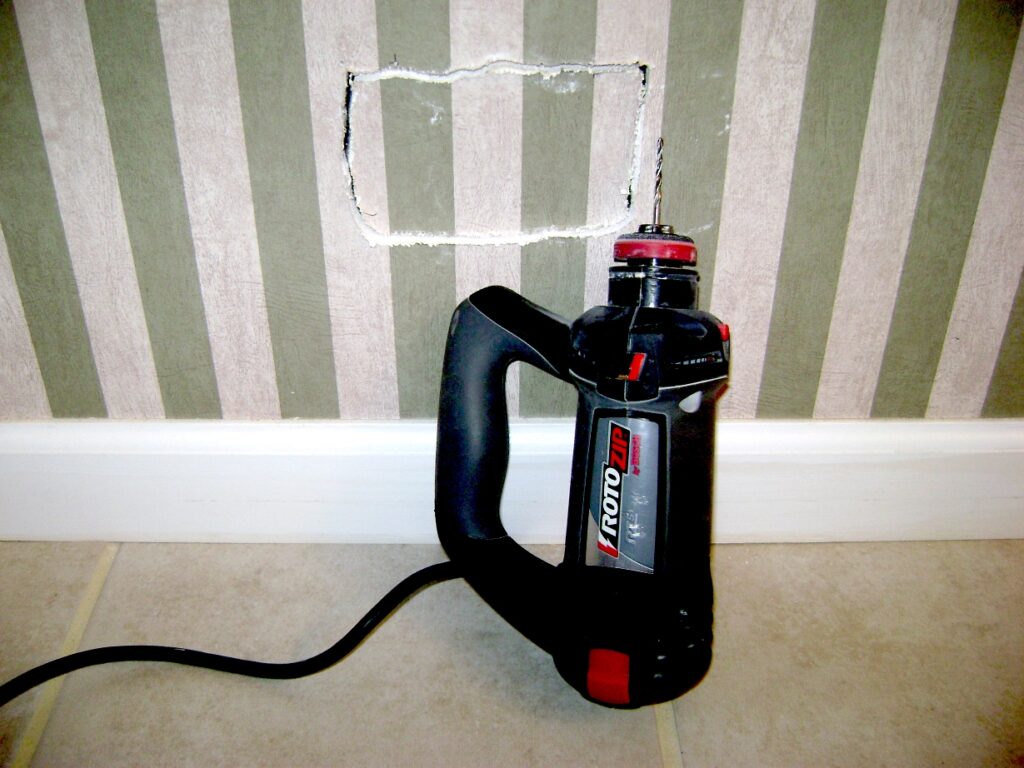
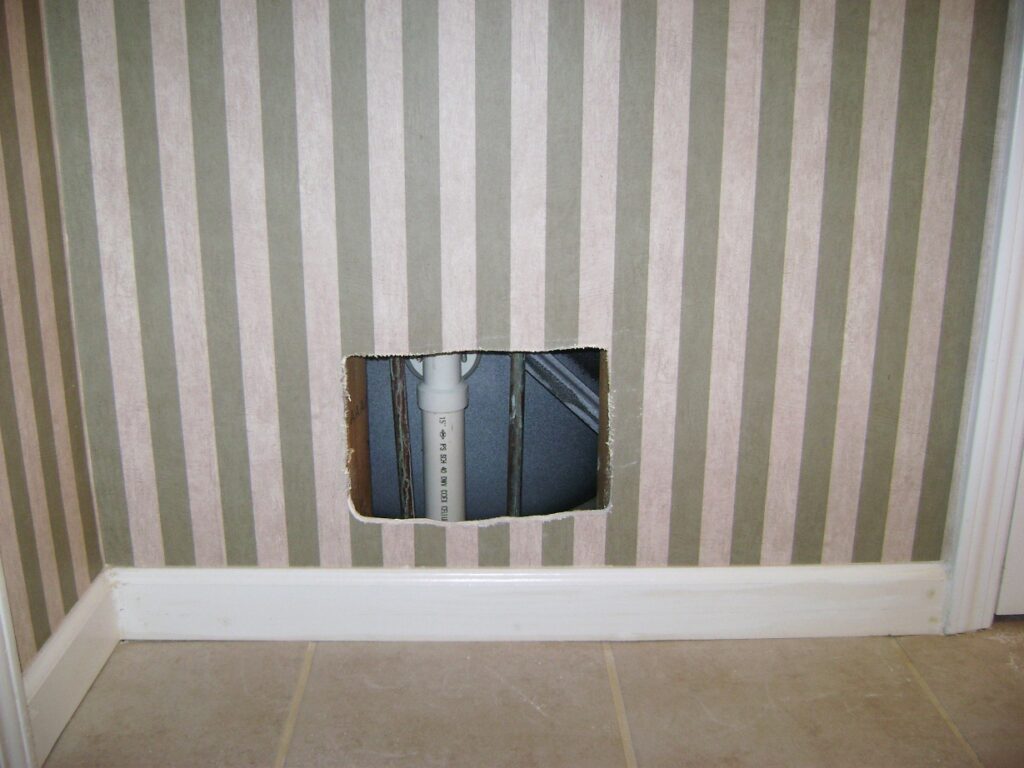
Now that I had confirmed there are no wall studs in the center section of the wet wall, I used a Rotozip spiral saw to cut a small inspection hole in the drywall to access the shower plumbing.
I cut a small inspection hole in the drywall because:
- I would have to repair the drywall later and small holes are easier to fix than large ones.
- Wallpaper is hard to repair as seams will show.
- I needed to locate the plumbing and wall studs before going any further.
The small inspection hole (above) allowed me to reach inside and locate the wall studs and plumbing; I also confirmed there was no electrical wiring in the wall. The inspection opening was enlarged to the span the width between the wall studs to dimensions of ~10.5 inches wide and ~8.5 inches tall.
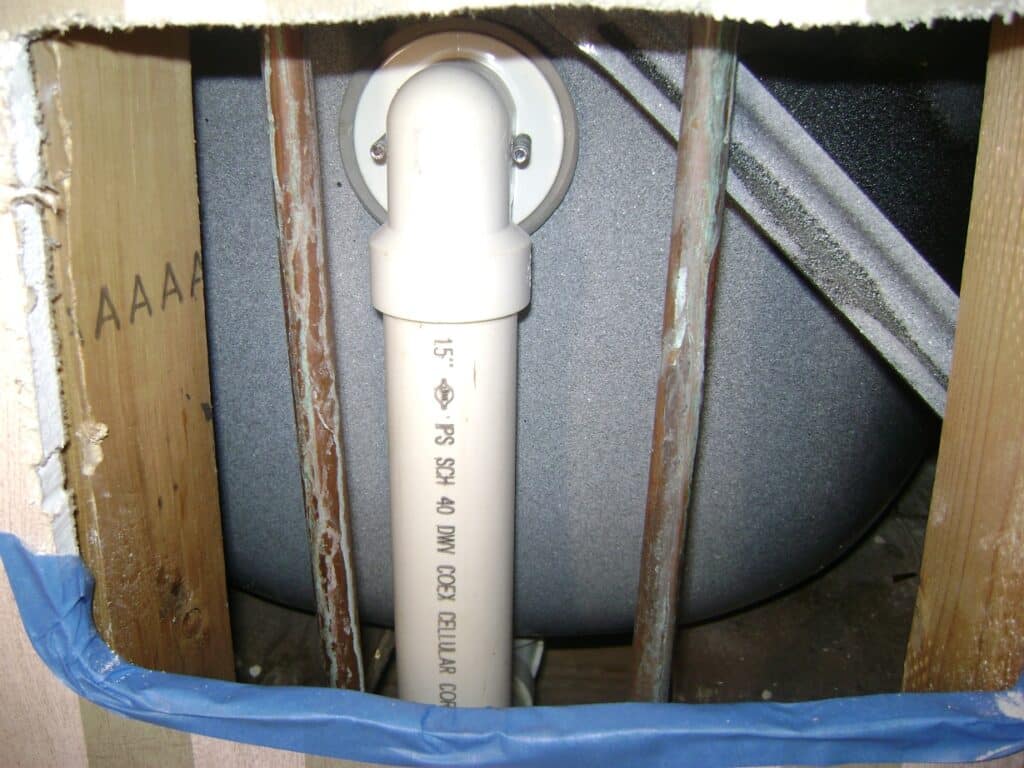
Below is a closeup of the hot & cold copper water supply pipes and the PVC overflow drain for the bathtub. An immediate concern are the greenish/white streaks on the copper pipes from dripping water. The pipes were dry and at this point I wasn’t sure if this were a historical artifact or recently made.
A strip of blue masking tape was applied to the bottom edge of the opening to reduce the amount of drywall dust rubbed off on my arms.
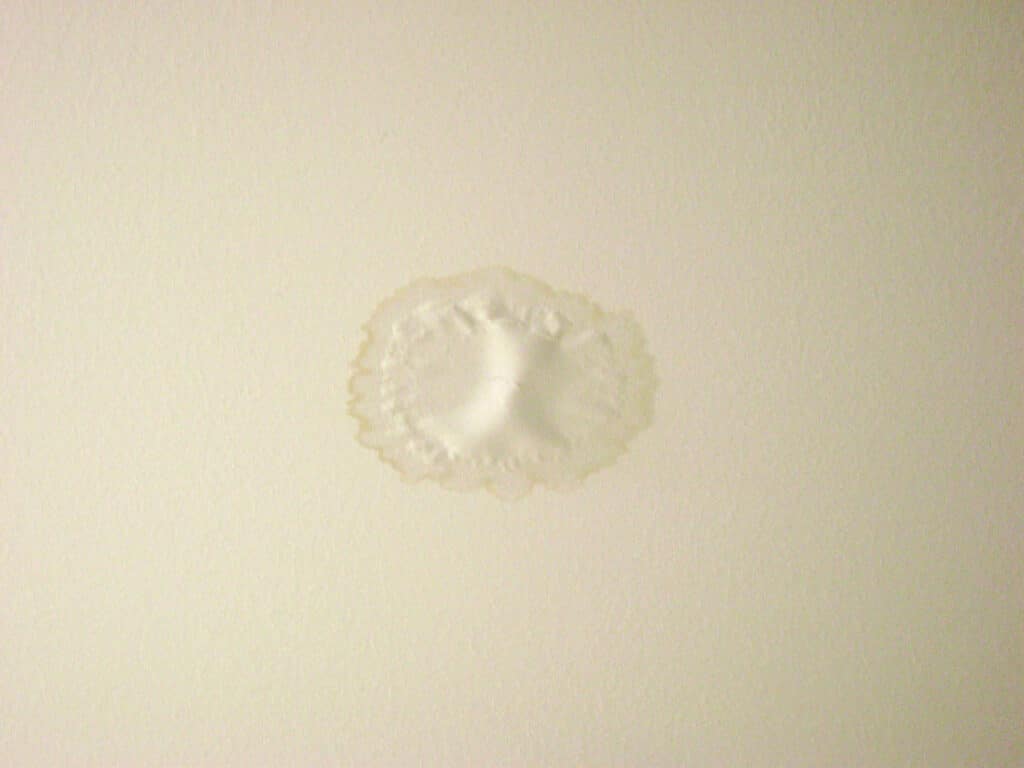
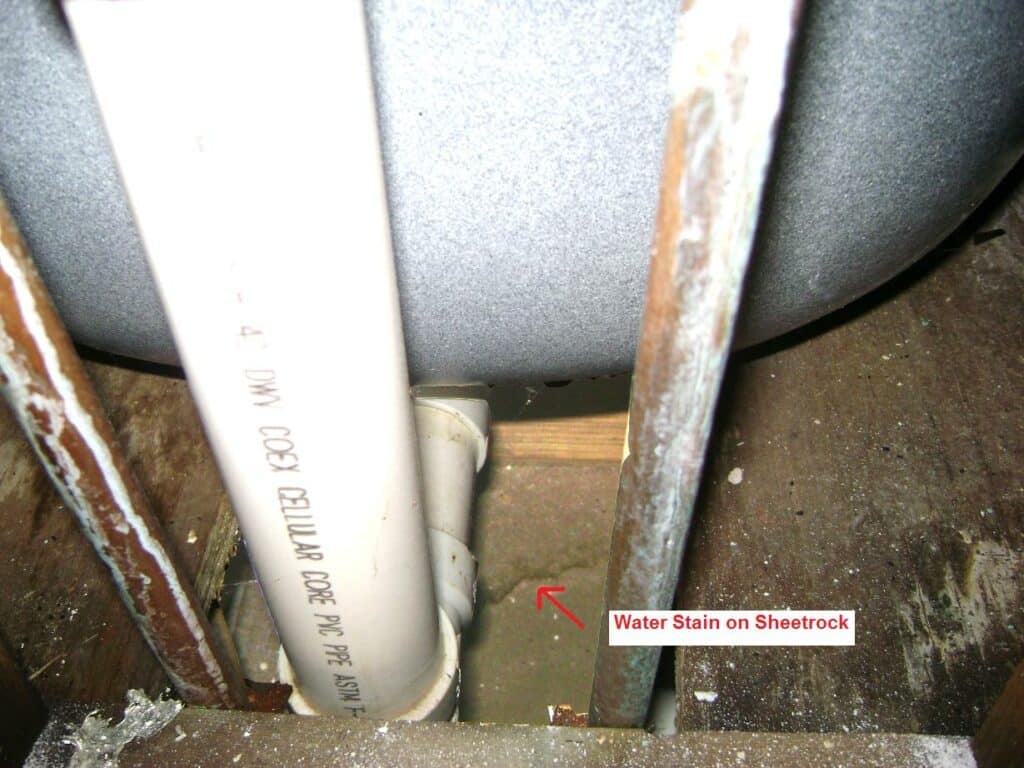
Water stains can be seen on the drywall ceiling below the bathtub:
Shower and Bathtub Drain Leak Checking
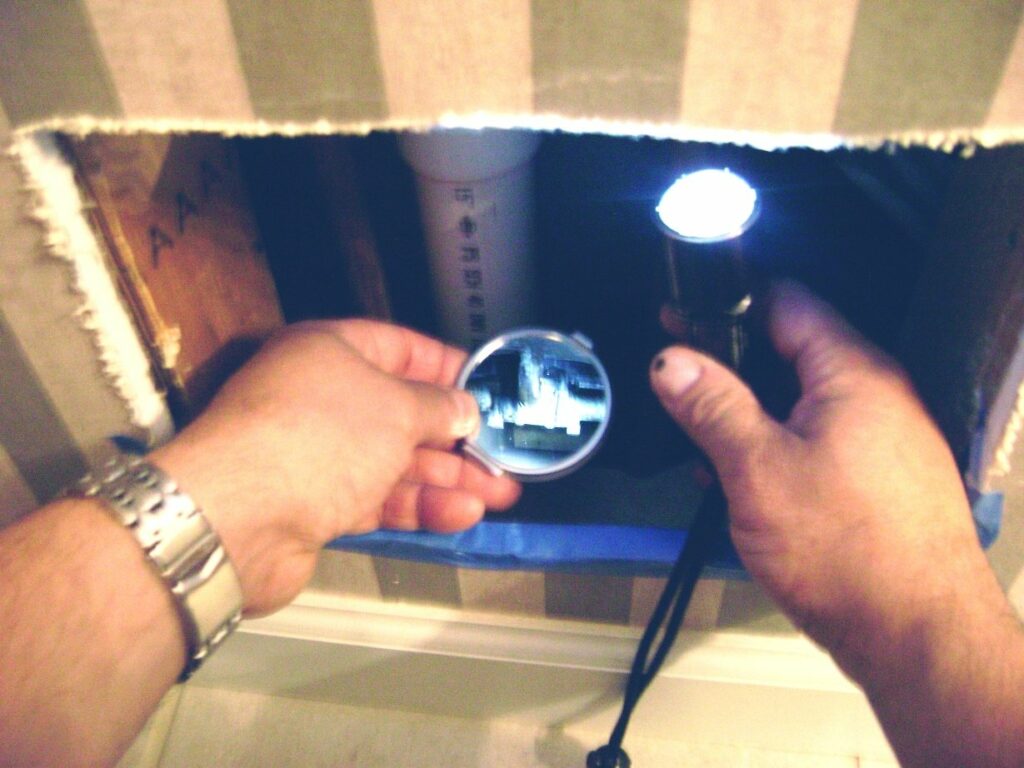
A flashlight and mirror are used to inspect the bathtub drain for leaks. The bathtub was filled with several inches of water and allowed to stand for 15 minutes. No leaks were found at the bathtub drain.
Check the Shower Plumbing for Leaks
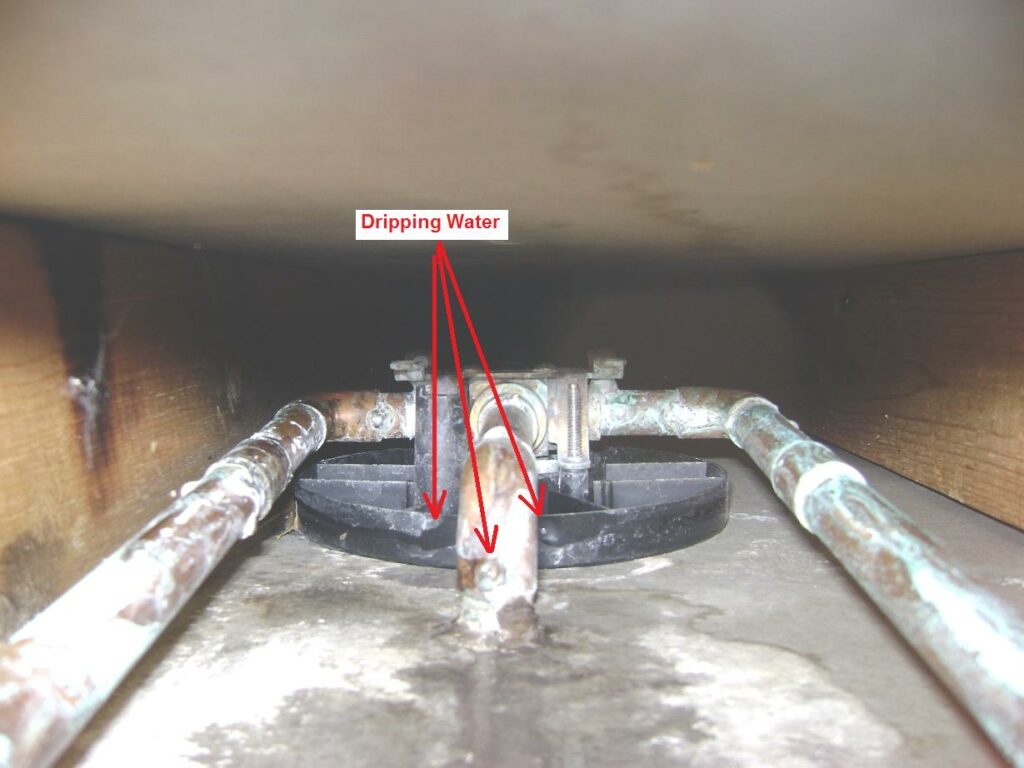
I turned on the shower and used the mirror and flashlight to inspect the copper piping, shower valve and shower head arm inside the wall. Bingo! Lot’s of dripping water.
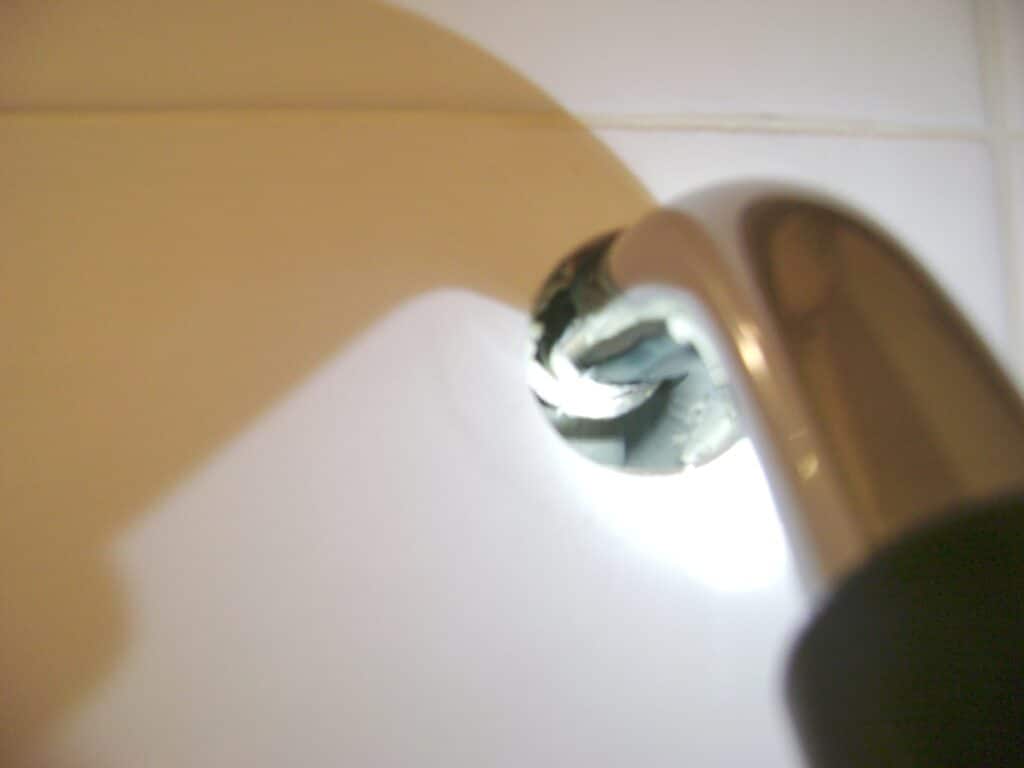
Looking up inside the wall at the shower leak. Drops of water are falling from the shower valve:
“Uh Oh!” If the shower valve is bad then I’ll have to cut another drywall access panel opening to fix the valve. That would be an ugly drywall repair. Notice the water stains on the drywall and chalky deposits on the copper pipes. The drywall integrity was fine – dry and solid – in spite of the water stains. I gave it a good shot of Lysol to discourage mold growth.
Upon closer inspection with the flashlight and mirror I was able catch a glimpse of the water dripping from the shower arm (up high by the shower head) onto the shower valve. Good! At the least the shower valve is not leaking.
Water is dripping on the subfloor from the shower arm and elbow next photo. The white stuff on the 2×4 base plate is drywall dust when I cut the access hole:
The shower leak is inside the wall at the connection between shower arm and elbow behind the tile:
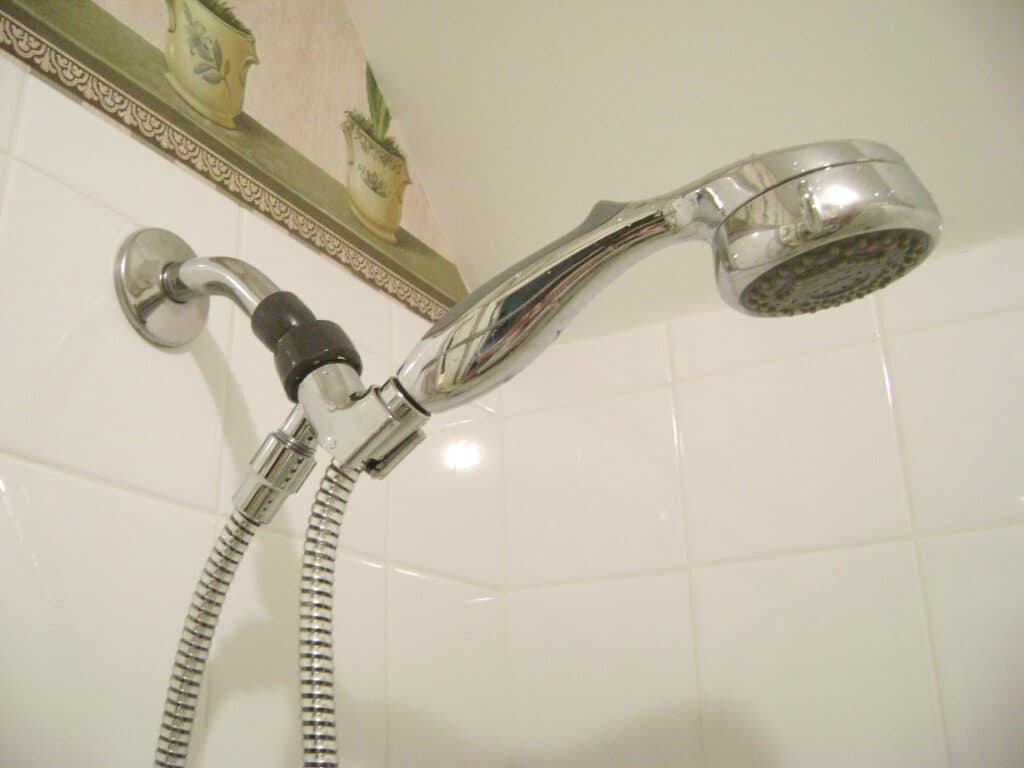
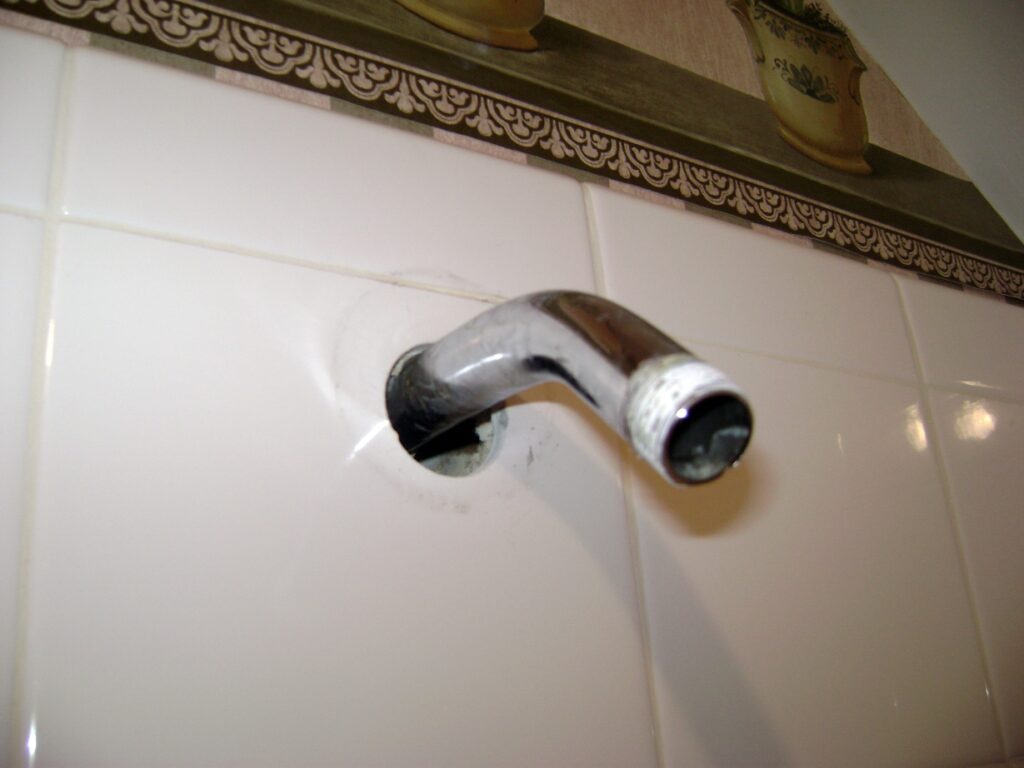
The shower head and escutcheon (trim plate) are removed to get a look at the shower plumbing inside the wall:
Shower Arm and Elbow Connection is Leaking
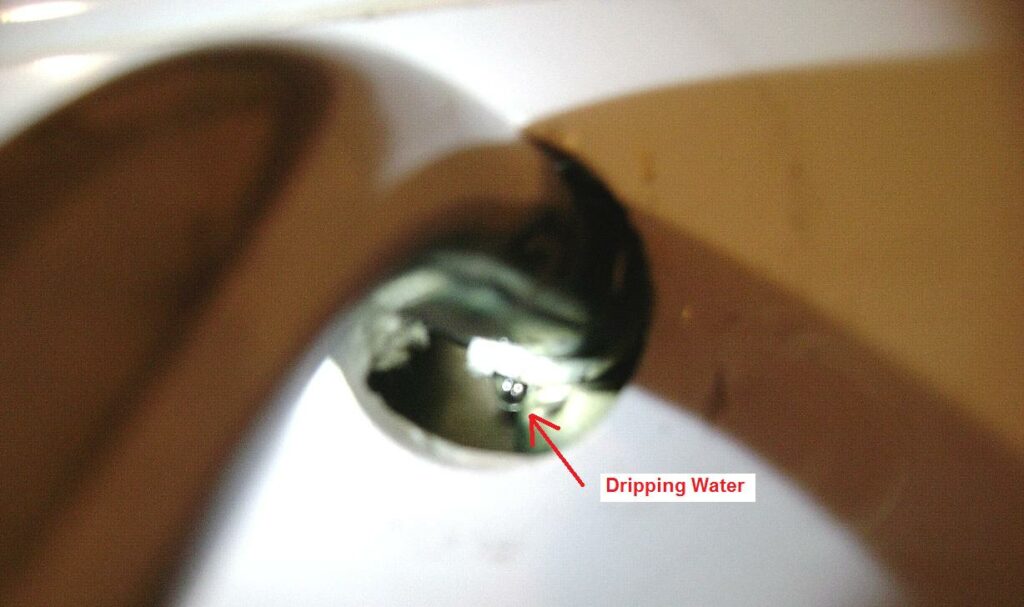
I reattached the shower head then turned on the shower. The shower leak was plainly seen. The leak was coming from the threaded joint at the shower arm and the drop ear elbow:
I unscrewed the shower arm from the elbow and observed that:
- The shower arm was threaded-in very tightly – this is good.
- The threads were sealed with pipe joint compound – also good.
- The pipe joint compound had become brittle and dry, this caused the shower leak.
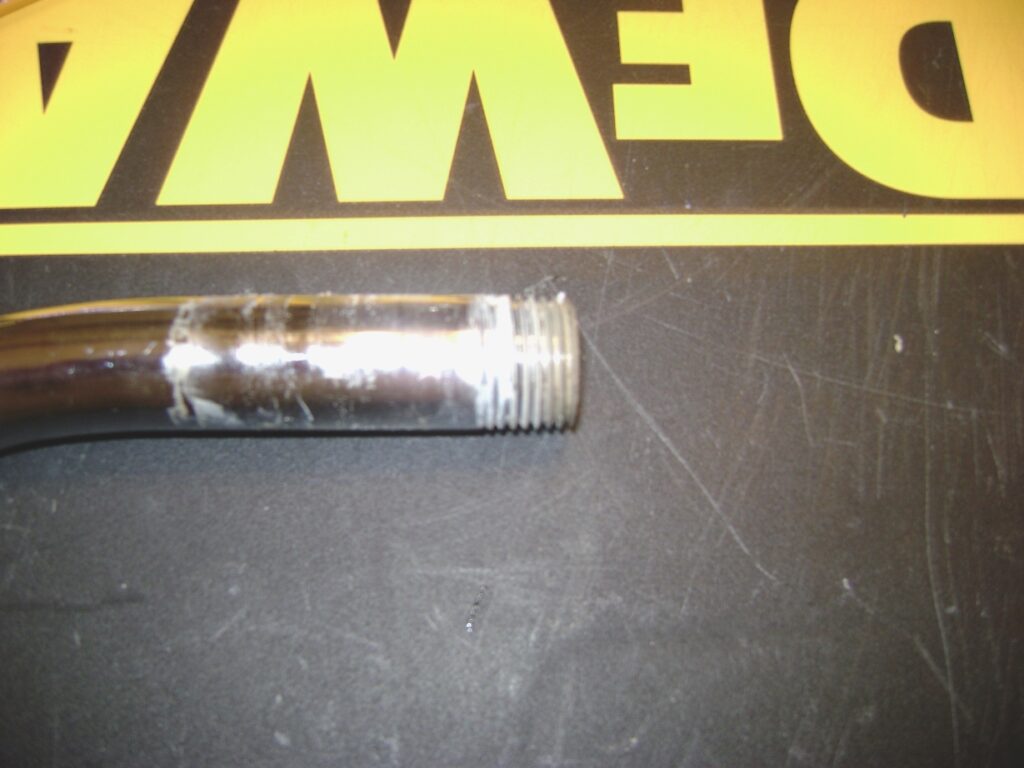
The shower arm is pictured below. The pipe joint compound is the white stuff in pipe threads:
Shower Arm Leak Repair
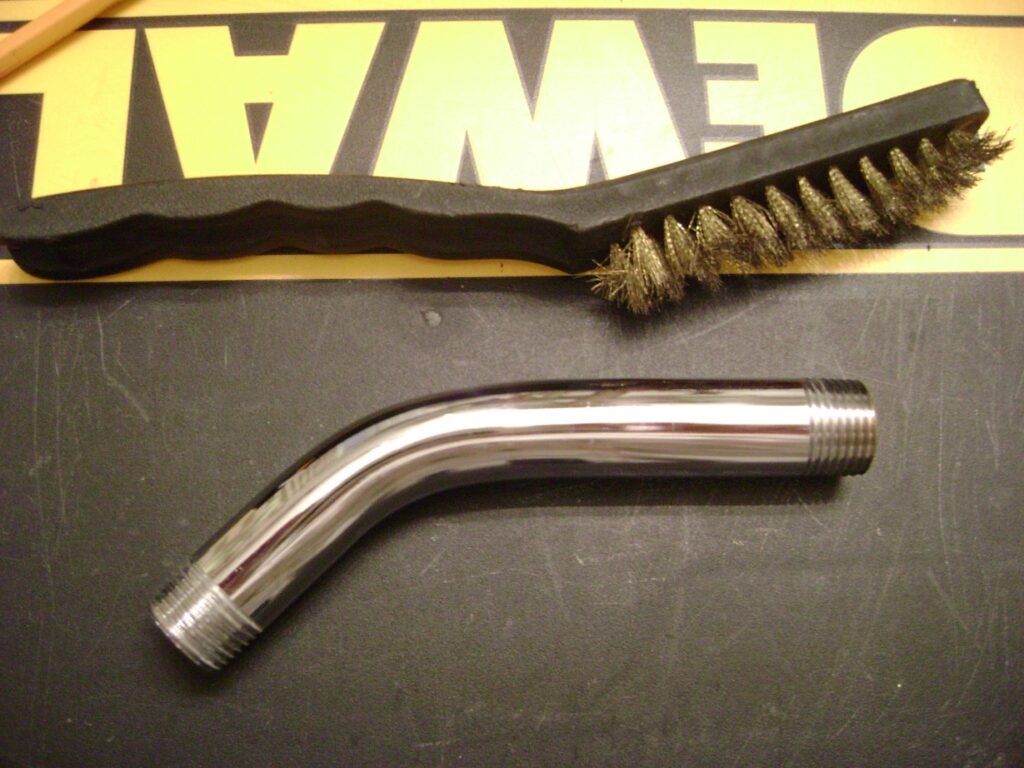
A brass-bristle wire brush was used to clean the old pipe joint compound from the threads of the shower arm. Brass is a soft metal and won’t scratch the nickel finish. The shower arm was polished with a cotton cloth.
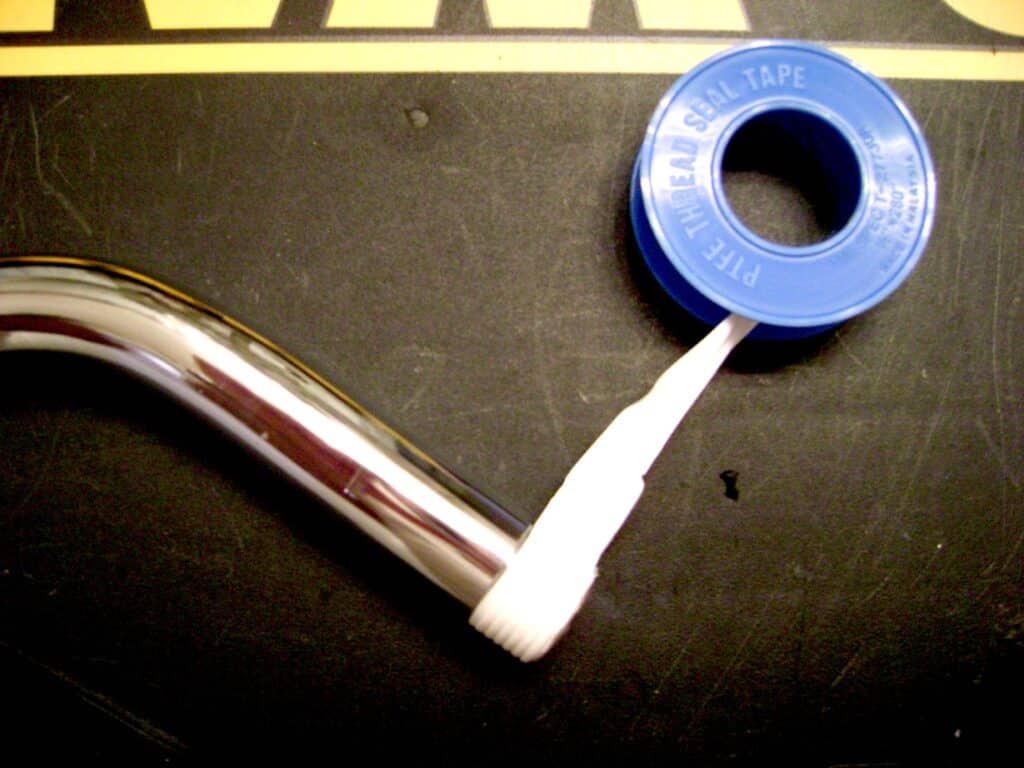
The shower arm threads are sealed with Teflon plumber’s tape. Wrap the tape clockwise (with the pipe end facing you) so the tape won’t unwrap as the shower arm is threaded into the drop ear elbow inside the wall:
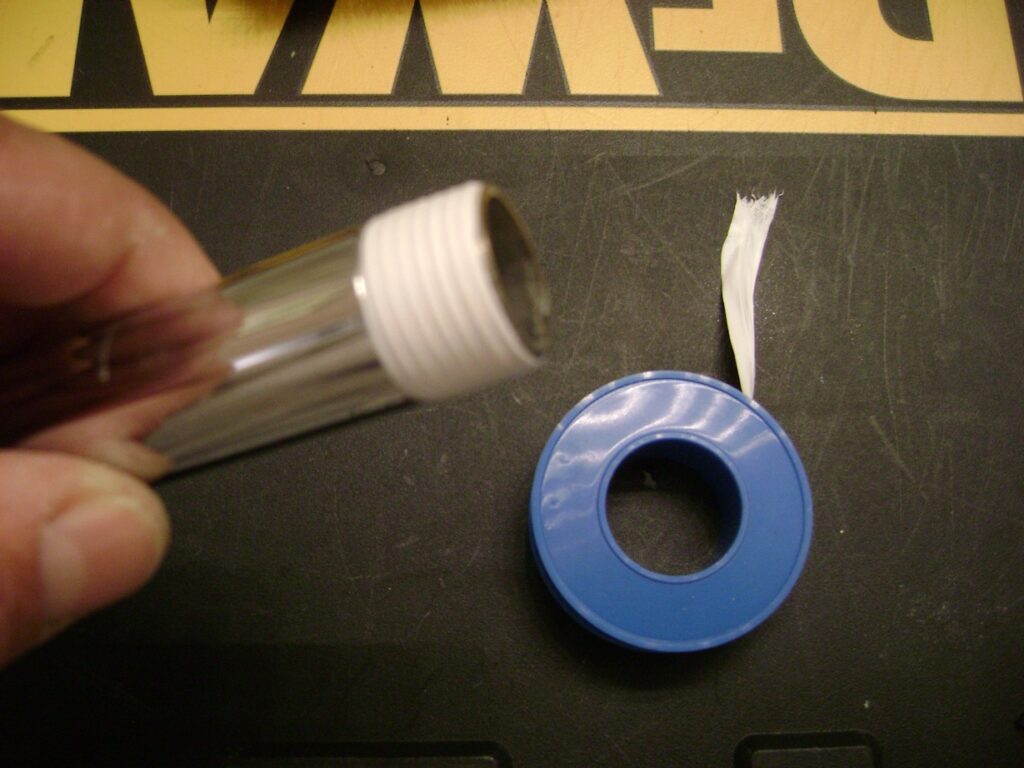
The shower arm threads wrapped after Teflon plumber’s tape is shown in the following photo. I prefer Teflon tape for this job over pipe joint compound because I wouldn’t be able to get a wrench on the elbow to really tighten the joint and I felt that Teflon tape does a better job of sealing gaps in the pipe threads.
The old pipe joint compound was cleaned from the drop ear elbow with the brass wire brush before reattaching the shower arm:

The shower arm was threaded into the drop ear elbow inside the wall and the shower head reattached. Then the shower is turned on to watch the plumbing joint for leaks. No leaks! Problem solved!
Install a Shower Plumbing Drywall Access Panel
The ugly inspection opening in the drywall was covered by 12 inch by 12 inch white return grill purchased from Lowes. The grill can be easily removed for maintenance or repair if needed in the future.
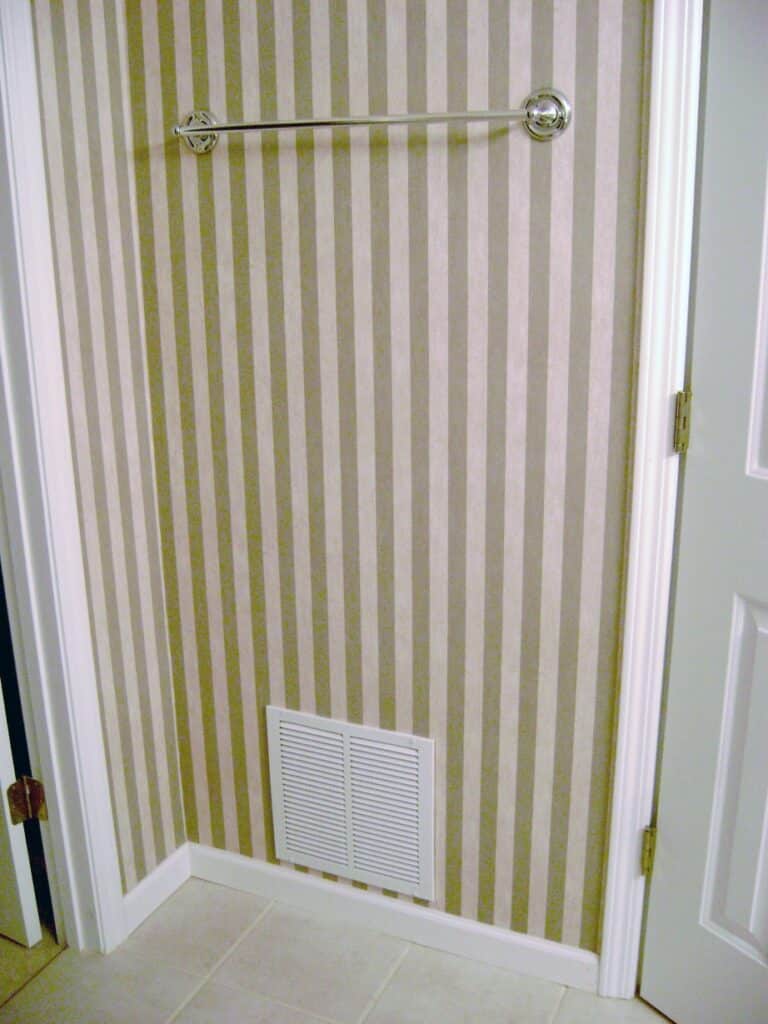
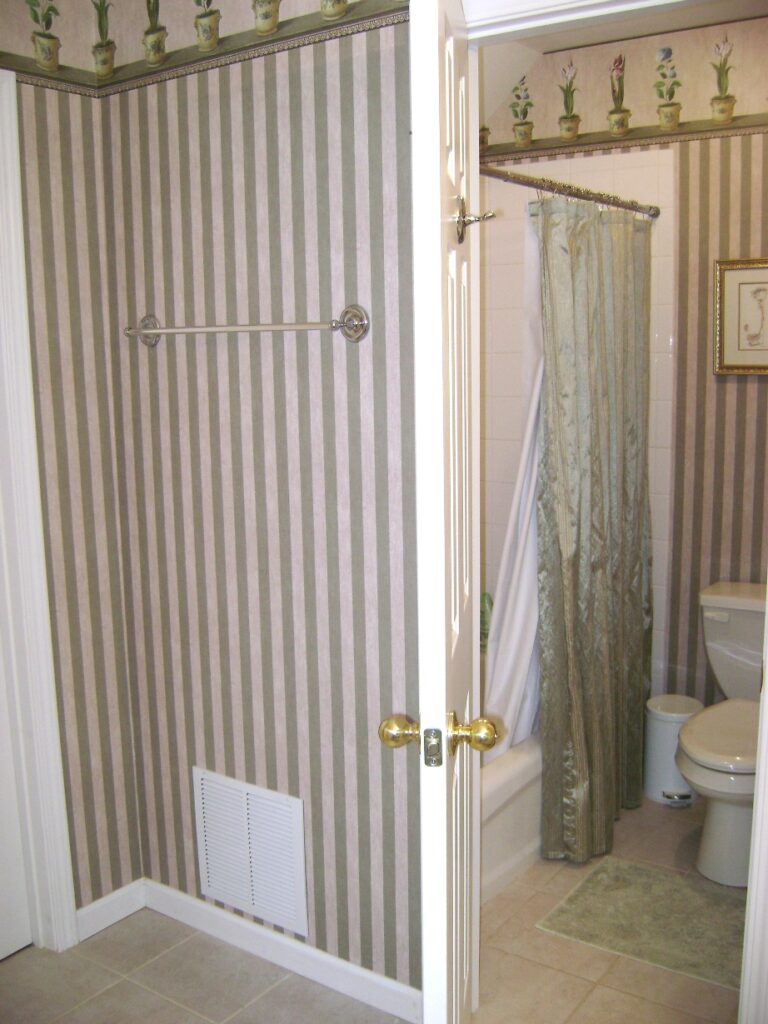
Here’s a better perspective of the bathtub/shower and wet wall with the newly installed white grill.
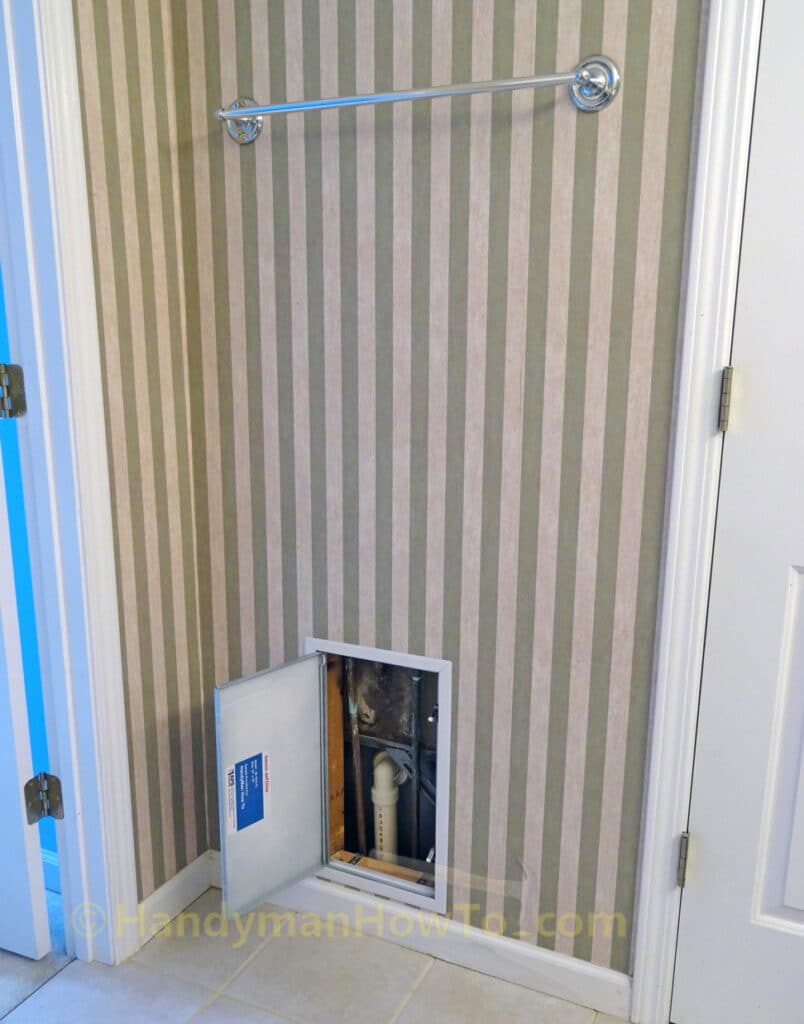
Update: bauco softline Access Panels
I was later introduced to the bauco softline access panels and replaced the air return grill for a better and more professional solution.
The final task is to paint the downstairs closet ceiling to cover the water stain.
Take care,
Bob Jackson
Your step-by-step guide on fixing a leaky shower is so helpful! The detailed explanations and photos make it much easier for someone like me who’s not very handy to follow along. Thanks for sharing these instructions and saving us from potential plumbing woes!