Connect the two sections of insulated flexible duct, build a drywall access panel out of plywood and close the interior soffit.
This project is continued from How to Replace a Bathroom Exhaust Fan and Ductwork – Part 7.c
Bathroom Exhaust Fan: Connect the Flex Duct
With the other end of the flexible duct now connected to the outside vent cap, I’m ready to make the final 4 inch vent duct connection inside the garage interior soffit. Recall the interior soffit is used to conceal the ductwork in the garage. The steps for connecting the flex duct from the bathroom ceiling to the garage are:
- Place the two worm gear band clamps over flex duct inner liners.
I used a piece of duct tape to temporarily hold the upper clamp out of the way. - Slide lower section of flex duct over the 4 inch metal duct connector until it meets the center rib.
- Wrap two layers of metal foil HVAC tape over the lower duct to secure and seal it to the duct connector.
- Tighten the band clamp over the taped joint.
- Repeat the procedure for the other section of duct.
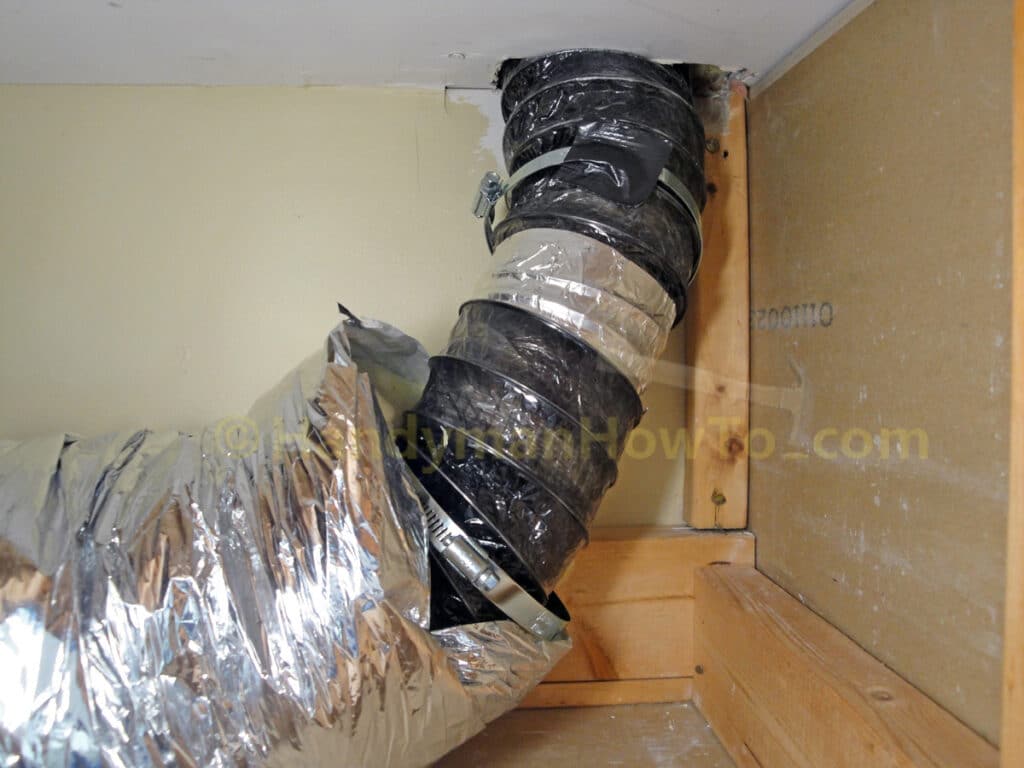
Here’s the flex duct connection after installing the HVAC tape and worm gear band clamps. Try to keep the duct bends wide and gentle as possible to minimize air flow friction losses:

The outer insulation jacket is pulled over the flex duct inner core to insulate it to prevent the warm moist bathroom air condensing inside the duct in the unheated garage. Water condensation inside the air duct could cause water to pool and promote growth of mold and mildew, or even a water leak over time. (The blue low-tack painter’s tape on the edge of the drywall opening is to keep down dust.)
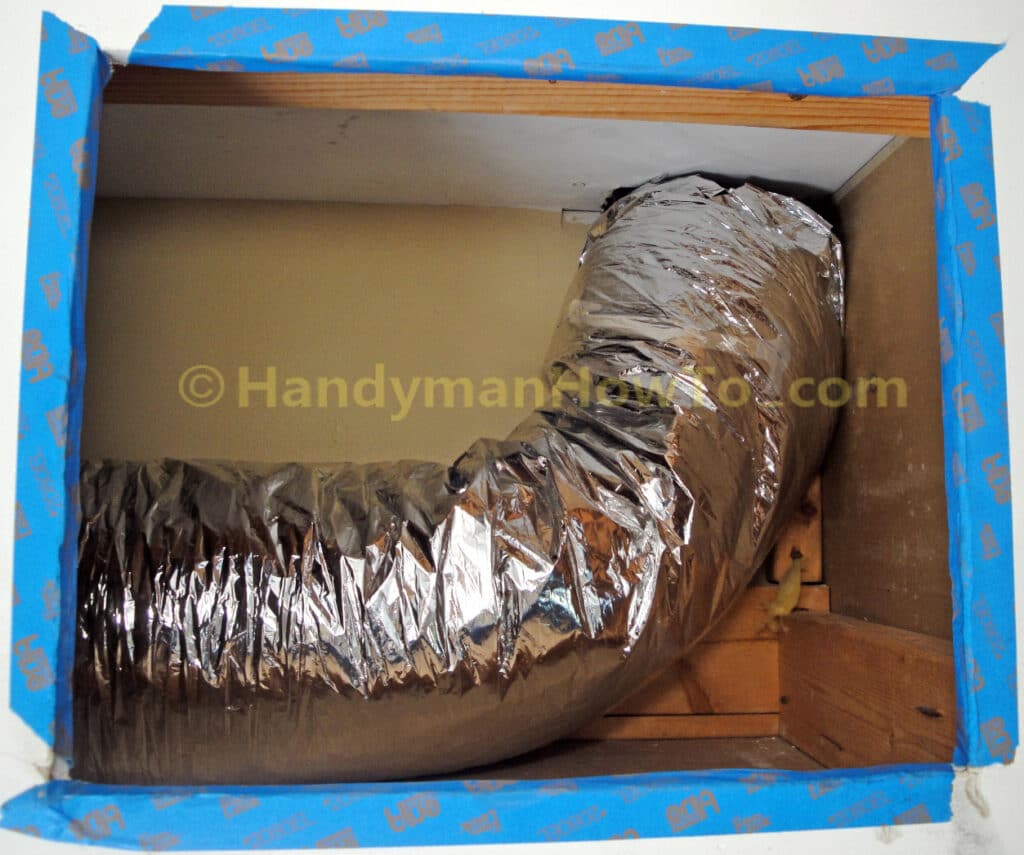
The new run of 4 inch insulated flexible duct from the master bathroom ceiling to the outdoors is now complete!
Build a Drywall Access Panel
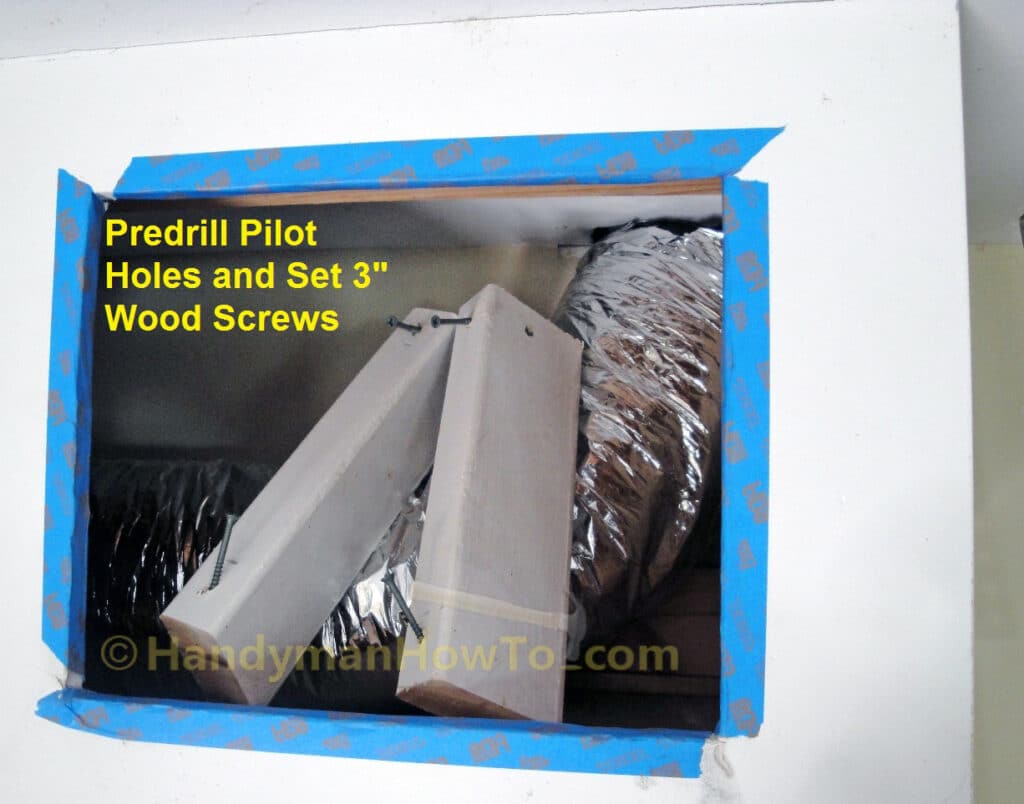
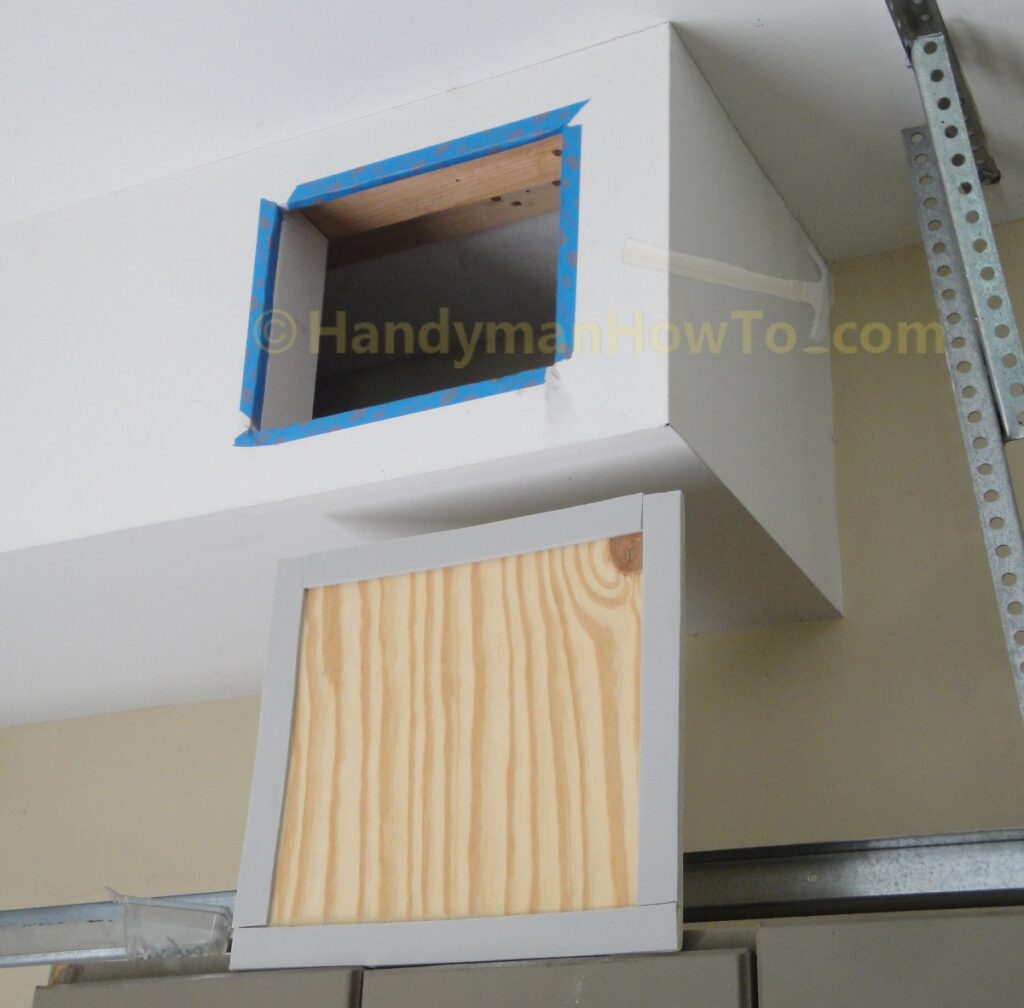
I’ll install a plywood access panel to cover up the access port cut on interior soffit drywall. The 2×4 horizontal framing members at the top and bottom of the access port are installed to mount the plywood access panel with screws, but I need to install vertical 2×4 framing on the sides to support the drywall access panel.
I measured and cut two pieces of 2×4 from a previous job that were painted white. Pilot holes for 3 inch wood screws were drilled and the wood screws partially driven in to make it easier to mount the pieces to the interior soffit framing:
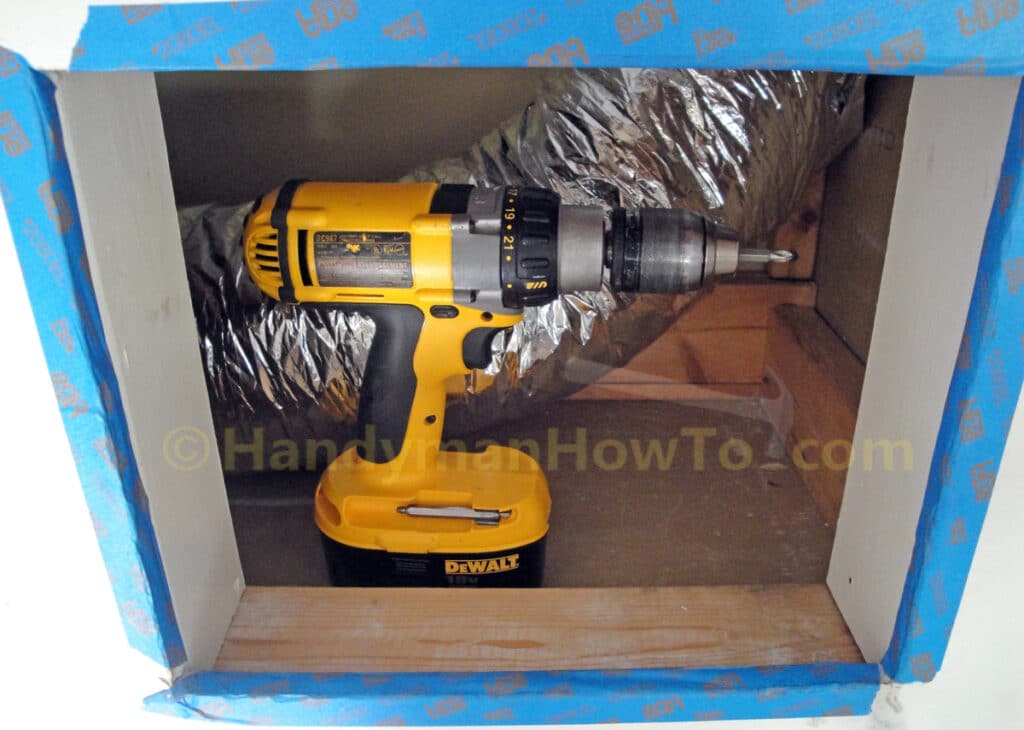
The vertical 2×4 framing members are set flush with the edge of the drywall opening and attached to the interior soffit framing with the 3 inch wood screws:
I measured and cut a 3/8 inch plywood access panel cover that is an 2 inches wider and 2 inches taller than the drywall opening so there is a 1 inch overlap on all sides of the hole. The back of the access panel is lined with self-stick PVC foam camper mounting tape to keep out dust, bugs and prevent drafts:
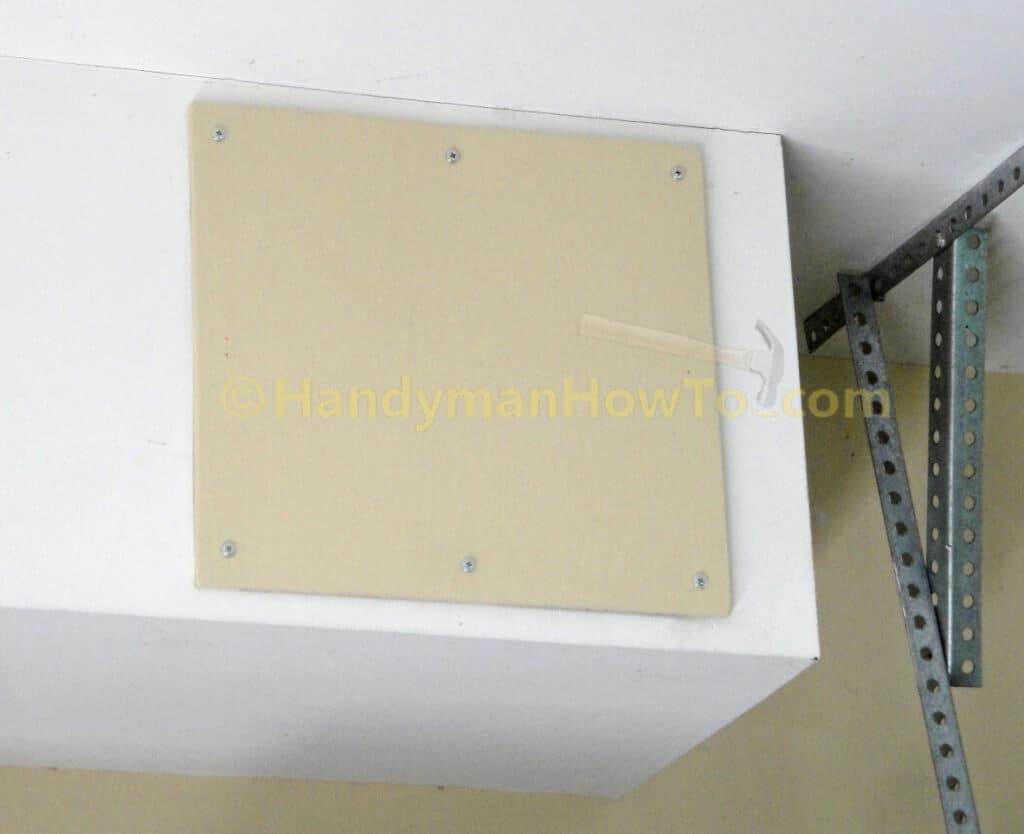
The drywall access panel is mounted to the 2×4 framing with 1-1/4 inch pan head wood screws set 5/8 inch from the panel edges. Use a bubble level to mount the panel plumb. I didn’t set the two wood screws in the center of the left and right side (see small red marks in the photo) because the plywood had a slight outward horizontal bow that caused the sides to pull tight against the soffit drywall. If I later notice a gap on the sides, I’ll install the side screws.
Take care to set the wood screws just tight enough to evenly compress, but not crush the foam camper tape. The foam tape needs to remain spongy to expand and make an air tight seal:
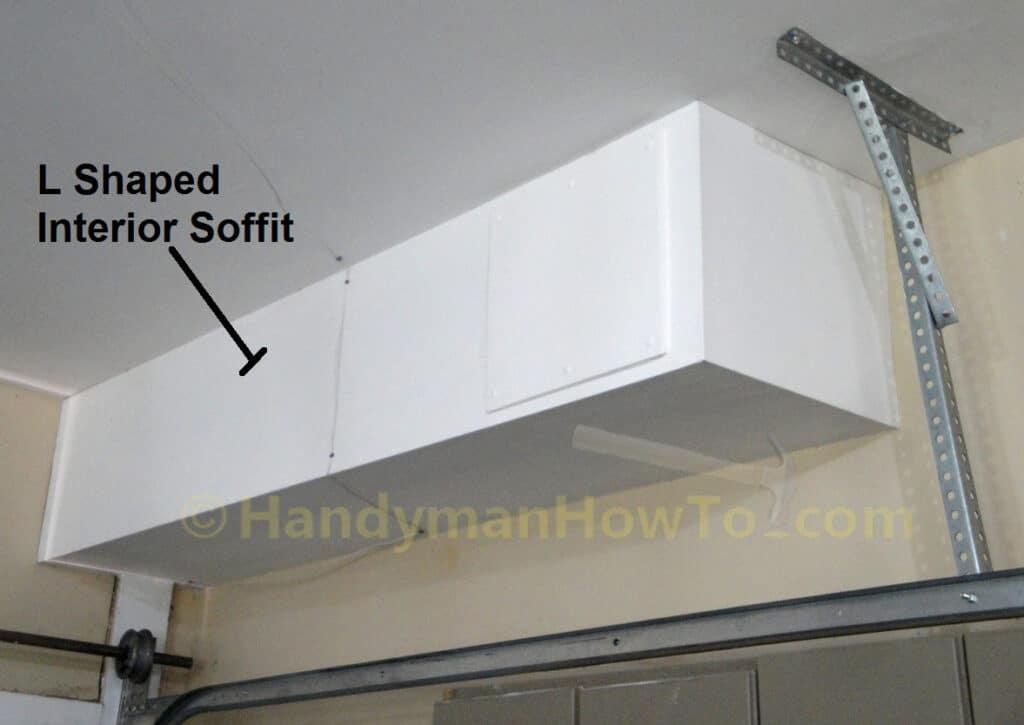
For perspective, this is the interior soffit in the garage after the drywall access panel has been painted white to match:
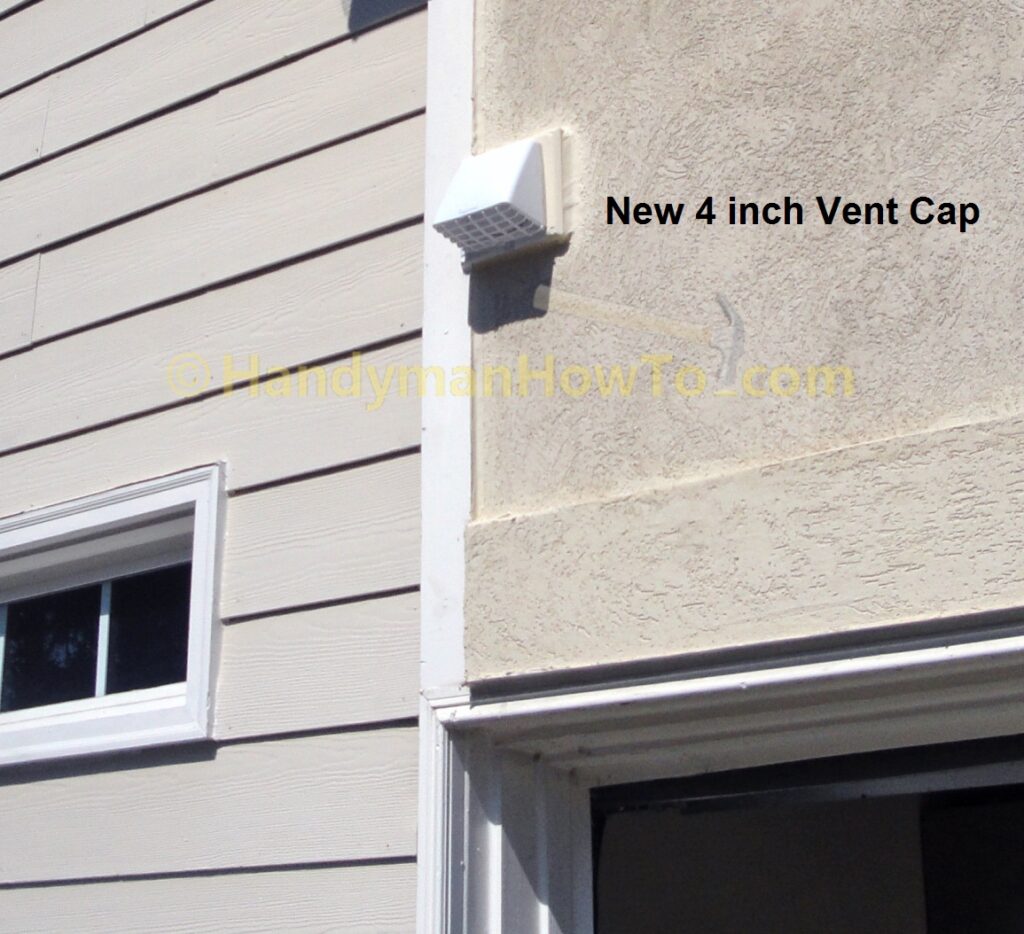
And the new 4 inch vent cap for the bathroom ventilation fan after caulking and painting to match the stucco wall:
This project is continued in How to Replace a Bathroom Exhaust Fan and Ductwork – Part 9.
Thanks for reading,
Bob Jackson