How to Finish a Basement Bathroom – Install the bathroom vanity and connect the plumbing for the faucet and sink drain. This project is continued from How to Finish a Basement Bathroom – Part 12. See the series introduction for the project index.
The bathroom vanity and matching mirror were purchased at Home Depot.
Basement Bathroom Vanity Combo Kit
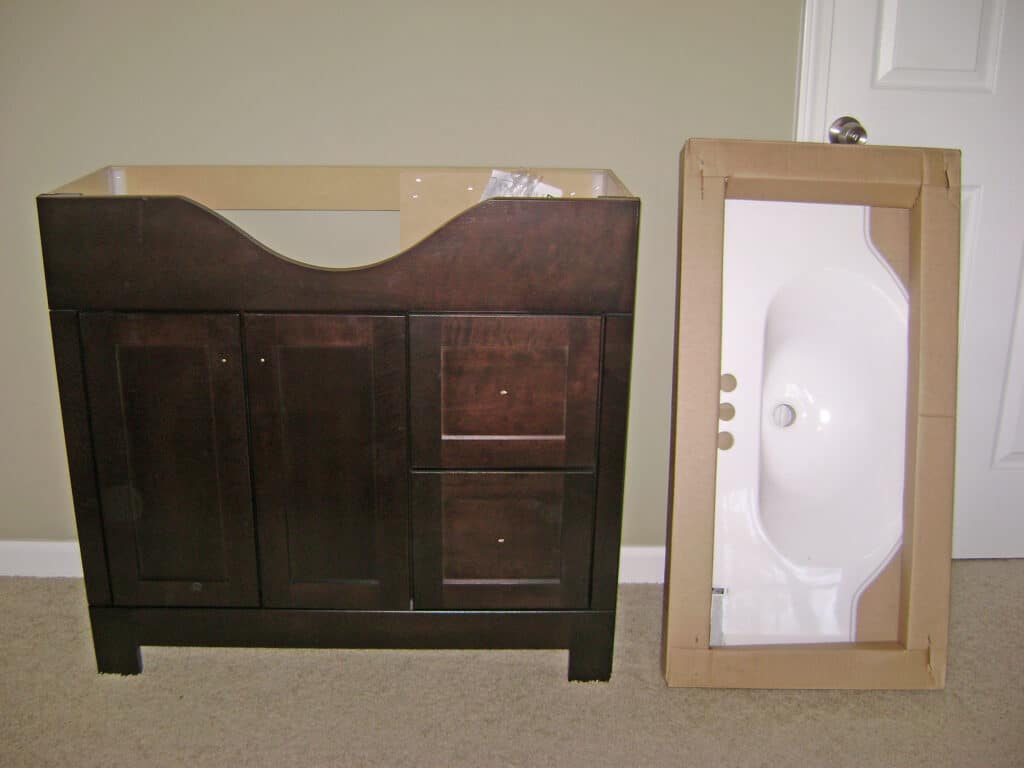
The vanity comes preassembled in a large and somewhat heavy box:

Unpacking reveals the vanity cabinet and cultured marble sink:
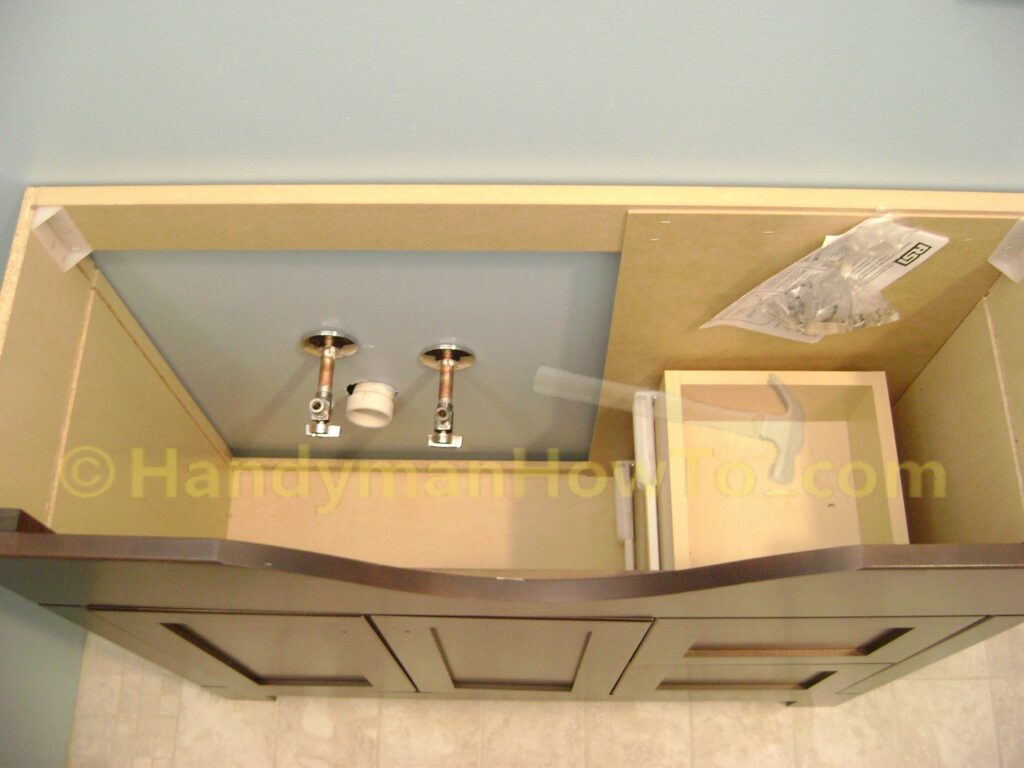
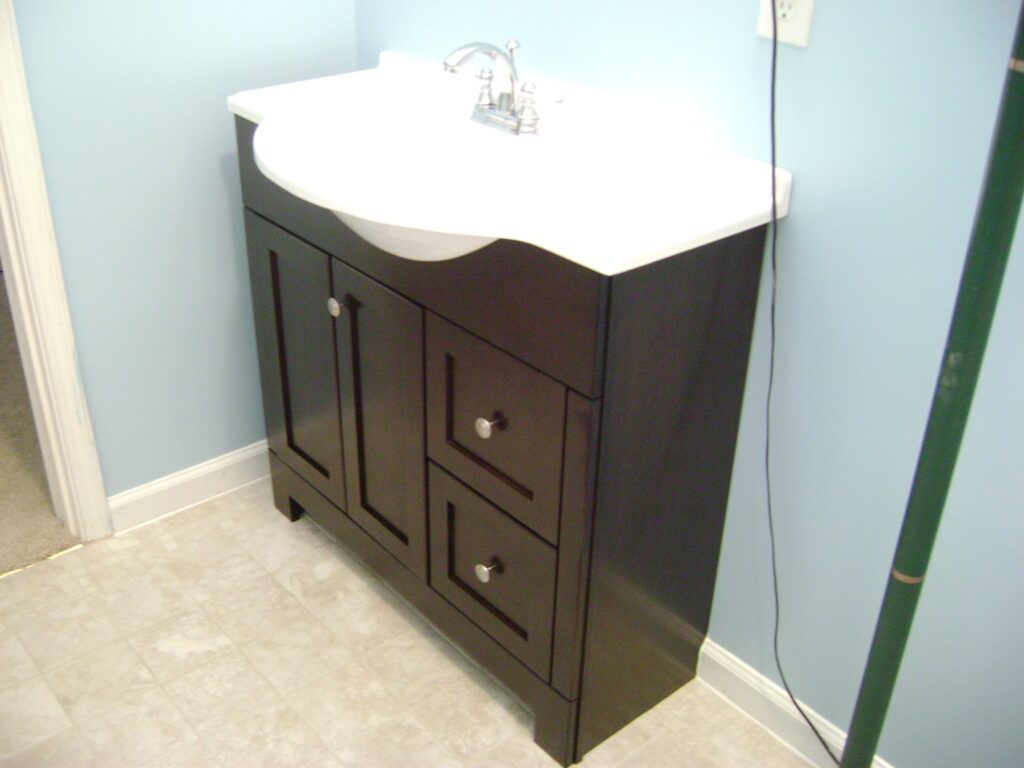
The vanity cabinet is temporarily set in place by the plumbing connections against the wall. The open back of the cabinet provides a large space for the copper water pipes and PVC drain pipe. The marble vanity top is then laid on top of the cabinet. The vanity cabinet is not fastened to the 2×4 wall studs with wood screws at this point.
Install Basement Bathroom Sink Faucet
I chose an American Standard Williamsburg faucet based on the style. It comes complete with the Speed Connect drain “1/3 the parts, connects in 1/3 the time” that I really liked.
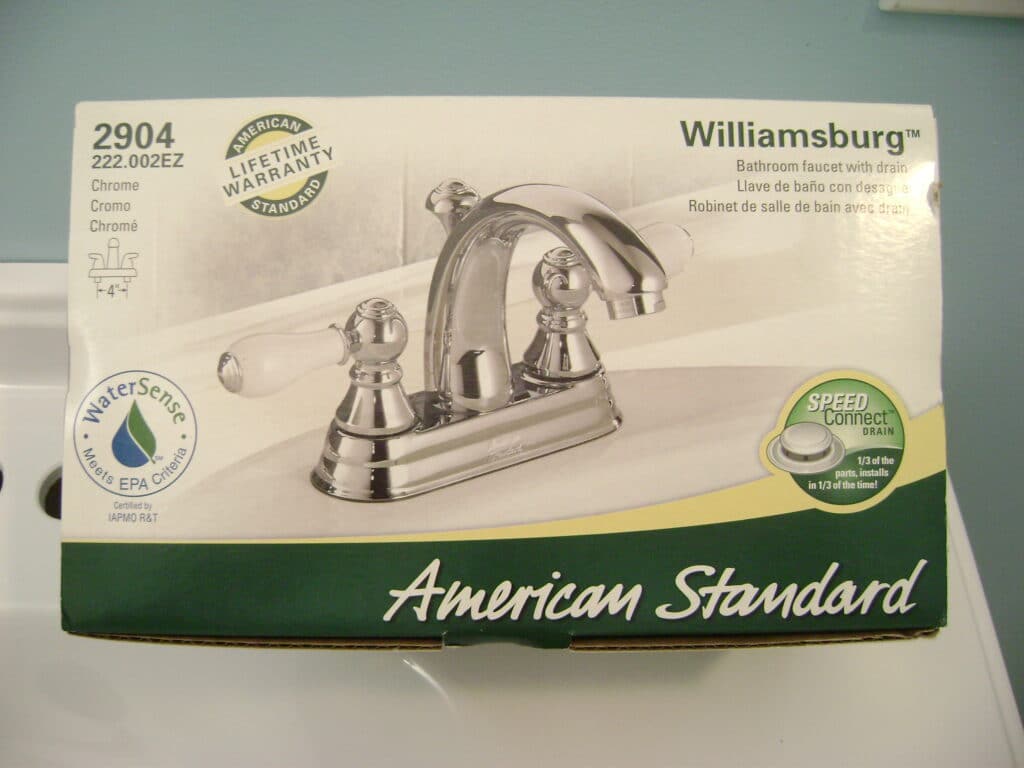
The faucet kit consist of:
- Faucet
- Speed Connect drain
- Alternate style of metal handles should you not like the white porcelain ones
- Plastic mounting nuts
- Installation Instructions

The faucet installs on the sink by inserting it through the mounting holes:
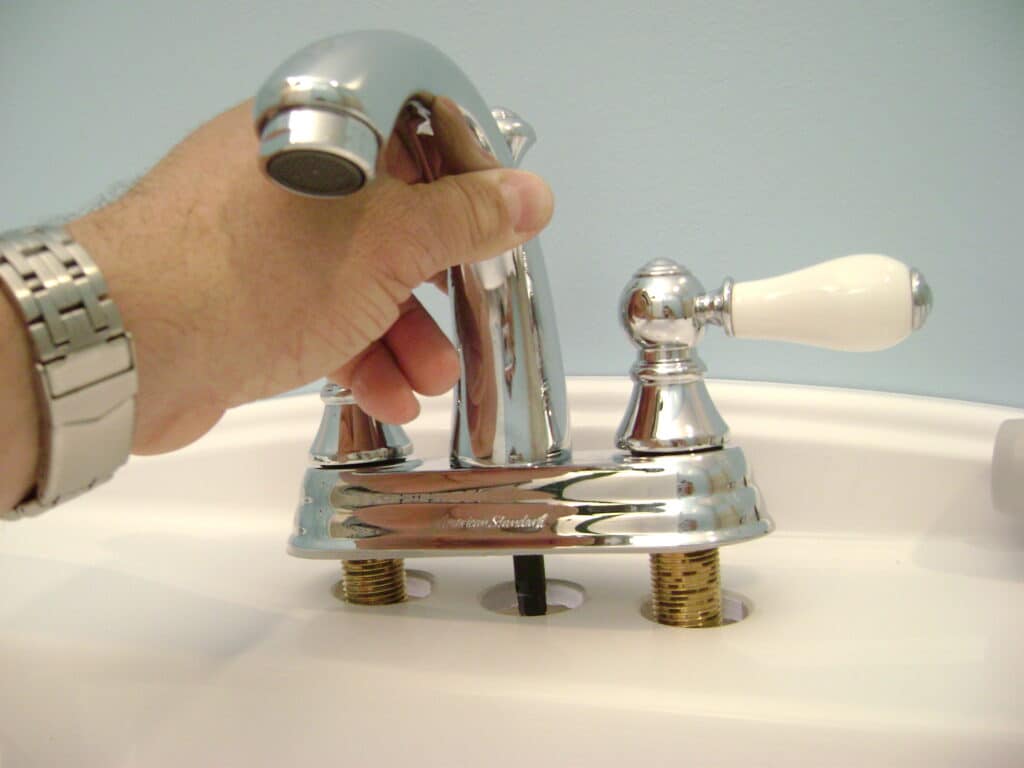
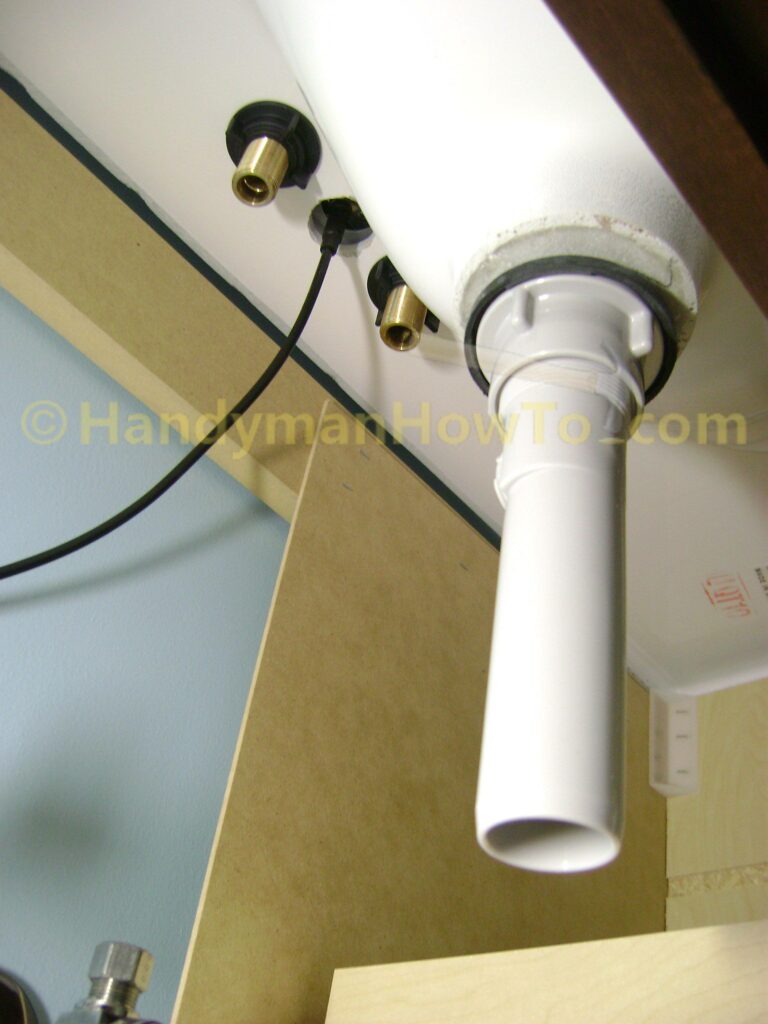
The faucet is held in place by the two black plastic wing nuts threaded on the hot and cold brass shanks (top of photo). The nuts are tightened by hand – no tools required. The next photo is looking up from inside the vanity cabinet.
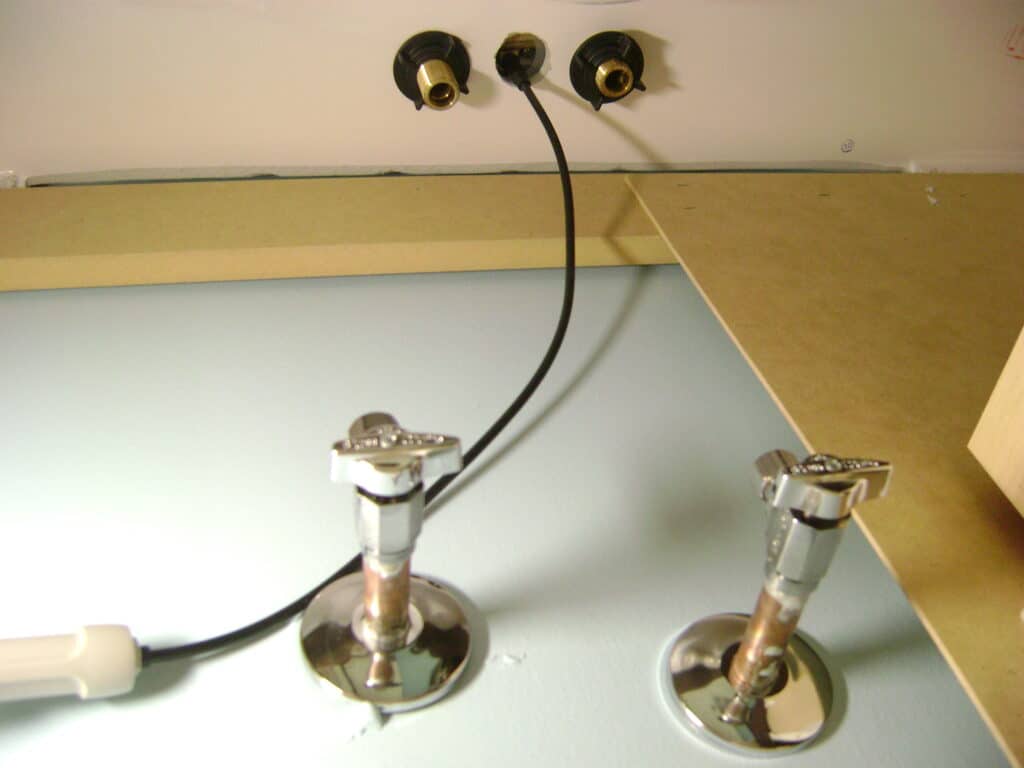
The pop-up drain is inserted in sink drain. Plumber’s Putty is not required because the pop-up drain has a white foam gasket:
The drain is held in place by the gray lock nut and tightened by hand against the black rubber gasket. It’s as simple as it looks!
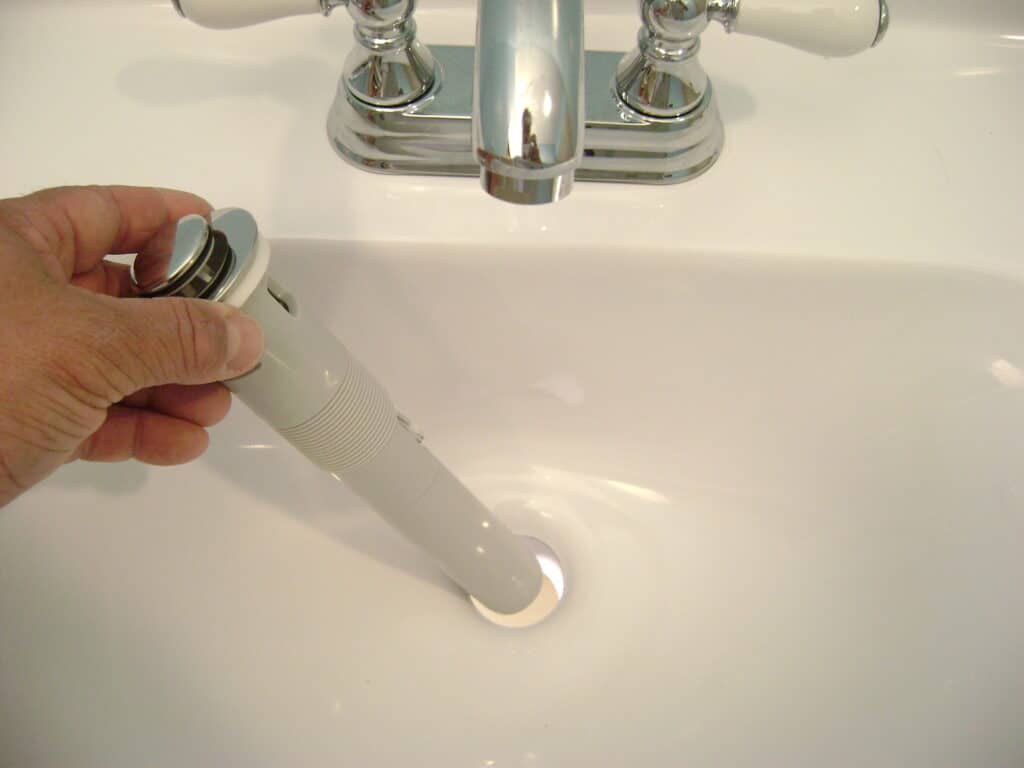
The installed bathroom faucet and sink drain:
This is really cool – the geared end of the Speed Connect popup drain. It reminded me of a speedometer cable on a car. Moving faucet drain level rotates the gear to open and close the popup drain. It works very well.
To connect the popup drain cable, push the faucet drain lever all the way down and pull the drain body in the sink up then screw the drain cable to the drain body as shown. Check the popup drain operation by working the faucet handle.
Connect the Bathroom Sink Drain Plumbing
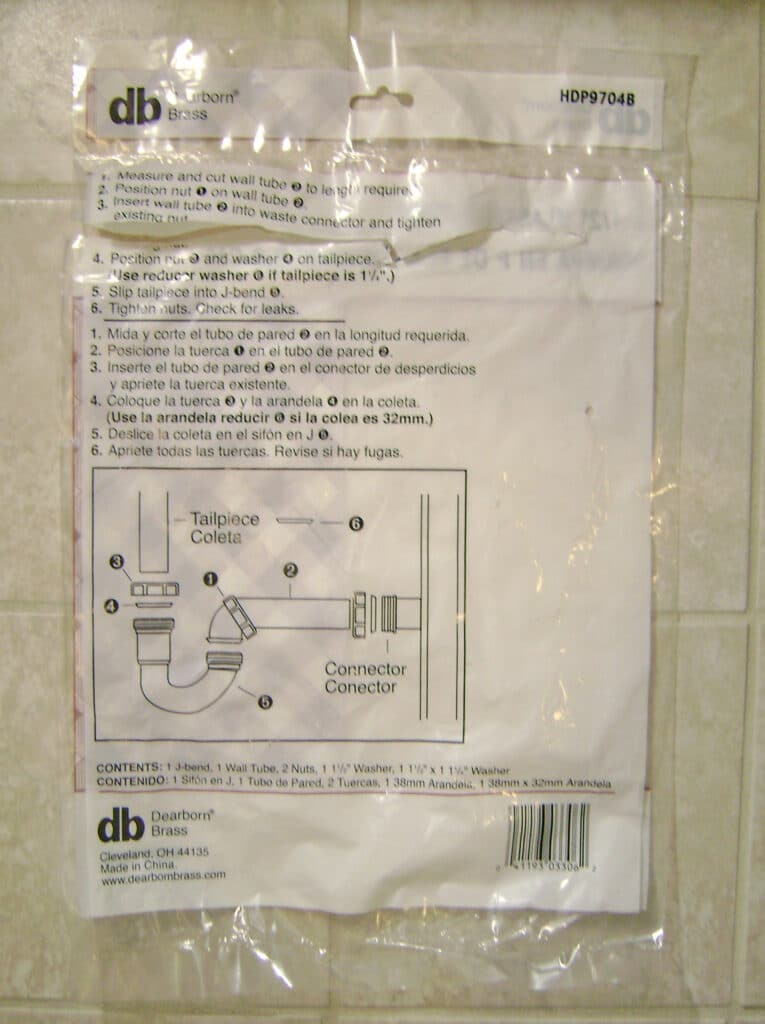
The sink drain PVC plumbing requires some measuring and cutting to connect the drain plumbing. I purchased a 1-1/2 inch P-trap kit from Home Depot. The purpose of the P-trap is to create a trap seal to prevents sewer gas and odors backing out of the bathroom sink drain.
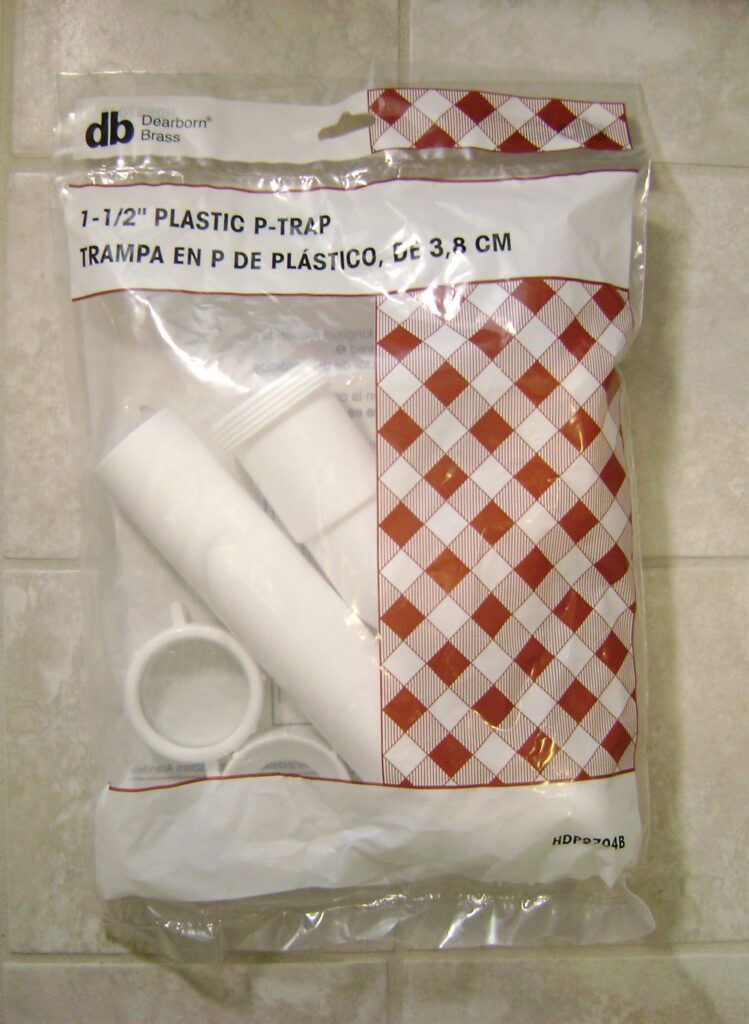
A schematic diagram is on the back of the P-trap package.
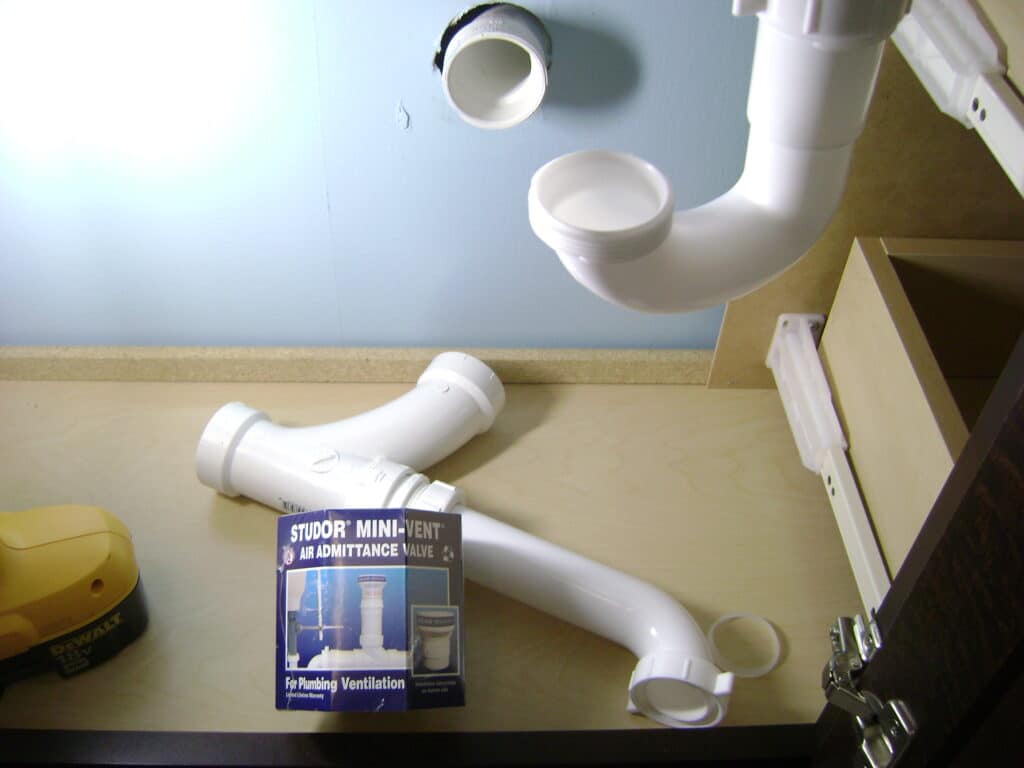
Studor Mini Vent Sink Drain Plumbing
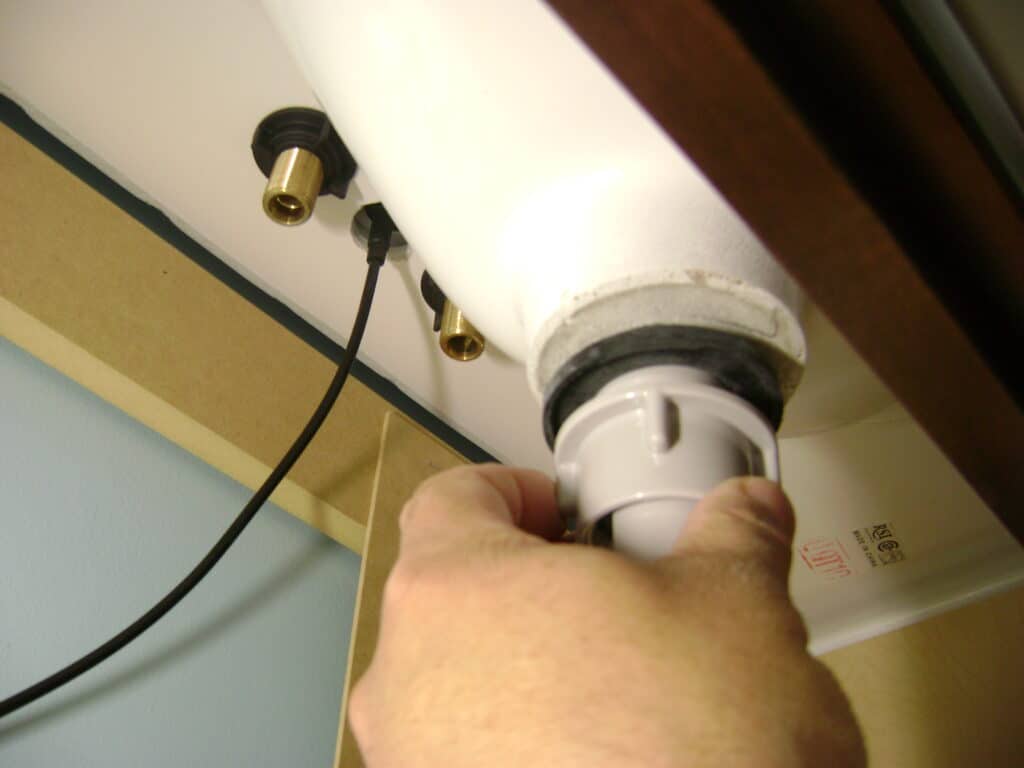
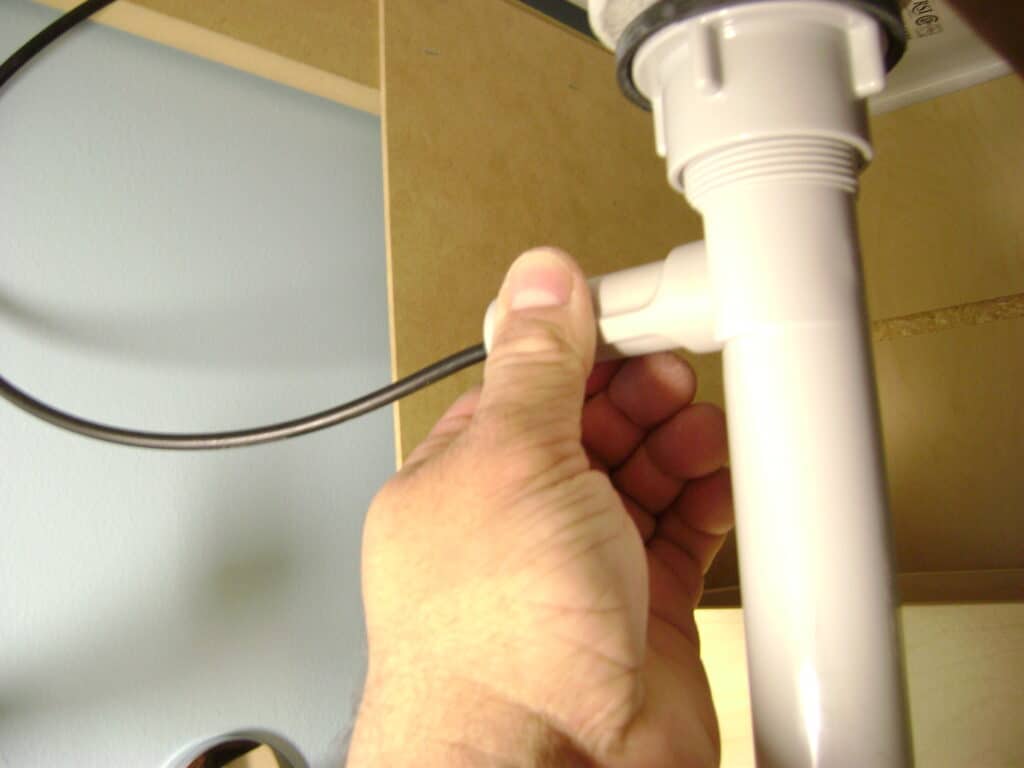
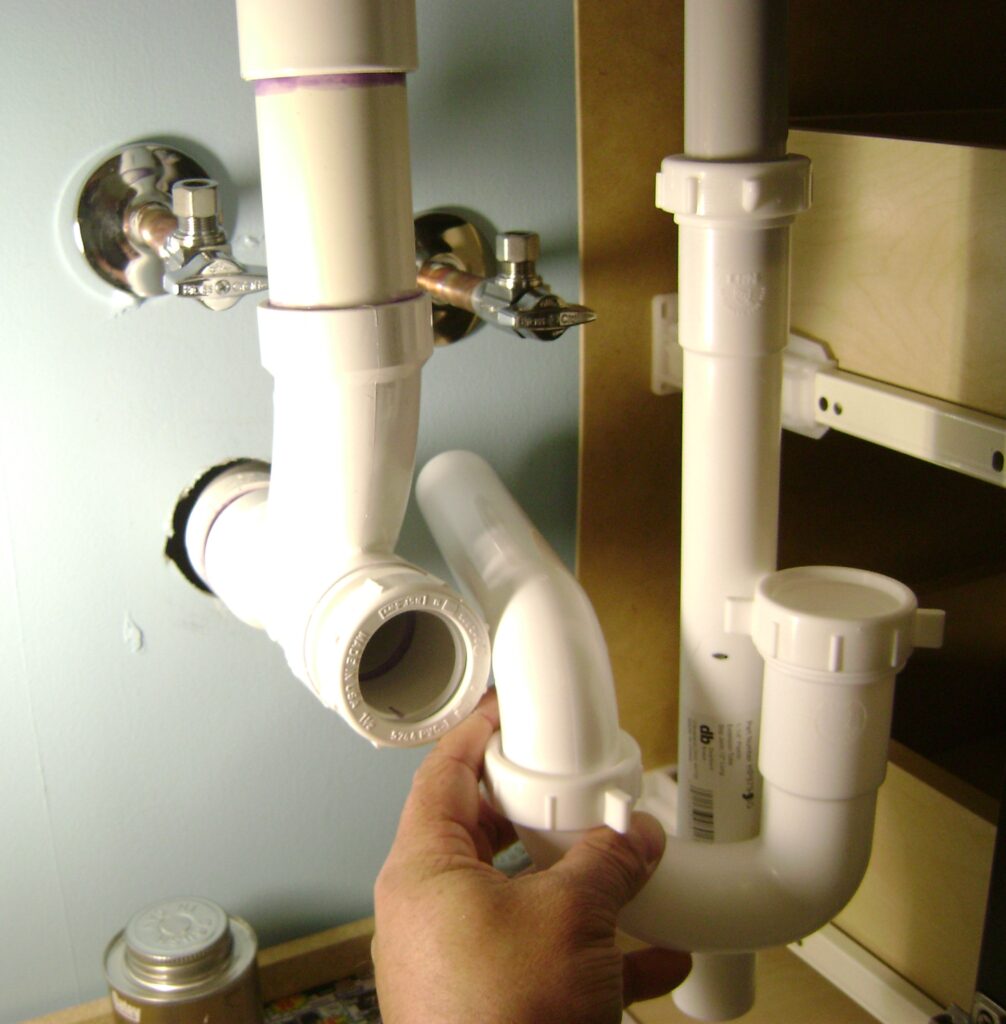
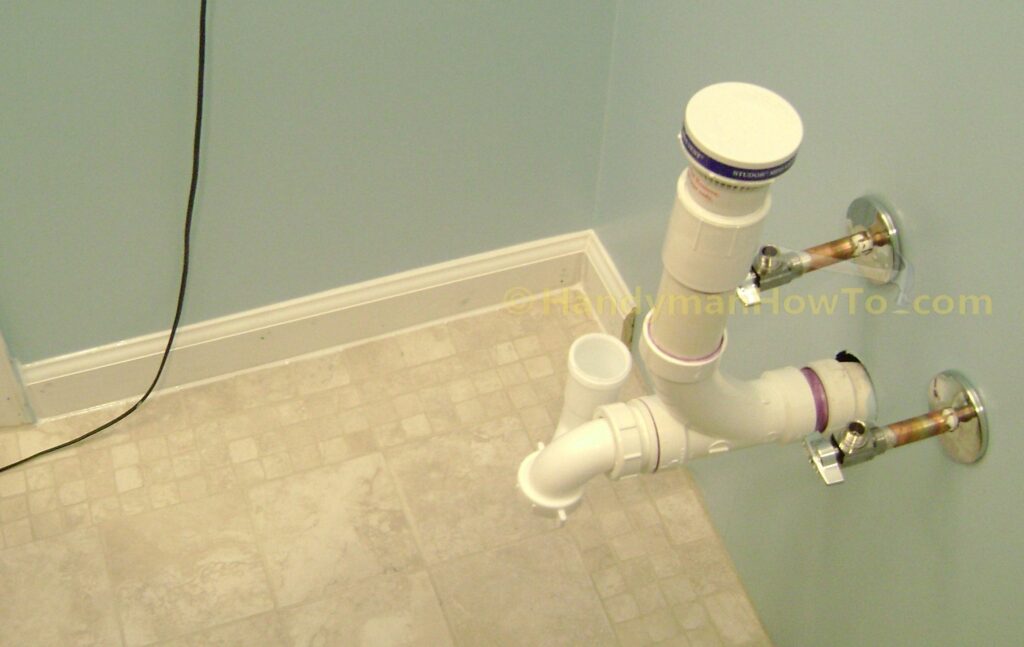
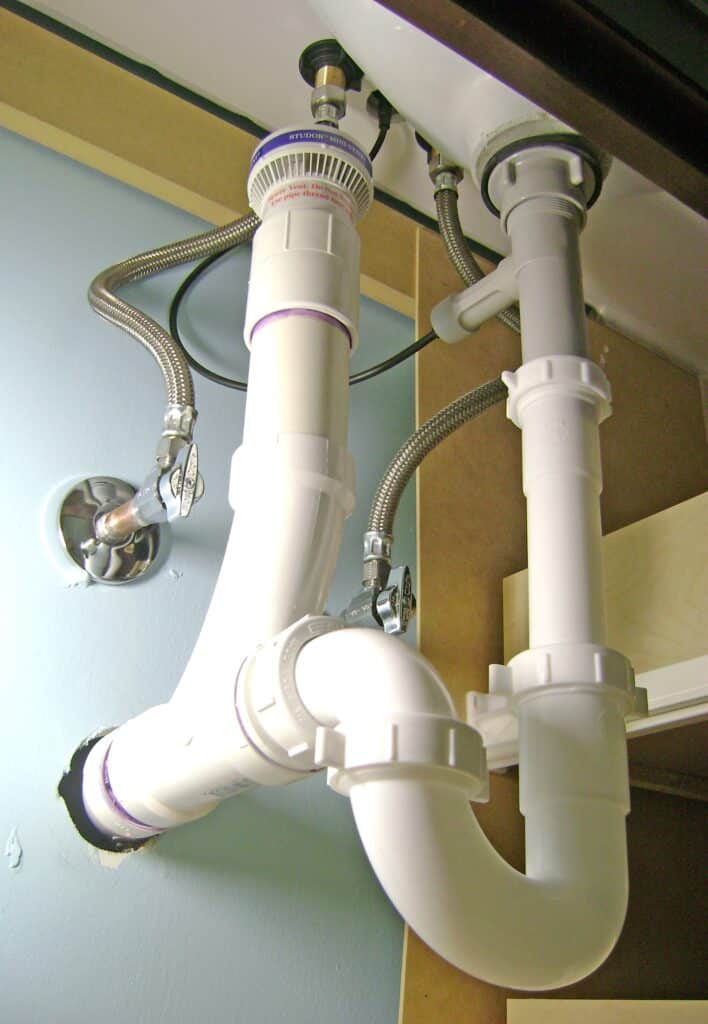
I’m fitting up the drain plumbing in the photo below. The P-trap is attached to the drain body of the sink and a wye section of PVC pipe. A Studor Mini-Vent (also see my article on sewer gas smell for details) prevents the P-trap from getting sucked dry by equalizing the air pressure in the pipe; and it’s required by the Building Code in most areas.
Measure and fitting the sink P-trap drain plumbing:
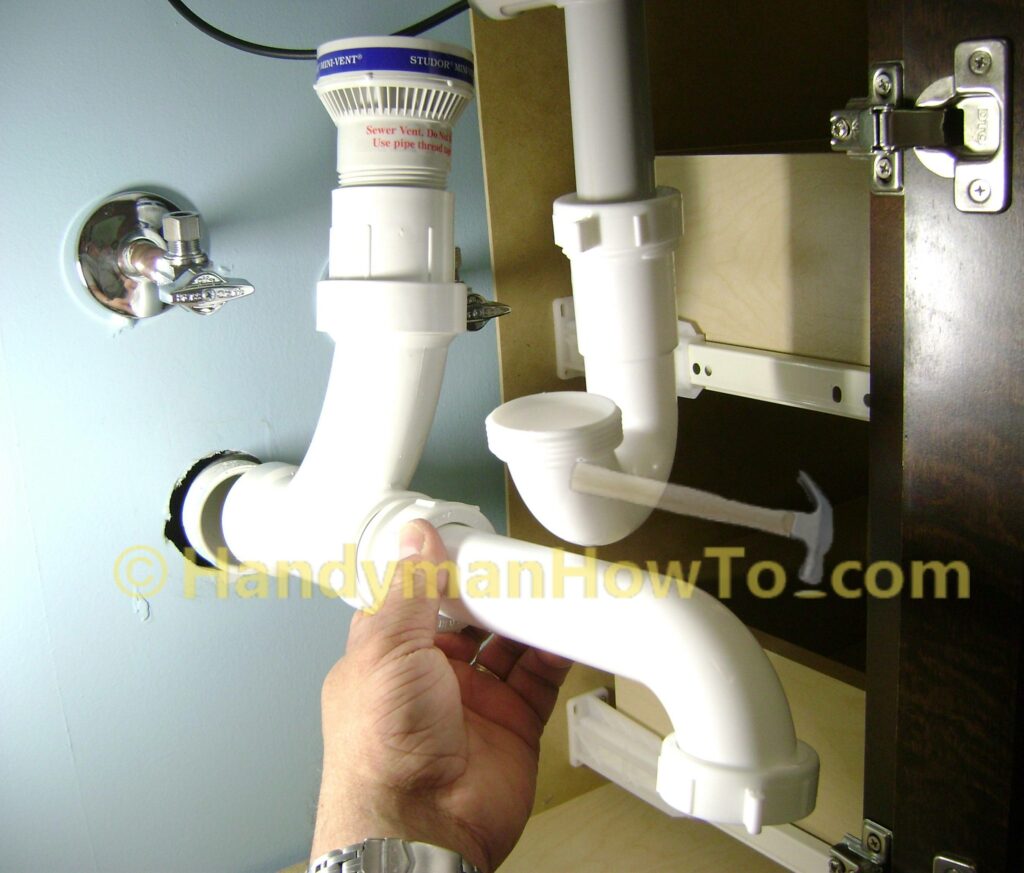
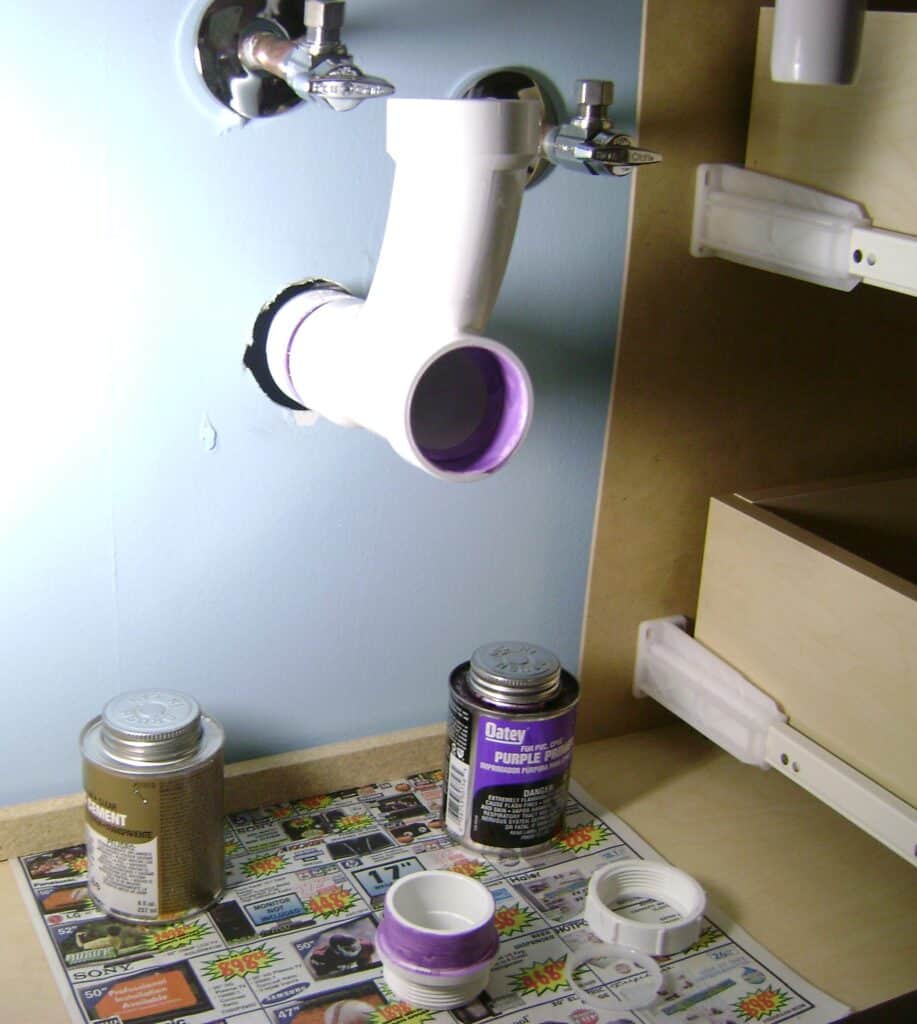
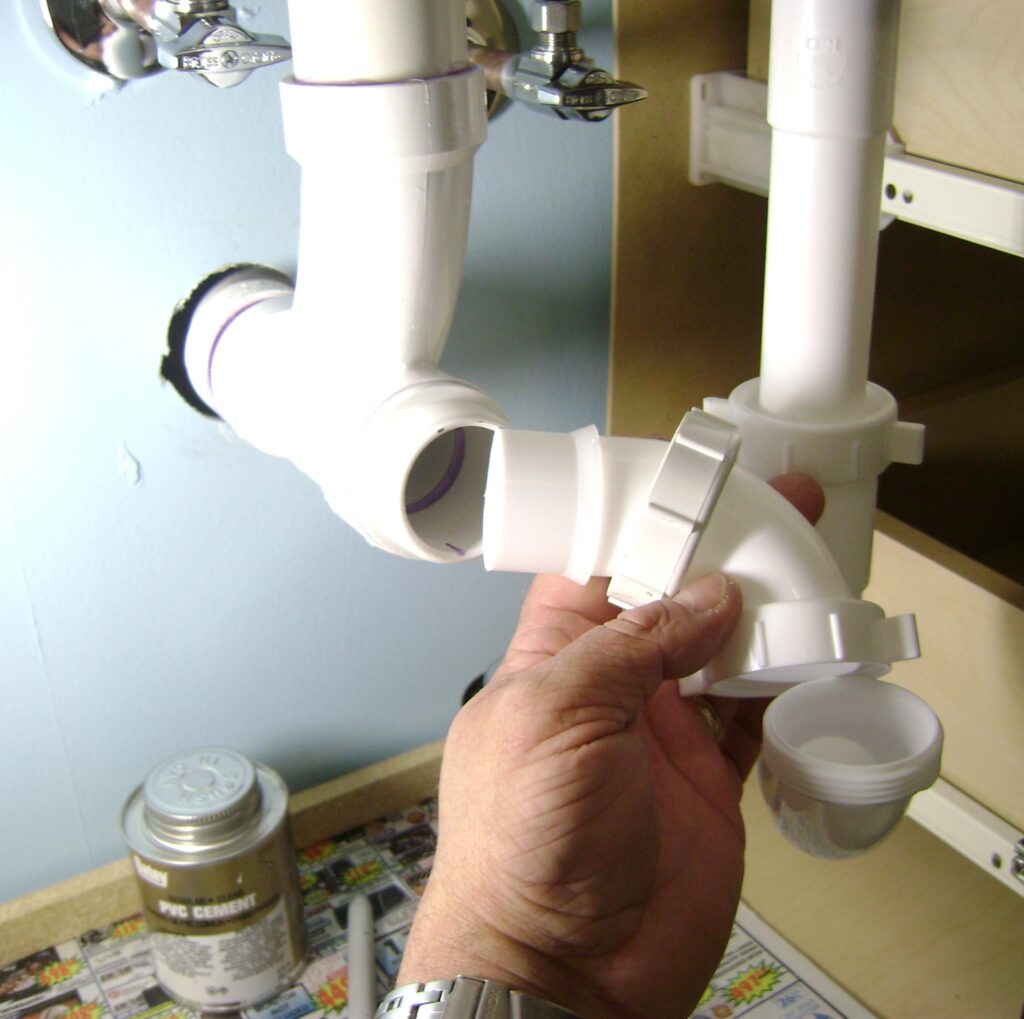
Another view of the bathroom sink drain P-trap and Studor air vent installation process. The various pipe and fittings are “dry fit” first and when I’m satisfied the pieces fit together, the parts are glued or screwed together:
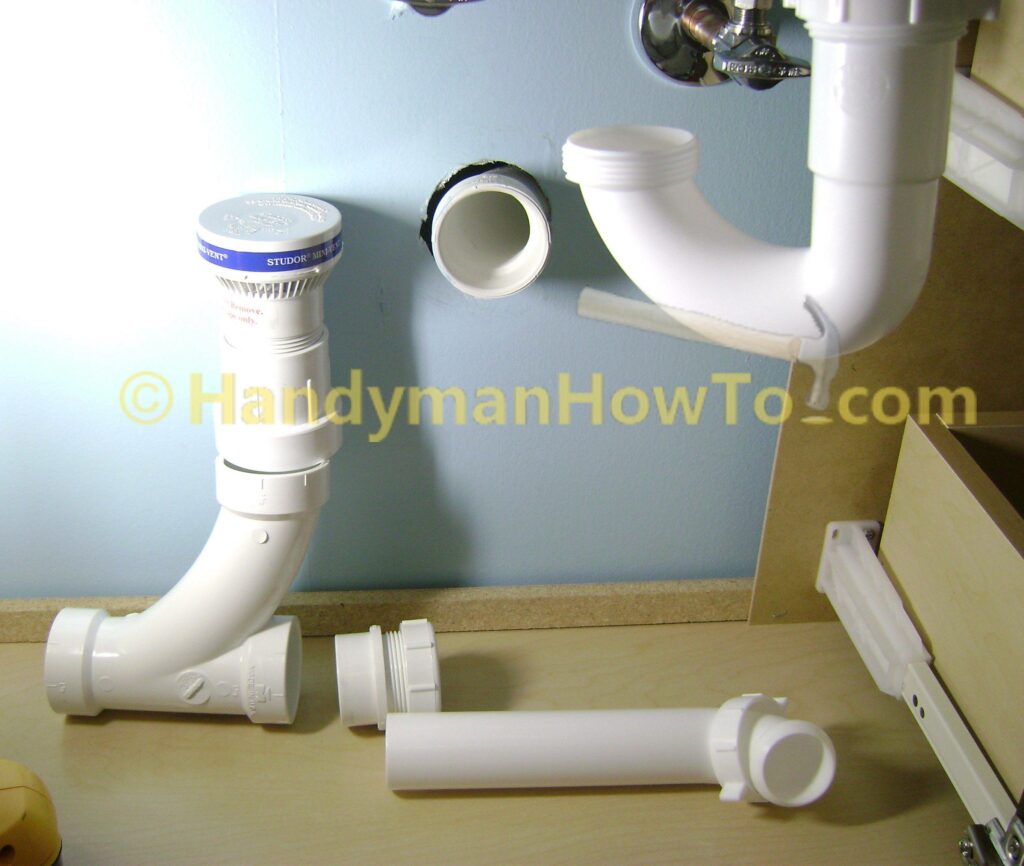
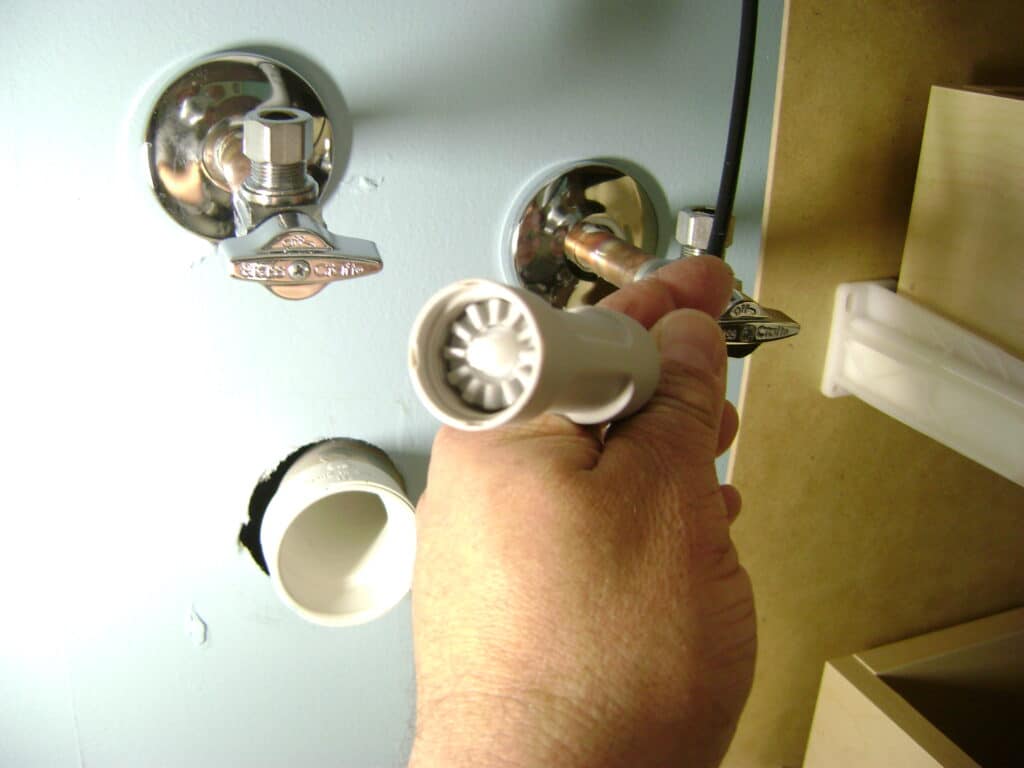
A short 1-1/2 inch section of PVC pipe is cut to join the wye to the sink drain pipe in the wall:
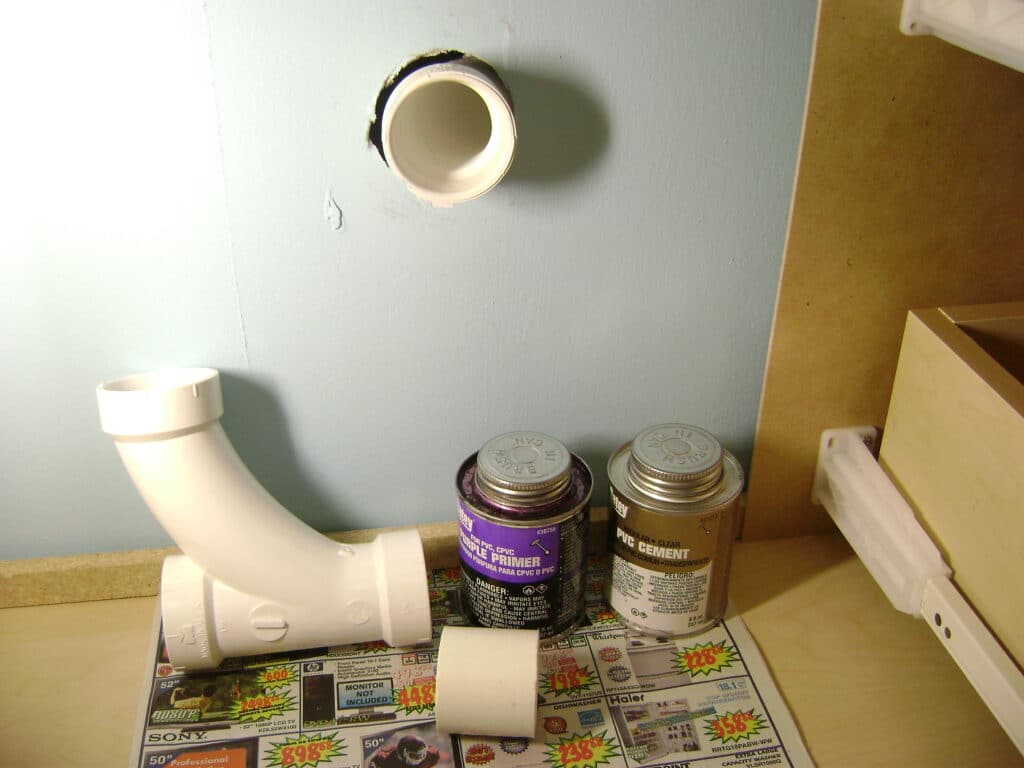
The 1-1/2 inch female P-trap adapter (bottom of photo) is coated with purple PVC primer and ready to be glued to the wye:
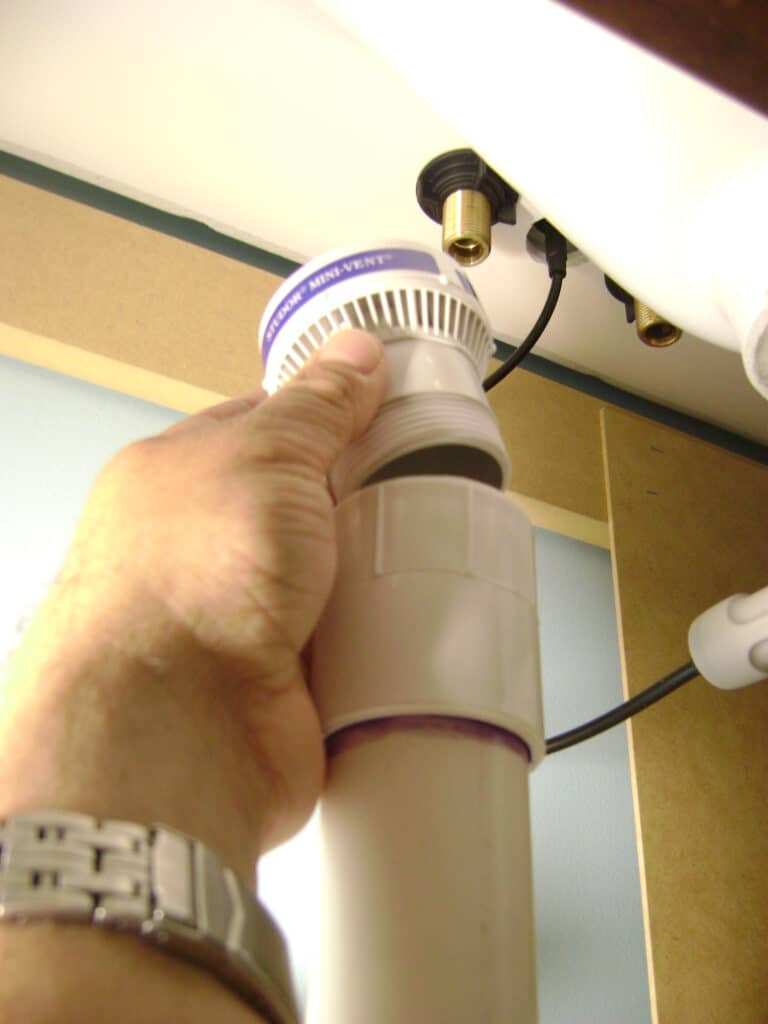
Install the Studor Mini Vent
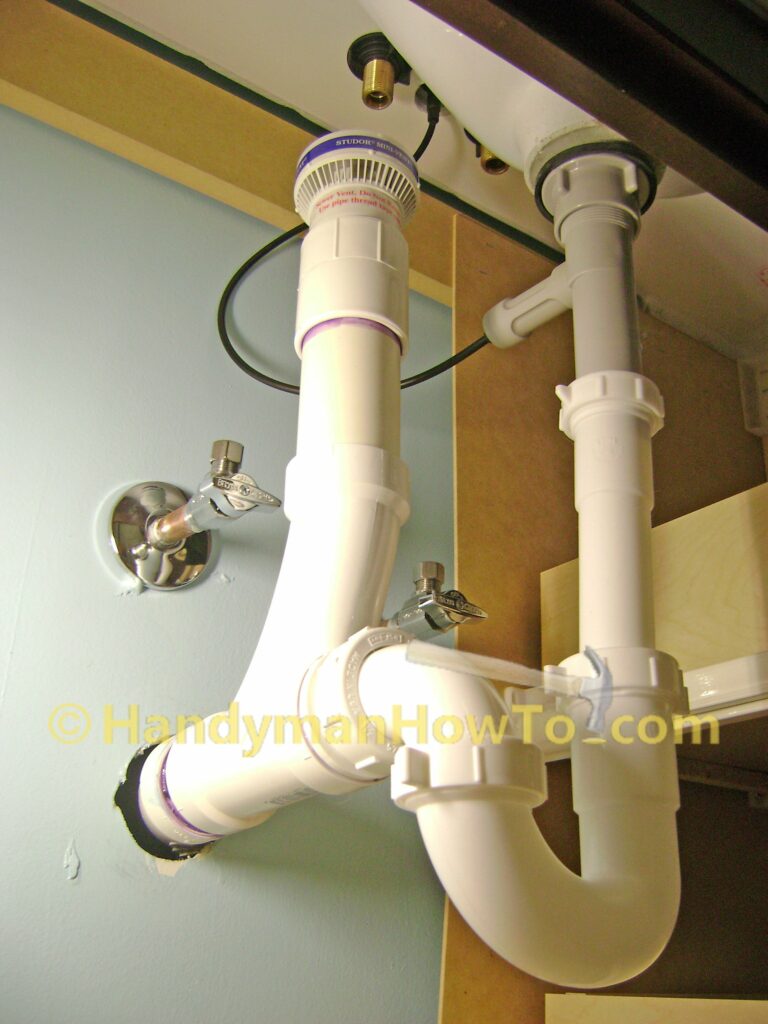
The Studor Mini Vent should be installed as high as practical (minimum 4 inches) above the drain pipe so there’s no chance of waste water backing up the vent pipe. The Mini Vent threads are sealed with Teflon plumbers tape and screwed into a 1-1/2 inch PVC female threaded adapter:
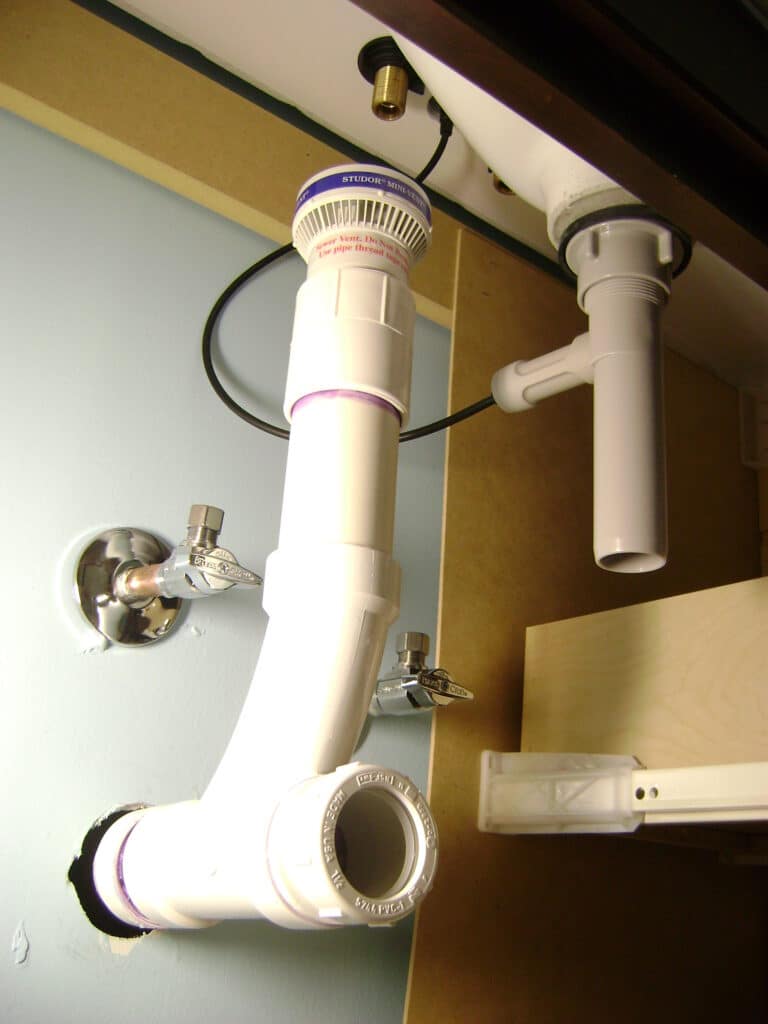
Progress thus far – Studor Mini Vent is set as high as practical above the horizontal drain line and the 1-1/2 inch female trap adapter is glued into the PVC wye:
Connect the Bathroom Sink Drain P-Trap
The P-trap arm is measured and marked for cutting because it’s too long. The trap tube should extend inside the PVC female trap adapter an inch or two at most:
The sink drain P-trap arm is shortened by cutting with hacksaw and deburring the pipe end. Note the P-trap assembly sequence in the photo:
- The threaded locking ring (or nut) from the female trap adapter is placed over the P-trap arm.
- Then white conical compression gasket from the PVC trap adapter is slipped onto the arm.
The orientation of the cone compression gasket is critical; the wide end faces the locking ring.
The final P-trap drain assembly steps are:
- Insert the P-trap arm into the female trap adapter, slide the white compression gasket into place and tighten the threaded locking ring/nut.
- Tighten the P-trap lock ring on the vertical section of pipe to the bathroom sink popup drain (center right of photo).
The are slip nut connections make for easy adjustments for correct fit and alignment:
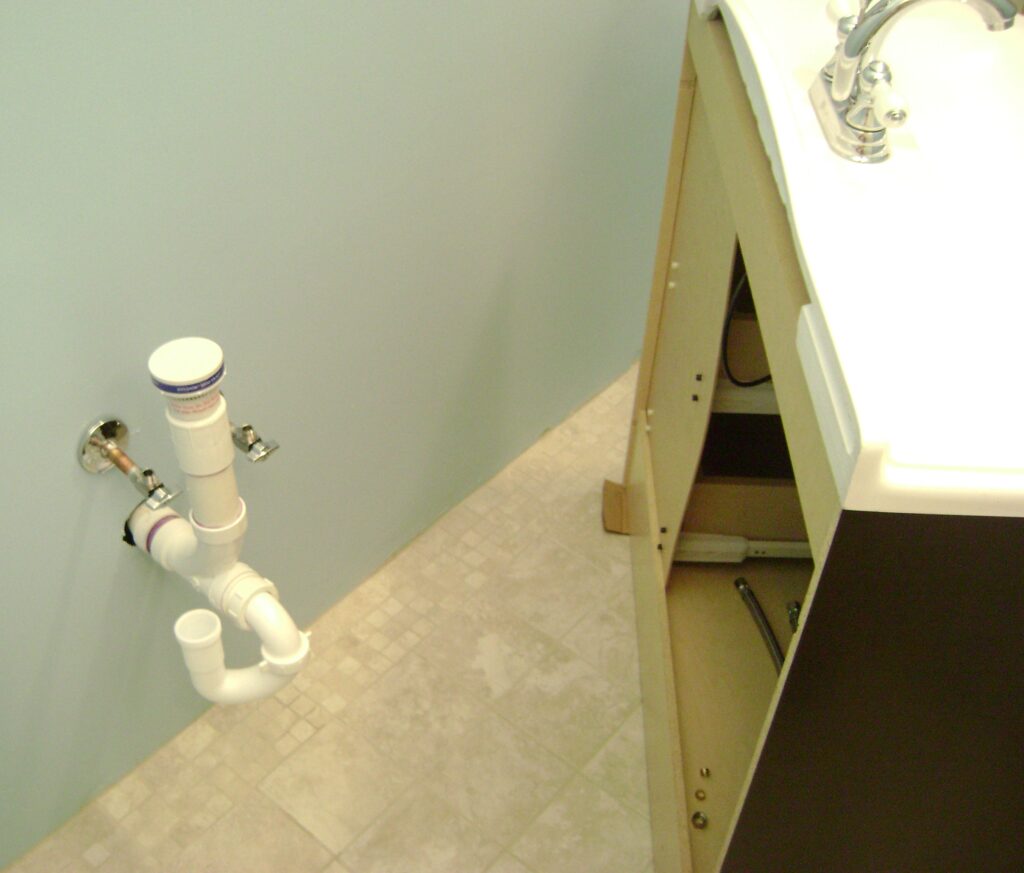
The bathroom sink drain plumbing is complete. I could connect the hot and cold water faucet hoses now, but I’ll install the baseboard first.
Install the Bathroom Vanity Baseboard
I disconnected the sink drain P-trap and moved the vanity away from the wall so I can install the baseboard trim in the corner; otherwise I wouldn’t have room to work.
The new baseboard is nailed to the wall studs with white finishing nails. The baseboard is fitted exactly against the sides bathroom vanity. This not only looks professional but prevents the cabinet from moving if bumped.
View of the baseboard fitted against the bathroom vanity cabinet.
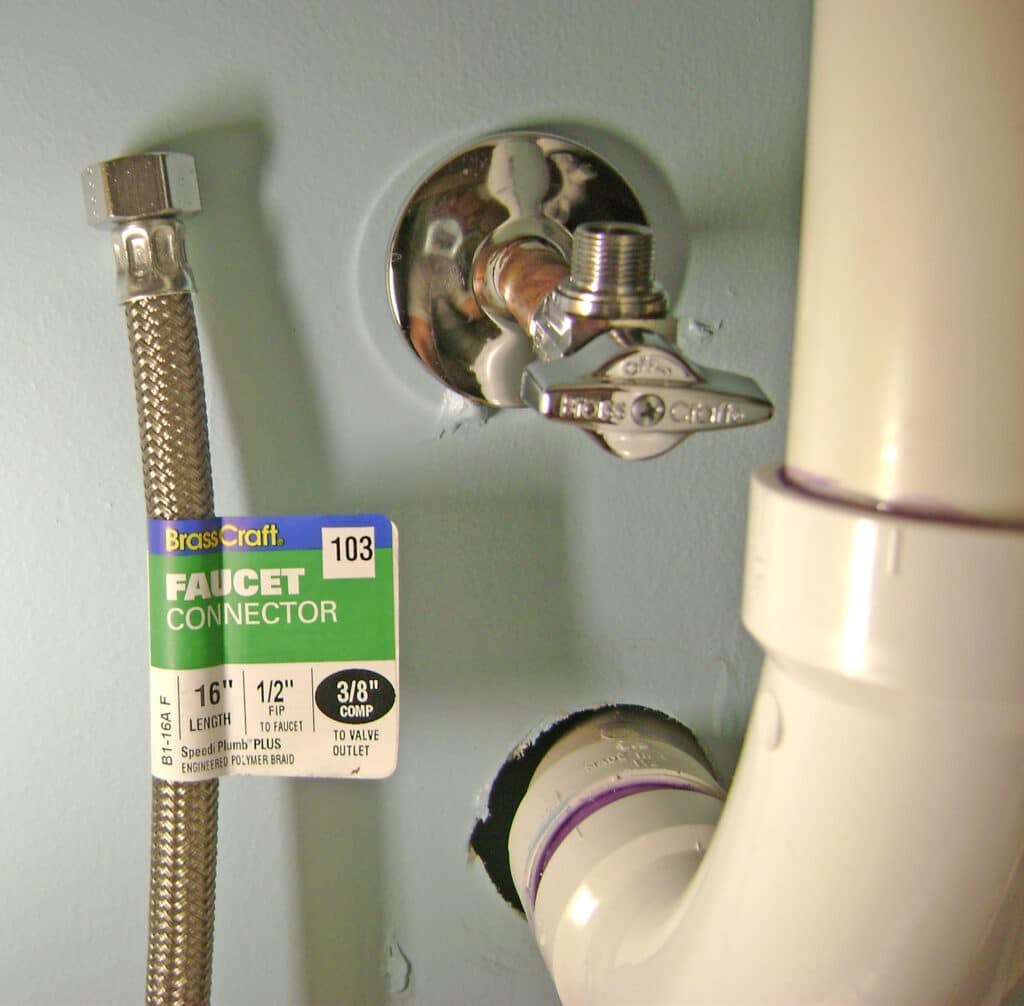
Bathroom Sink Hot and Cold Water Faucet Connectors
The braided metal faucet connector is threaded onto the hot and cold water ballcock and the faucet. Use the shortest available faucet hose to minimize any chance of kinks and constrictions.
The faucet hoses are connected to the brass stems of the faucet. A small adjustable wrench is required to tighten the hoses:
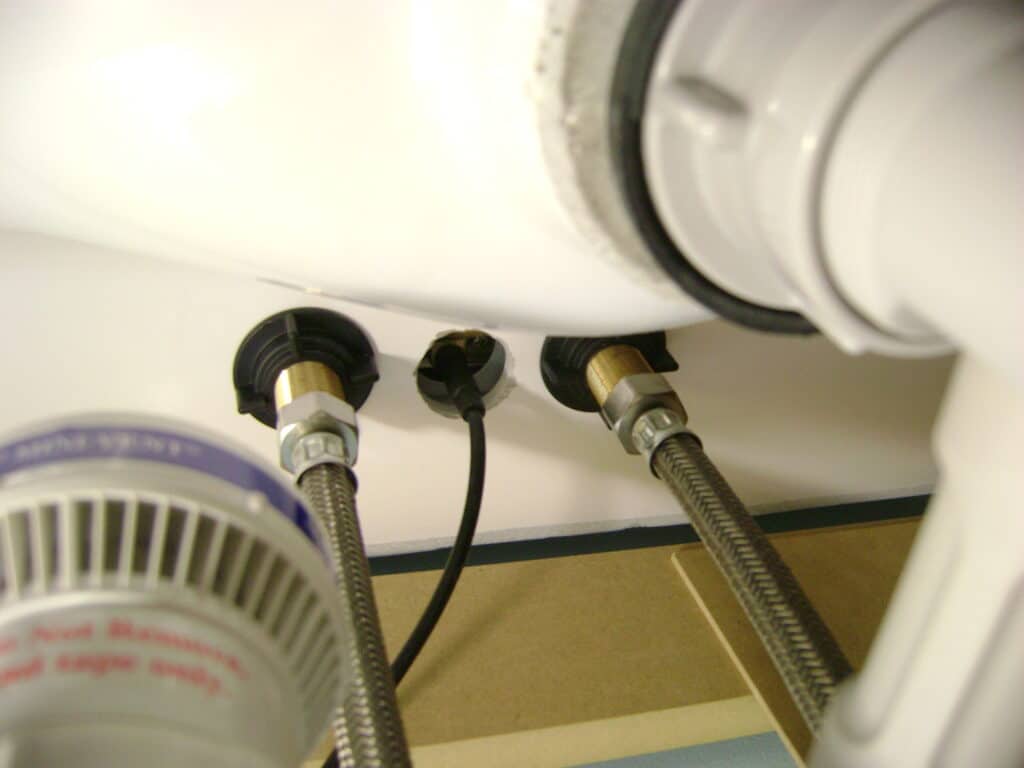
The sink faucet hoses are connected to the hot and cold water supply stop valves. Then the sink drain P-trap is reconnected:
Fasten the Vanity to the Wall
Locate and mark at least one wall stud behind the vanity with a stud finder. Because I’d already hooked up the plumbing I located the studs on the wall above the sink and transferred the mark to the interior cabinet. Remove the vanity drawers if necessary for access. Drill 1/4 inch pilot hole in the vanity back rail. Fasten the vanity cabinet to the studs with 3 inch long wood screws.
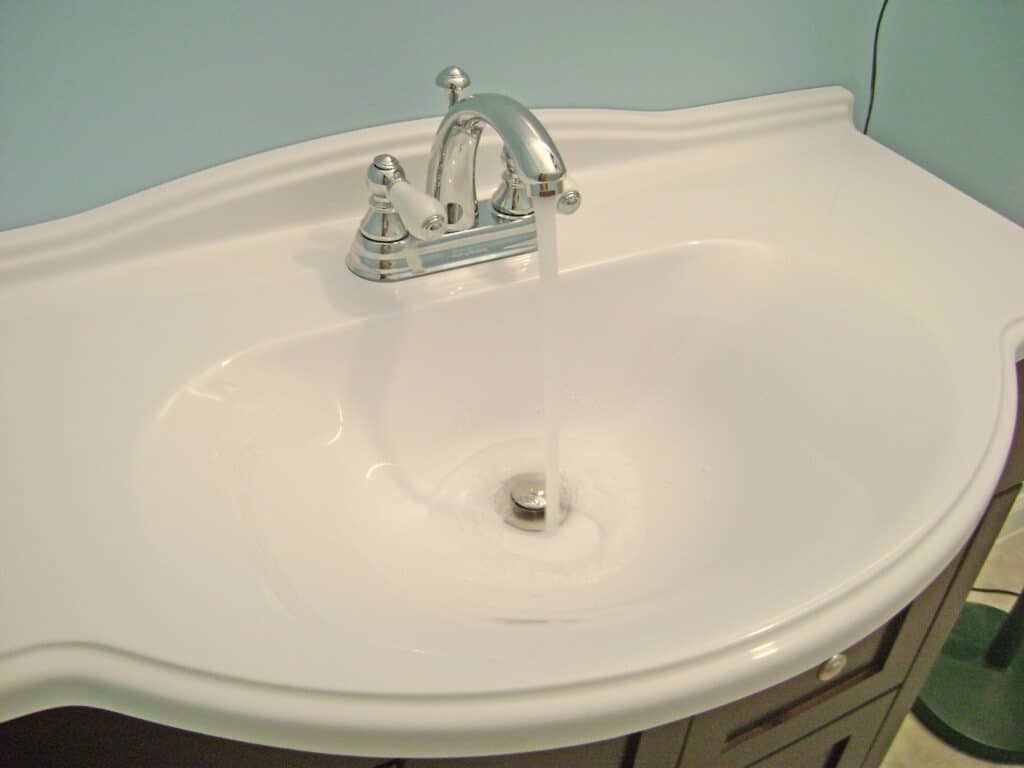
The basement bathroom sink plumbing is now complete! Turn on the water supply valves, open the faucets and check the plumbing for leaks:
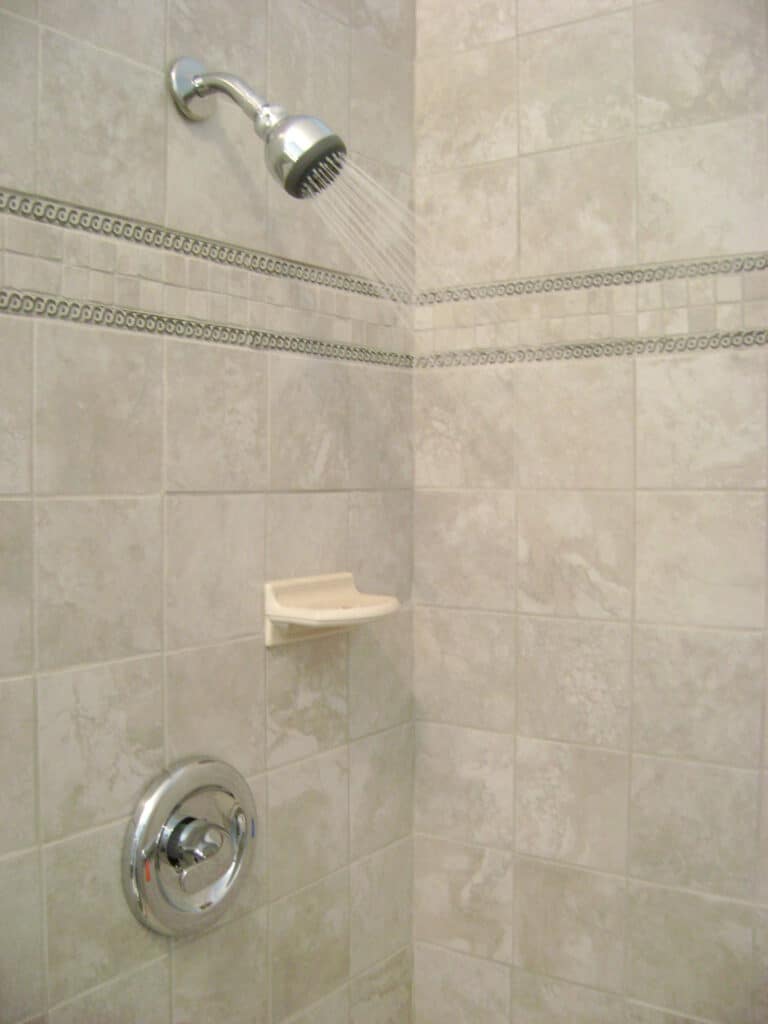
Running the shower:
I also flushed the toilet several times. Everything worked fine.
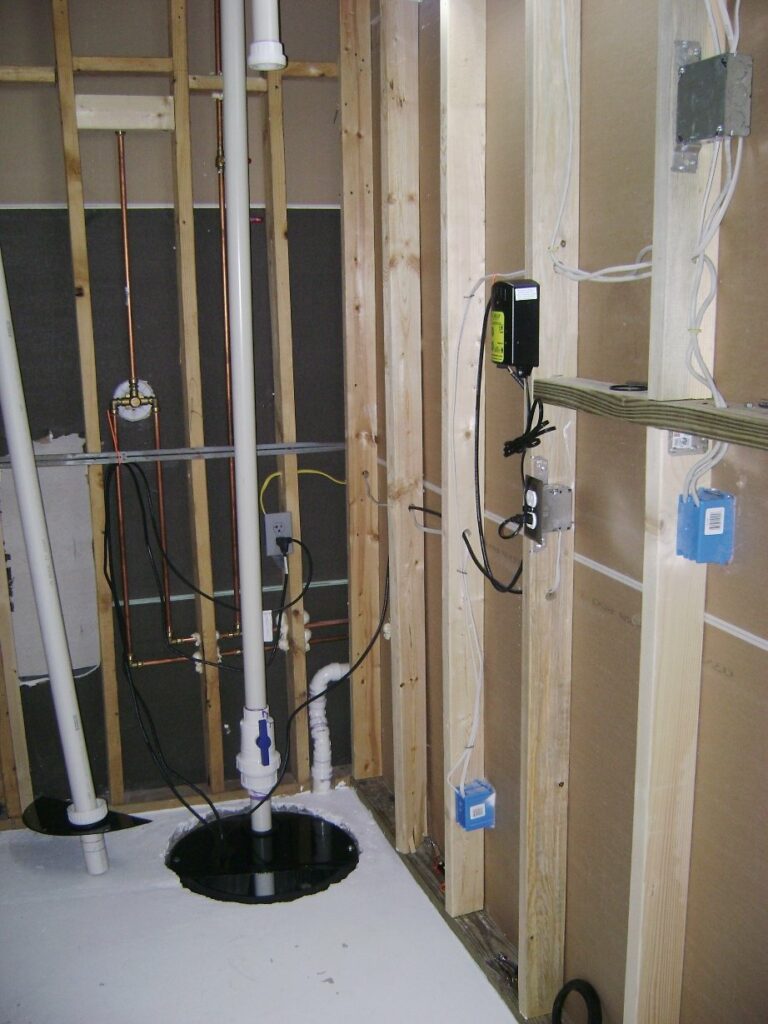
Basement Bathroom Sewage Pump Operation
The basement bathroom drains into the sewage basin for removed by the sewage ejector pump. I left off the basin lid so I could inspect the sewage pump operation and check the PVC sewer lines for leaks. Everything was perfect!
The following video shows how the Liberty sewage pump operates:
- Water from the bathroom faucet fills the basin.
- The mechanical float switch turns the pump on at the high water level.
- The pump lifts the water out of the basin to the main sewer line overhead.
- The mechanical float switch turns the pump off at the low water level.
- The inline check-valve prevents water from draining back into the basin.
The basin only looks dirty because dirt and rainwater got into it when the house was built and open to the weather. PVC plastic shavings are floating on the water surface when I trimmed the basin outlet with a Rotozip tool.
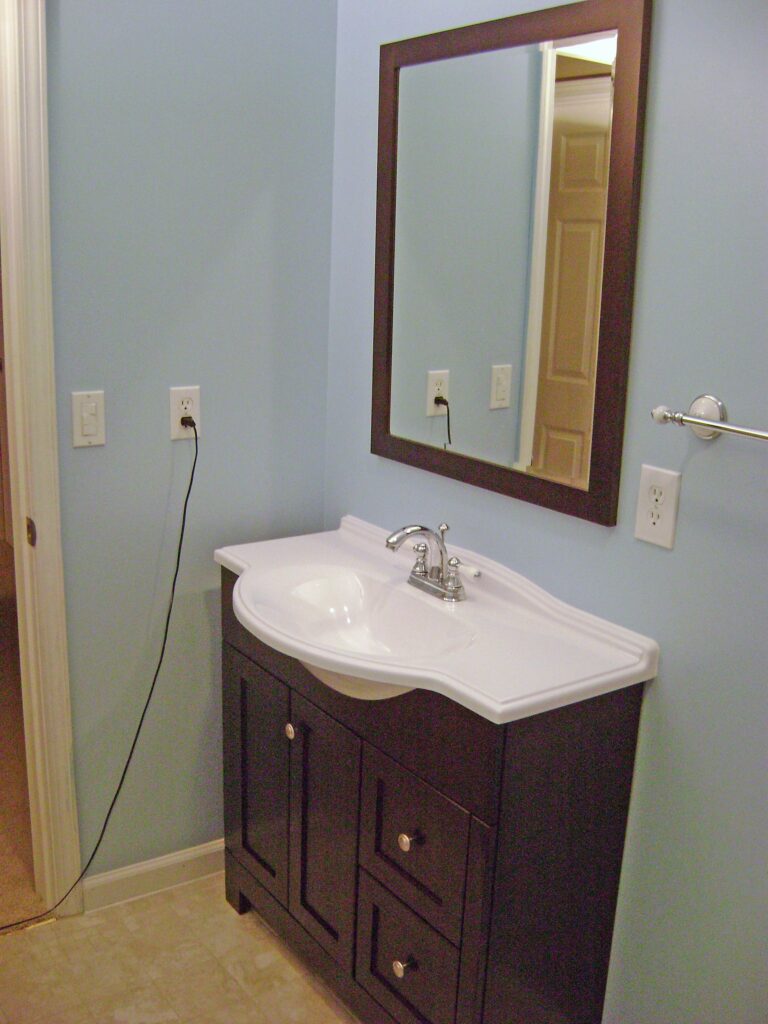
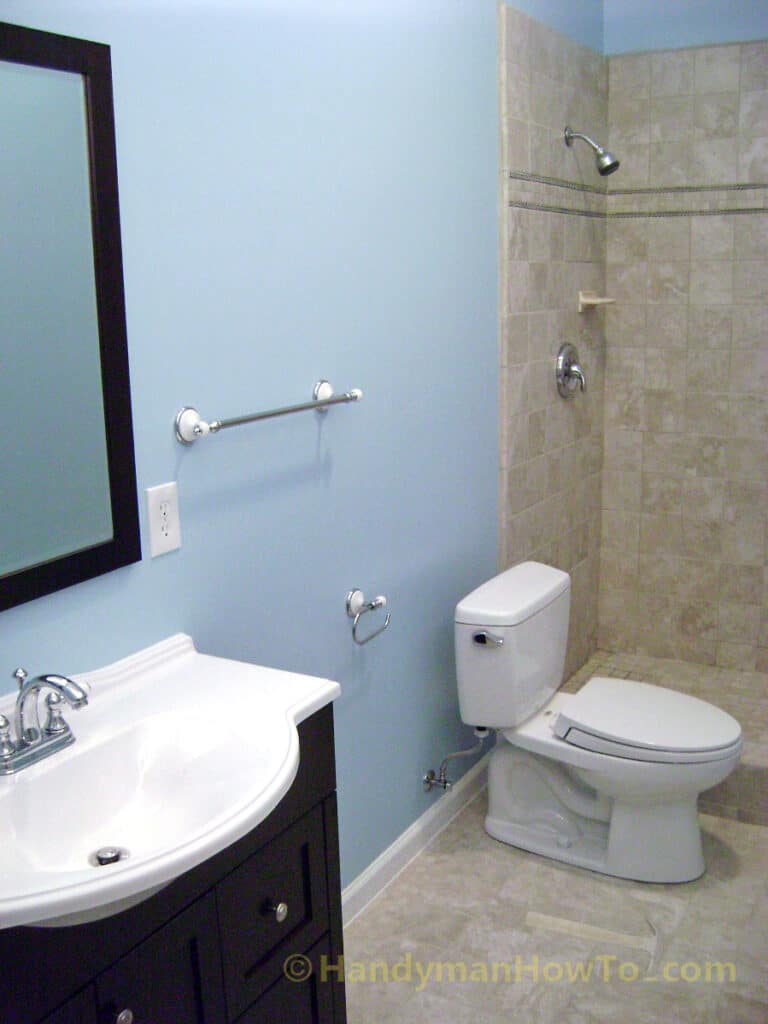
The vanity, toilet and shower. I’ve also installed the toilet paper and towel racks:
The vanity light and switch installation and wiring are covered in the How to Finish a Basement Bathroom – Part 14.
Take care,
Bob Jackson