The new bathroom fan is installed between the attic ceiling joists, wired and mounted to the wood support frame. This project is continued from Panasonic WhisperCeiling Vent Fan Old Work Installation Steps.
Panasonic WhisperCeiling Bathroom Fan – Wiring and Mounting
I’m now working in the attic above the 2nd floor bathroom to mount the bathroom fan. Remember, the electricity has been shutoff at the circuit breaker.
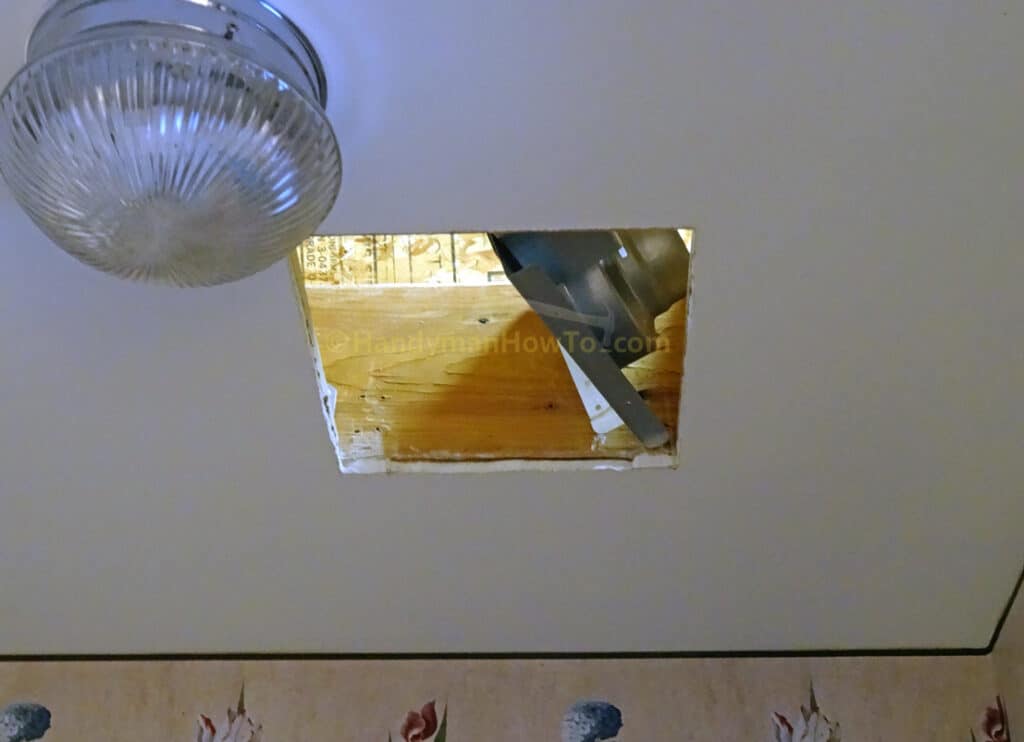
Drywall Ceiling Mounting Hole
The opening in the drywall ceiling for the old bathroom vent fan was approx. 7 inches square and will be enlarged for the Panasonic WhisperCeiling fan.
I used a carpenter’s square and tape measure to mark the dimensions for a larger hole 10-5/8 inches by 10-1/2 inches. Why the 1/8 inch difference for a square fan body? That’s to allow for the mounting bracket which will hold the fan body slightly off from the ceiling joist. However, you can simply make the ceiling mounting hole and wood frame 10-5/8 inches square because the fan body has wide mounting flanges and oval mounting screw slots for generous tolerances.
I cut the larger hole inside attic with my drywall jab saw while my helper stood on a step ladder in the bathroom holding a plastic bin to catch the dust.
I next verified the WhisperCeiling duct adapter fits through the ceiling by turning it at an angle – after which it will slot against the edge of the ceiling as required to mate it with the fan body:
Install the Wood Mounting Frame between the Ceiling Joists
The 1 x 2 inch wood mounting frame is fastened to the 2 x 12 ceiling joists with Simpson Strong-Tie SD8 #8 1-1/2 wood screws:

Panasonic WhisperCeiling Bathroom Fan Wiring Connections
The Panasonic WhisperCeiling model FV-05VQ5 is wired identically to the FV-11VQ5 fan as shown in this earlier master bathroom project.
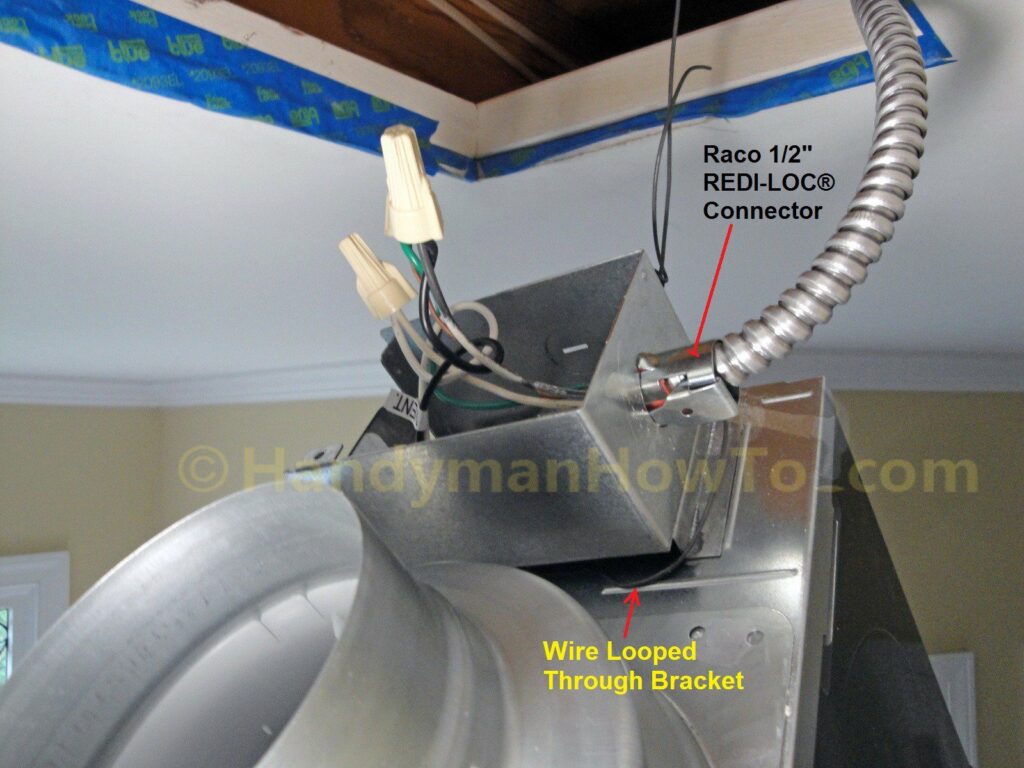
I prefer the aluminum flexible conduit instead of a simple two-piece NM clamp connector because the flex conduit protects and reduces stress on the NM-B 14/2 (14 gauge, 2 conductors plus ground wire) electrical wiring. The electrical parts and fittings were purchased at Home Depot.
This photo from my master bathroom project illustrates the required electrical fittings:
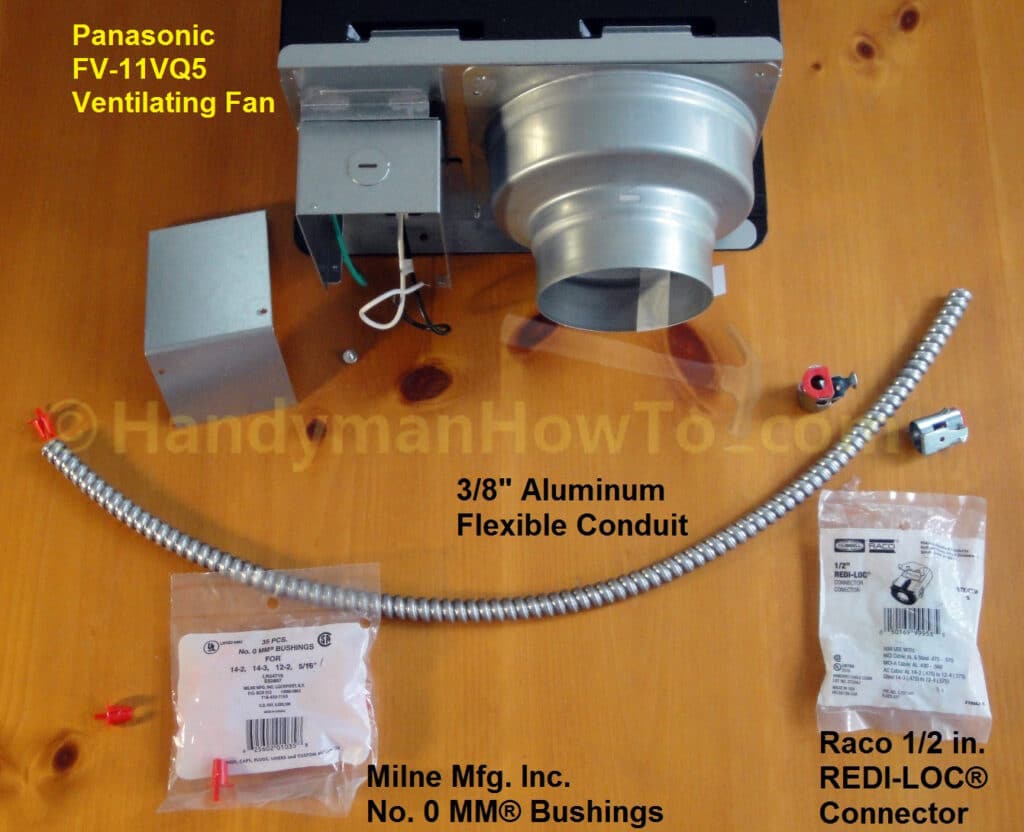
The NM-B 14/2 wiring prep with the flex conduit and Raco REDI-LOC connector is explained here.
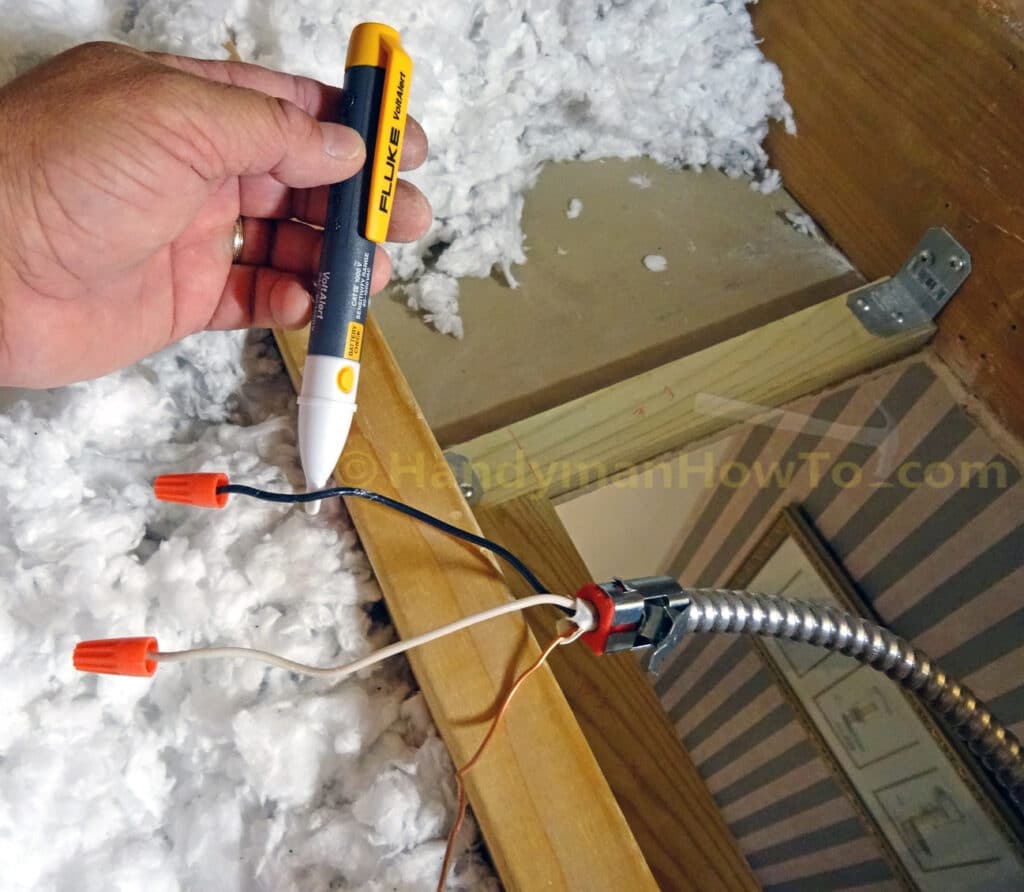
I’ve already shutoff the electricity at the circuit breaker panel, but I always double check the electricity is off with my non-contact voltage detector before working on the wiring. The detector would glow red if voltage were present; since it’s not illuminated the electricity is off and the wiring is safe to work on.
Note the black (hot) and white (neutral) wires have been capped with wire nuts for safety to prevent a short and/or fire if the electricity were accidentally turned on.
The Panasonic WhisperCeiling wiring hookup steps are:
- Remove the fan junction box screw and cover.
- Remove the junction box knockout.
- Measure and cut a 2 to 3 foot length of aluminum flex conduit.
The NM-B 14/2 cable for my fan entered the attic from a 2×4 support wall about 3 feet away.
Deburr the sharp edges of the conduit with a metal file. - Insert a red MM plastic bushing in the end of the conduit to protect the NM-B 14/2 cable from nicks and cuts.
- Straighten the NM-B 14/2 cable by hand, remove the wire nuts and slide the flex conduit over the cable starting at the end with the red MM bushing.
- Insert a Raco REDI-LOC Connector over the end of the NM-B cable and twist it onto the end of the flex conduit.
National Electrical Code (NEC) requirements:
At least 1/4 inch of the NM-B 14/2 white outer insulation jacket must extend past the REDI-LOC connector (see photo above) per NEC 314.17 and at least 6 inches of wire must extend past the REDI-LOC connector into the fan junction box per NEC 300.14:
“The minimum length of conductors, including grounding conductors, at all boxes shall be 6″. At least 3″, of every conductor, shall extend outside the box.” - Insert the wires and Raco REDI-LOC Connector into the knockout hole until it snaps-in.
If you’re shopping at Lowe’s home improvement stores, I really like this 3/8-in BX-MC-Flex Connector and it’s easier to install. - Connect the NM-B 14/2 house wires to the fan wires, matching by color (black & black, white & white, green & copper ground), then right-twist each wire pair slightly with your fingers and secure with a wire nut.
- Fold the wires into the fan junction box.
- Reattach the junction box cover and screw.
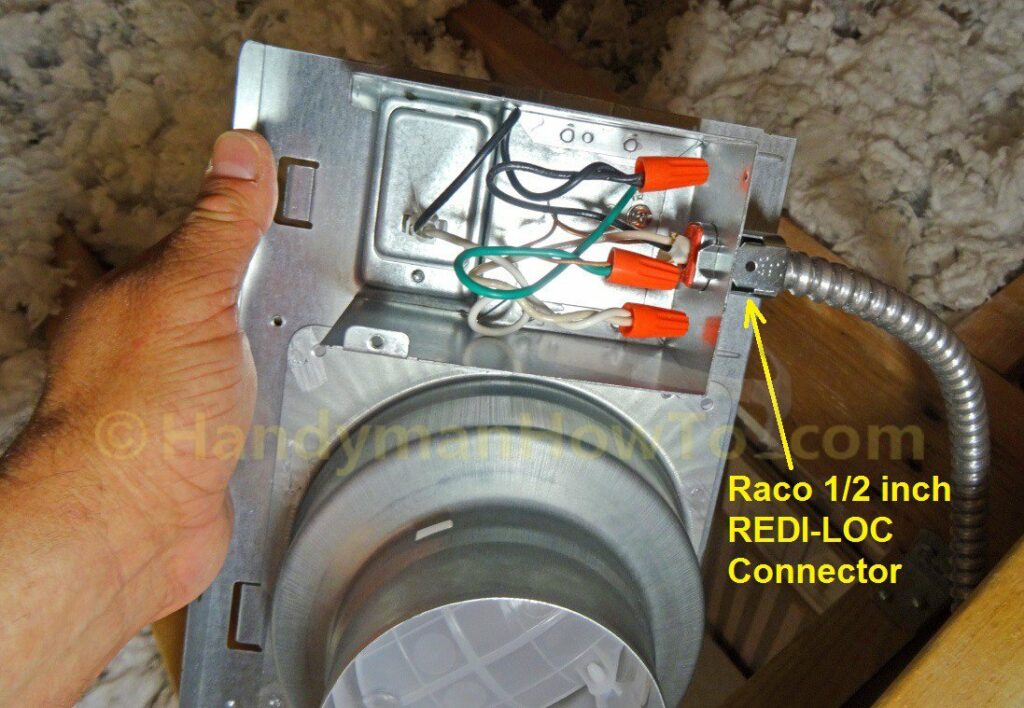
The WhisperCeiling bathroom fan duct adapter assembly is now wired and I’m ready to install the fan body:
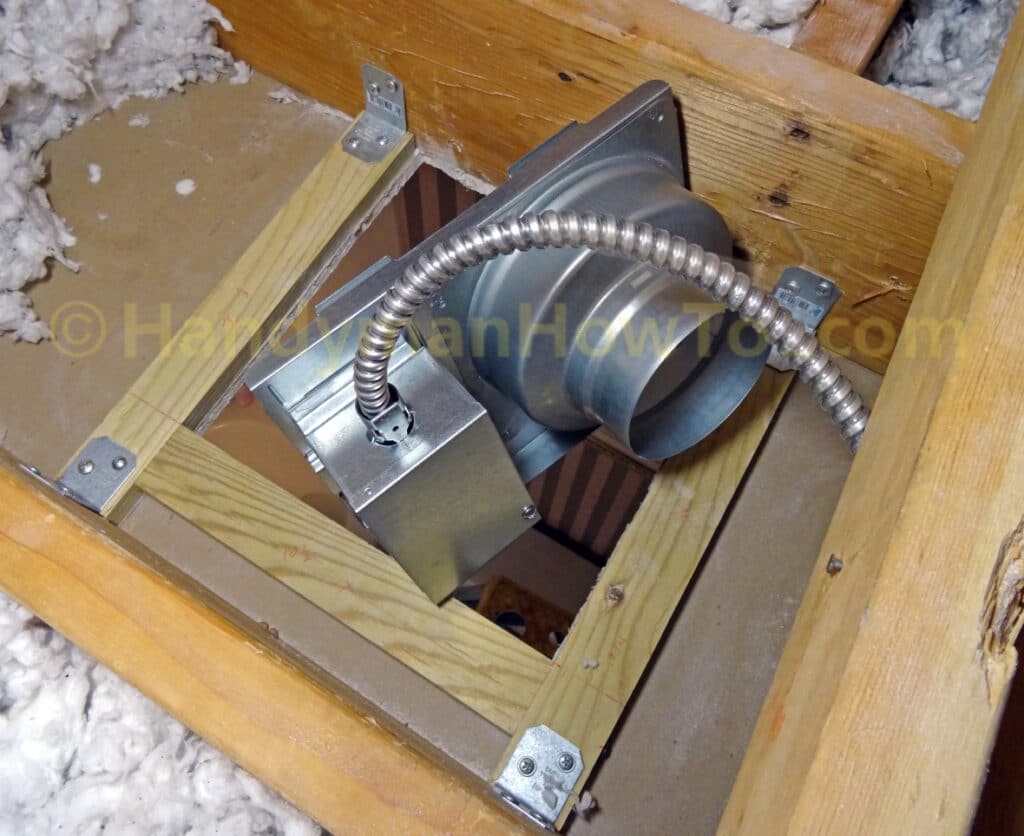
Minor Duct Adapter Installation Problem
I ran into a minor problem when I tried to slide the duct adapter assembly into place between the 1/2 inch thick drywall ceiling the 1 x 2 inch wood mounting frame; the flared base of the round duct adapter was hitting the 1 x 2 frame preventing it from seating. The aluminum oxide from the duct adapter rubbed off on the wood frame leaving a dark smudge marking the problem area.
The fix was to whittle a ~1/4 inch scoop from the top edge of the 1 x 2 frame with a utility knife as indicated by the light blue line:
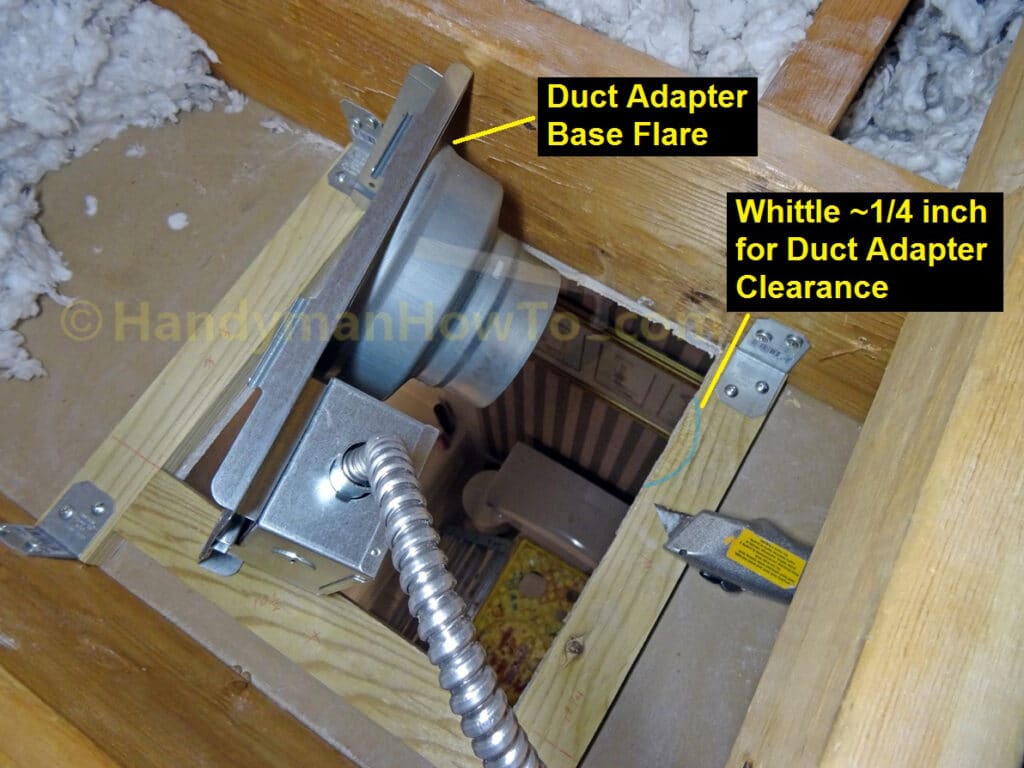
The fan duct adapter now fit perfectly against the wood frame:
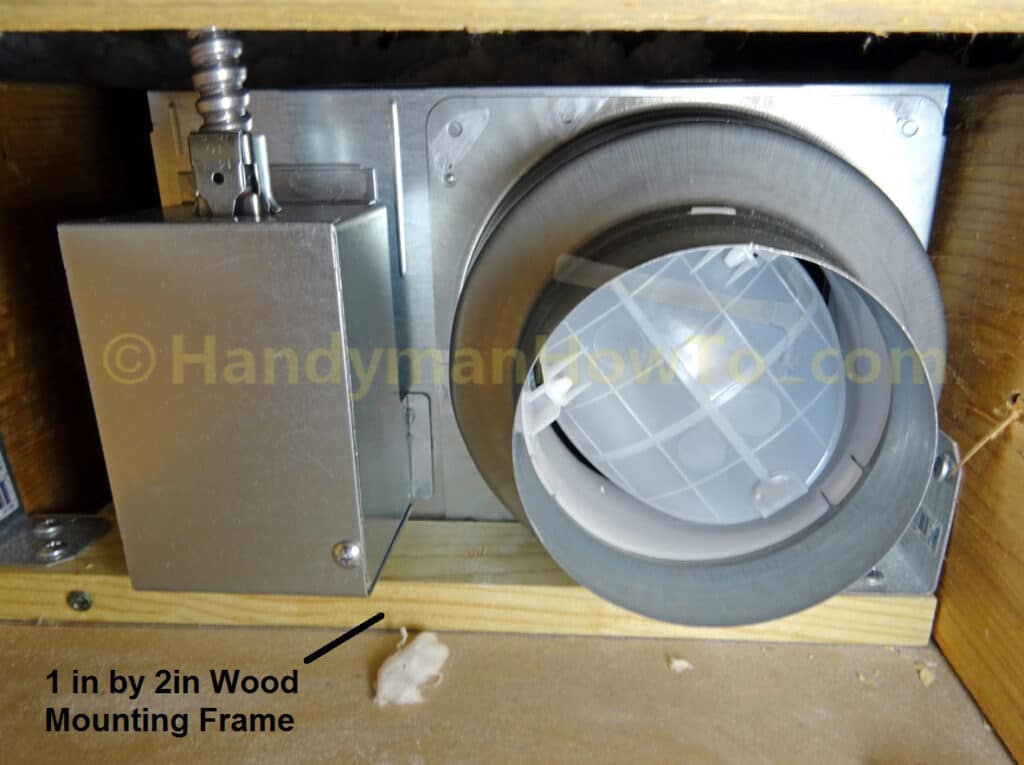
Close-up view of the duct adapter and 1 x 2 inch wood frame:
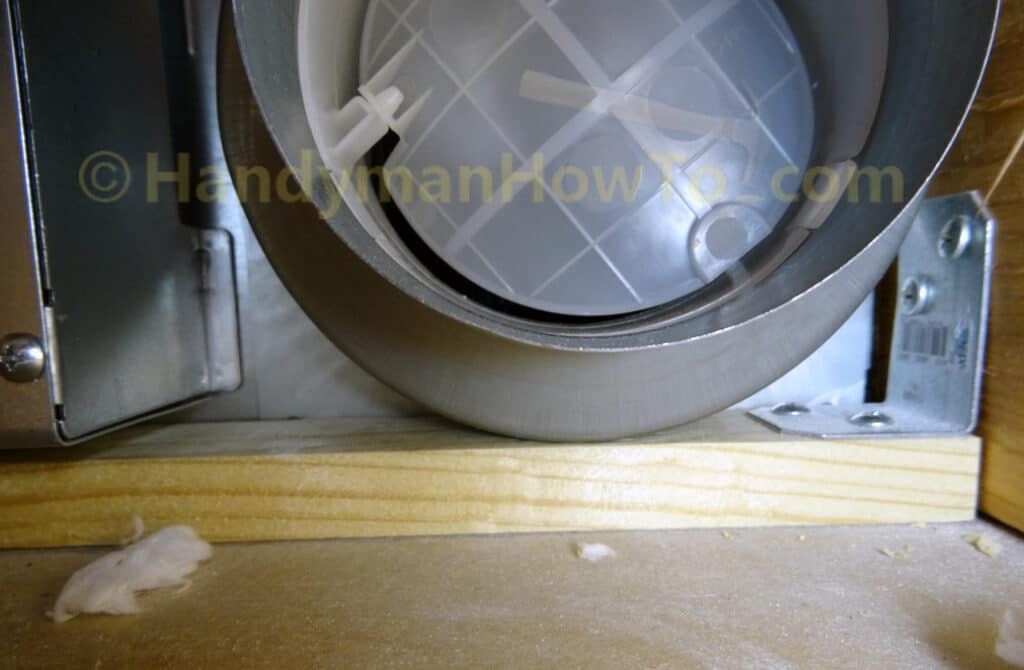
This all looks easy with attic access.
What if you’re installing the bathroom fan between the 1st & 2nd floors or don’t have attic access?
No problem! Separate the duct adapter assembly from the fan body, then connect the fan wiring and vent duct from inside the bathroom.
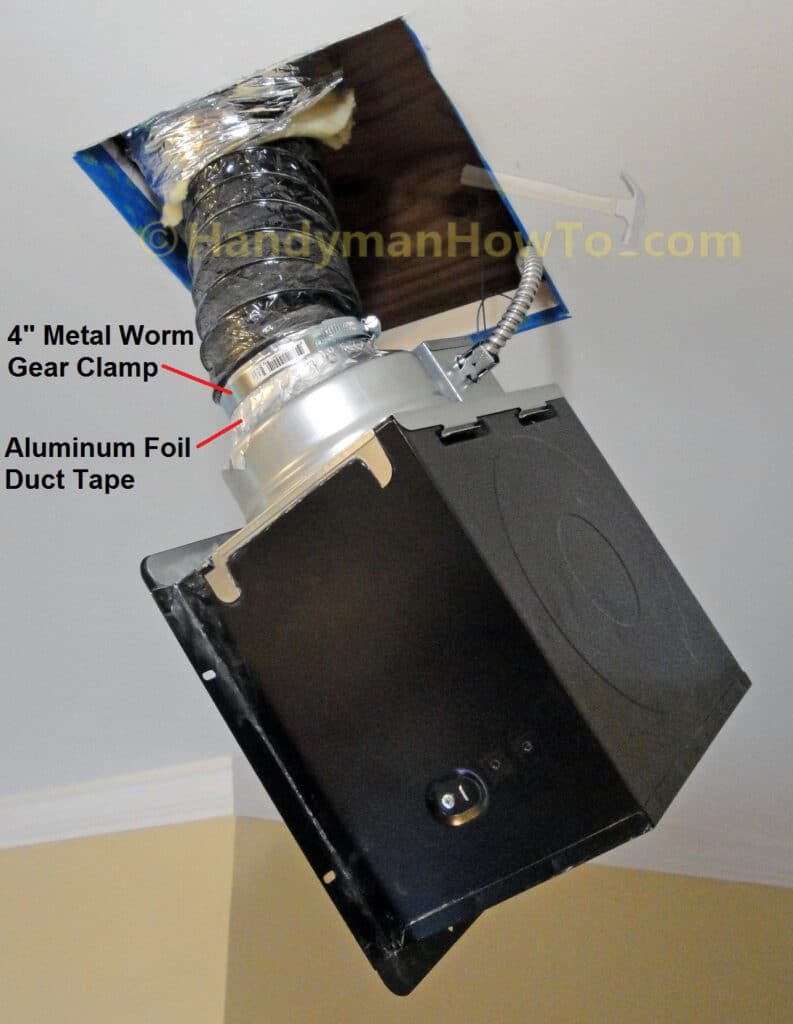
The next two photos from my master bathroom project were taken before I figured out how to separate the duct adapter from the fan body.
And connect the flex duct… remember the better way to install fan is to separate the silver duct adapter from the black fan body:
and now back to the 2nd floor bathroom project…
Install the Panasonic WhisperCeiling Fan Body
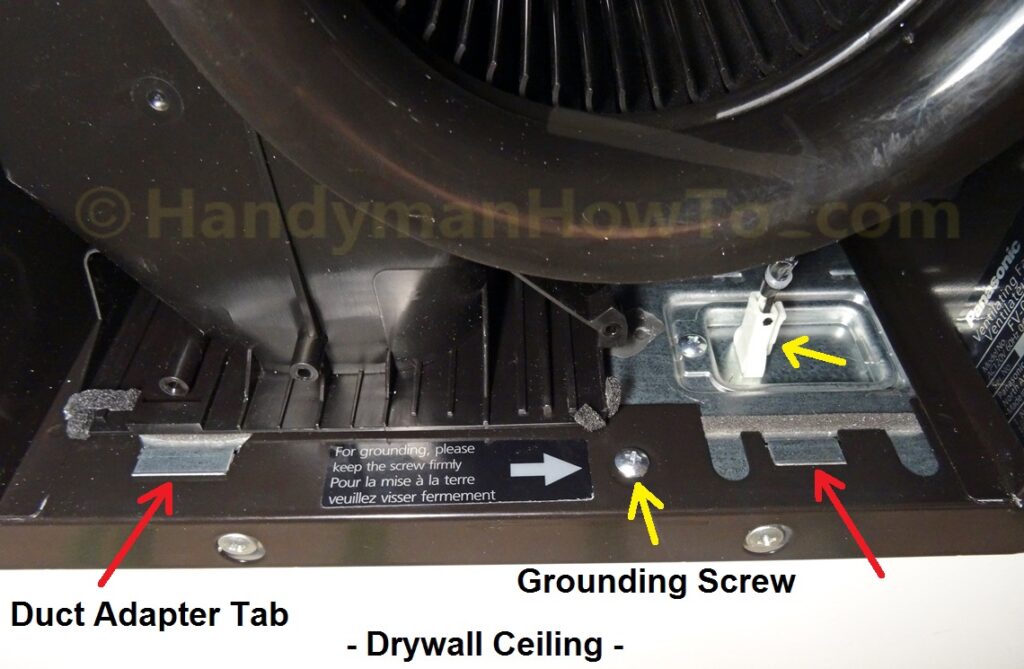
I stayed in the attic and held the duct adapter against the edge of drywall ceiling & wood frame (remember the duct adapter bottom flange goes against ceiling inside the bathroom) while my helper in the bathroom inserted the WhisperCeiling fan body into the ceiling. The fan body and duct adapter fit together easily on the first try. You’ve got it right when the two duct adapter mounting tabs are inside the fan body – see the red arrows in the following photo.
As my helper held the fan body against the ceiling, I left the attic and fastened the duct adapter to the 1 x 2 wood frame with two Simpson Strong-Tie SD8 #8 1-1/2 wood screws. Next I reinstalled the Grounding Screw and fastened the fan body flanges to the wood frame with more screws. The fan motor is also plugged back in:
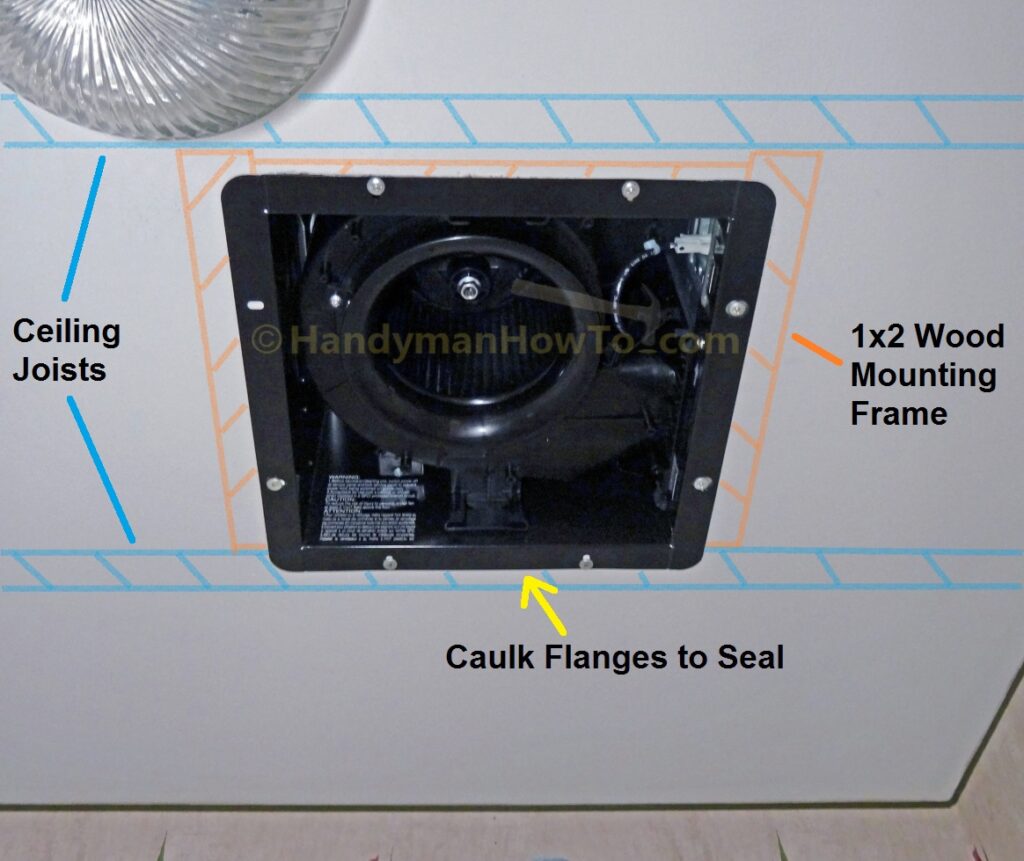
The Panasonic WhisperCeiling bathroom fan mounting and wiring is now complete. This photo illustrates the positions of the attic ceiling joists and the 1 x 2 wood frame. I used several wood screws to pull the fan body snug against the drywall ceiling. I later applied a thin bead of non-adhesive silicone caulk around the edge of flange and drywall to seal and prevent against air drafts into the attic:
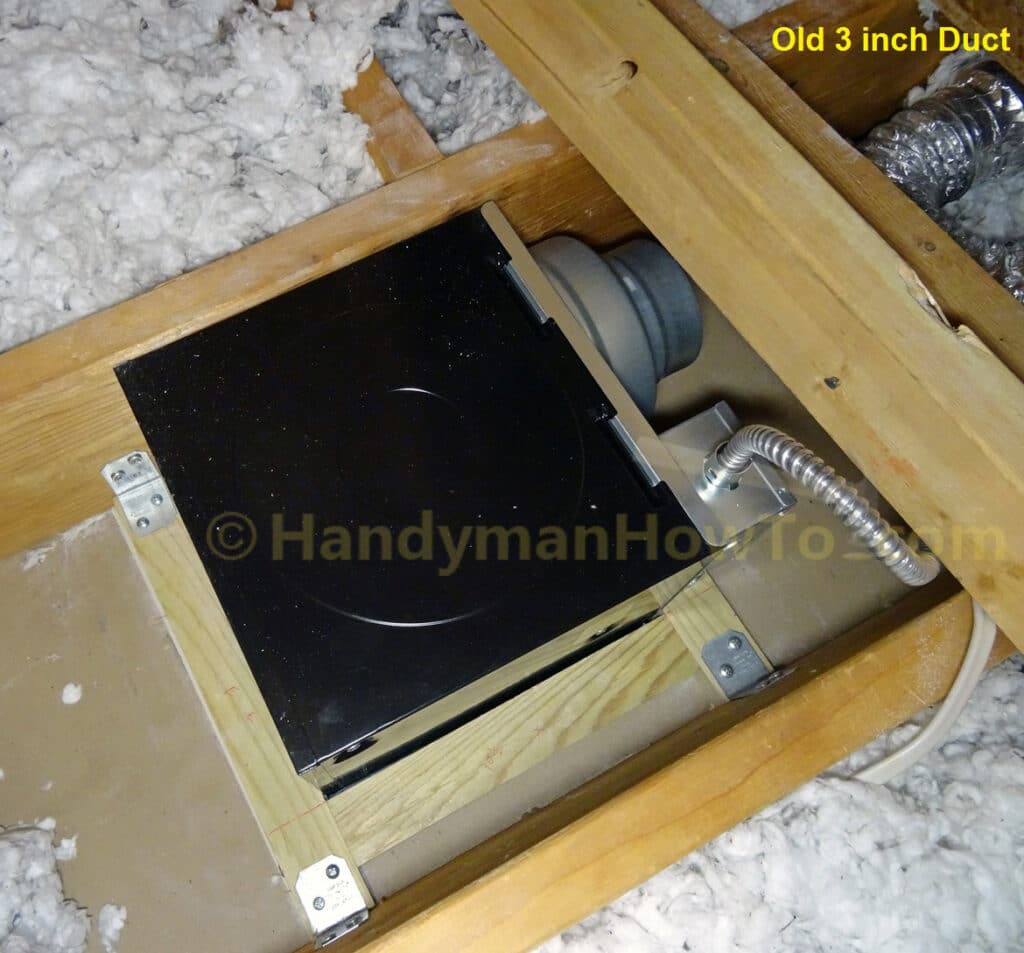
The bathroom vent fan installation as viewed from the attic. I’ll take out that old 3 inch vent duct and install a short run of 4 inch insulated flex duct with a new soffit vent located closer to the fan:
It’s now safe to turn on the electricity at the circuit breaker panel, flip on the wall switch and check the fan operation.
This project is concluded in How to Install a Soffit Vent and Ductwork for a Bathroom Vent Fan.
Thanks for reading,
Bob Jackson