The new bathroom ventilation fan is designed to be installed from above the ceiling (e.g. from the attic) but this isn’t possible when replacing a vent fan in the drywall ceiling between the first and second floors. To solve the “old work” installation challenge, a simple wood frame is built to mount the bathroom ventilation between the ceiling joists. This project is continued from How to Replace a Bathroom Exhaust Fan and Ductwork – Part 4.
Bathroom Ventilation Fan Ceiling Mounting Frame
The Panasonic WhisperCeiling FV-11VQ5 (Editor’s Note: this is a discontinued model, here’s a modern version) ventilation fan installation instructions assumes the fan will mounted to the joists before the drywall is installed, or you have attic access to mount the fan between two joists using the supplied telescoping mounting brackets. Neither approach would work for me because the fan is being installed between the space between 1st and 2nd floors in an “old work” situation. I only have access to the hole in the bathroom ceiling to mount the fan and needed a new mounting method.
The old work mounting method I chose was to make a mounting frame out of 2×2 inch wood balusters left over from my porch deck rail project, Simpson Strong-Tie A21Z Z-Max steel angles and wood screws:
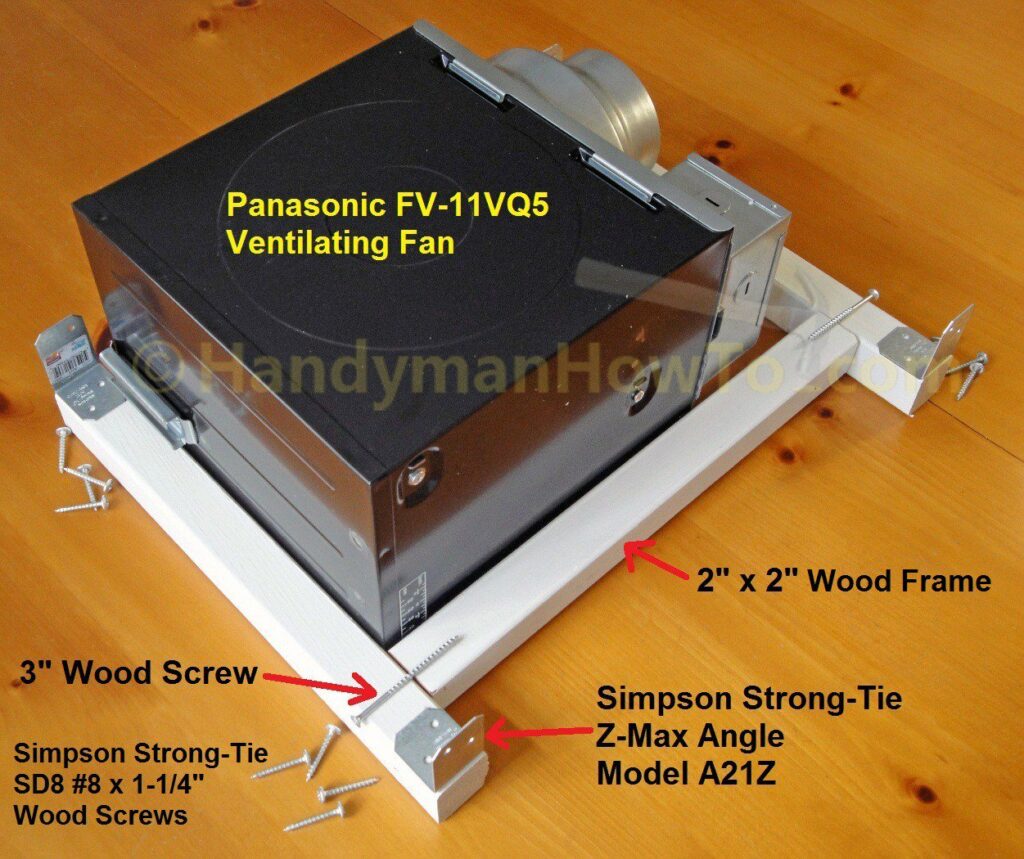
The two side braces with the steel angles will be fastened between the 2×10 inch joists with wood screws. The cross brace (right side in the above photo) is fastened with 3 inch wood screws to the side braces. The fan flange will be fastened with screws on two sides: 1) to the 2×10 joist and 2) to the cross brace.
The cross brace is approx. 15 inches long to allow clearance for the junction box and duct adapter. This dimension is not critical so long as the 2×2 brace does not interfere with the air duct connection. The two cross braces are 14-1/2 inches long which is the distance between the faces of 2×10 joists on 16 inch centers. Some fitting and trimming was necessary because my joists were plus/minus 1/16 to 1/8 inch from being exactly 14-1/2 between the joist faces.
Notice how the left side brace and bottom cross brace in the next photo overlap the mounting flange of the fan housing for fastening the fan with screws to the 2×2 frame:
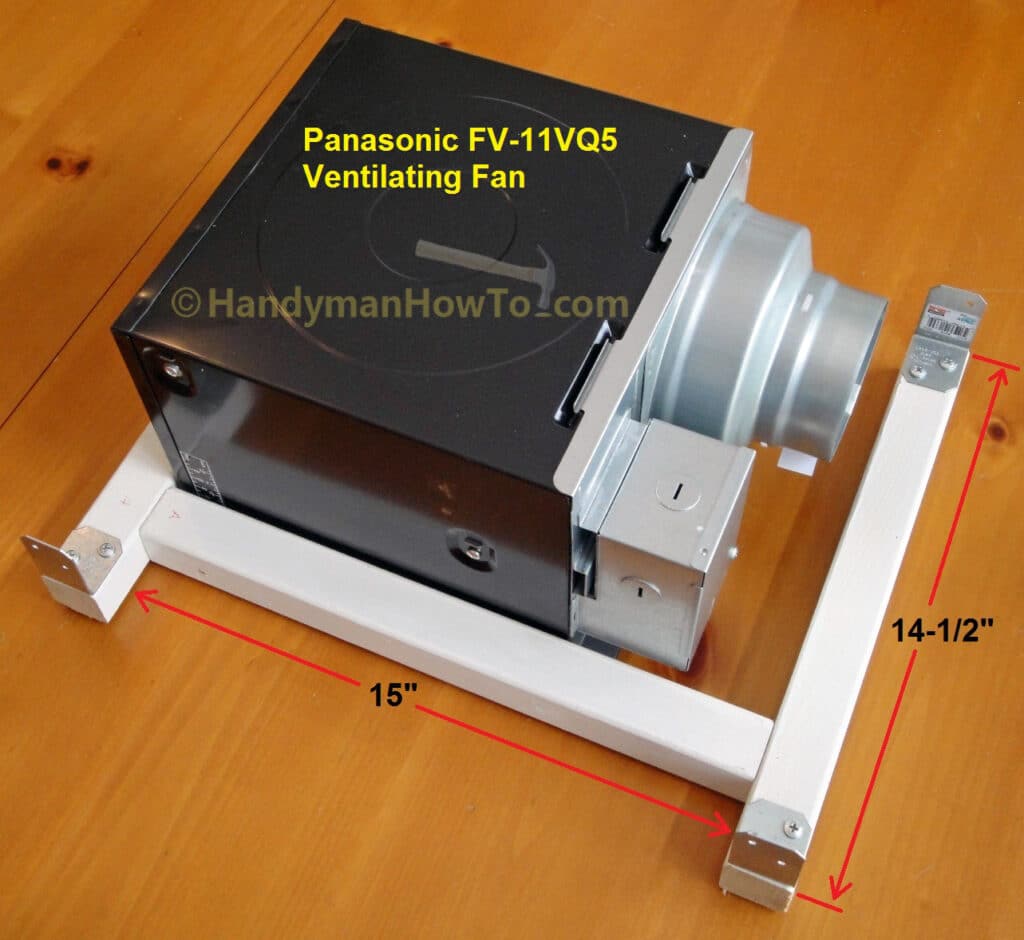
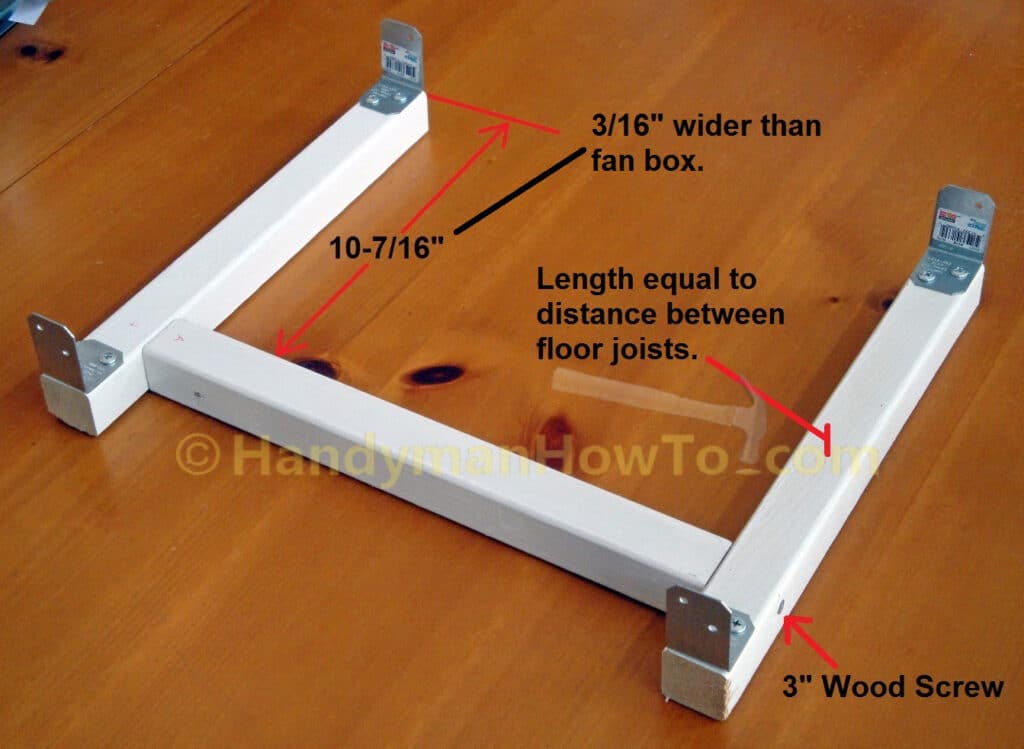
Below is the assembled Panasonic ventilation fan mounting frame. The FV-11VQ5 fan housing is 10-1/4 inches square; I set the cross brace at 10-7/16 inches to allow 3/16 inch for clearance between the frame and fan housing.
Take care to drill 1/8 inch pilot holes for strain relief such that the wood screws don’t crack the 2×2 framing:
Install Vent Fan Mounting Frame between the Joists
The side brace that is on the back of the fan (i.e. opposite side from the duct adapter) is removed from the mounting frame and fastened with wood screws between the two 2×10 inch joists. Note that this brace is aligned with the edge of the mounting hole in the drywall ceiling. This simple task of setting four wood screws (two screws in each end for the angle brackets) took me at least 15 minutes due to the awkward and cramped workspace. Tip: Start the wood screw by tapping it with a hammer so it sticks in the joist, then set it the drill/driver. Those wood joists are hard!
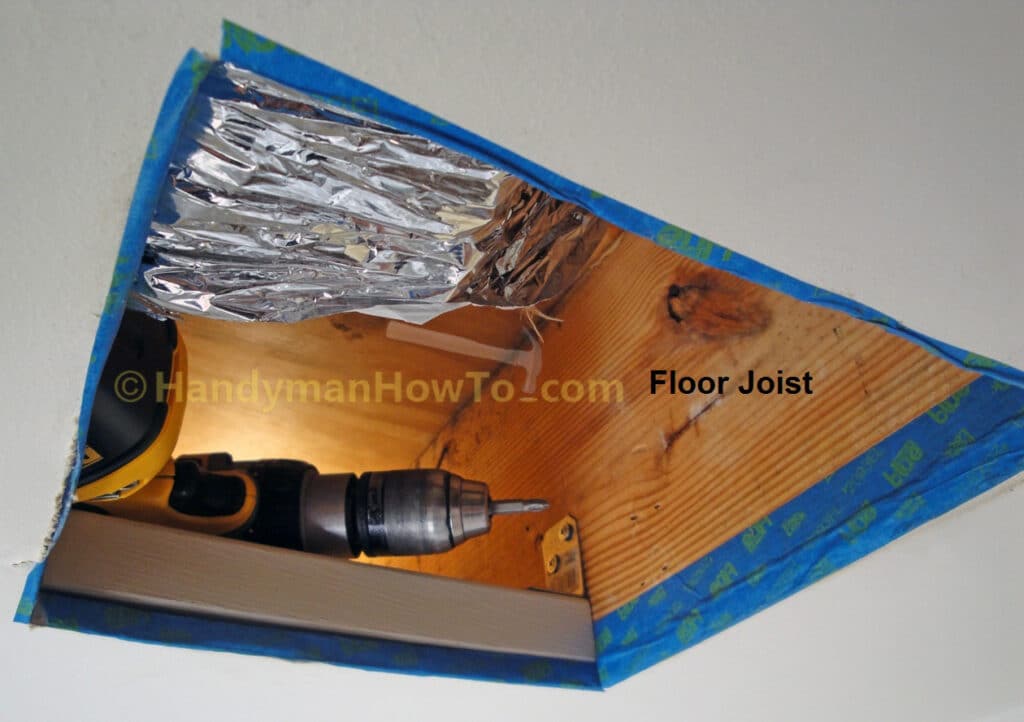
Now you can see why the back cross brace was installed first because the assembled frame would not fit through the drywall ceiling mounting hole! The L shaped assembly here fits easily through the vent fan mounting hole:
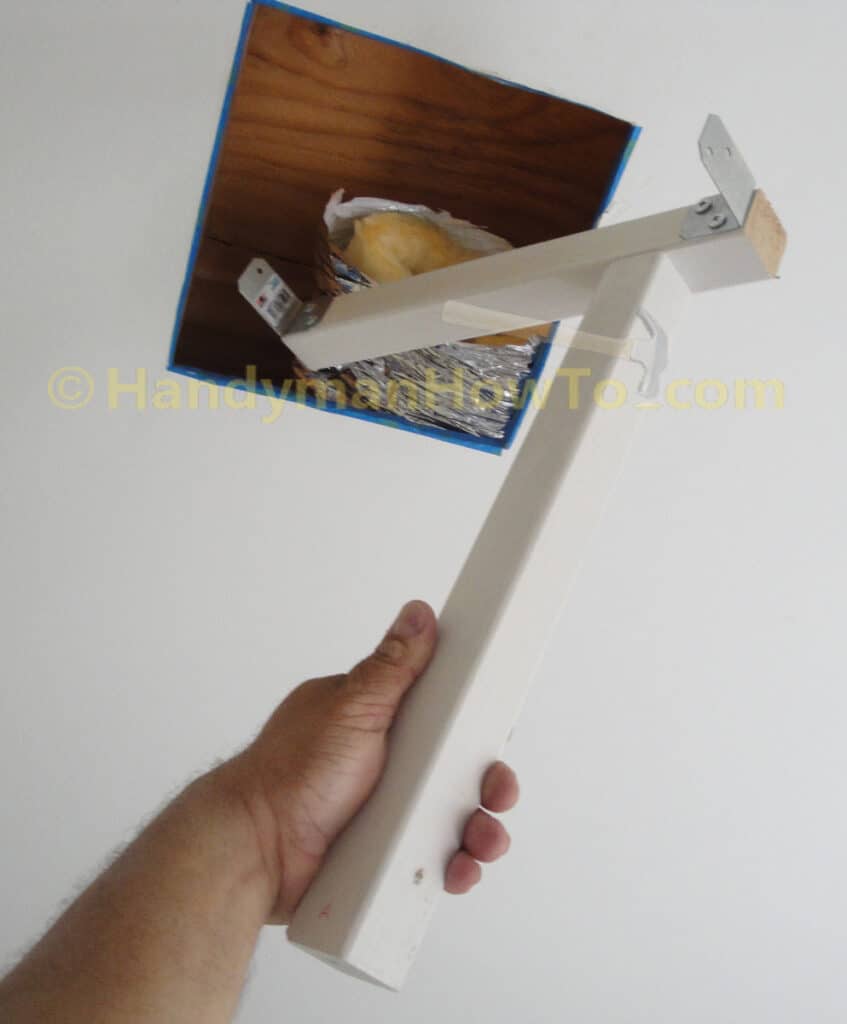
Fasten the L frame section (above photo) to the previously installed cross brace with a 3 inch wood screw. The pre-drilled pilot hole from the fully assembled mounting frame put together on the work bench is a essential for driving in the 3 inch wood screw because you’re working blind and can’t see around to the other side of the frame:
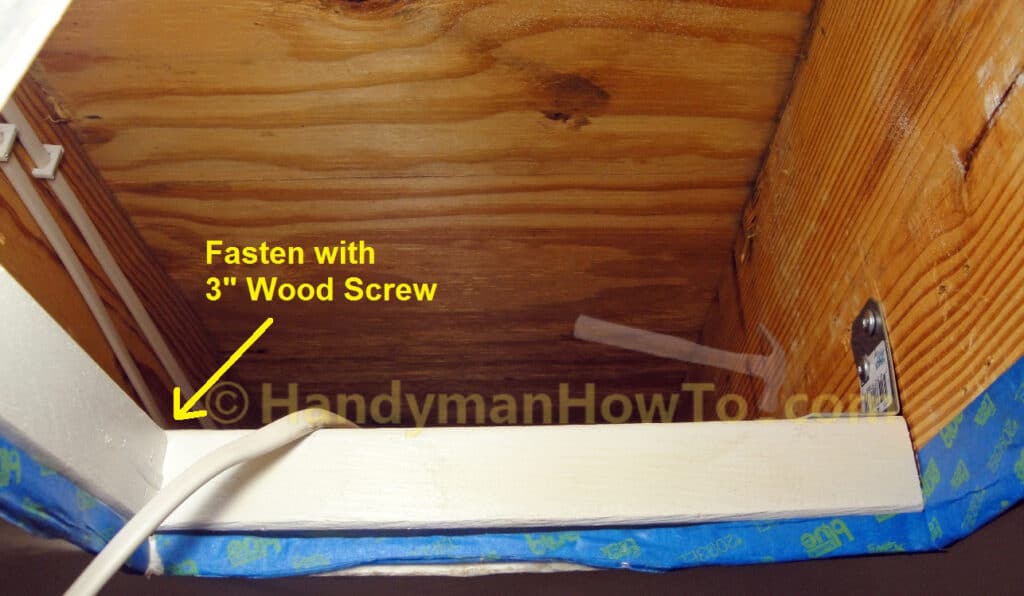
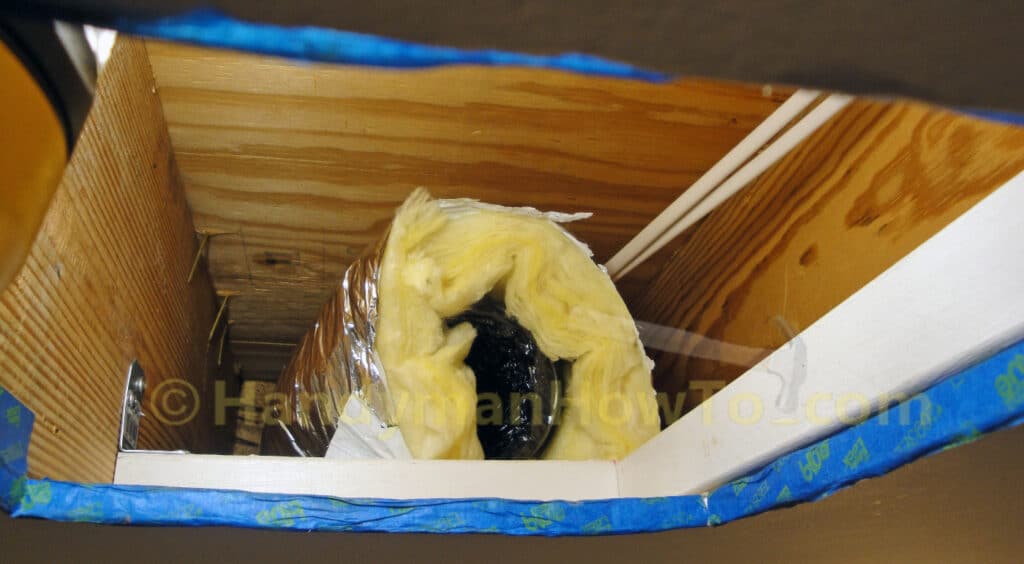
Fasten the angle brackets on the frame L shaped section to the 2×10 joists on both sides. Notice the clearance from the edge of the drywall ceiling to the cross brace to allow space for the fan junction box and duct adapter. I’ve pushed the insulated flexible duct back out of the way:
Panasonic WhisperCeiling Fan Electrical Wiring
Turn off the electricity to the fan circuit at the circuit breaker panel to prevent electrical shock and/or death. Verify the power is Off with a voltage detector. I prefer a non-contact voltage detector for convenience.
The Panasonic vent fan FV-11VQ5 electrical wiring is simple. I used the following items to hookup the fan to the house wiring:
- An approx. 2-1/2 feet length of 3/8 diameter aluminum flexible conduit.
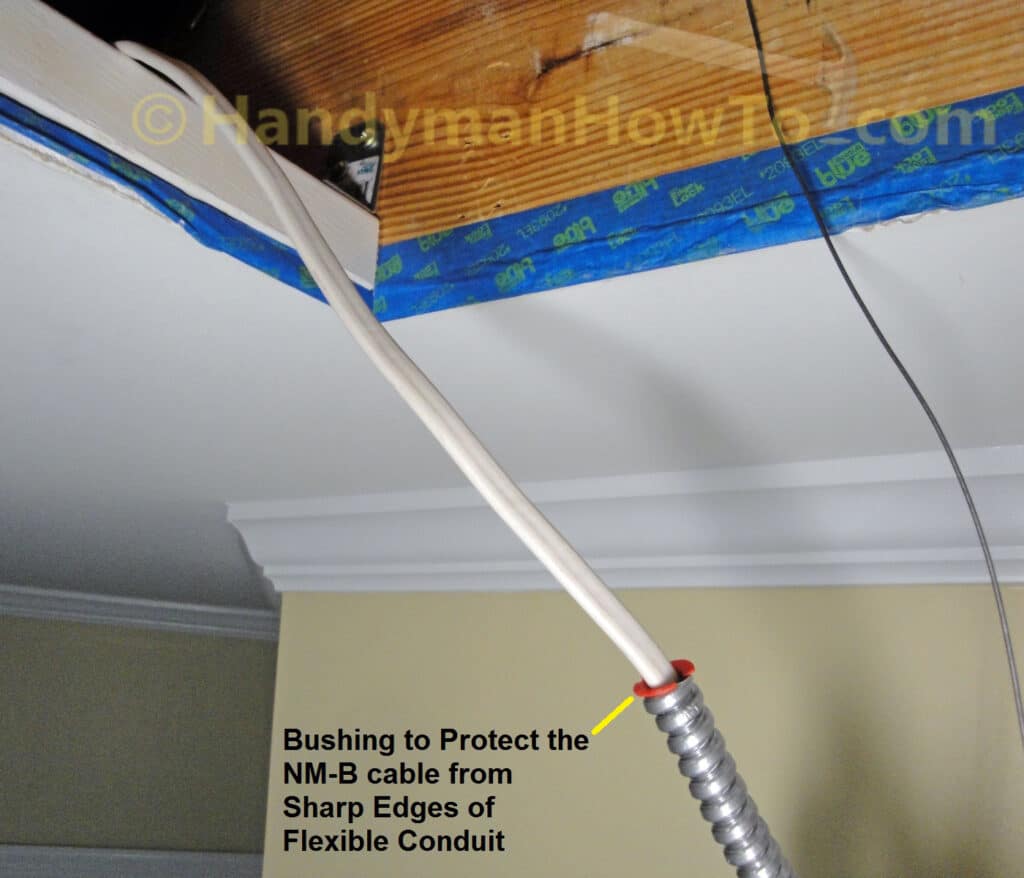
The purpose of the flexible conduit is to protect the NM-B 14/2 electrical cable from rubbing against the fan housing, potentially wearing through the insulation. - Red plastic No. 0 MM Bushing.
The MM bushing protects the NM-B 14/2 cable from the sharp edge of the flexible conduit. - Raco 1/2 inch REDI-LOC Connector to secure the aluminum conduit to the fan junction box.
You can find MM Bushings and REDI-LOC Connectors at the home improvement store in the electrical supply section.
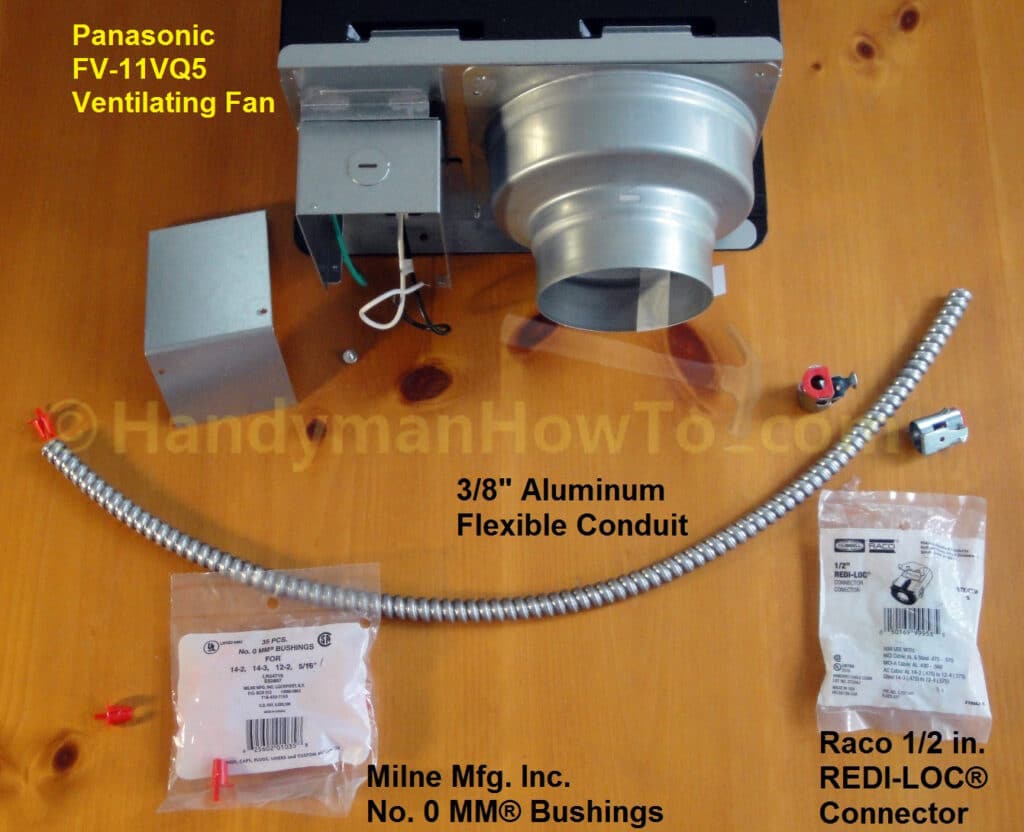
Install the Panasonic exhaust fan wiring by:
- Tape the ground wire, black (hot) and white (neutral) ends of the NM-B 14/2 house wiring together so the wires don’t snag on the ribs of the aluminum flex conduit.
- Insert a red plastic No. 0 MM Bushing into the aluminum flex conduit.
- Push the NM-B 14/2 electrical cable into the flex conduit as shown.
Straighten any bends in the wire so it pushes more easily through the flex conduit. - Push the NM-B 14/2 through the flex conduit until the outer insulation jacket extends just past the other end of the flex conduit with 6 inches of wires exposed. See How to Replace a Bathroom Exhaust Fan and Ductwork – Part 6 for additional wiring details.
Test Fit the Bathroom Exhaust Fan in the Ceiling Opening
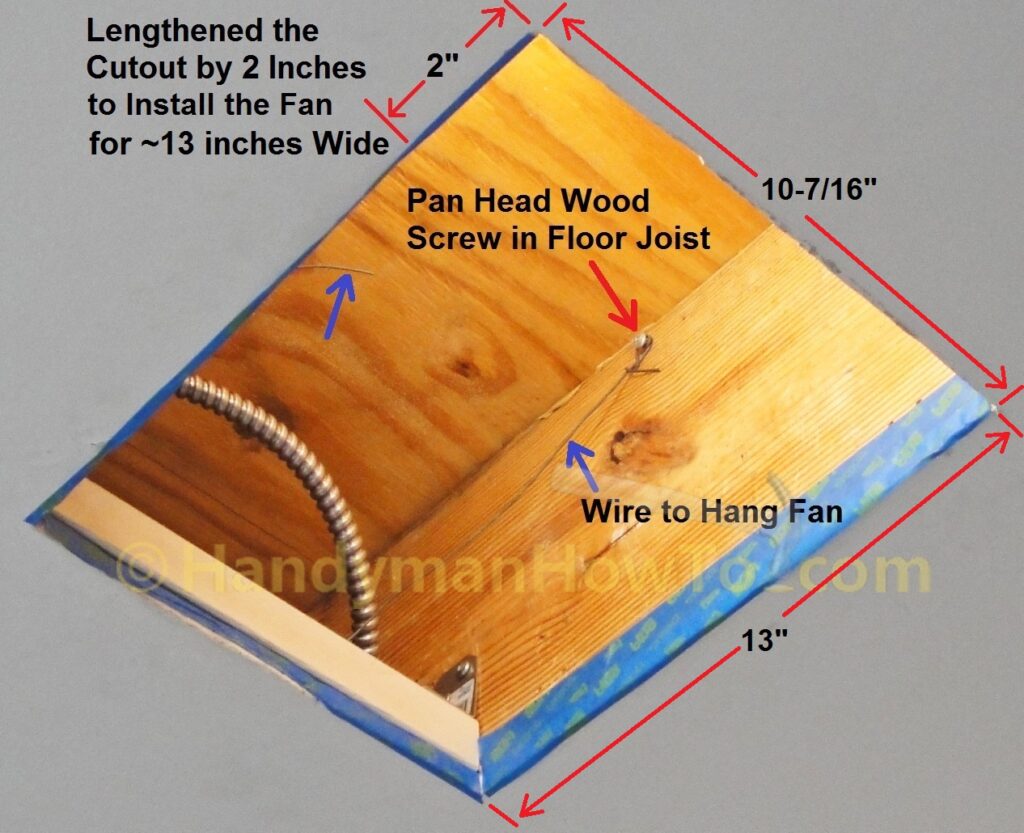
Since I was working by myself on a step ladder to reach the drywall ceiling, I needed a way to hold the Panasonic WhisperCeiling vent fan while connecting the wiring and ductwork. My solution was to set a pan head wood screw high on the joist and wrap a 3 feet length of general purpose wire around the screw (see the following photo). The free end of the wire will be wrapped around the fan mounting bracket behind the junction box to hang the fan below the ceiling while I’m working.
“Houston, we have a problem!” – When I tried to set the Panasonic WhisperCeiling exhaust fan into the 10-7/16 inch square mounting hole in the drywall ceiling the fan wouldn’t fit! The problem is the duct adapter is fairly large and there was insufficient clearance to slip the fan into the ceiling. My only choice was to extend the ceiling mounting hole to 13 inches by sawing another 2 inches of drywall ceiling on the duct adapter side of the mounting hole.
Update: It’s not necessary to cut a larger mounting hole as I later learned when installing a Panasonic WhisperCeiling model FV-05VQ5 in the 2nd floor bathroom. (The FV-05VQ5 dimensions are identical to the FV-11VQ5 fan.)
Just remove the duct adapter assembly from the fan body, connect the wiring and vent duct, then insert the fan body into the ceiling after duct adapter because the two parts will align and snap together. The revised installation method greatly simplifies things.
The new dimensions are 10-7/16 inches x 13 inches as shown:
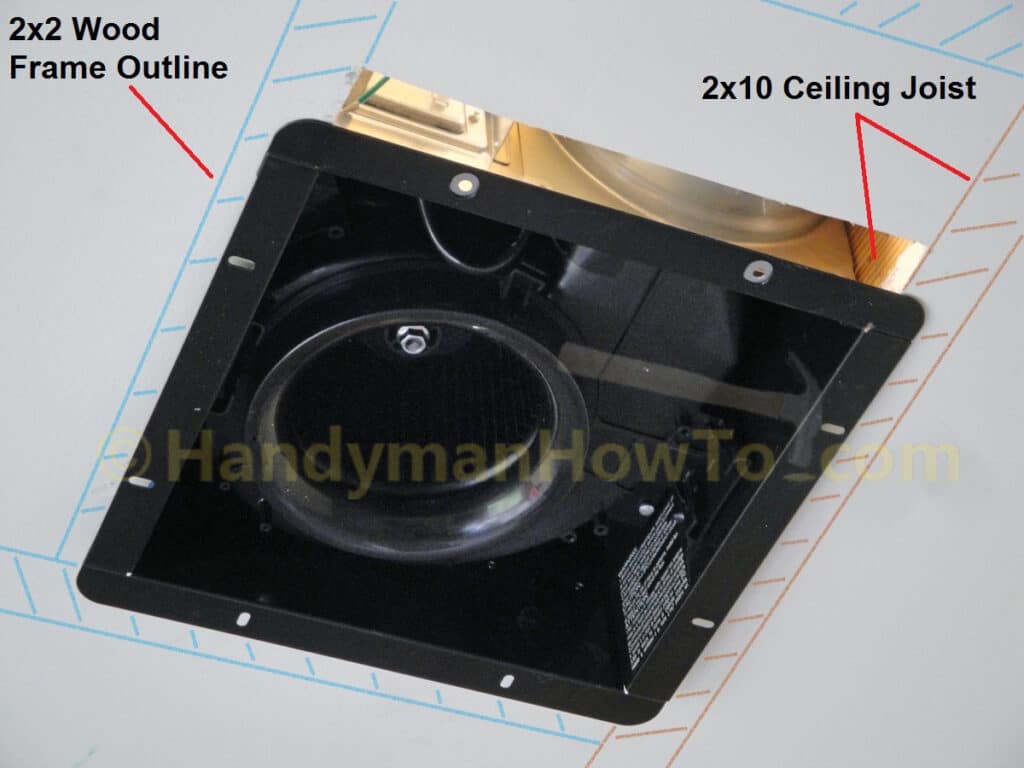
The Panasonic bathroom exhaust fan now fits in the drywall ceiling. I’ve drawn outlines for the ceiling joist and 2×2 mounting frame on the photo for clarity:
You’re probably asking “What about that big ugly gap in the bathroom ceiling drywall?!” I pondered that question and came up with a really nice solution: Build a decorative wood trim moulding to cover the drywall ceiling gap as explained in How to Replace a Bathroom Exhaust Fan and Ductwork – Part 9 of this series. It looks really nice.
This project is continued in How to Replace a Bathroom Exhaust Fan and Ductwork – Part 6.
Thanks for reading,
Bob Jackson