A new smoke alarm is mounted and wired in the suspended drywall ceiling for the basement living room using an old work electrical box. NM-B 14/3 cable is pulled from an existing smoke alarm to power and interconnect the new smoke detector.
This project is continued from How to Install a Hardwired Smoke Alarm – Part 2.
Smoke Alarm Installation
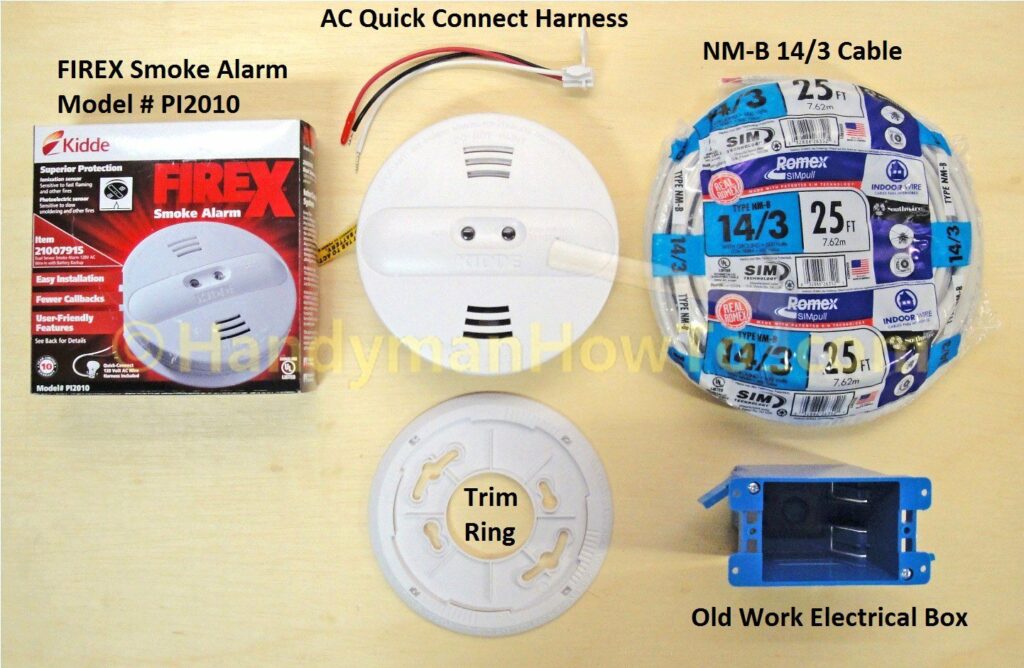
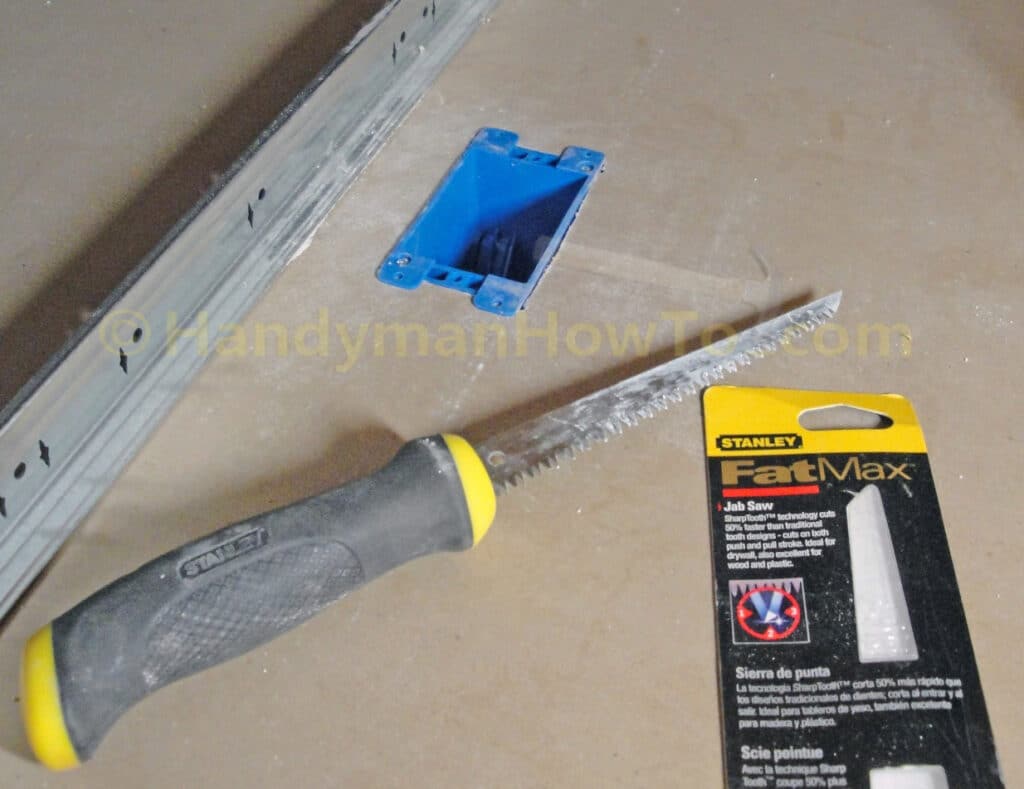
A second Kidde/Firex Dual Sensor (Ionization and Photoelectric) AC powered hardwired smoke alarm will now be installed in the finished basement living room. The smoke alarm, NM-B 14/3 cable roll and old work electrical box are shown here:
Smoke Alarm Wiring Diagram
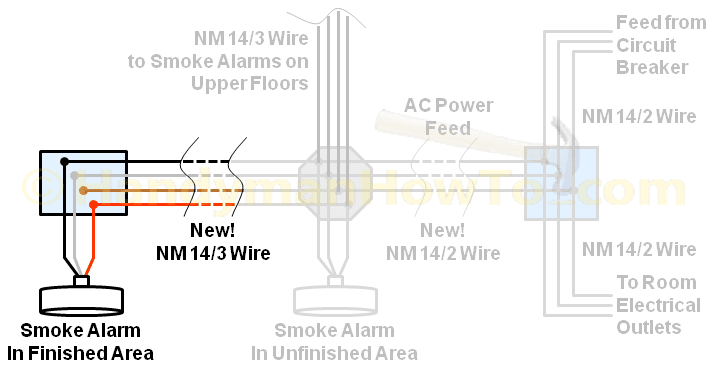
The NM-B 14/3 branch circuit for the new smoke alarm was connected to the octagonal ceiling box in Part 2. The NM-B 14/3 wire will be strung along the floor joists to the basement living room. The wiring diagram for this work is:
Install the Old Work Electrical Box in the Drywall Ceiling
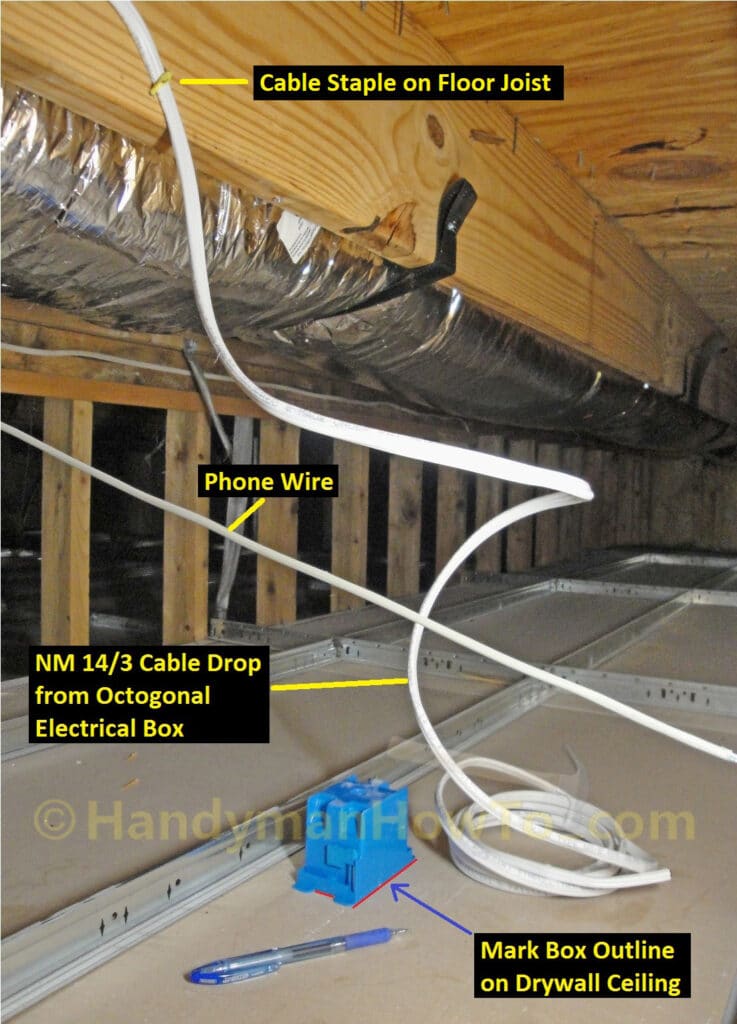
After pulling NM-B 14/3 cable along the floor joists and fastening it with insulated cable staples every 4 or 5 feet, I wedged myself into the crawlspace above the finished basement and reached out as far as I could to position the electrical box on the suspended drywall ceiling above the basement living room. The smoke alarm must be at least 4 inches away from the walls and I’m at least 2 feet away here.
I positioned the old work electrical box parallel to the metal stringers and traced the outline of the box on the drywall ceiling with an pen. The box outline is highlighted in red for better viewing. Note: Do not trace around the tabs on the ends of the old work box because the tabs must seat against the face of the drywall to so the box doesn’t pull through the drywall mounting hole.
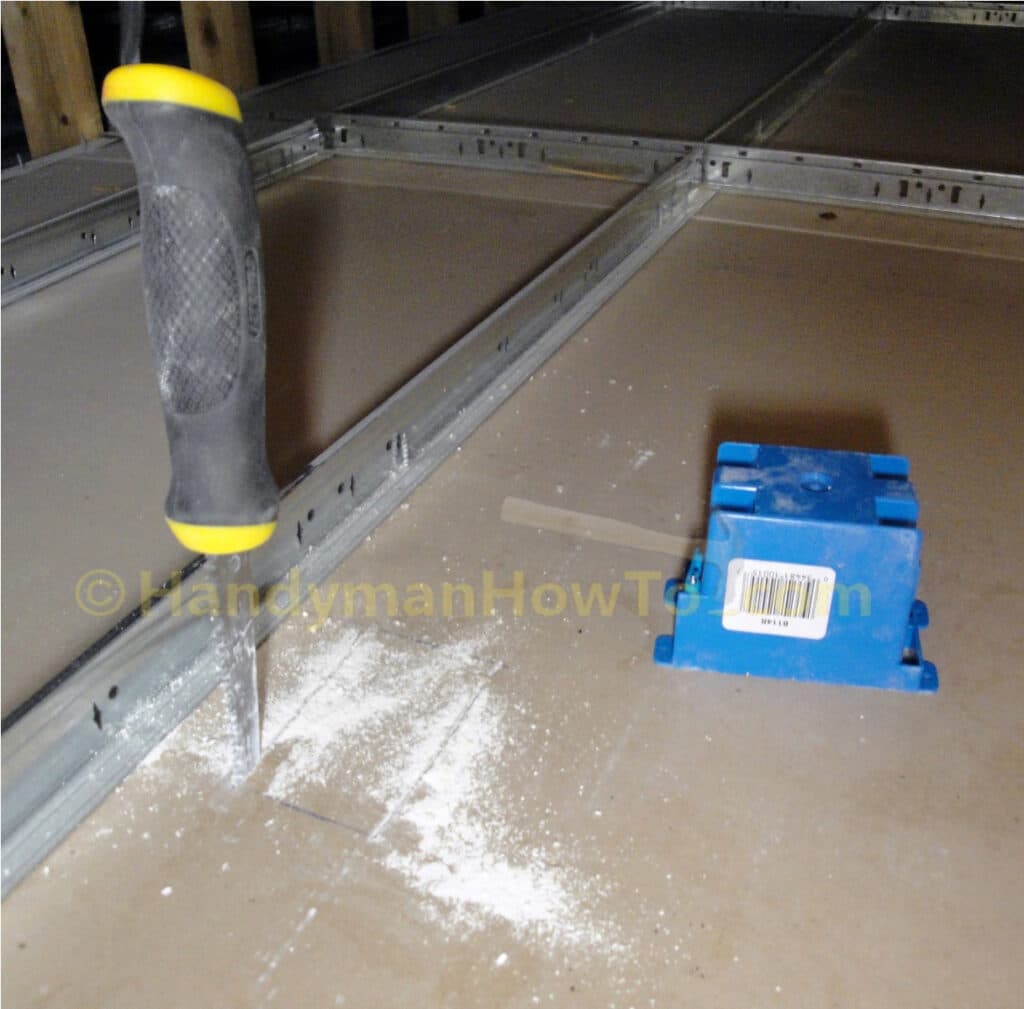
I cut along the box outline traced on the ceiling with the Stanley FatMax Jabsaw. The FaxMax made quick work of cutting the hole. When starting a cut, I find it best to work the pointed nose into the drywall to puncture through rather than pounding the saw in – you’ll have a cleaner starting cut with less tearing of the finished drywall face. My helper was on a ladder inside the room holding a plastic tub against the ceiling to catch the dust:
I slipped the old work electrical box in the drywall ceiling to ensure it would fit when I installed the bop from the finished side of the ceiling. It fit perfectly the first time. Note how the four plastic tabs prevent the old work box from falling through the mounting hole:
I removed the old work electrical box and fed the NM-B 14/3 cable through the drywall ceiling to wire the smoke alarm:

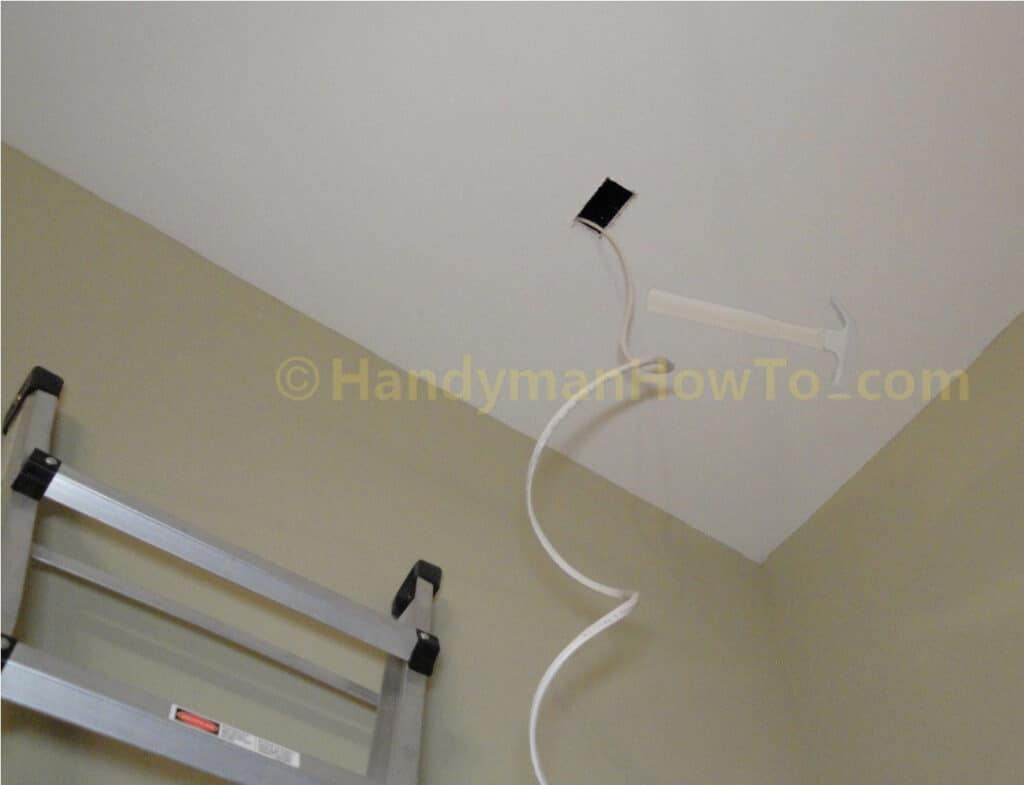
View of the ceiling cutout and cable drop for the new hardwired smoke alarm from the basement living room. You can get by with about 12 inches of cable hanging from the ceiling:
Mount the Old Work Electrical Box in the Drywall Ceiling
The NM-B 14/3 cable is fed through the old work electrical box then the box is inserted in the drywall ceiling. Swing clamps that grab the back of the drywall when the two corner screws are tightened. Be careful not to over tighten the mounting screws because the swing clamps can crush the drywall. Tighten the screws until the box is snug. Notice the cordless drill/driver torque is set to a low torque value of 4:

Smoke Alarm Ceiling Box Wiring
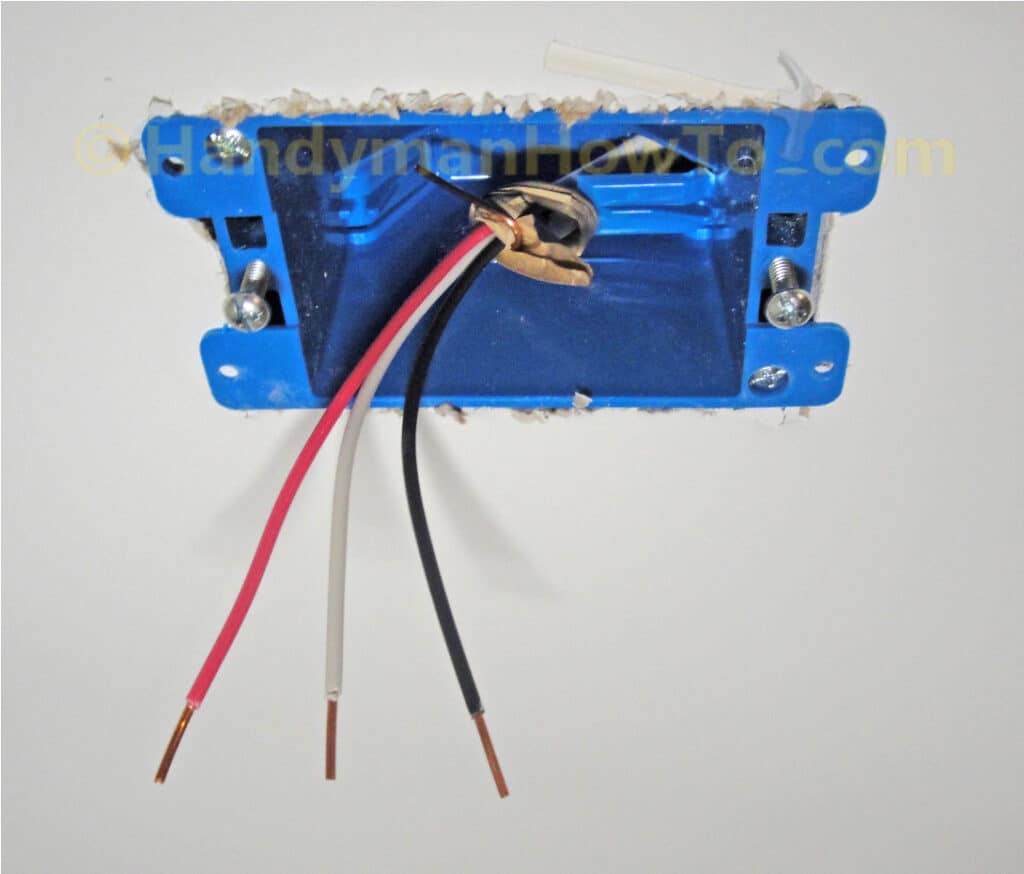
The NM-B 14/3 wires are cut so at least 6 inches extends into the box and at least 3 inch extends past the box. Only 1/2 inch of insulation is stripped from the wires ends to match the exposed wire of the Kidde PI2010 AC Quick Connect Harness. Notice the copper ground wire is wrapped out of the way since it’s not used and there’s nothing for it to connect to on this terminating circuit. Plastic electrical boxes do not require grounding. (Metal junction boxes must be grounded with a green ground screen and ground wire pigtail.)
I’ve set two flat head 8/32 thread by 3/4″ long screws in the box ends to secure the smoke alarm trim plate. The old work electrical box doesn’t include these screws so you’ll have to provide your own:
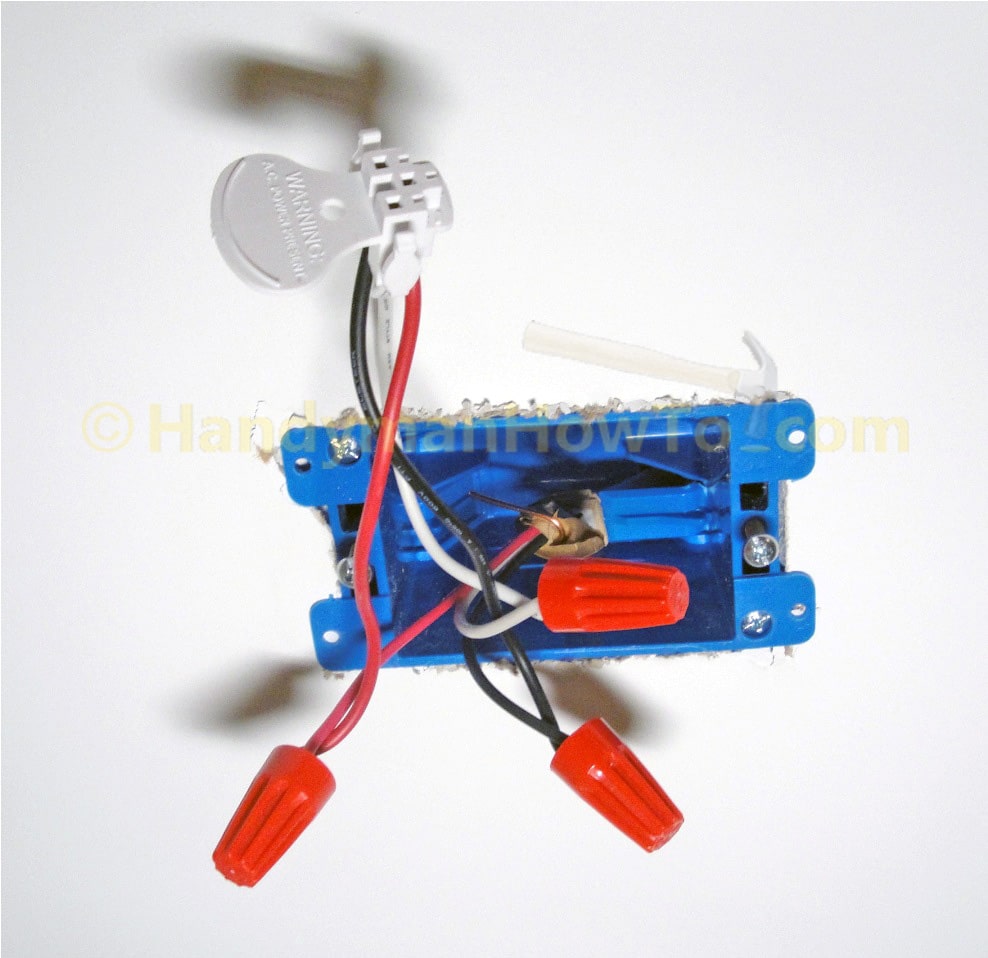
The Kidde PI2010 AC Quick Connect Harness is fastened to the NM-B 14/3 wires with wire nuts:
Almost done! The trim plate is fastened to the ceiling electrical box with the two screws. The wiring harness is plugged into the smoke and the smoke alarm ratcheted onto the trim plate. Remember to pull the plastic yellow ribbon from smoke alarm to activate the battery:

Kidde PI2010 Smoke Alarm Testing
I turned on the electricity at circuit breaker to restore the AC power to the smoke alarm circuit then walked through the house to verify the green AC power LED is illuminated on all smoke alarms. Yes! Steady green lights on the units. I also watched each smoke alarm to see the red LED flash about once a minute indicating the smoke alarm is operating correctly in standby mode.
With my helper on the 2nd floor, I visited every smoke alarm in the house and pressed the “Test” button on each unit for at least 5 seconds. The alarm sounded followed by all the other alarms ringing as it should for an interconnected system. Very loud and annoying, but working as advertised!
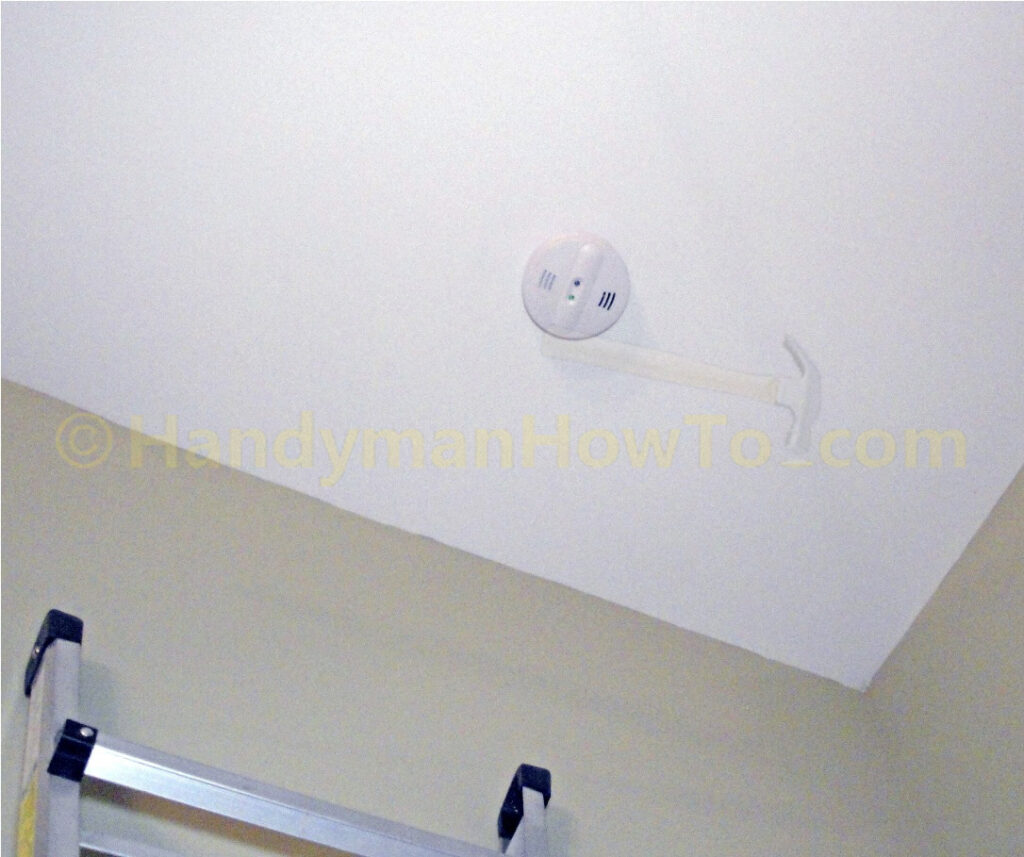
The green LED is illuminated on the smoke alarm in the finished basement (click on the image for full size view):
Install a Bedroom Smoke Alarm
I later finished the basement bedroom and a smoke alarm is required in each sleeping area per the Building Code. That job is explained in How to Install a Hardwired Smoke Alarm – Part 4.
Stay safe!
Bob Jackson