This project shows how to install an Ethernet jack for a home network with wiring instructions and photos.
The home network is extended to the basement game room by running Cat 5e cable and installing a new Ethernet jack. A “wired” network connection was needed at this location due to a weak Wi-Fi (wireless) LAN signal. Cat5e or Cat6 cable wiring is often needed for Power over Ethernet (PoE) connections to network cameras and WiFi Access Points.
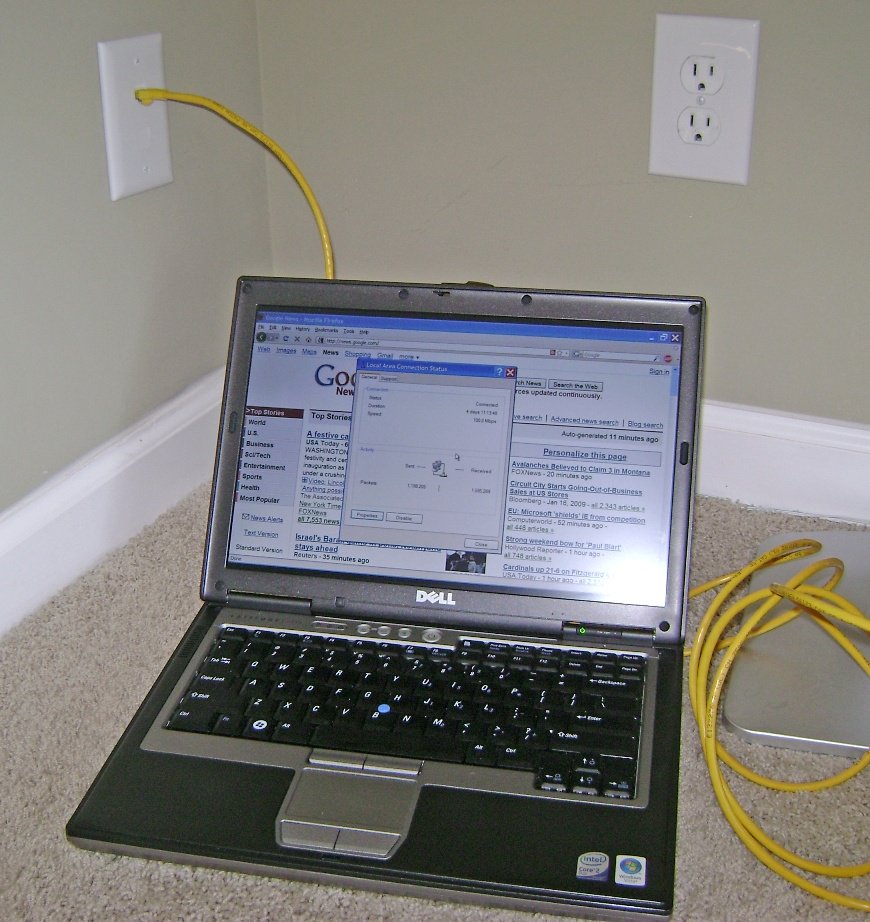
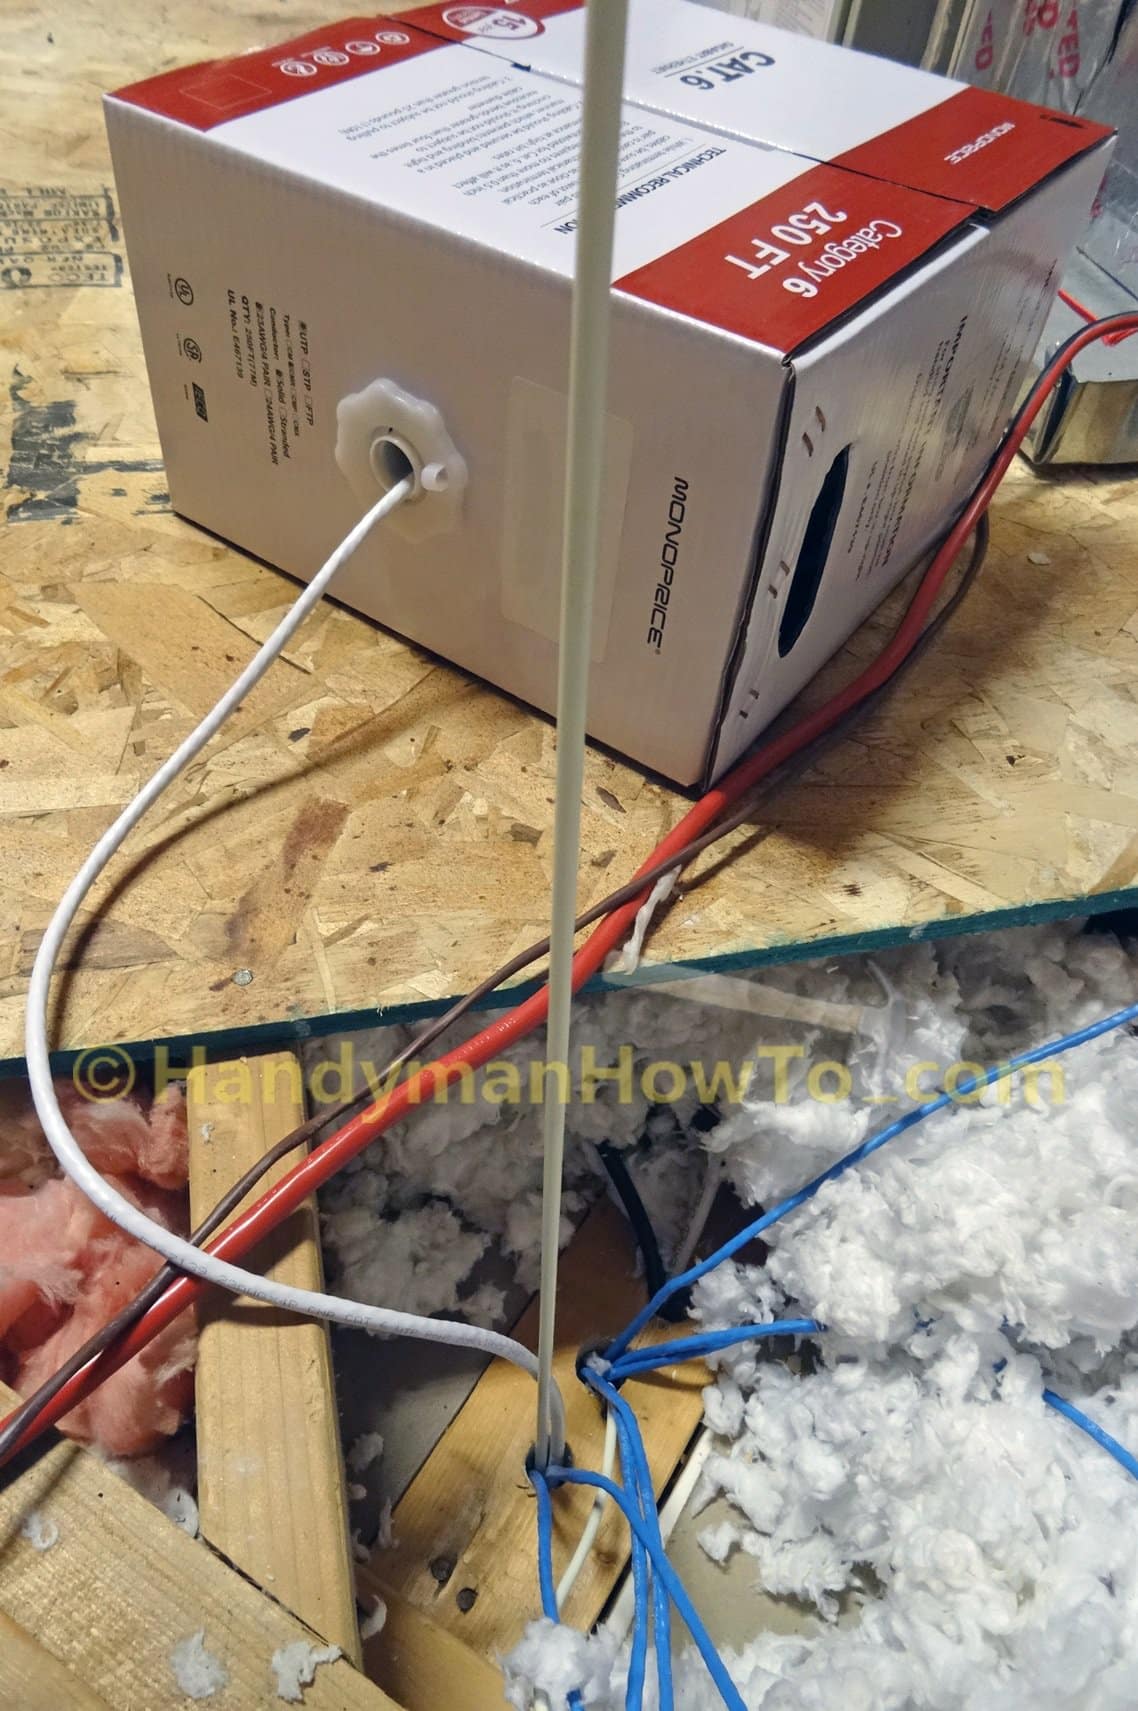
The most difficult part of this project was fishing 65 feet of Cat 5e Ethernet cable from the home router in the upstairs bedroom to the attic and down three floors to the basement game room. The trick is to find a convenient pathway to fish the Ethernet cable inside the walls.
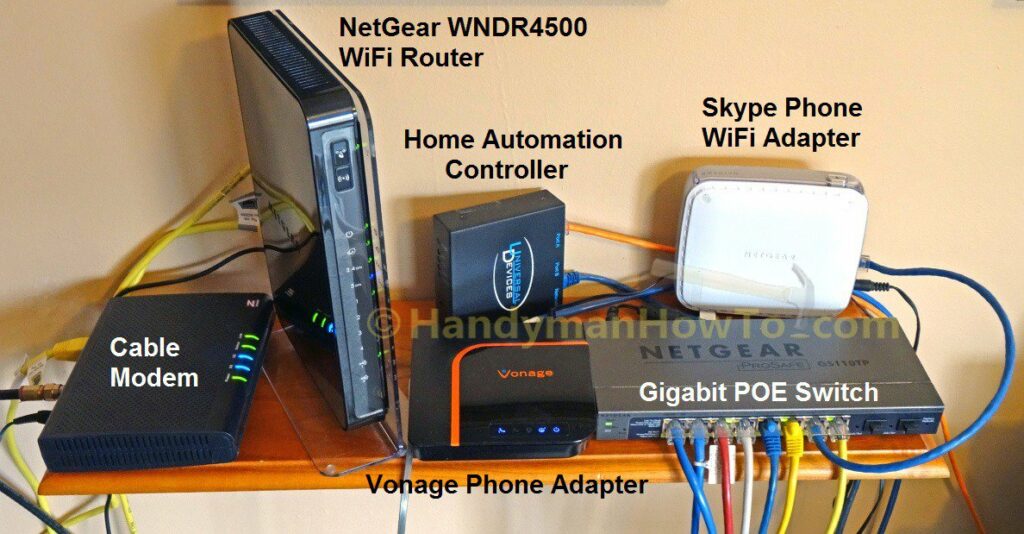
Home Network Cable Modem and WiFi Router
My home network originally consisted of a Cable Modem, NETGEAR WiFi Router N900 Dual Band Gigabit (WNDR4500), Netgear ProSafe Plus 8-Port Gigabit Ethernet with PoE (Power Over Ethernet), Universal Devices ISY Home Automation Controller, NetGear Skype WiFi phone adapter and a Vonage phone adapter. The NETGEAR Ethernet switch is needed for increased Ethernet port capacity and Power Over Ethernet (PoE) devices on my network:
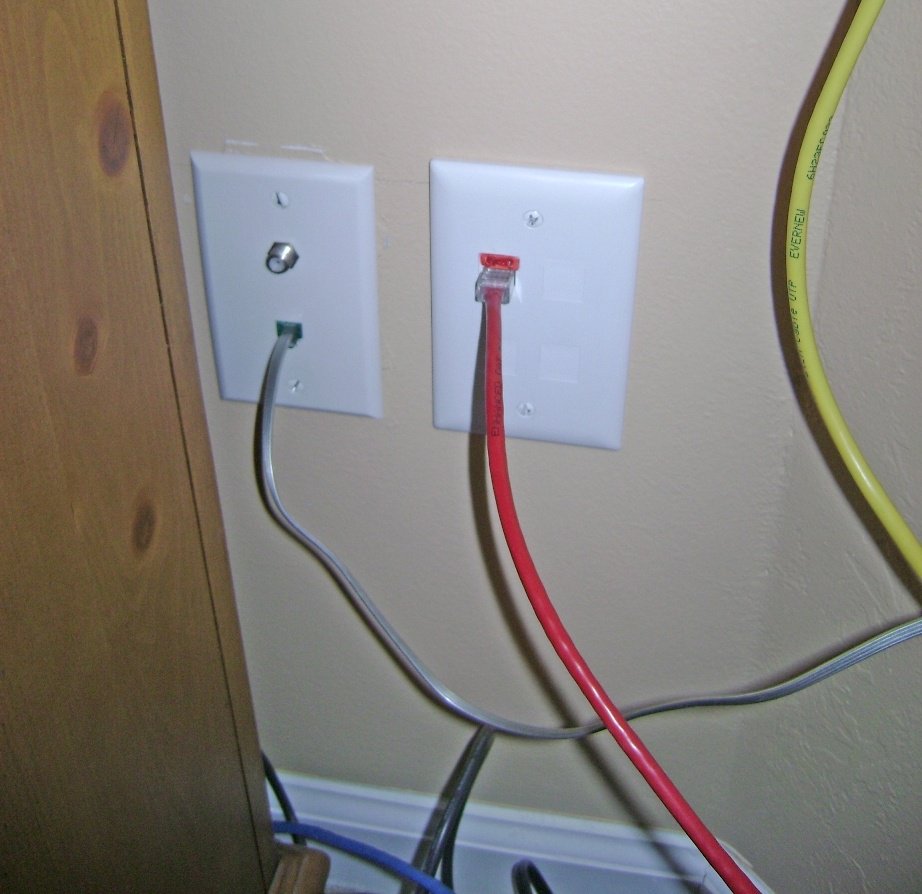
I previously installed a dedicated wall box with a single Ethernet Jack and 4-port wall plate. I used a red Ethernet cable to denote a Power over Ethernet (PoE) connection. I’ll add a 2nd Ethernet jack to this outlet and pull a new Ethernet cable to the finished basement.
Working from the attic, I fed kite string with fishing weights the through a 3/4 inch hole in the 2×4 wall plate between the wall studs to the blue old work box. It took a few minutes of trial and error to drop the fishing weights through the hole in top of the box. I had a helper shine a flashlight into the outlet box so I could see my target from the attic and tell me when the fishing weights dropped into the old work box. I have rolls of nylon and metal fish tape, but didn’t use it because the fish tape coils in the wall cavity and I’d never hit the small hole in the blue outlet box. A fiberglass fish rod (available here) would have worked better if I’d had one available at the time.
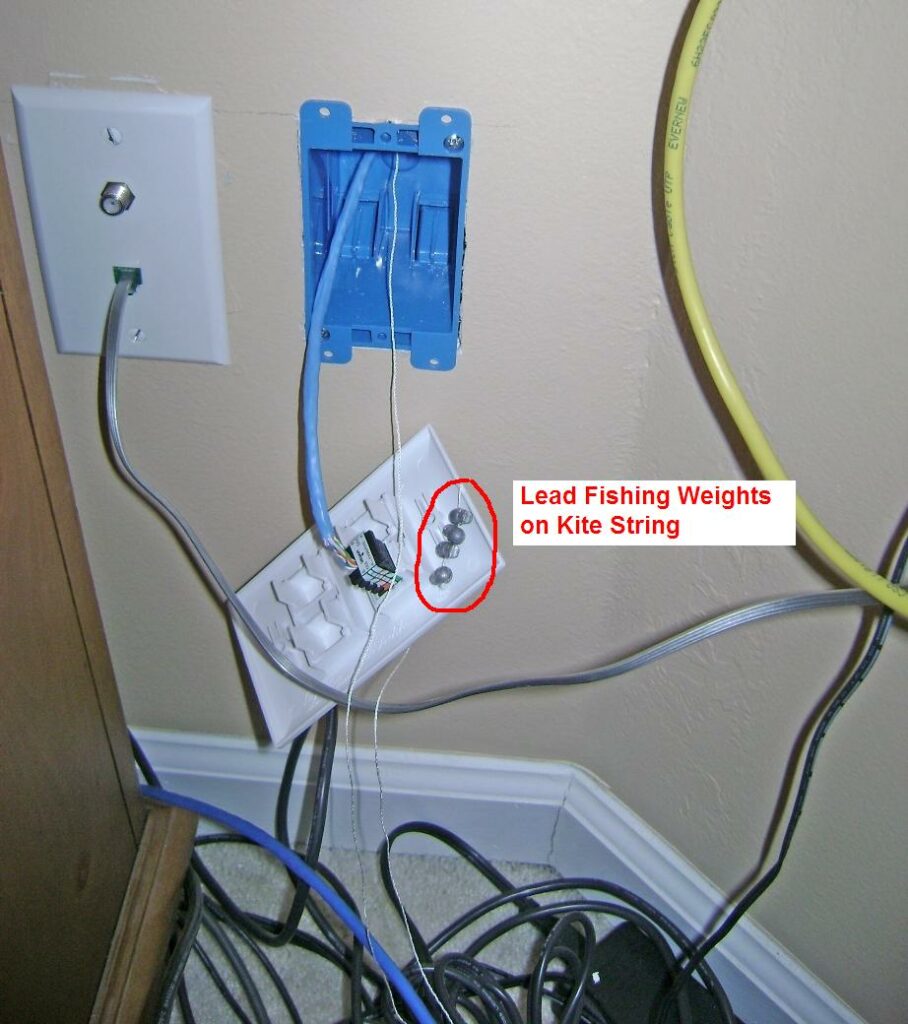
With the kite string fished through the old work wall box:
- I tied yellow construction string to the kite string and pulled it up into the attic.
- The Ethernet cable was taped to the yellow construction string.
- The Ethernet cable was pulled down and out of the outlet box.
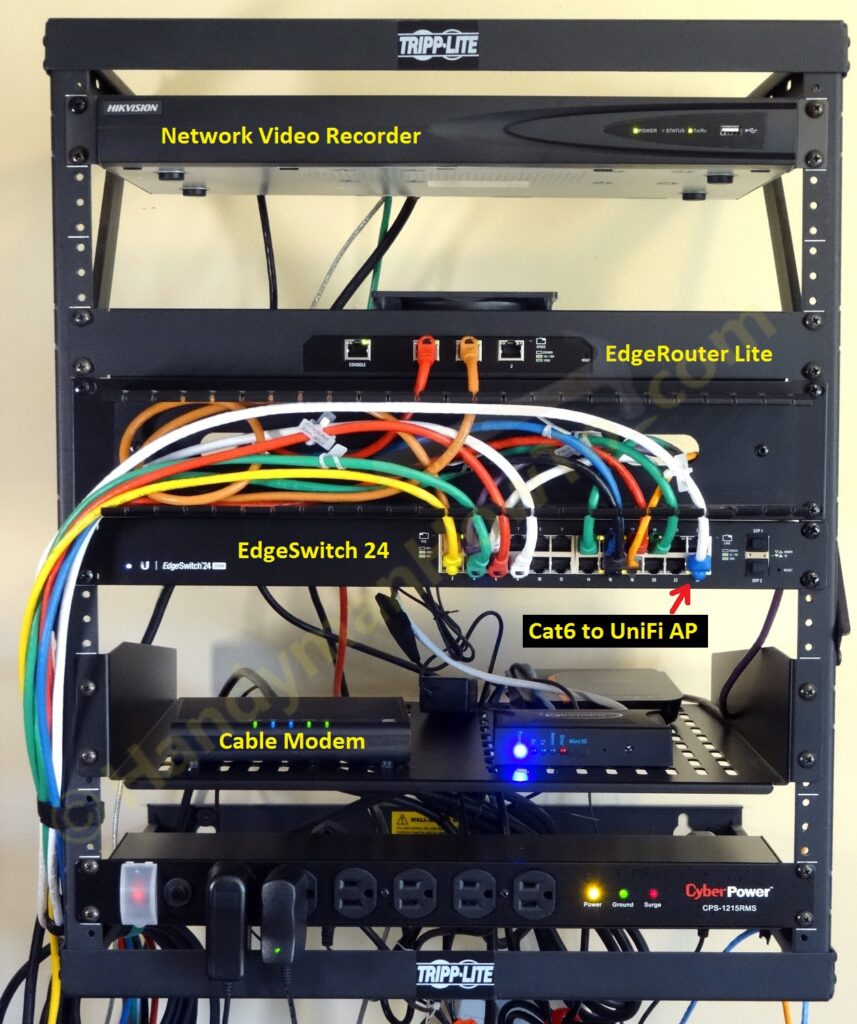
Home Network Rack Mount Upgrade
My home network continues to grow and it’s now looking like a small business network as new gear and devices are added:
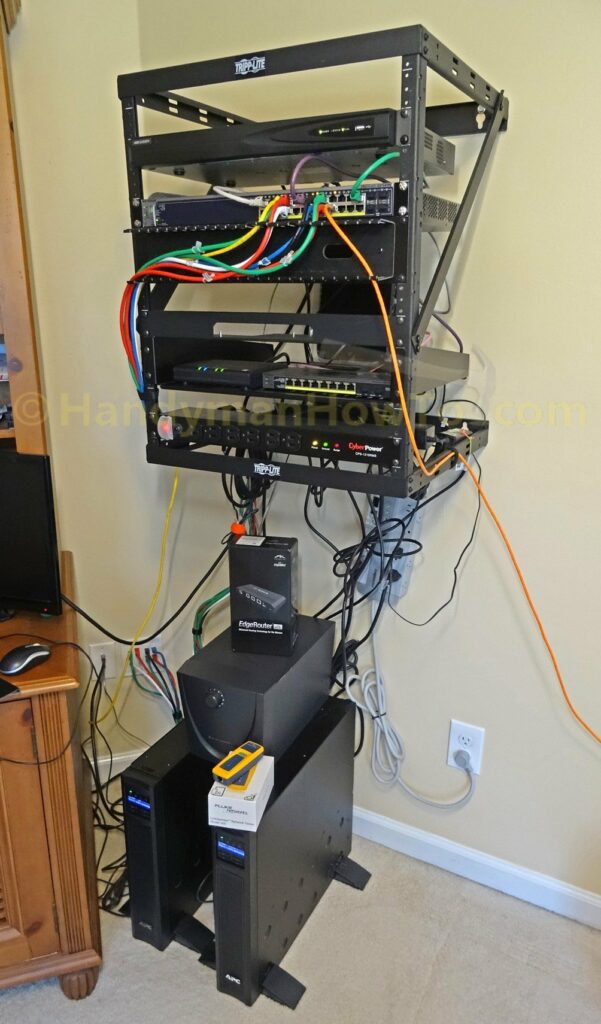
The network upgrades are:
- Tripp Lite Wall Mount Rack
- Network Video Recorder (NVR) for IP security cameras (top)
- NETGEAR 24 port Gigabit ethernet switch (non-blocking wire-speed) with Power over Ethernet (PoE) (2nd position from top)
- Ethernet cable management tray
- Ubiquity EdgeRouter Lite rack mount plate (currently empty)
- Vented Rack Mount Shelf for the cable modem, Vonage adapter, Wi-Fi router, Home Automation Controller, etc. desktop gear that isn’t rack mountable
- CyberPower CPS-1215RMS Rackmount Power/Surge Strip (bottom)
- Two APC SMX750 UPS battery backup units (sitting on floor)
My next task is to replace the NETGEAR WiFi router with the Ubiquity Edgerouter Lite for better network management, security and remote access.
Ubiquiti EdgeRouter Home Network Upgrade
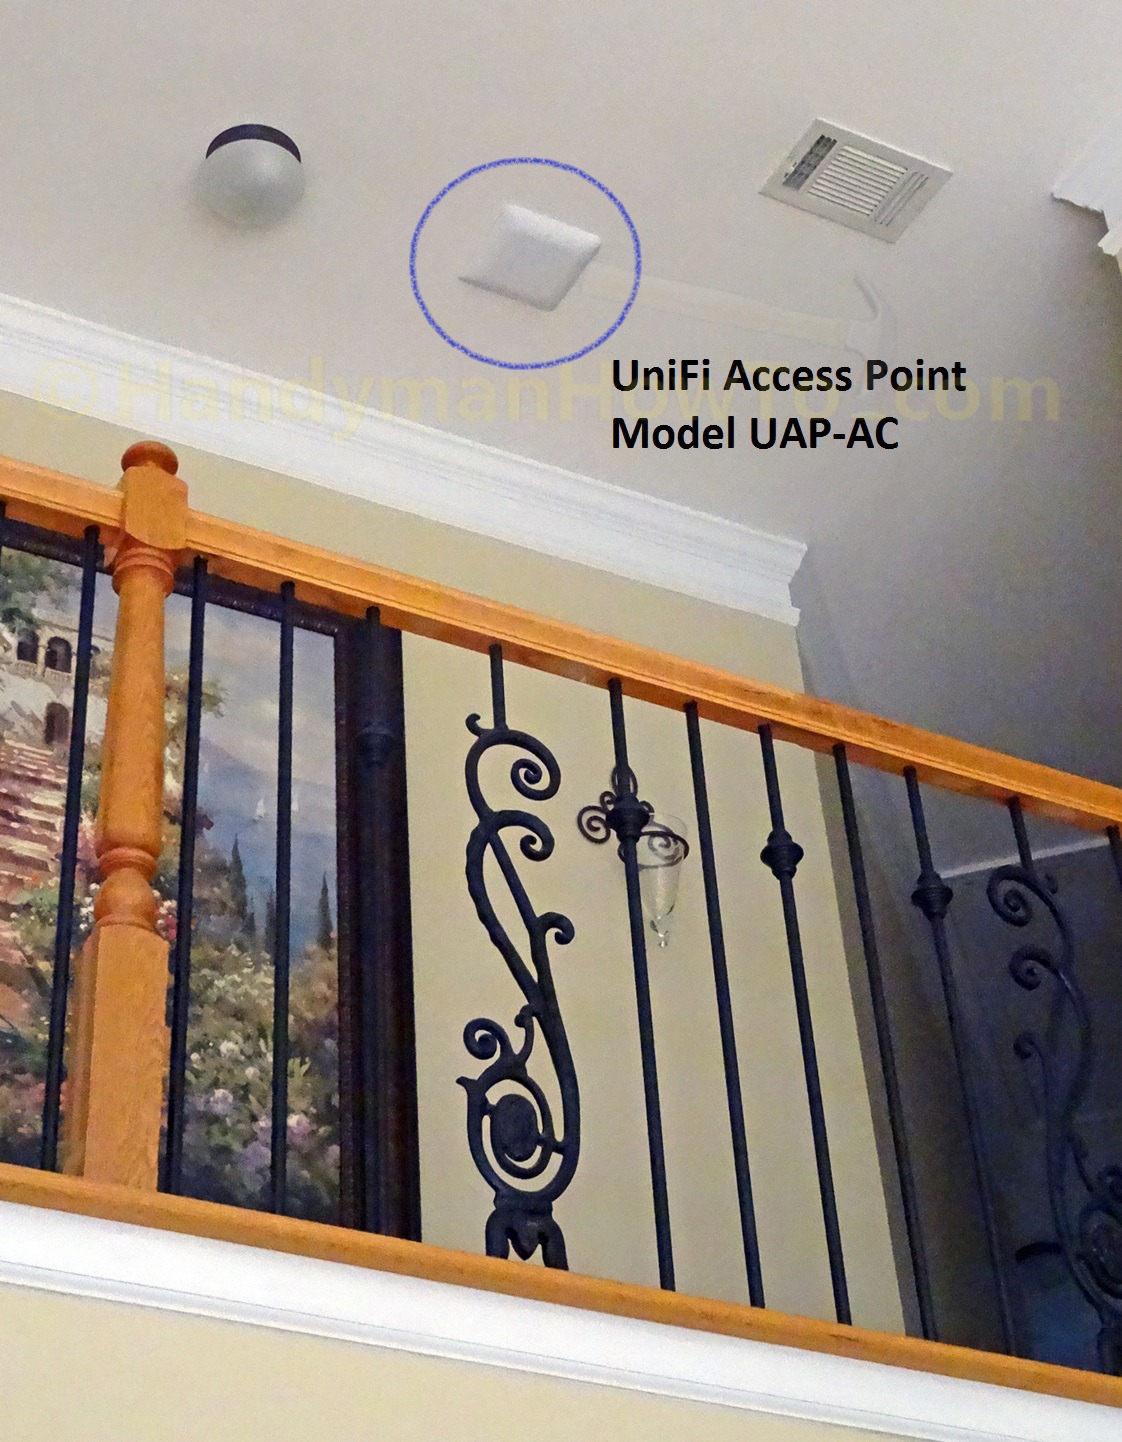
I’ve since completely overhauled the network and installed Ubiquiti EdgeRouter, EdgeSwitch and UniFi Access Point:
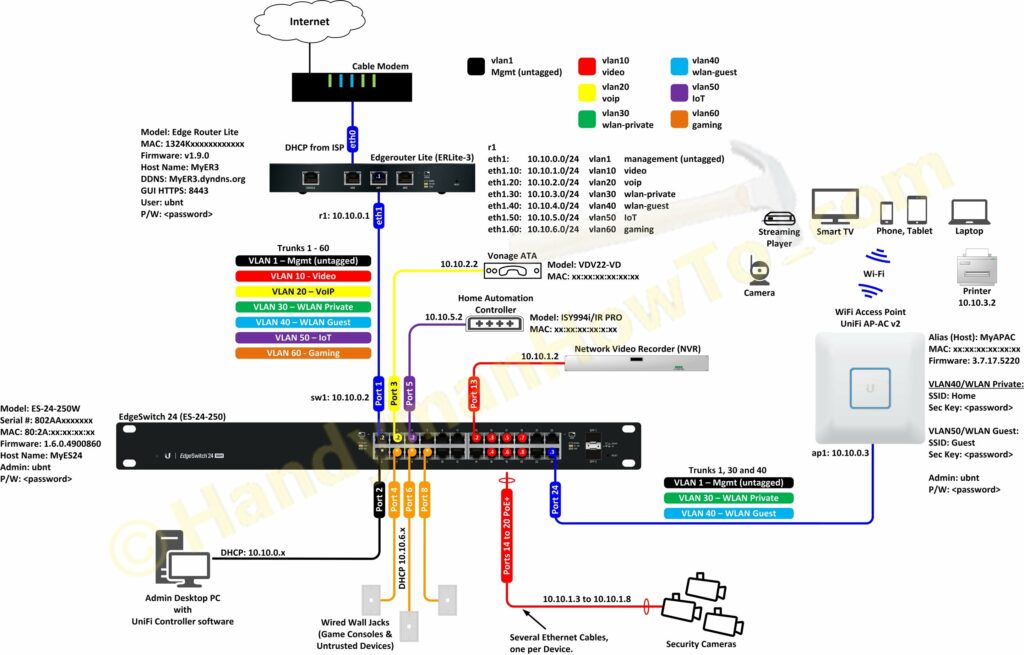
The new EdgeRouter rack gear:
See the Ubiquiti EdgeRouter Lite SOHO Network Design project for details.
How to Install an Ethernet Jack for a Home Network
Also see the Cat6 tutorials:
RJ-45 Ethernet Jack Punchdown Wiring
Wiring an RJ-45 Ethernet jack is easy to do if you’re attentive to detail and follow a couple of guidelines:
- Strip about 2 inches of outer sheath from the cable.
- The four wire pairs should remain twisted as closely as possible to the punch down pins for maximum signal integrity. About 1/2 inch to 5/8 inch of untwisted wire is usually sufficient to reach the punch down pins.
- Avoid kinks as the light gauge copper strands can break.
- Double check the wire color are correctly matched to the colored-coded pin positions on the jack.
- Wire the jack following the T568B wiring diagram unless you have reason to use the T568A wiring scheme. The T568B standard is widely used in commercial and residential cable installations. It doesn’t really matter which wiring scheme you choose because either method is fine if both ends of the Ethernet cable are wired the same way.
- If your cable or phone company installs an Ethernet jack for you, they’ll mostly likely use the B standard. I asked several technicians if they were using T568A or T568B, they’re all using T568B.
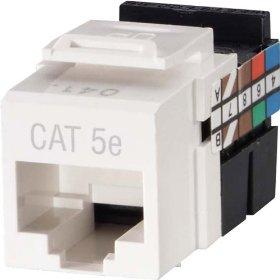
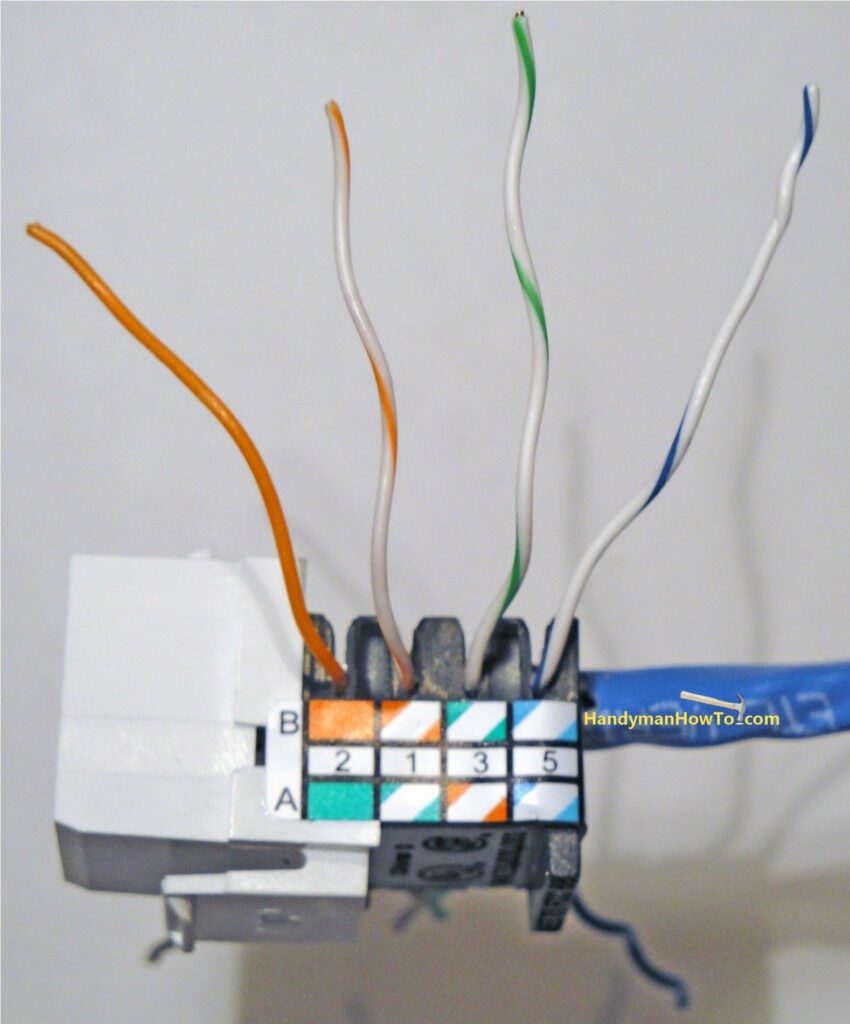
- The following instructions illustrate how to wire the Ethernet jack per the T568B standard. The means matching the twisted pair colors to the “B” color code band on the Ethernet jack. Notice the B color band (upside down) on the Leviton QuickPort Jack in the image below. (If you choose to wire per the T568A standard just match the wires colors to the “A” color code band.)
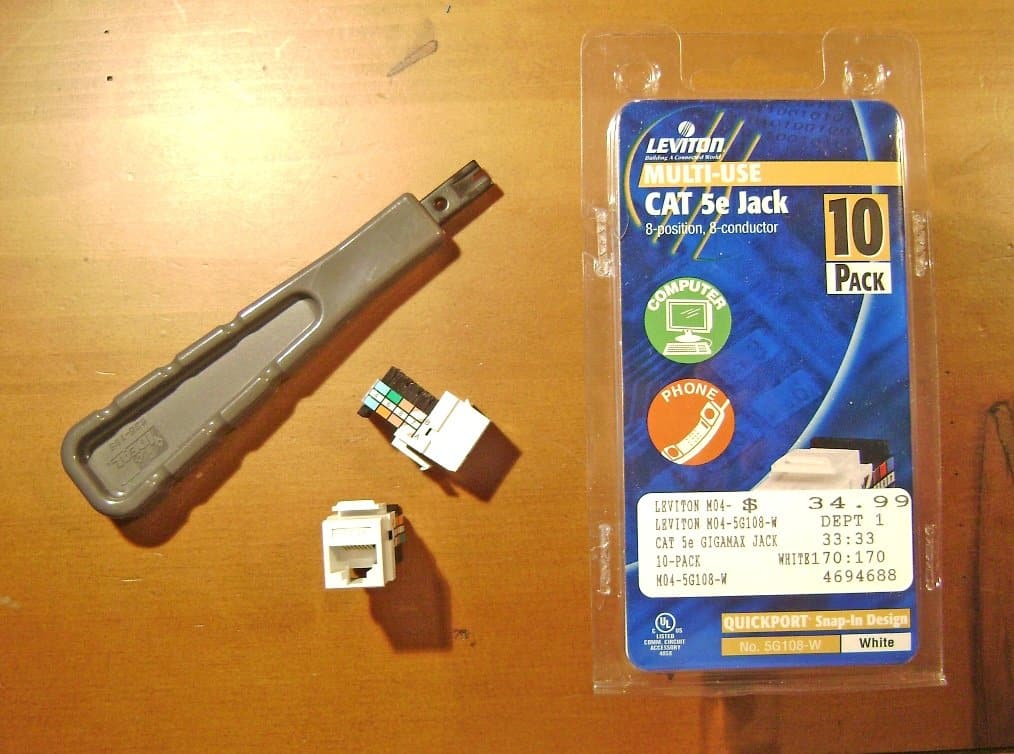
The punch down tool and Cat 5e jacks are illustrated below. The punch down tool is a basic model that’s fine for occasional work.
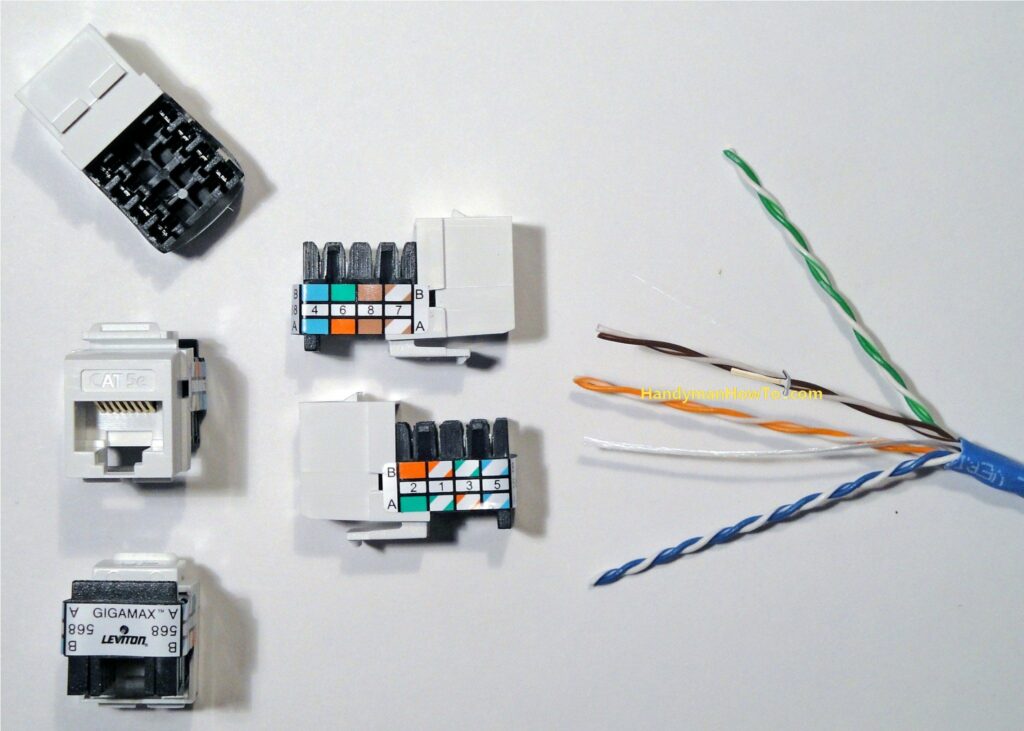
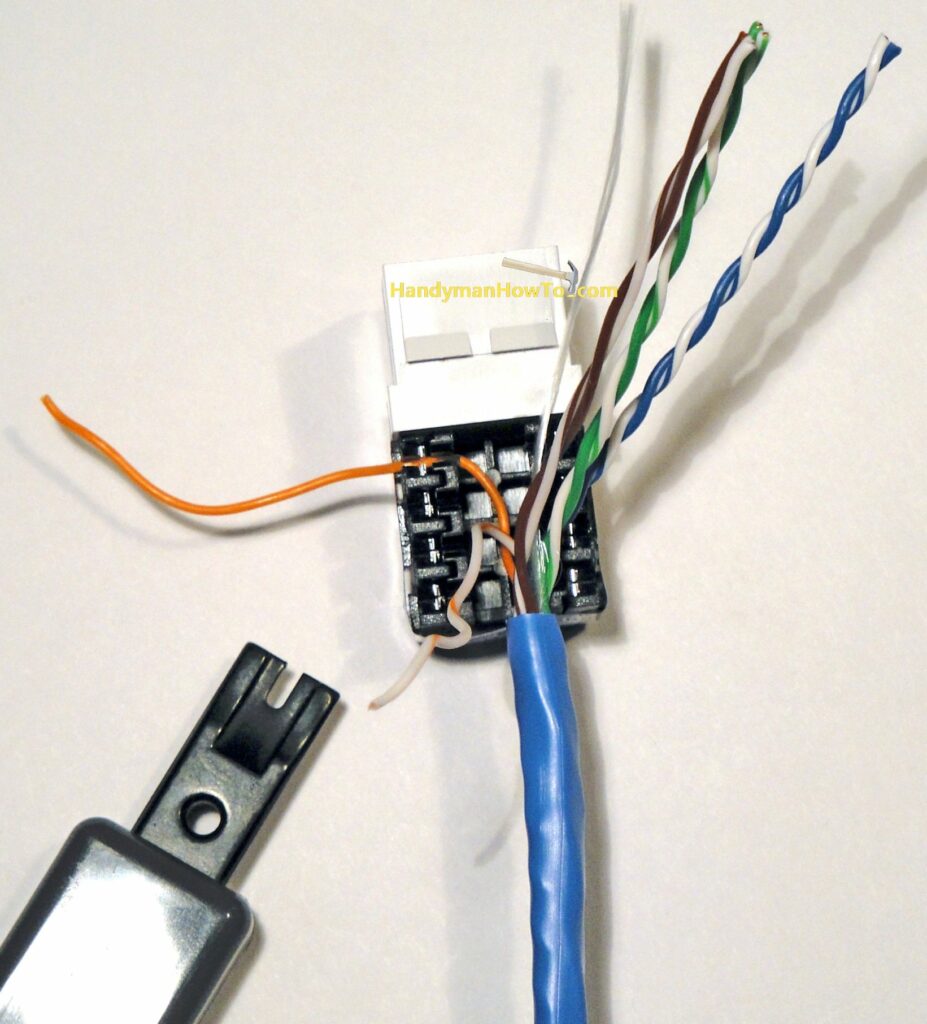
About 2 inches of sheath are removed from the cable, revealing the four twisted wire pairs.
How to Wire an Ethernet Jack
The orange wire is matched to the orange pin position on the ‘B‘ color band and punched down:
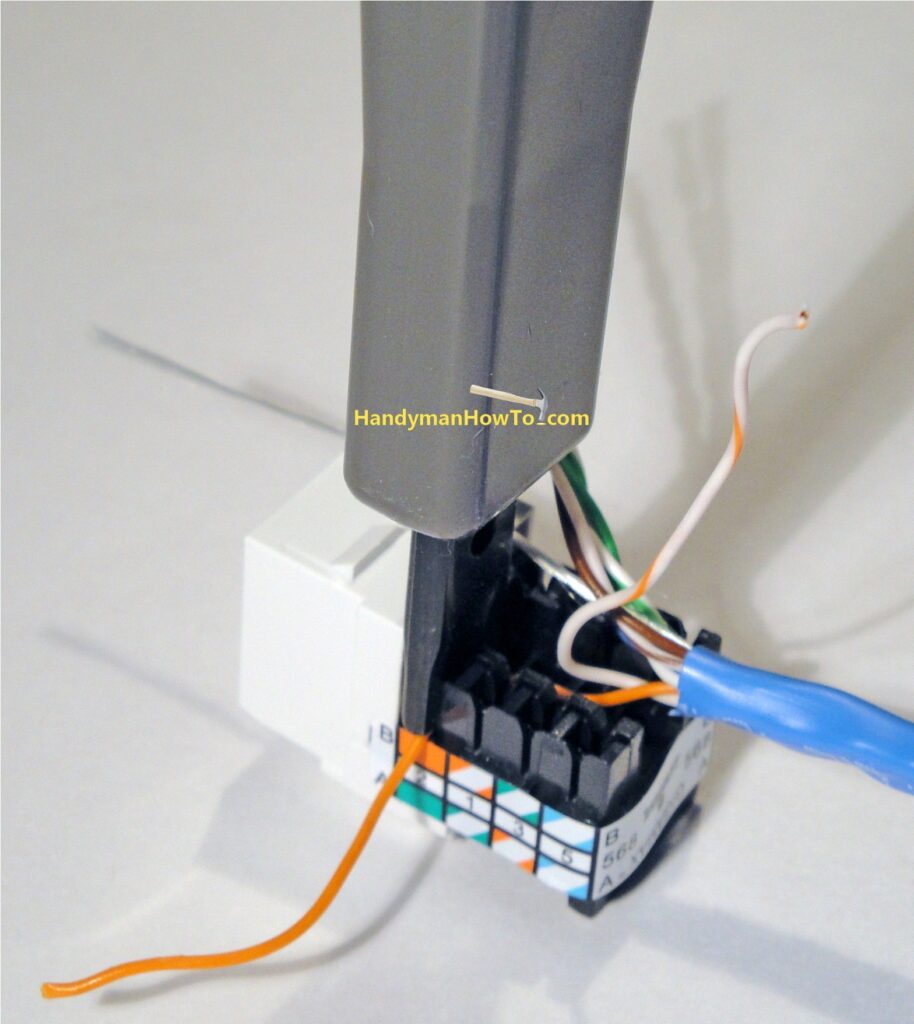
The orange Cat 5e wire is punched down on the jack pin in the following photo. The punch down pin is slotted such that it cuts the insulation and grabs the wire, holding it securely in the jack:
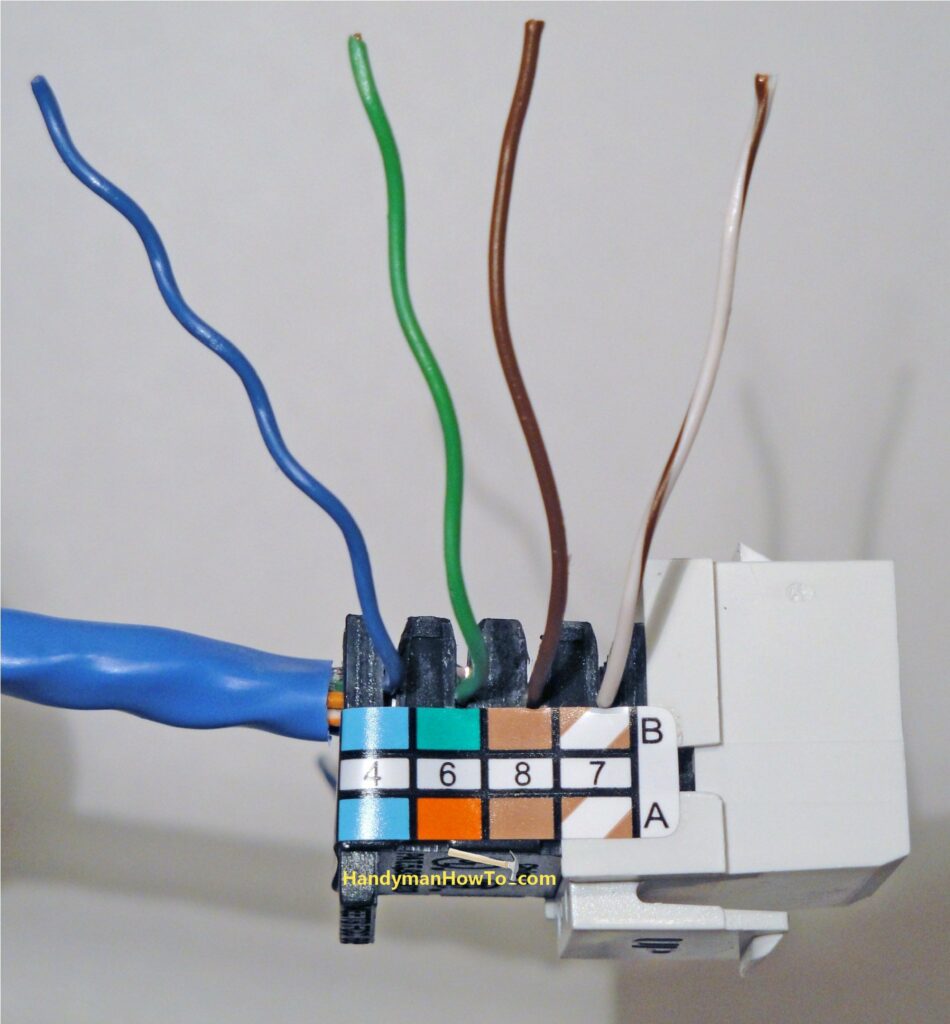
The color coded wires are matched to the ‘B‘ band color codes and punched down in sequence. The minor trick here is to carefully route each wire to the pin position and avoid kinks:
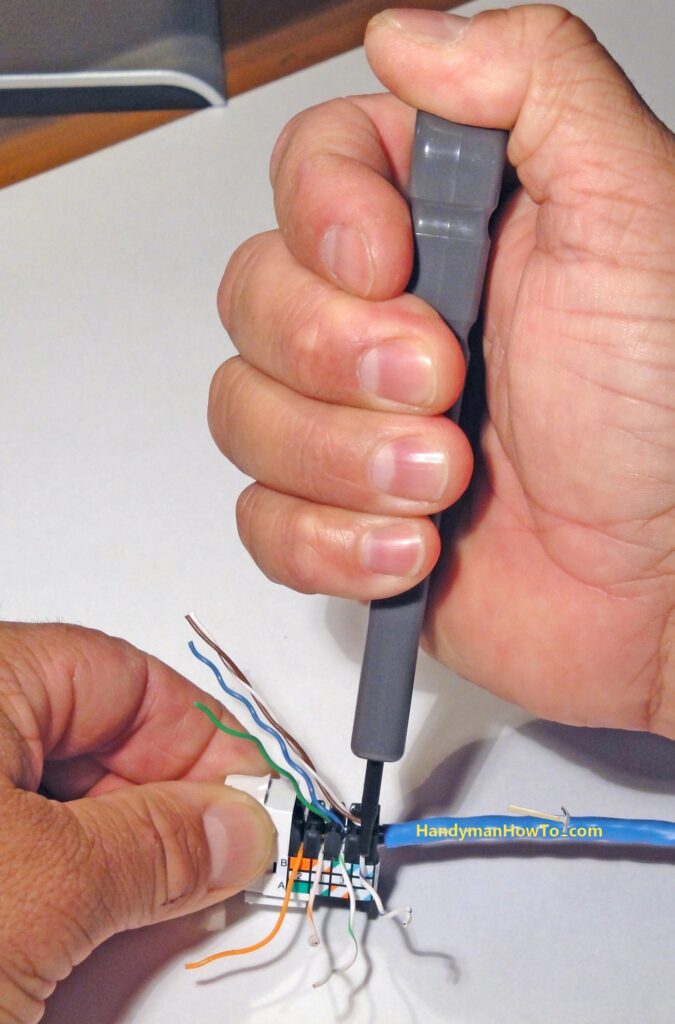
Your Cat5e jack should look like this after punching down all eight wires. Punching down Cat6 cable is the same:
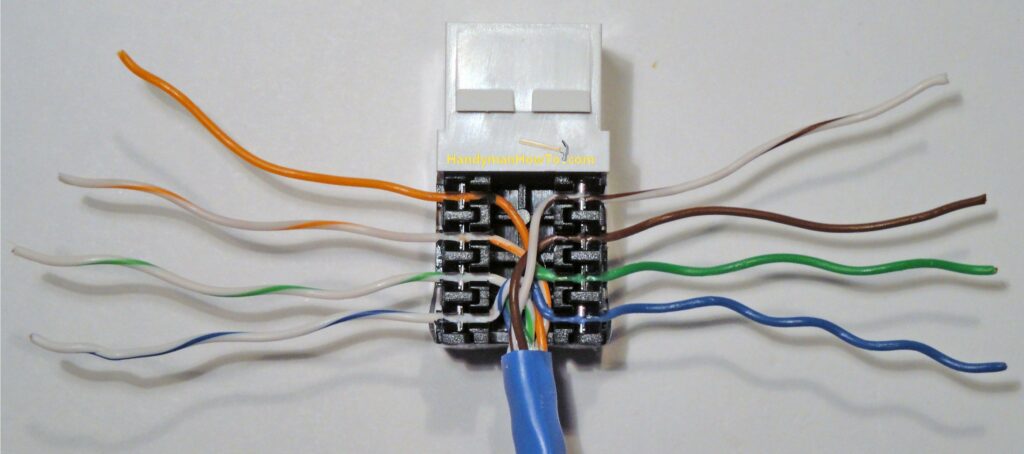
Right side close-up. The wire color matches the pin in the ‘B‘ color band.
Left side close up:
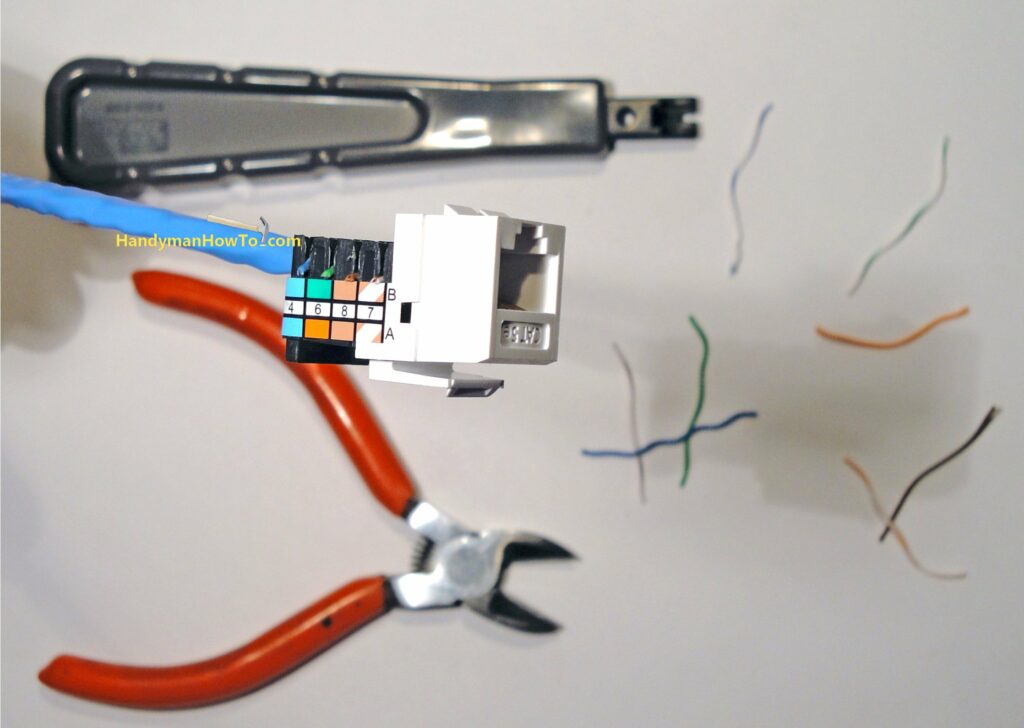
Trim the excess wire as close to the jack as possible:

The finished Ethernet jack:
Cat6 Ethernet Jack Wiring
More recently I’ve switched to Cat6 cable for all new installs. See How to Wire a Cat6 RJ45 Ethernet Jack for details.
The Fluke LinkSprinter Network Tester is a handy tool for setting up and maintaining a network. It automatically tests:
- Power over Ethernet (PoE)
- Ethernet Link, jacks and cables
- DHCP and Static IP Addresses
- Network Gateway
- Internet Connectivity
LinkSprinter takes guesswork out of network test and troubleshooting.
This tutorial is continued in How to Install an Ethernet Jack for a Home Network – Part 2.
Also see How to Make an Ethernet Network Cable Cat5e Cat6 if you need to install an RJ-45 Ethernet plug on the other end of the cable, for example to connect an IP video camera or make a custom length patch cable.
Take care,
Bob Jackson