This project explains the Panasonic bathroom vent fan electric cable fishing – remove the old electrical wall box and switches, then pull new NM-B 14/2 cable. This project is continued from How to Install a Panasonic WhisperFit EZ Bathroom Fan.
Project Series Index
The fan installation is covered in a four part series:
- How to Install a Panasonic WhisperFit EZ Bathroom Fan.
- Panasonic Bathroom Vent Fan Electric Cable Fishing. (You are here.)
- Panasonic WhisperFit EZ Fan Old Work Ceiling Mount and Junction Box Wiring.
- Panasonic WhisperFit EZ Fan Installation – Wall Switch Wiring.
Panasonic Bathroom Vent Fan Electric Cable Fishing
Electrical Safety: Recall the electricity was shutoff at the circuit breaker at the start of the project. Always ensure the electricity is Off before working on the wires.
Disconnect the Wall Switches
The old wall switches for the fan motor and light must be disconnected then the old double gang plastic wall box removed to pull new run of NM-B 14/2 cable for the new Panasonic WhisperFit EZ model #FV-08-11VFL5. I began by remove the wall plate and switches to expose the wires:
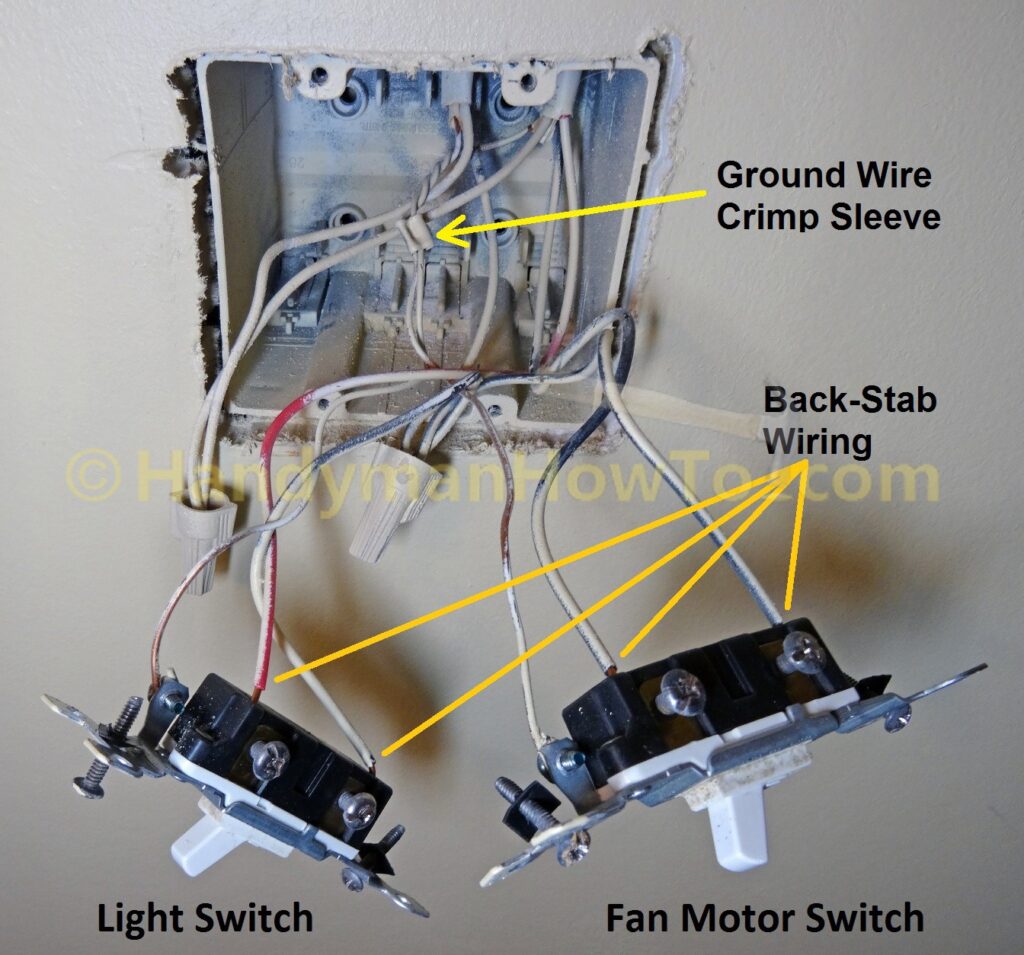
In the above photo, the “line side” ground wire from the circuit breaker was cut short and the pigtail ground wires were connected using a copper crimp sleeve. Electricians do this to save space but I find it very aggravating because it makes changes difficult. The old switches are wired using the quick & dirty back-wire (a.k.a. “back stab”) method which IMHO is a subpar connection.
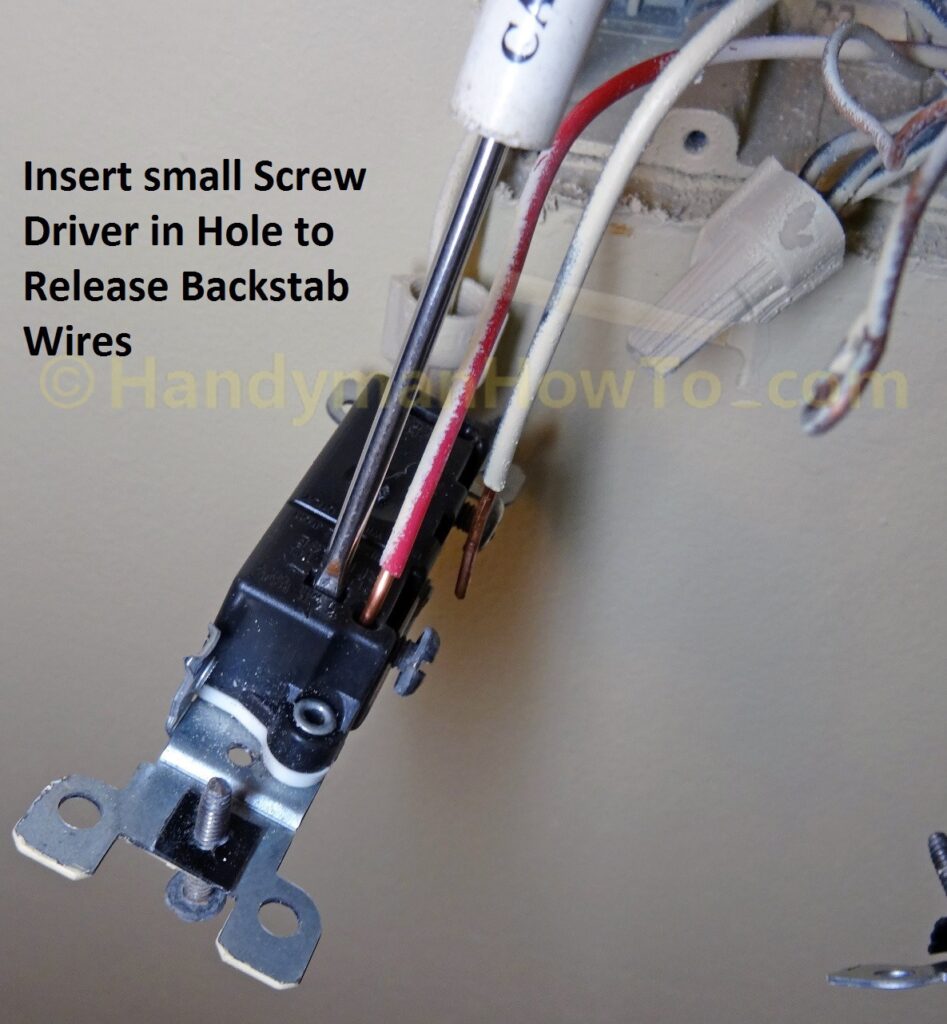
Disconnect the switches by inserting the tip of small flat blade screwdriver in the slot next to the wire to release and pull out the wire:
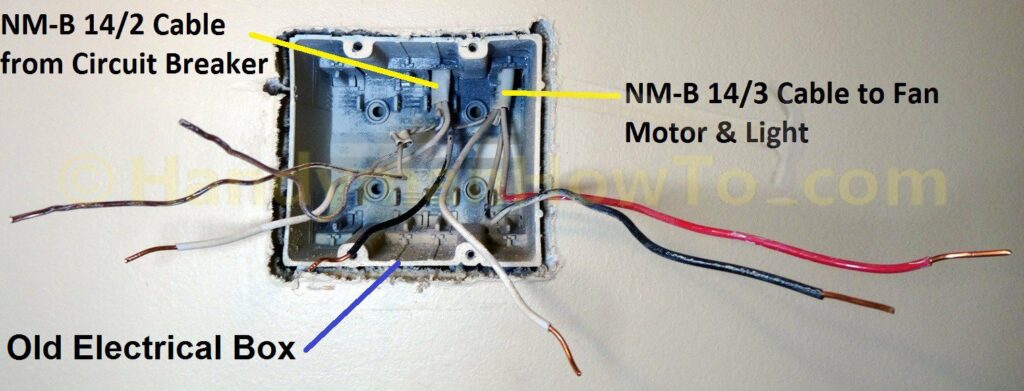
After removing the switches the cables in the wall box are:
- NM-B 14/2 cable from the circuit breaker.
This cable provides power to the box. - NM-B 14/3 cable that connected the switches to the bath fan motor and light.
The ground wire copper crimp sleeve is cut off using diagonal cutting pliers then I untwisted the grounds using needle nose pliers.
My progress thus far with the old bathroom fan and switches disconnected:
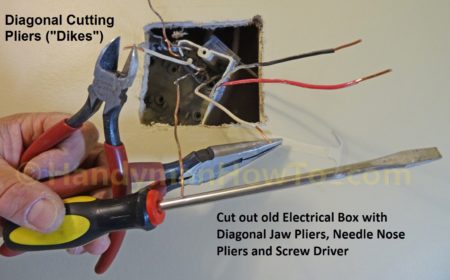
Remove the Old Electrical Wall Box
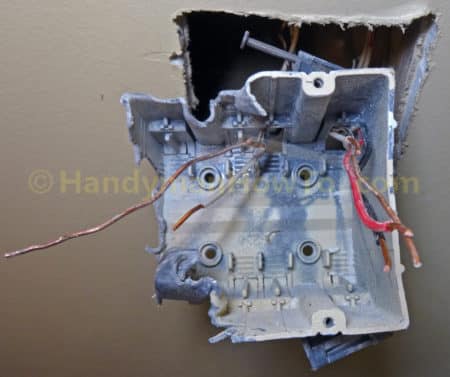
Because it would be very difficult to fish cable from the ceiling and down the wall into the old box, I cut up the old plastic box to get it out of the wall. I used a large screw driver to pry the box and two nails off the 2×4 wall stud (easy), then cut out pieces using diagonal cutting pliers and needle nose pliers (somewhat tedious). Cut with the diagonal pliers and twist off sections of plastic with the needle nose pliers. Take care not to damage the wires or insulation:
When enough material was cut off the plastic box, I wiggled it out of the wall:
With the old box removed, I easily put my hand inside the wall to fish a new run of NM-B 14/2 cable.
Fish New Run of NM-B 14/2 Electric Cable
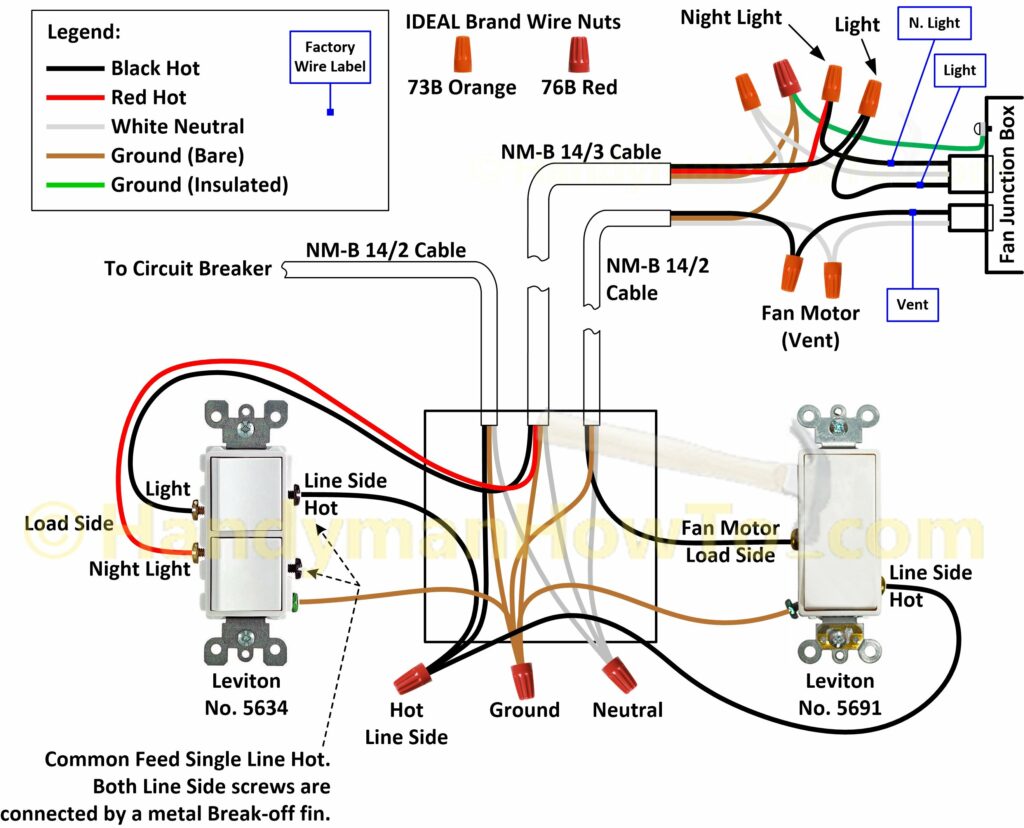
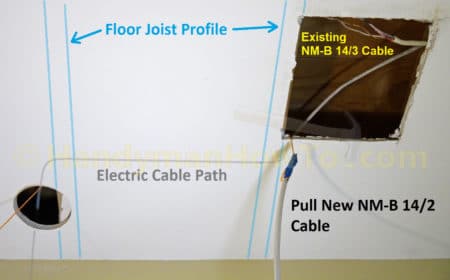
Recall from my wiring diagram a new run of NM-B 14/2 cable is needed for the fan switch and motor (right side of diagram). I’ll reuse the existing NM-B 14/3 cable for the fan light and light night:
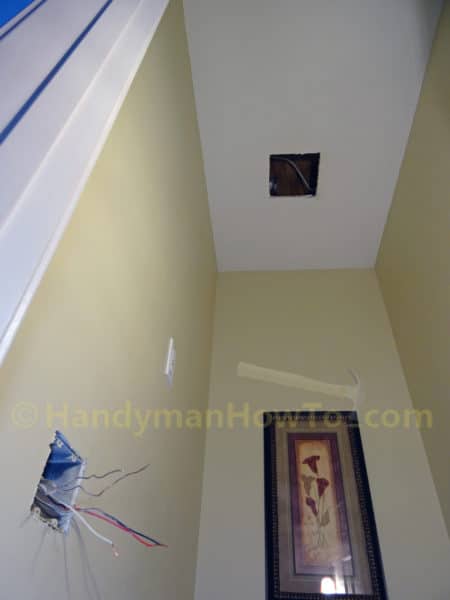
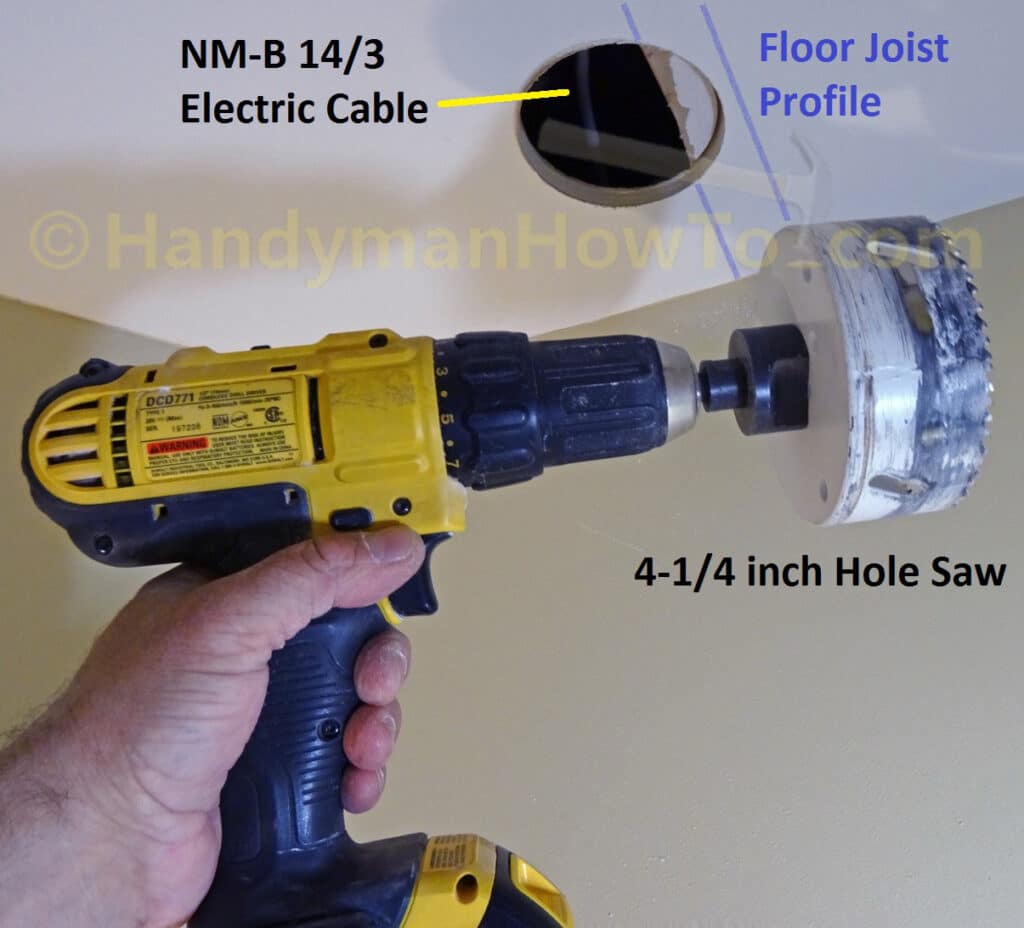
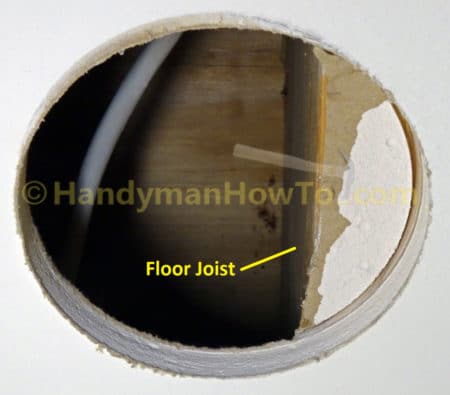
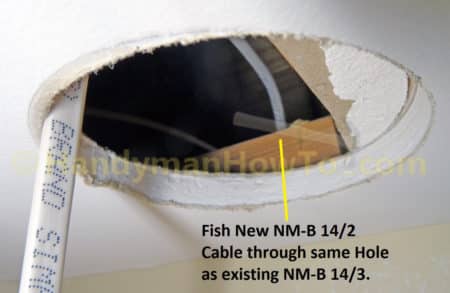
Because I knew it would be next to impossible to pull cable across the bathroom ceiling through two floor joists and down the top plate of the wall through two 90 degree turns following the path of the existing NM-B 14/3 cable , I drilled a 4-1/4 inch hole with my Milwaukee 3/8″ arbor and 4-1/2″ hole saw in the ceiling close to the wall above the wall switches. I was careful to locate the floor joists using a stud finder and confirming the stud location by driving in a finishing nail. The hole overlaps the bottom edge of the floor joist. Why? Because I’ll install a blank off metal cover plate later to conceal the hole. It’s a lot simpler than patching a hole in the drywall!
Closeup of the 4-1/4 inch hole overlapping the joist. The existing run of NM-B 14/3 cable exits the joist face (right side) and goes down the wall (left side):
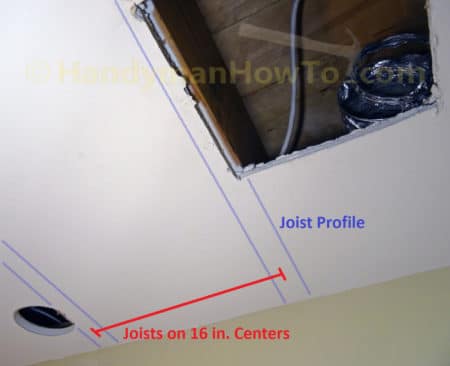
View of the NM-B 14/3 cable routing through two floor joists and down the wall:
I used a short section of fiberglass fish rod to feed orange construction string across the ceiling through the floor joists, then taped the string to the new section of NM-B 14/2 cable:
By gently pulling the string from the round hole while feeding the cable through the square ceiling opening on the right, I was able to fish the new cable through the joists:
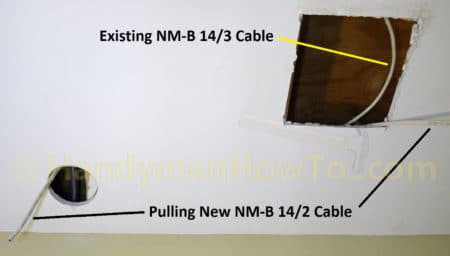
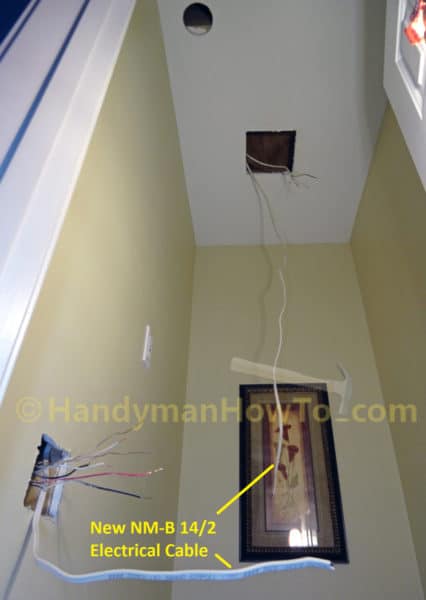
The new cable is sticking out of the ceiling with some slack inside the ceiling (left side). I’ll feed it down the wall following the path of the existing cable:
I fed the new run of NM-B 14/2 cable bit by bit through the two 90 degree turns in the ceiling and wall. Then reached inside the switch box rough opening and pulled the cable out of the wall. The new cable is much longer than necessary – I’ll cut it to length and I can always use short sections of cable for making pigtails:
Mark and Saw the Ceiling Opening for the Panasonic Bath Fan
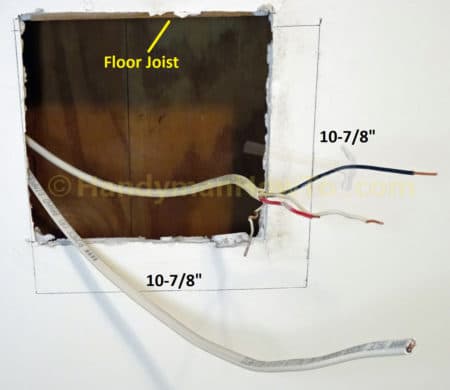
The old bathroom fan is smaller than the WhisperFit EZ FV-08-11VFL5, so I needed to mark a larger 10-7/8 inch square opening on the drywall ceiling per the fan installation instructions:
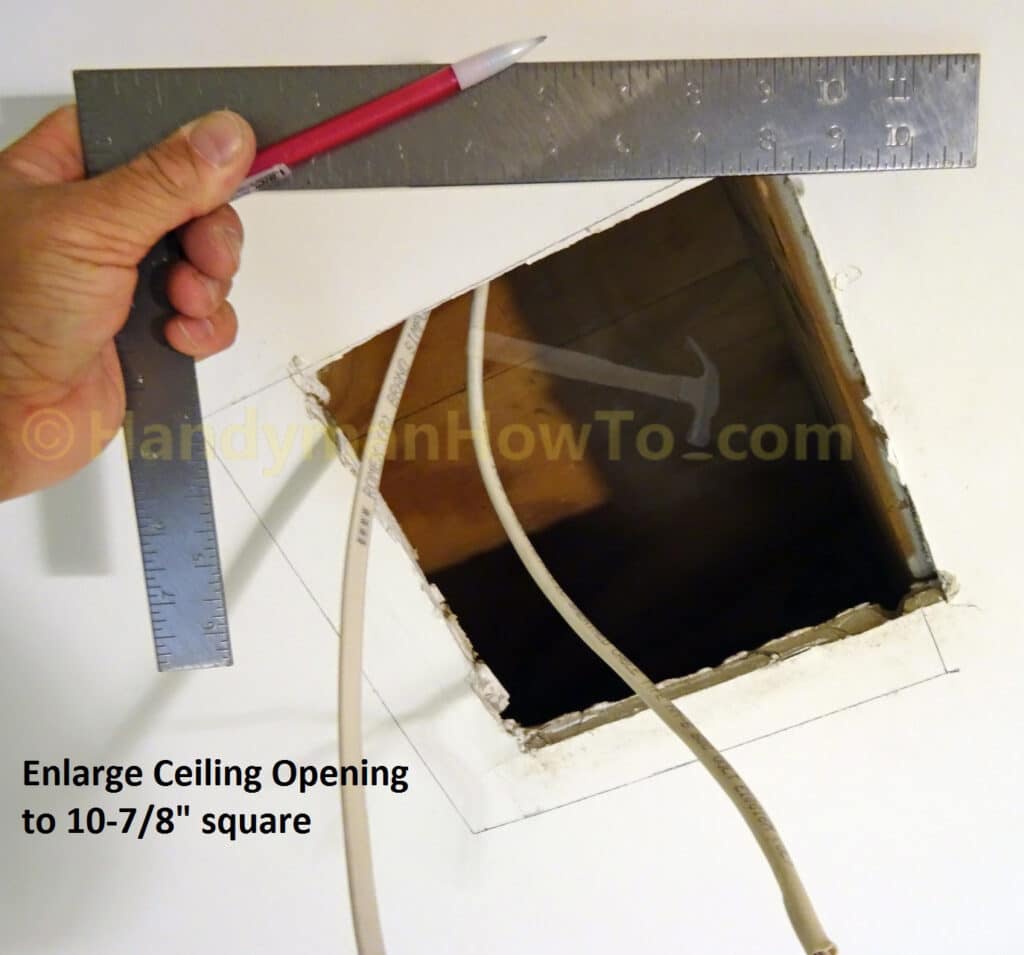
I’ll cut the drywall with my Stanley FatMax jab saw. Tip: Push the cables into the ceiling and off to the side to avoid damage by the saw. Have a helper hold the nozzle of the vacuum cleaner next to the saw to catch most of the dust.
This project is continued in Panasonic WhisperFit EZ Fan Old Work Ceiling Mount and Junction Box Wiring.
Thanks,
Bob