How to insulate round sheet metal air duct with R-8 thermal insulation sleeve. This project is continued from How to Seal Sheet Metal Duct with Mastic – Part 1.
Project Index
-
How to Install Round Sheet Metal Duct
Introduction, flex duct problems, sheet metal duct design and material cost. -
How to Install Round Sheet Metal Duct – Part 2
Plenum start collar and adjustable elbow. -
How to Install Round Sheet Metal Duct – Part 3
Metal support straps and snap-lock duct pipe. -
How to Install Round Sheet Metal Duct – Part 4
Adjustable elbows and rigid duct board distribution box connection. - How to Cut and Assemble Snap Lock Duct Pipe
- How to Seal Sheet Metal Duct with Mastic
- How to Insulate Round Sheet Metal Air Duct (you are here)
- How to Insulate Round Sheet Metal Air Duct – Part 2
Duct Wrap vs Duct Sleeve Insulation
I considered two methods for insulating sheet metal air duct insulation that are practical for the DIY homeowner:
- Duct Wrap Insulation
- Pros:
- Insulation blanked applied after the ductwork is installed and sealed.
- Faster overall installation with new ductwork.
- Most popular option based on availability at HVAC supply stores in my area.
- Cons:
- May requires outward clenching staples.
- More insulation joints to be sealed.
- May require two layers to obtain R-8 thermal rating required by the residential building code.
R-8 rated duct wrap was not available at local supply stores.
- Pros:
- Duct Sleeve Insulation
- Pros:
- Slips over the duct pipe like a sock.
- Fewer insulation joints.
- Readily available with an R-8 rating as required by code (.pdf – see page 13 “Duct Insulation”).
- Cons:
- Requires installation planning to install the sleeve over the duct during assembly.
- Pros:
I chose the duct insulation sleeve because it was the better long term solution in my opinion. The extra ductwork assembly is a one time job and I prefer quality over speed.
How to Insulate Round Sheet Metal Air Duct
I purchased 10 roll box of 5 feet long by 12 inch diameter rolls of JP Lamborn MT-05 thermal sleeve R-8 rated duct insulation from a local HVAC supply store based on my estimate of ~40 feet of sheet metal duct to be installed, allowing extra for waste. A plastic starter cap is optional and fits over the duct pipe so the sleeve doesn’t catch on the sharp pipe end. In a pinch, a starter cap could be made out of cardboard.
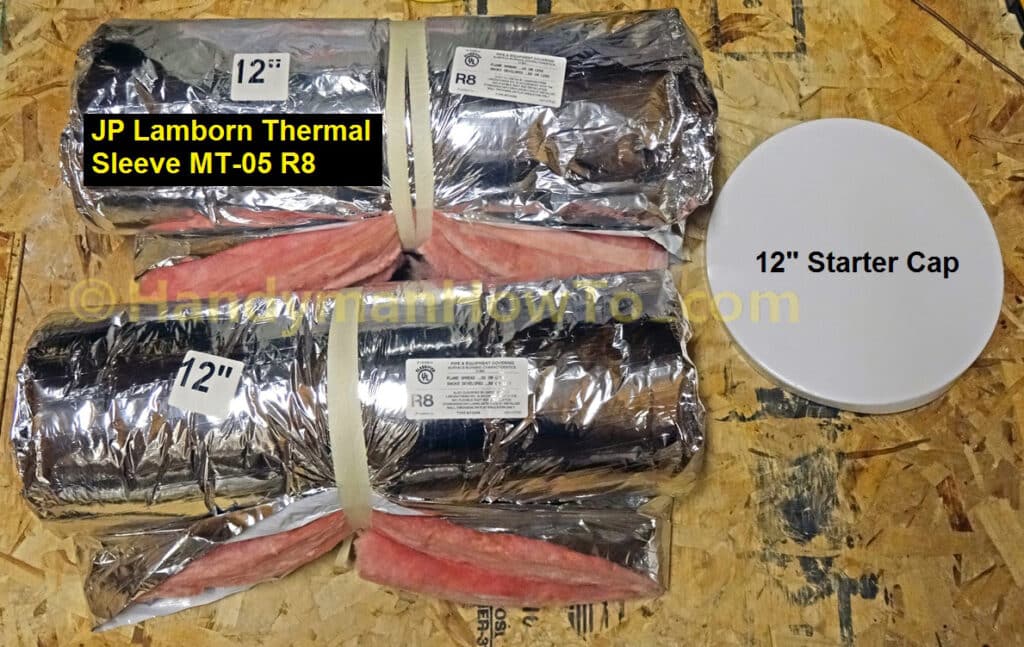
See the JP Lamborn thermal sleeve installation instructions for details.
Sheet Metal Duct Insulation Sleeve Installation Options
I considered several options for installing the insulation sleeve over the sheet metal duct:
-
Install the sleeve while assembling the ductwork.
The challenge here is scooting the sleeve back and forth along pipe and elbows to seal the duct with mastic. The duct hanger straps get in the way and the sleeve will bunch-up (compress) only a certain amount, slowing down the mastic sealing work. - Remove only one section of pipe and slide several sections of insulation sleeve down the entire length (over 25 feet) duct after sealing with mastic. Sliding the insulation sleeve over an elbow takes some effort – I know because I tried! I didn’t go this route because it seemed tedious.
-
Remove the straight pipe sections and install the insulation sleeve.
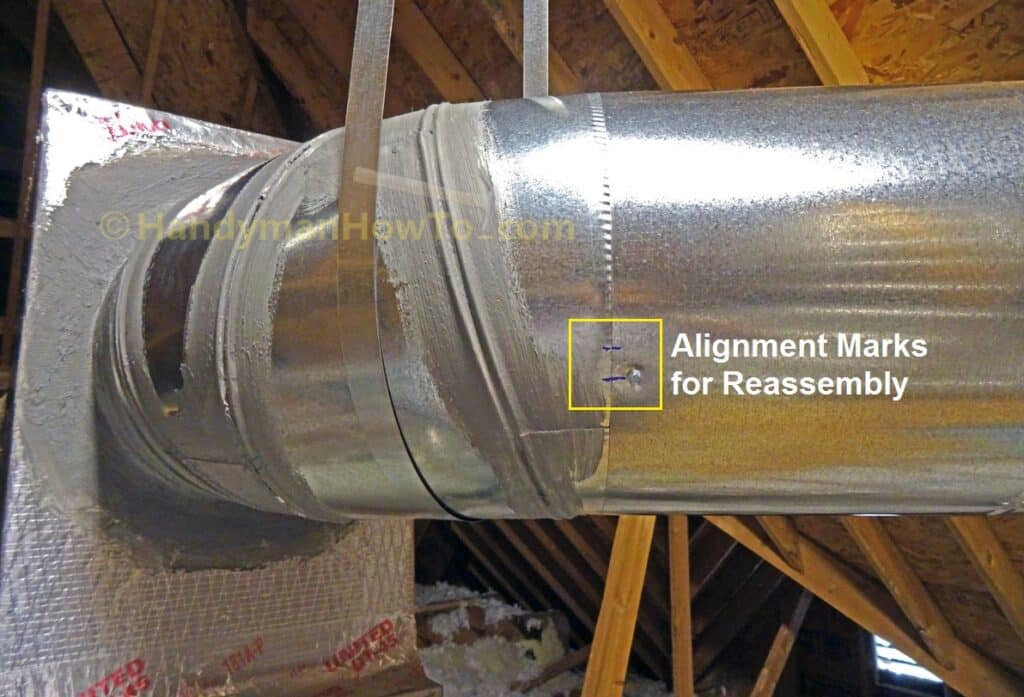
The duct pipe is easy to disassemble by removing the sheet metal screws at the crimp joints, and I was careful to not seal the pipe joints with mastic so I could go with this approach.
Which insulation method you choose will depend on the ductwork configuration, installation difficulty and your preferences. I have unobstructed access to the ductwork with plenty of space to move about.
Install the Sheet Metal Duct Insulation Sleeve
The mastic that was applied to the duct start collars, elbows and snap lock pipe seams has dried overnight. You don’t want to install the insulation sleeve over gooey wet mastic because it’ll make a mess and ruin the air tight mastic coating.
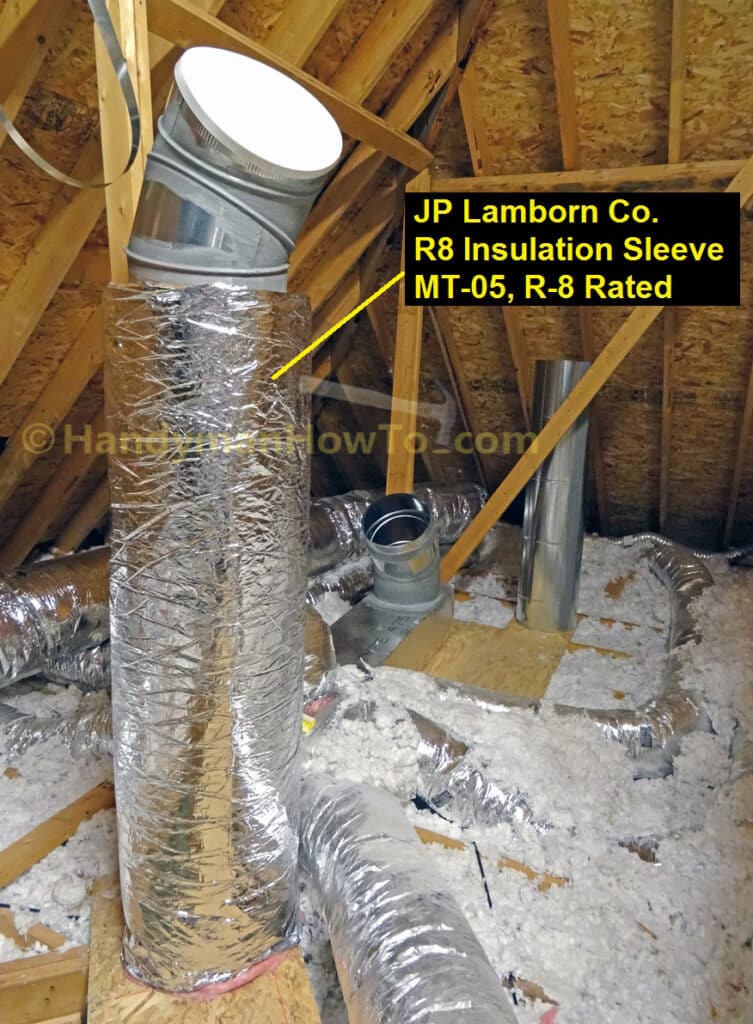
I disconnecting the straight pipe sections – handle the pieces gently so as not to split open the mastic duct sealant – placed the plastic starter cap on the pipe, then slipped on an insulation sleeve:
Make an alignment mark at the duct pipe joints to simplify reassembly, then back out the sheet metal screws and remove the duct pipe:
The sleeves are installed and the duct pipe reassembled with sheet metal screws. As I reassembled the duct pipe, the metal duct straps were lowered an inch or so to allow for the insulation thickness to prevent high spots that could stress the start collars. The duct disassembly, insulation and reassembly was completed in about 15 minutes.
The duct insulation is bunched up in this photo to expose the straight pipe joints to be sealed with mastic:
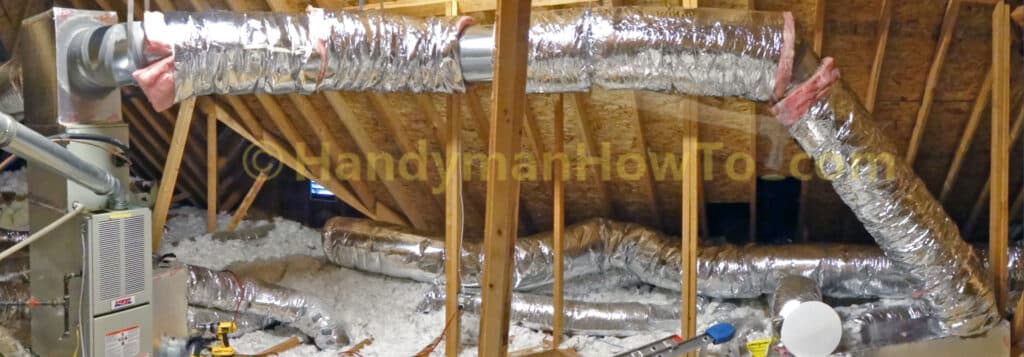
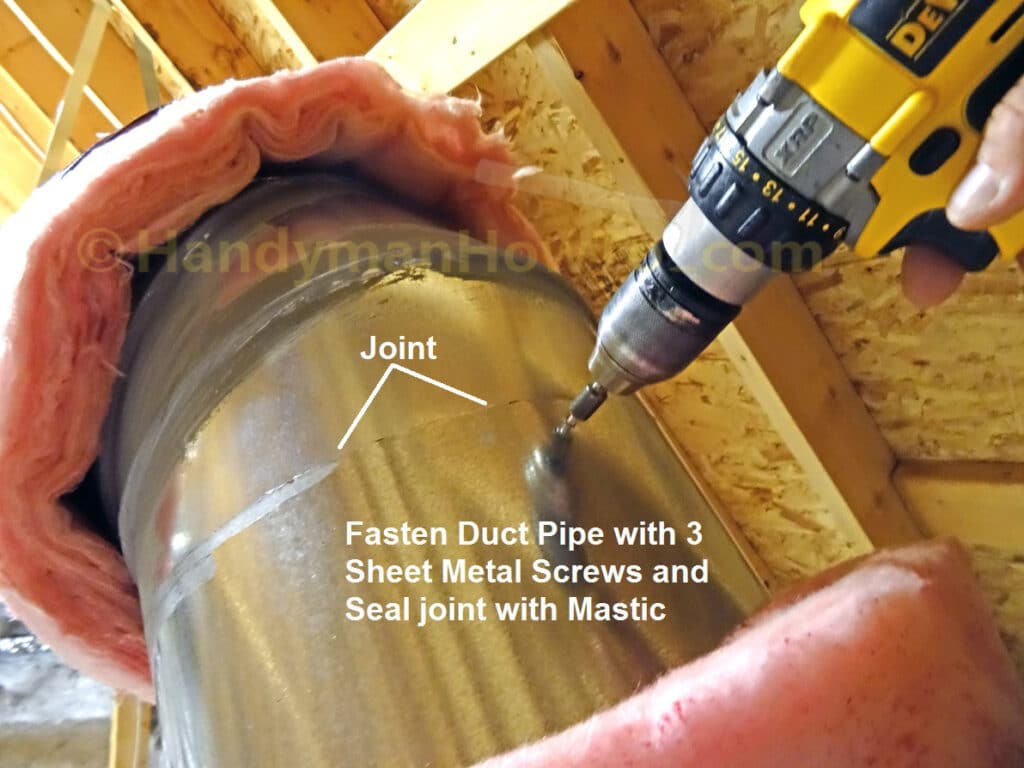
Because I planned to disassemble the duct pipe to install the insulation, I pinned some sections in place with only one or two sheet metal screws. No screws were initially set in the downward sloping duct pipe (far right in the above photo and closeup below) because it was held in place by the upper and lower elbows. I fastened the straight pipe sections to the elbows with a least 3 self piercing sheet metal screws equally spaced around the pipe and driven through the crimp joint:
Seal the Duct Pipe with Mastic
Scoot back the duct insulation to expose pipe joints, clean any dust or oils, then seal with a liberal coat of mastic. The blue low tack painter’s tape was helpful for holding back the insulation:
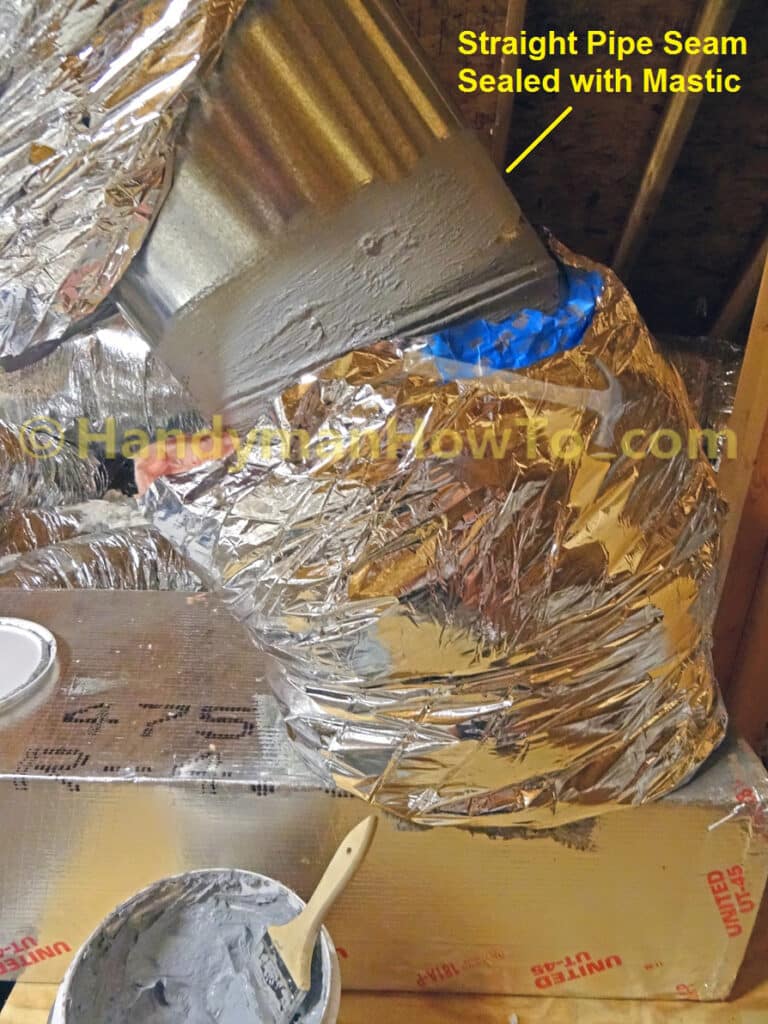
Mastic is applied to all duct pipe joints and over the sheet metal screws for an air tight seal. Wet mastic is a lighter gray compared to the darker cured mastic:
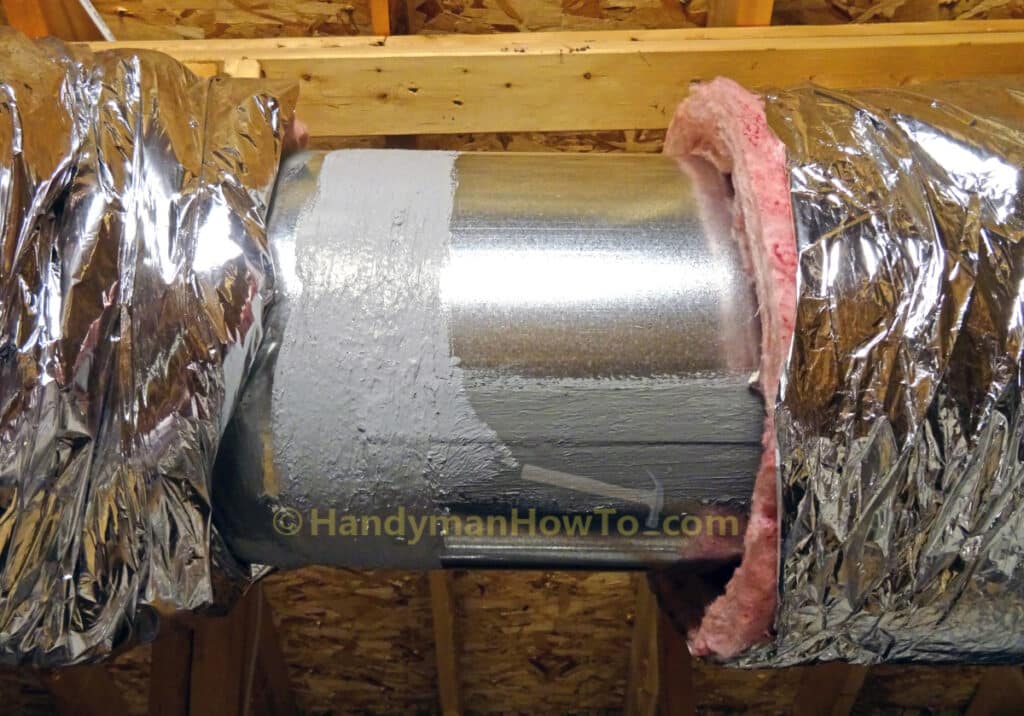
Inspect all joints for any cracks or gaps in the mastic and reseal if needed. Through careful handling, I had no problems.
The duct insulation sleeve is butted together and sealed with HVAC metal tape in the How to Insulate Round Sheet Metal Air Duct – Part 2.
Take care,
Bob Jackson